
An API key lets your other tools talk to Servgrow directly, so information moves on its own instead of being typed twice. A new lead from your website form becomes a customer, a finished job lands in your marketing tool, or a developer builds the exact report you have always wanted. You decide which tool gets a key and exactly what it can see or change, and you can switch any key off in one click.
Find API Keys
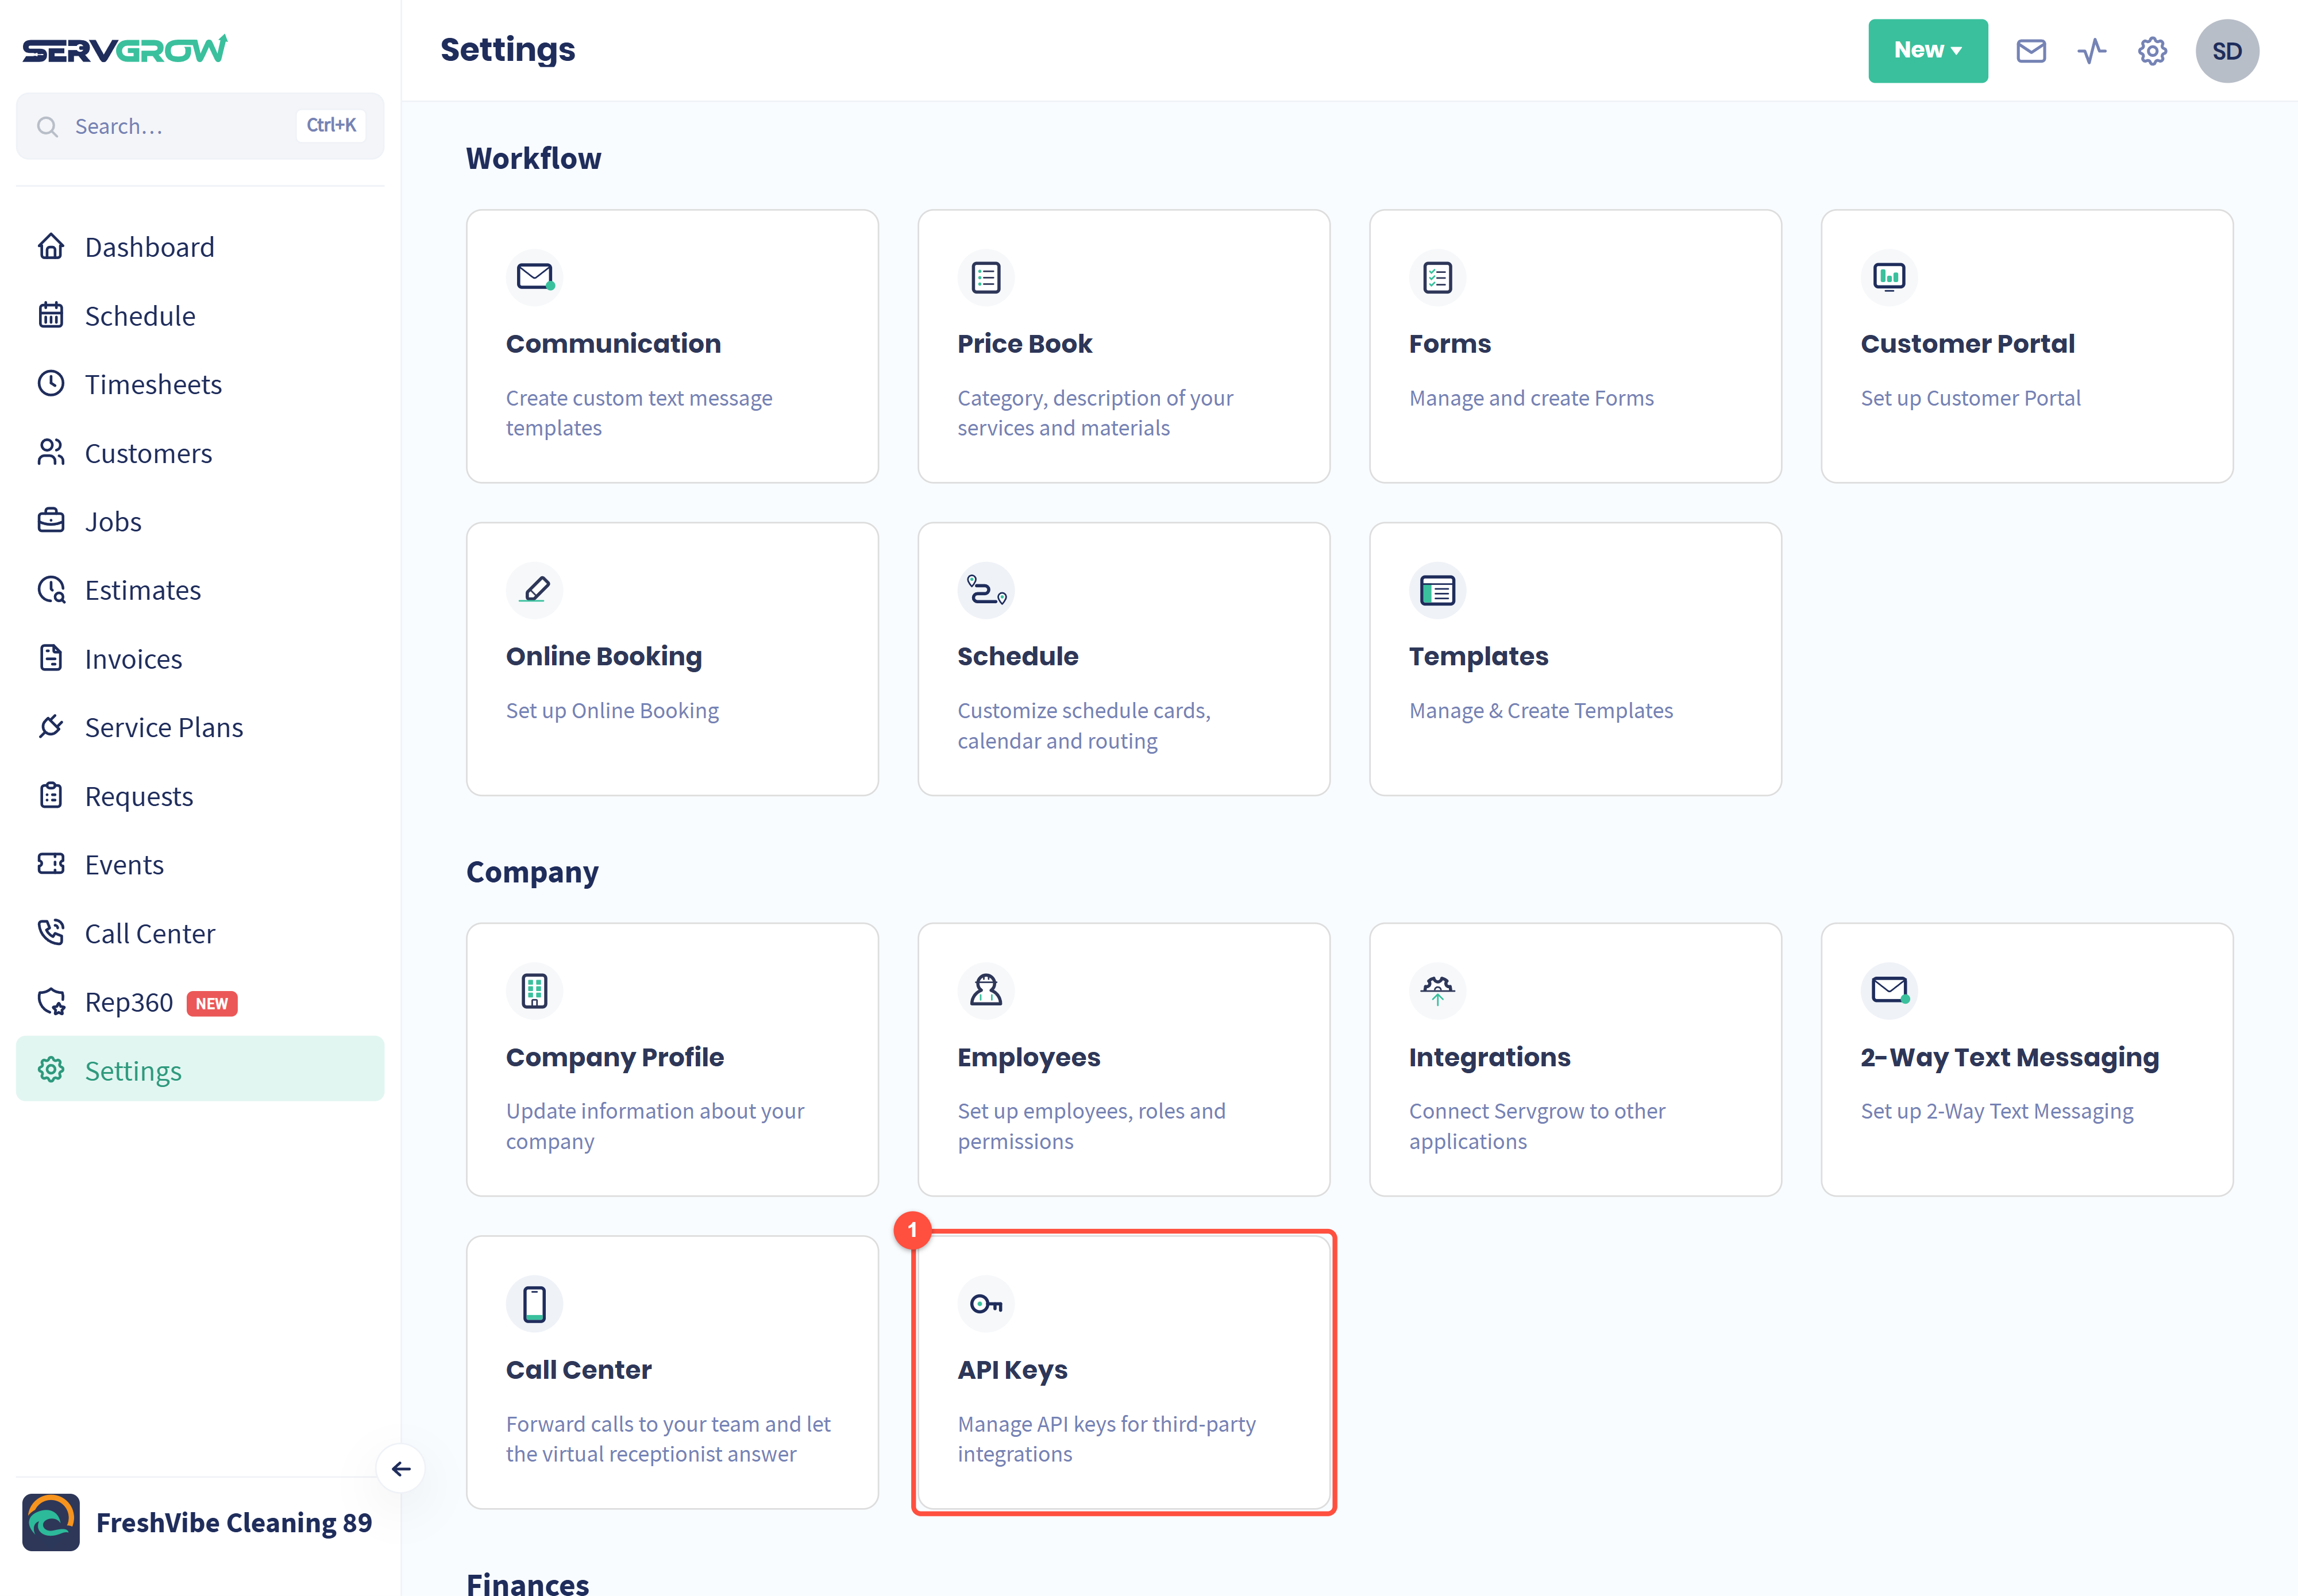
Click Settings, then API Keys under Company.
The API Keys page
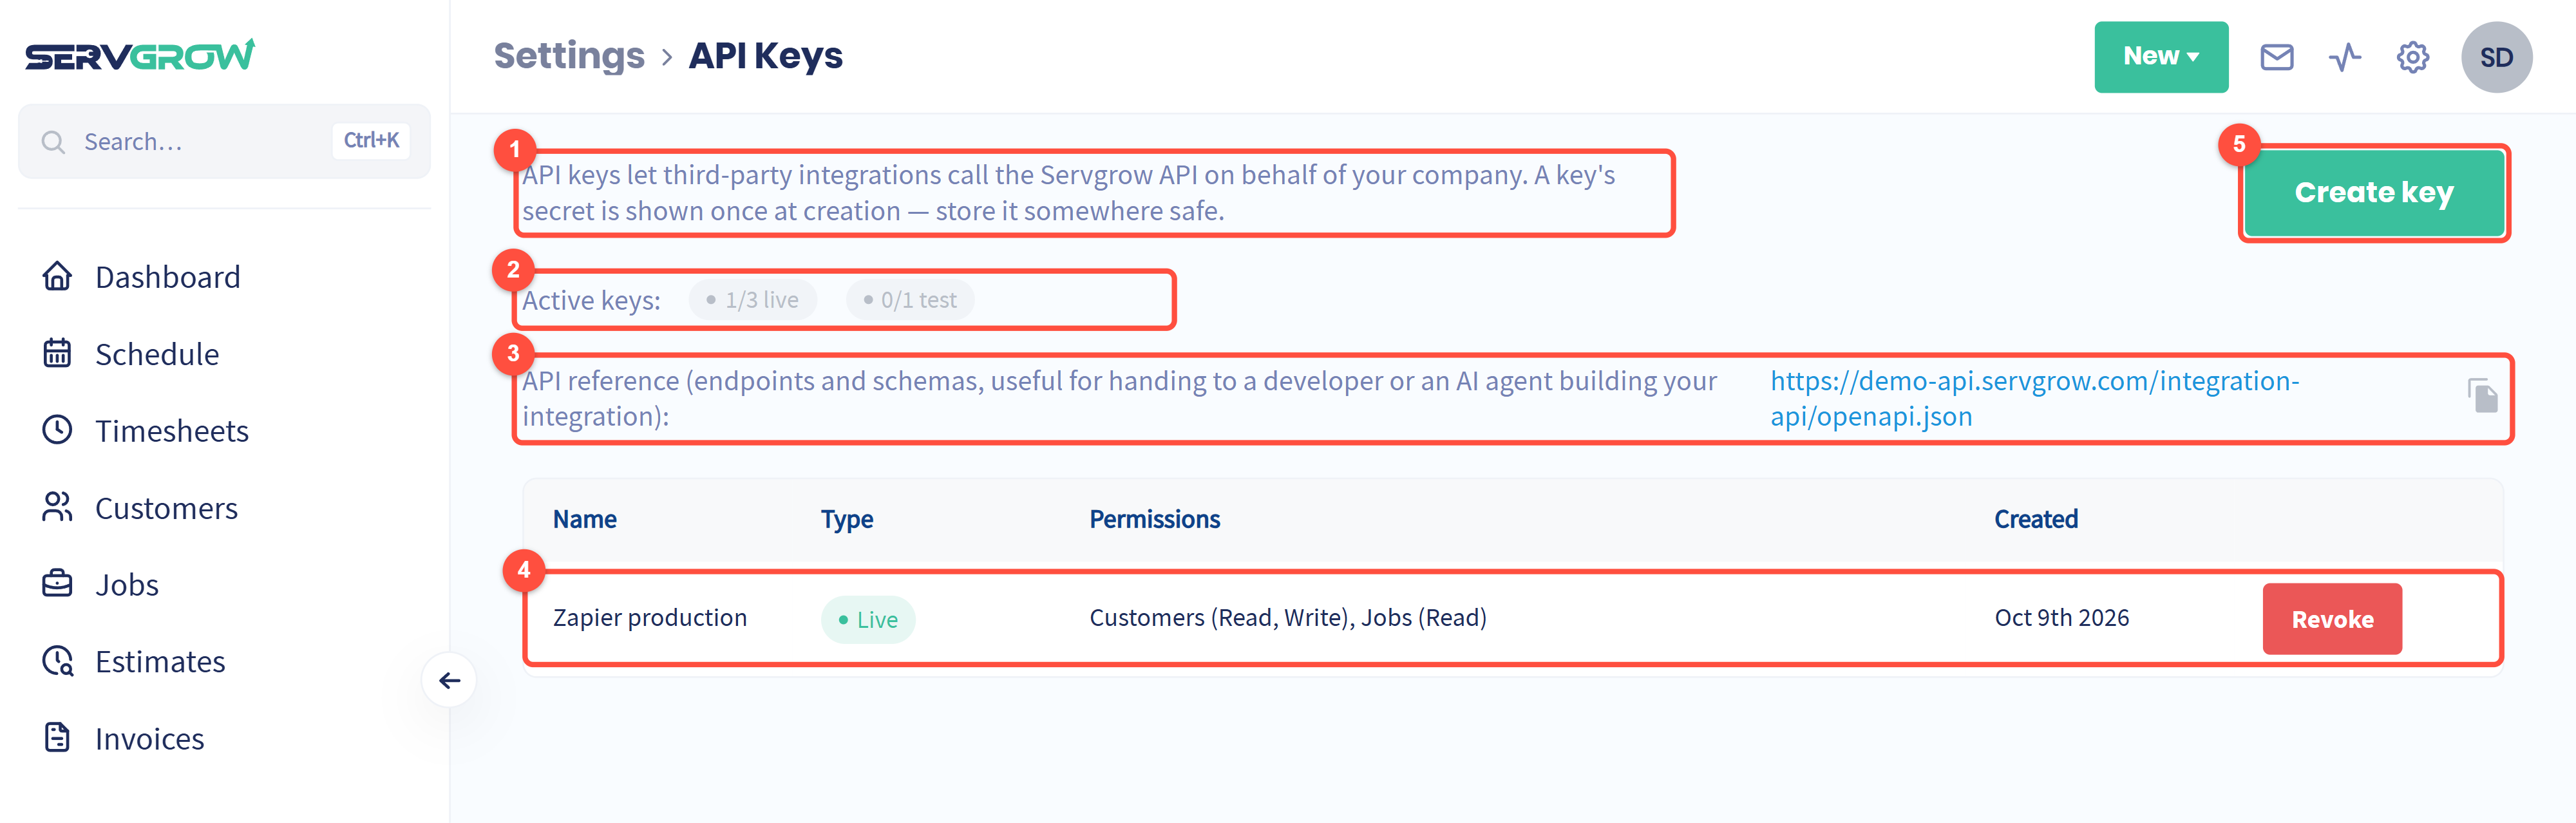
A reminder of how keys work: a key's secret is shown once, when you create it, so store it somewhere safe.
Active keys: how many live and test keys you have, out of what your account allows (here 3 live and 1 test).
API reference: the full list of what the API can do, with endpoints and data formats. Copy this link for your developer, or for an AI assistant that is building the connection for you.
Each key you create: its name, whether it is Live or Test, its permissions and when it was created. Revoke switches it off for good; any tool using it stops working straight away.
Create key makes a new one.
Create a key
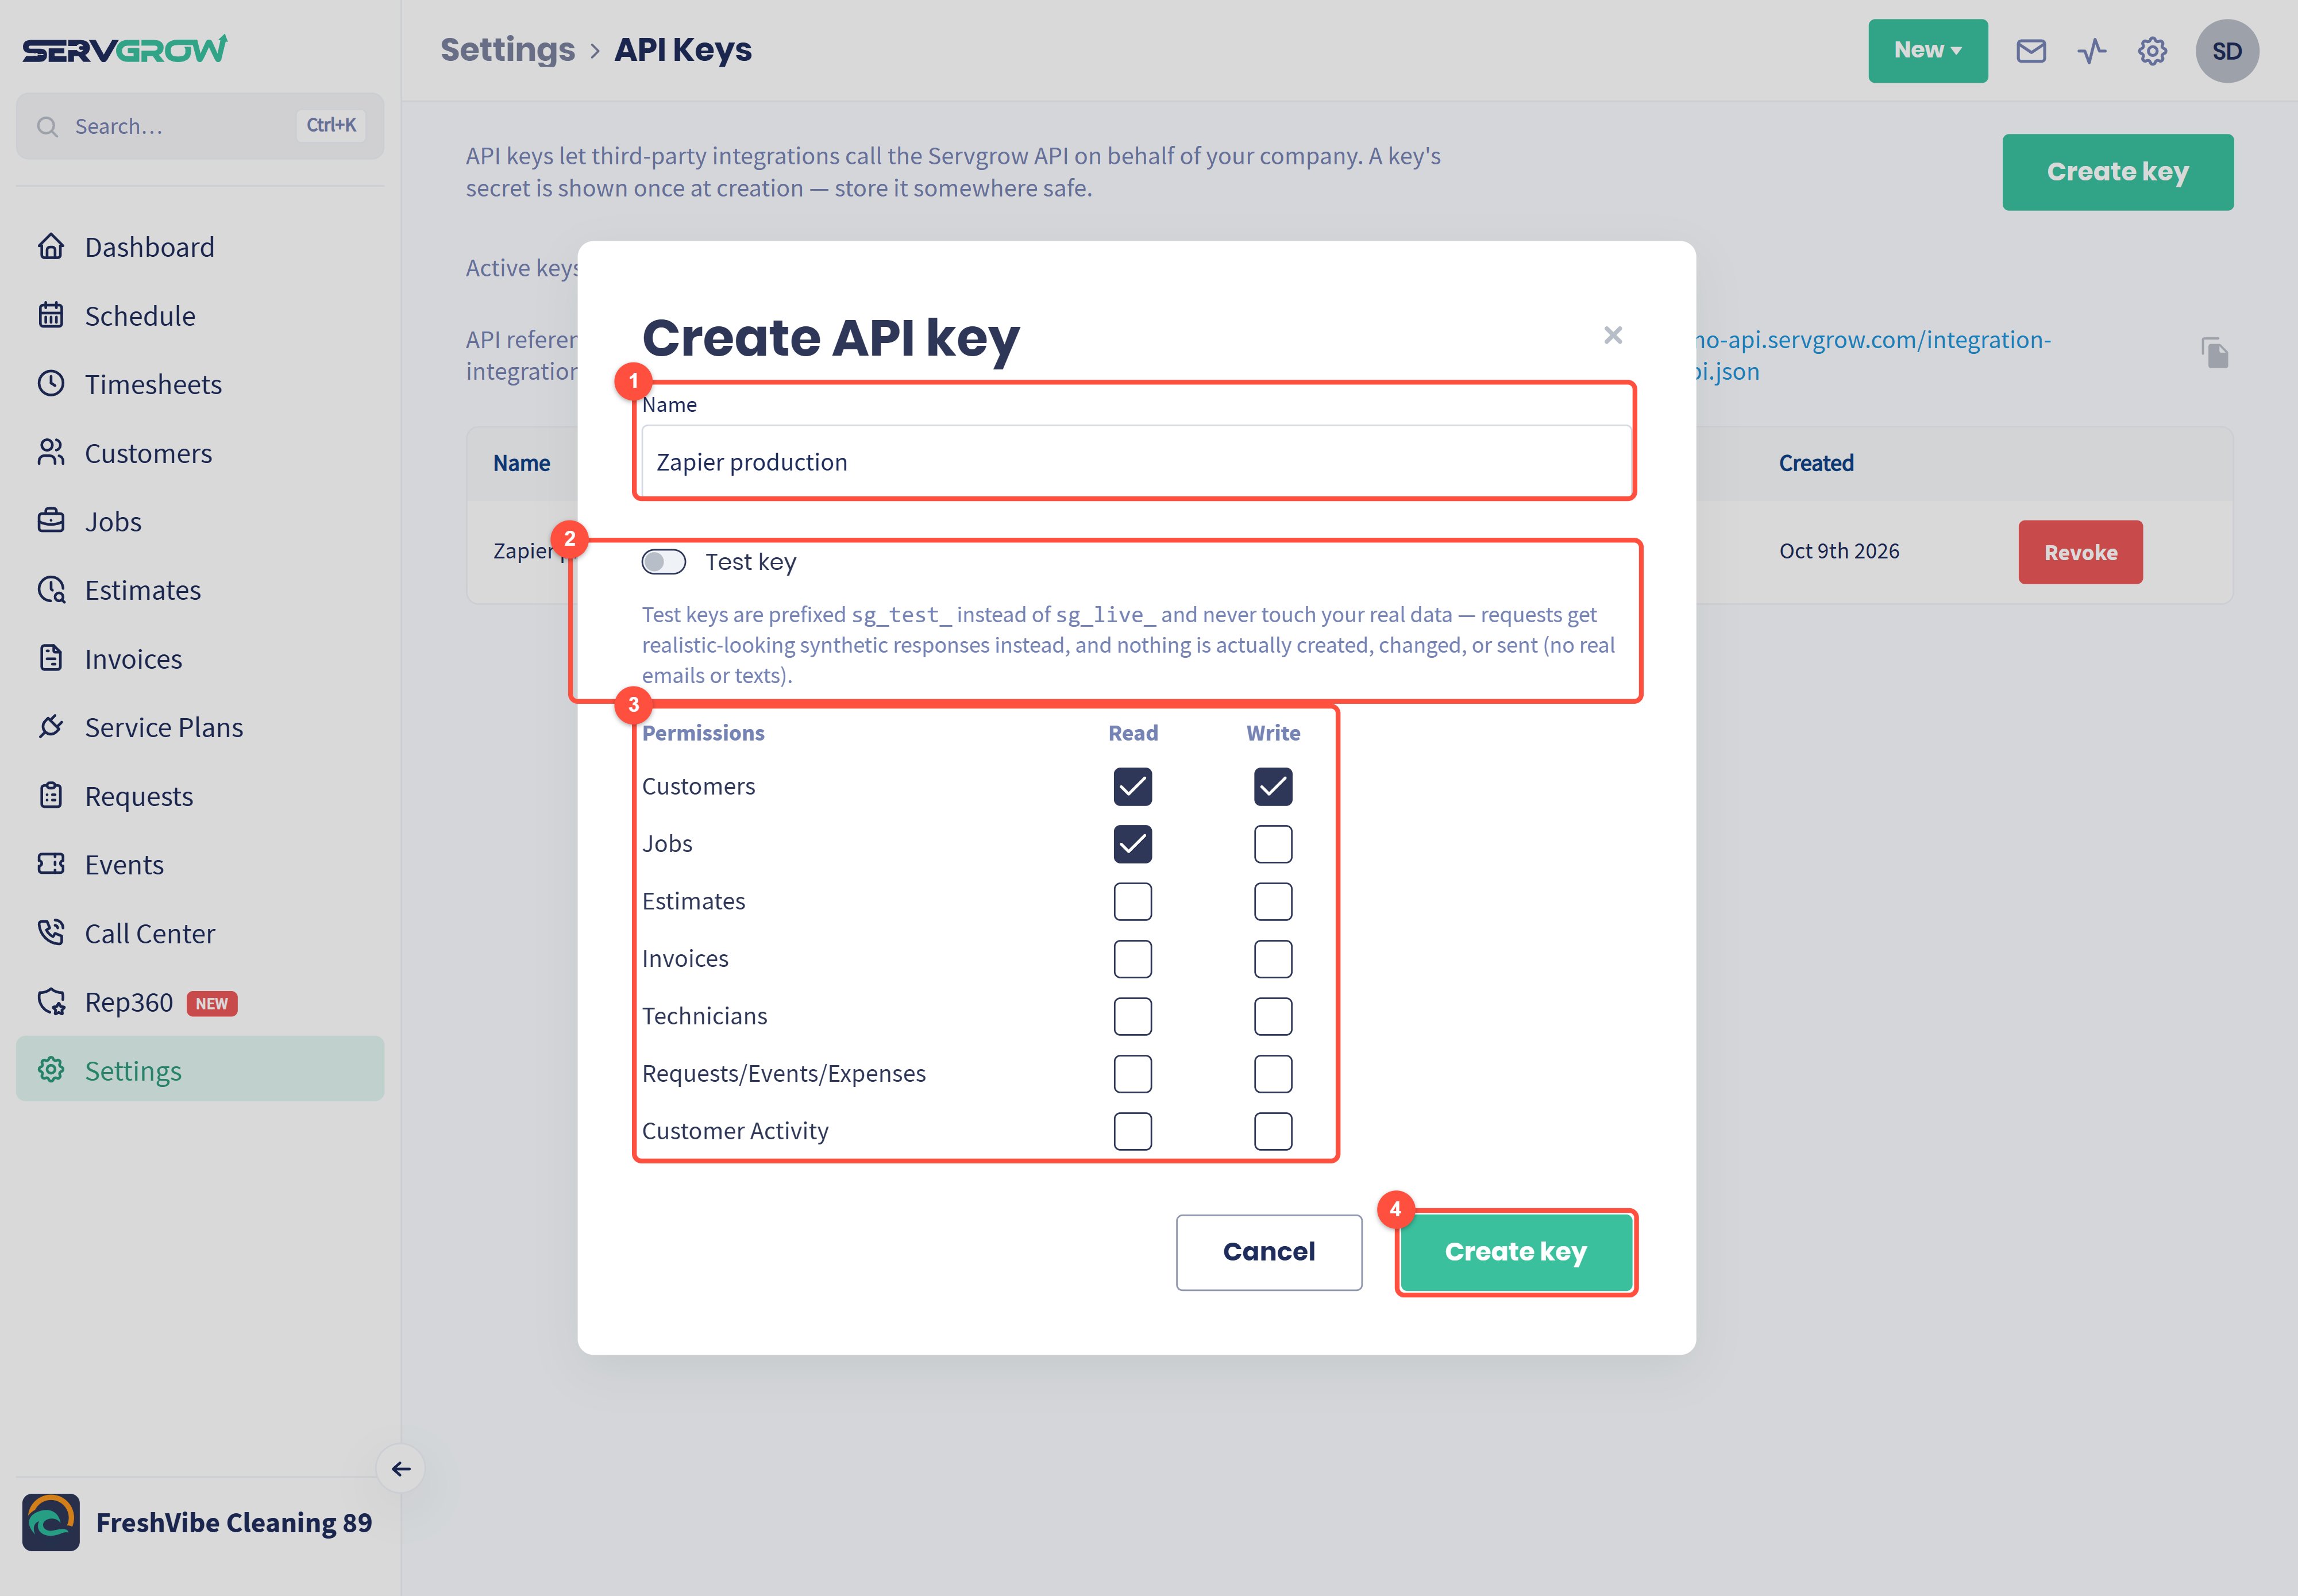
Name: say which tool and what for, such as "Zapier production" or "Website lead form". When you look at the list in six months, you will know exactly what each key is.
Test key: switch on to get a key that starts with
sg_test_instead ofsg_live_. A test key never touches your real data: the API answers with realistic sample data, and nothing is created, changed or sent, so no real emails or texts go out. Use one while a connection is being built, then create a live key when it works.Permissions: tick Read to let the tool see an area and Write to let it create or change things there. The areas are Customers, Jobs, Estimates, Invoices, Technicians, Requests/Events/Expenses and Customer Activity. Give each tool only what it needs: a tool that adds new leads needs Customers Write, not Invoices.
Click Create key.
Copy the key, once
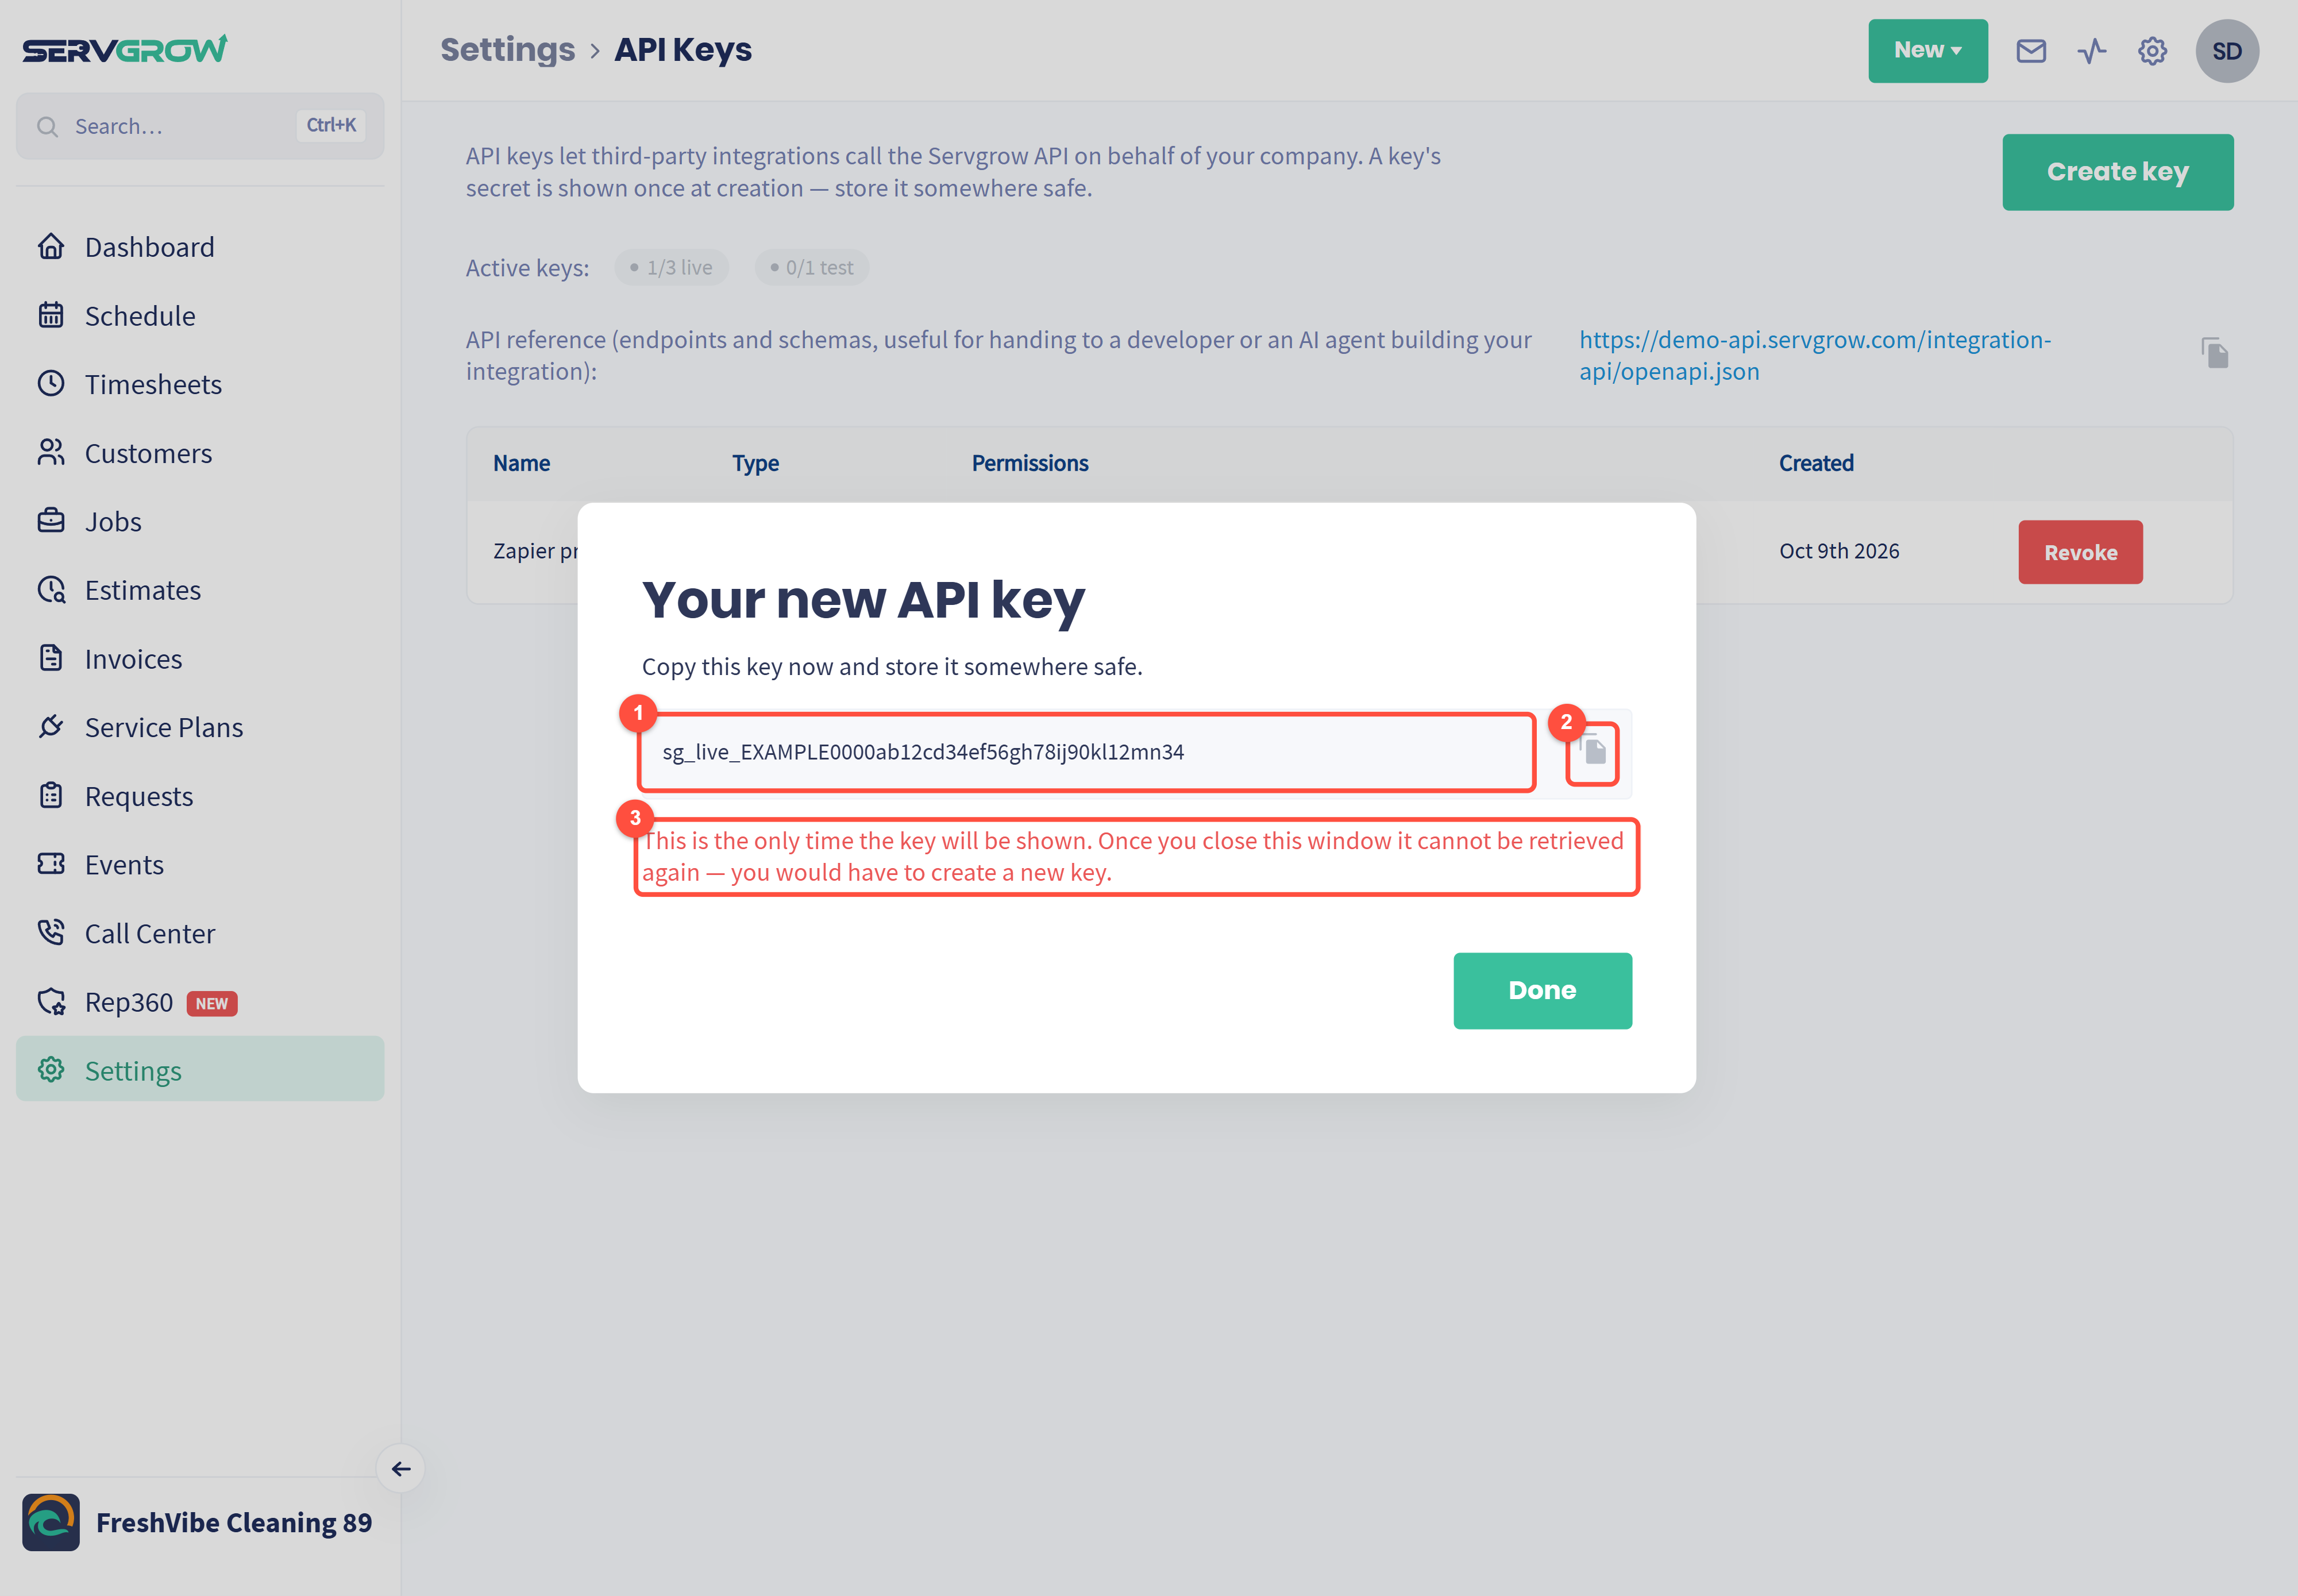
Your new key. (The key in this picture is an example, not a real key.)
Click the copy button and paste the key straight into the tool you are connecting, or into your password manager.
This is the only time the key is shown. Once you close the window it cannot be retrieved. If you lose it, revoke it and create a new one.
Click Done. The key now appears in your list.
Keep your keys safe
Treat a key like a password. Anyone with a live key can do whatever its permissions allow in your account. Never email it, text it or post it in a chat.
One key per tool. If you stop using a tool, revoke just its key and everything else keeps working.
Revoke straight away if a key may have been seen by someone who should not have it, or when a developer or agency you worked with moves on.
Start with a test key for anything new, so mistakes never reach your real customers.
Related articles