
Most service businesses find out a job lost money weeks after the truck left. The fuel, the rental, the supplies run off in one direction while the invoice sits in another, and nobody puts the two together until the quarter closes.
Expense Tracking closes that gap. Log the spend the moment it happens, attach the receipt, tag it to the job it belongs to, and every job carries its real cost instead of a guess. You find out which work actually makes you money while you can still do something about it.
Here's how to set it up.
Where to find it
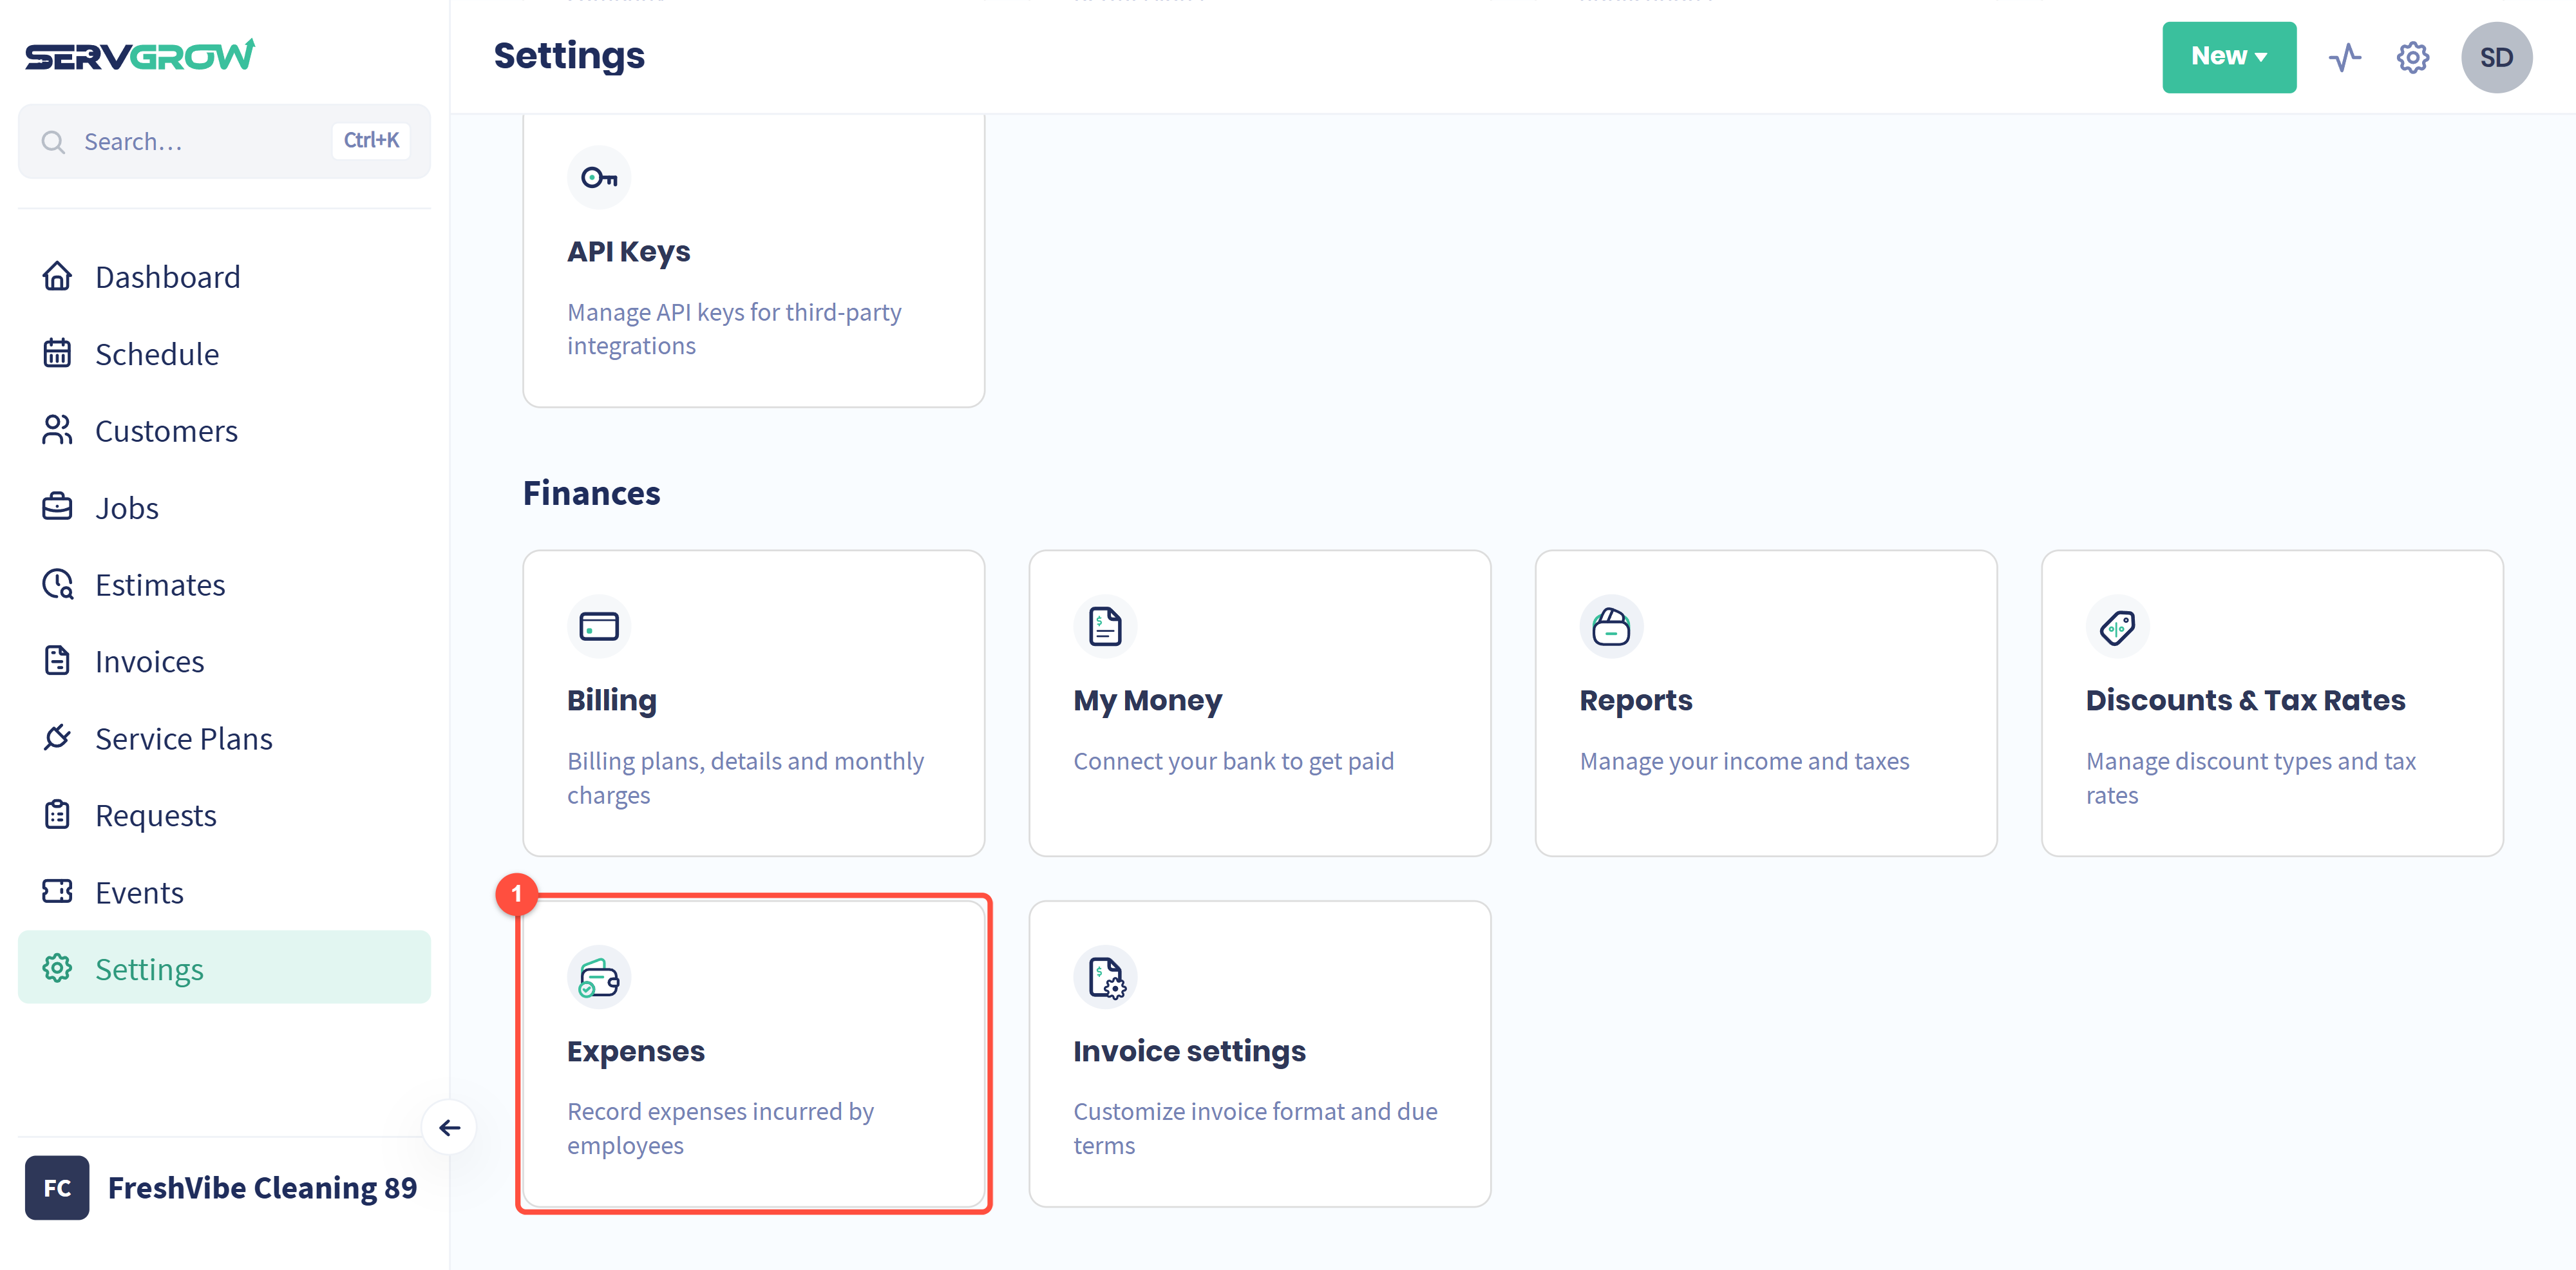
Go to Settings, scroll down to the Finances section, and click Expenses. The page that opens is titled Expense Tracking.
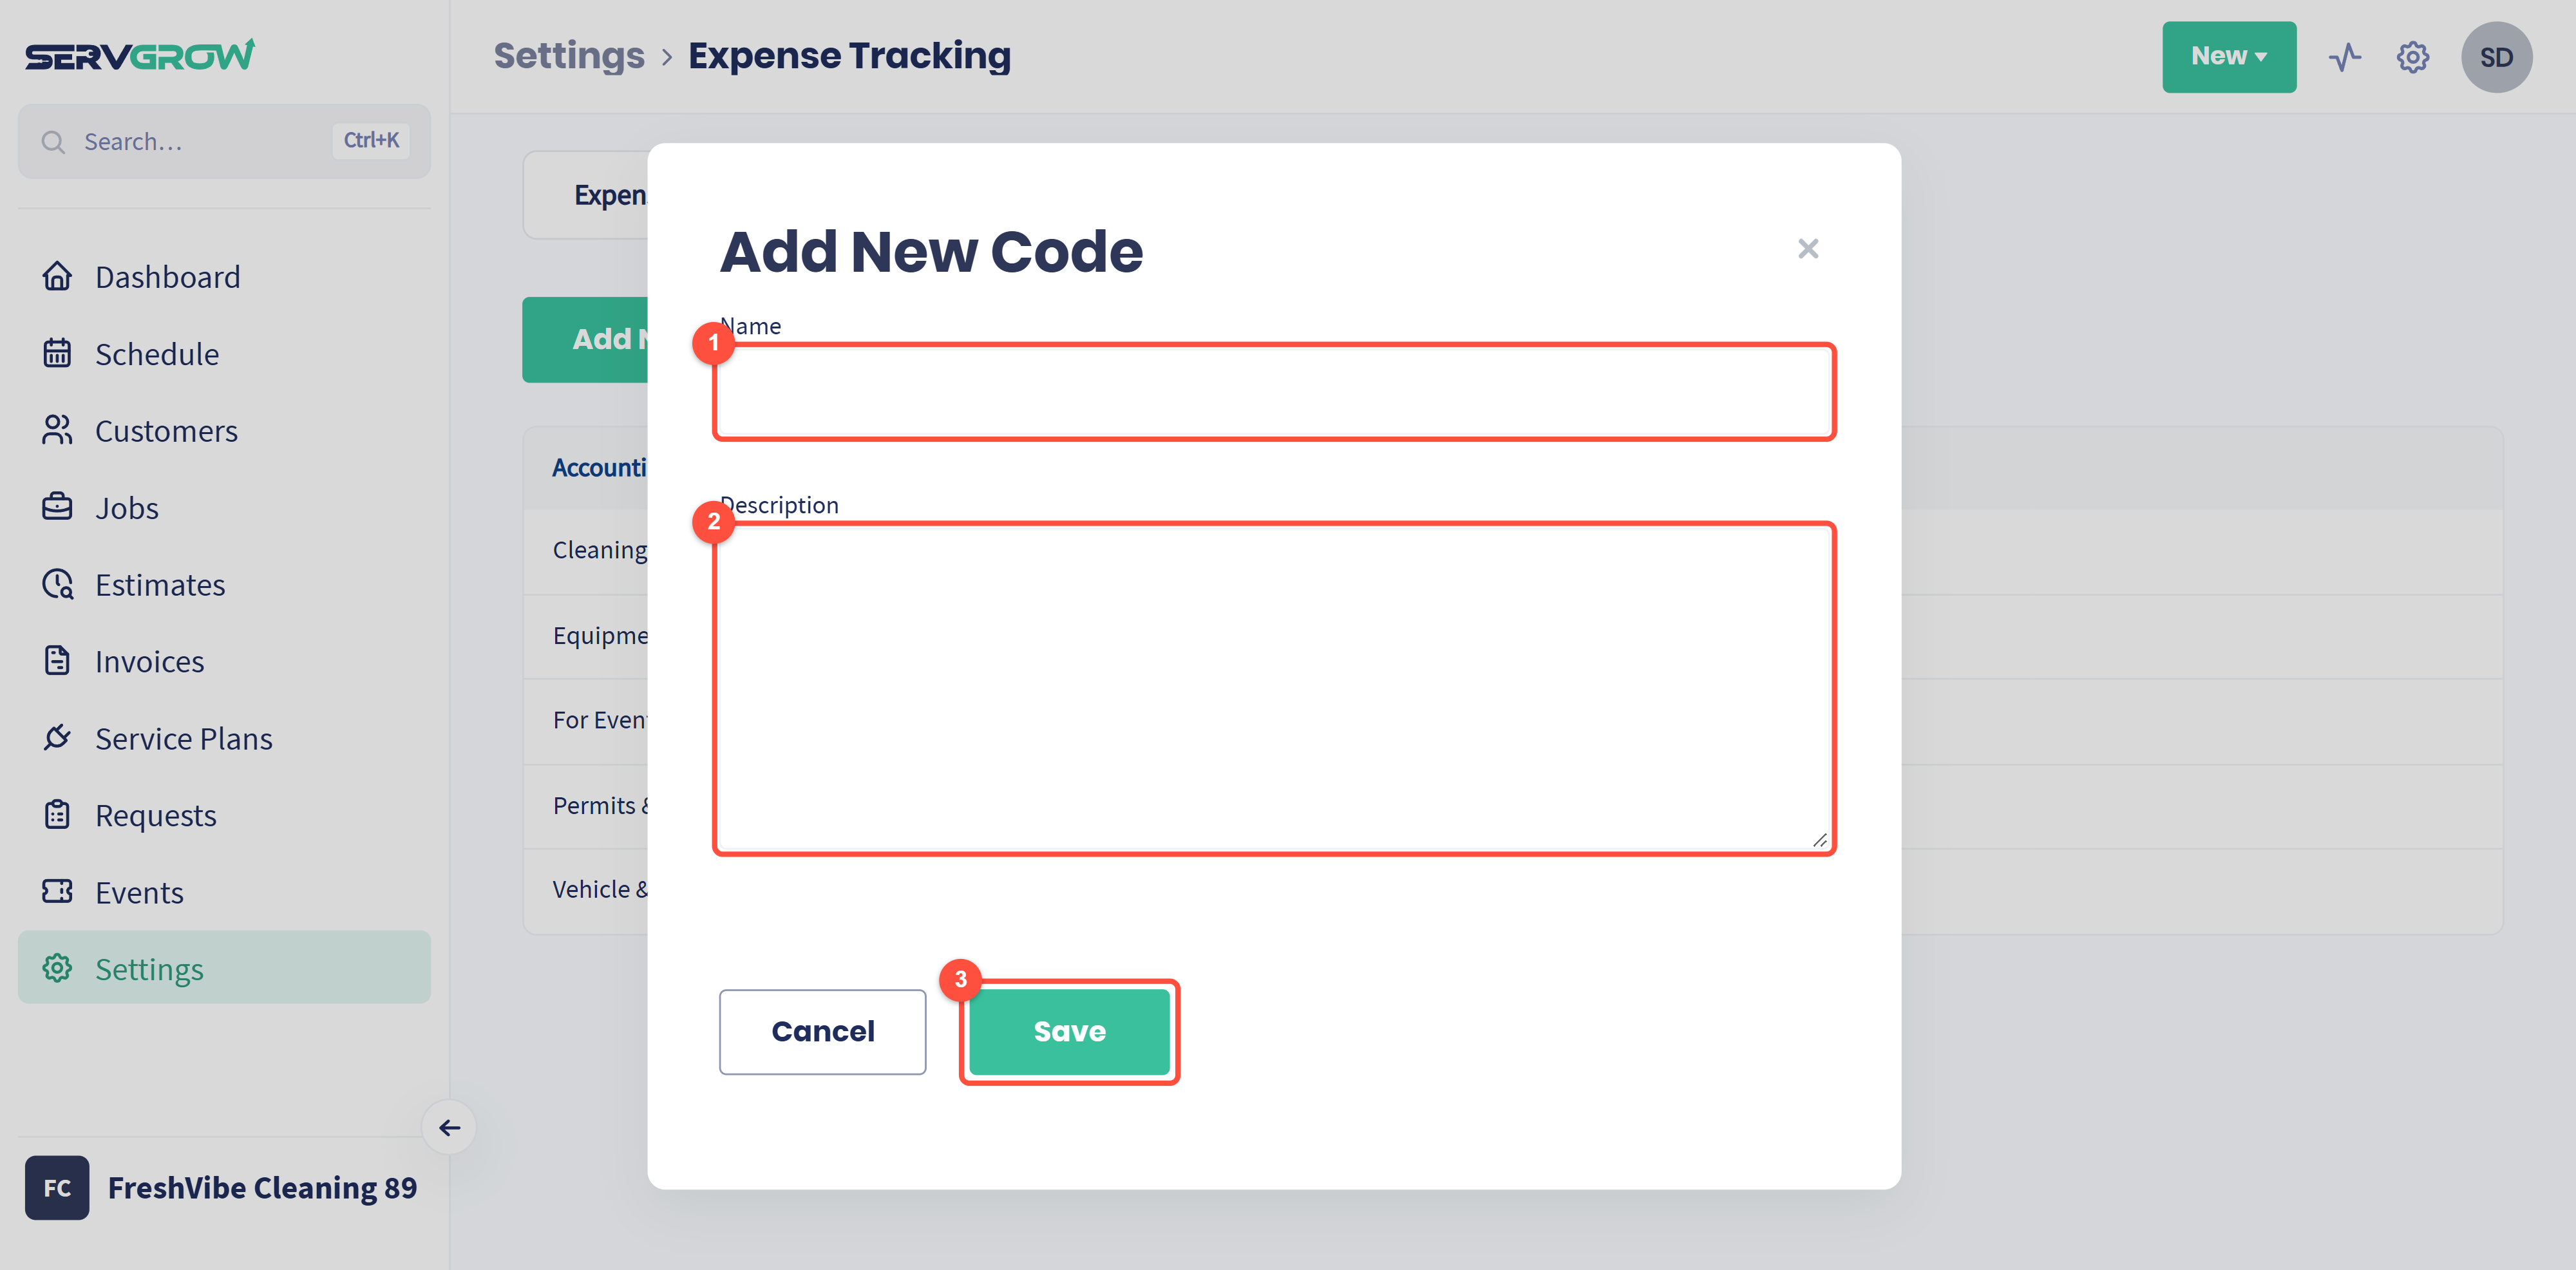
You'll see two tabs: Expenses and Accounting Codes. Start with Accounting Codes. They're the categories every expense gets filed under, and having a few in place before you log anything keeps your reporting clean from day one.
Part 1: Set up your accounting codes
Click the Accounting Codes tab.
Click Add New Code.
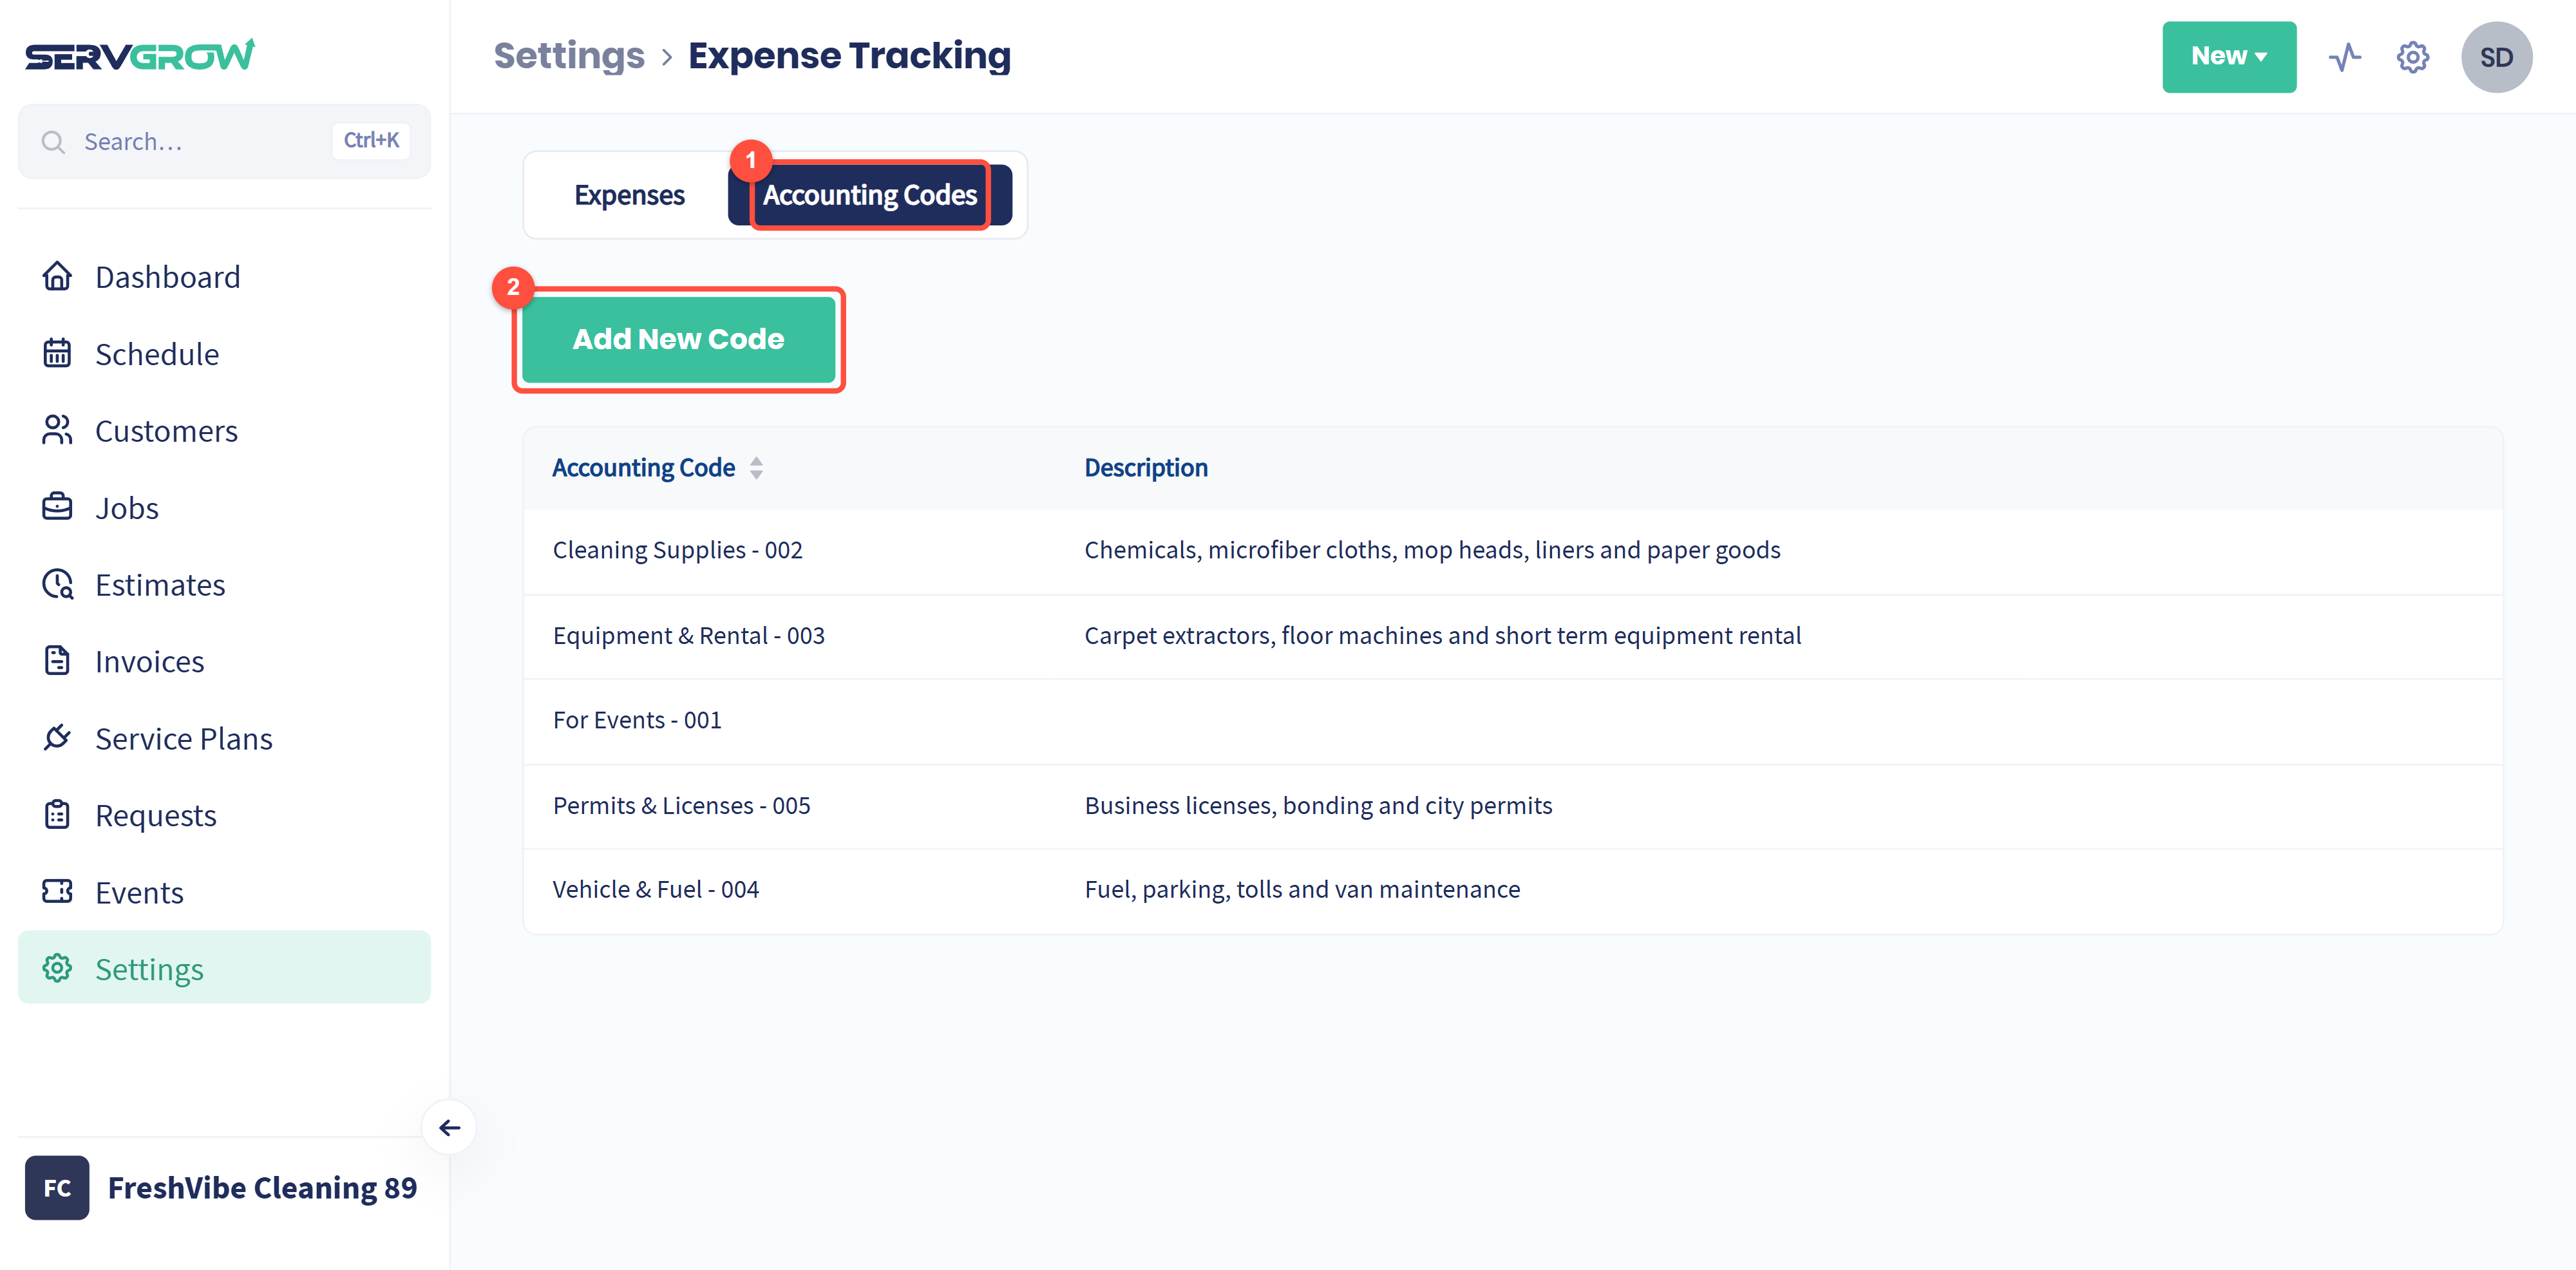
Enter a Name for the code. Most businesses use a category plus a number, like
Cleaning Supplies - 002, so the codes sort predictably and line up with the chart of accounts your bookkeeper already uses.Add a Description so your team knows what belongs in it. Something like "Chemicals, microfiber cloths, mop heads, liners and paper goods" removes the guesswork when someone is logging an expense from a parking lot.
Click Save.
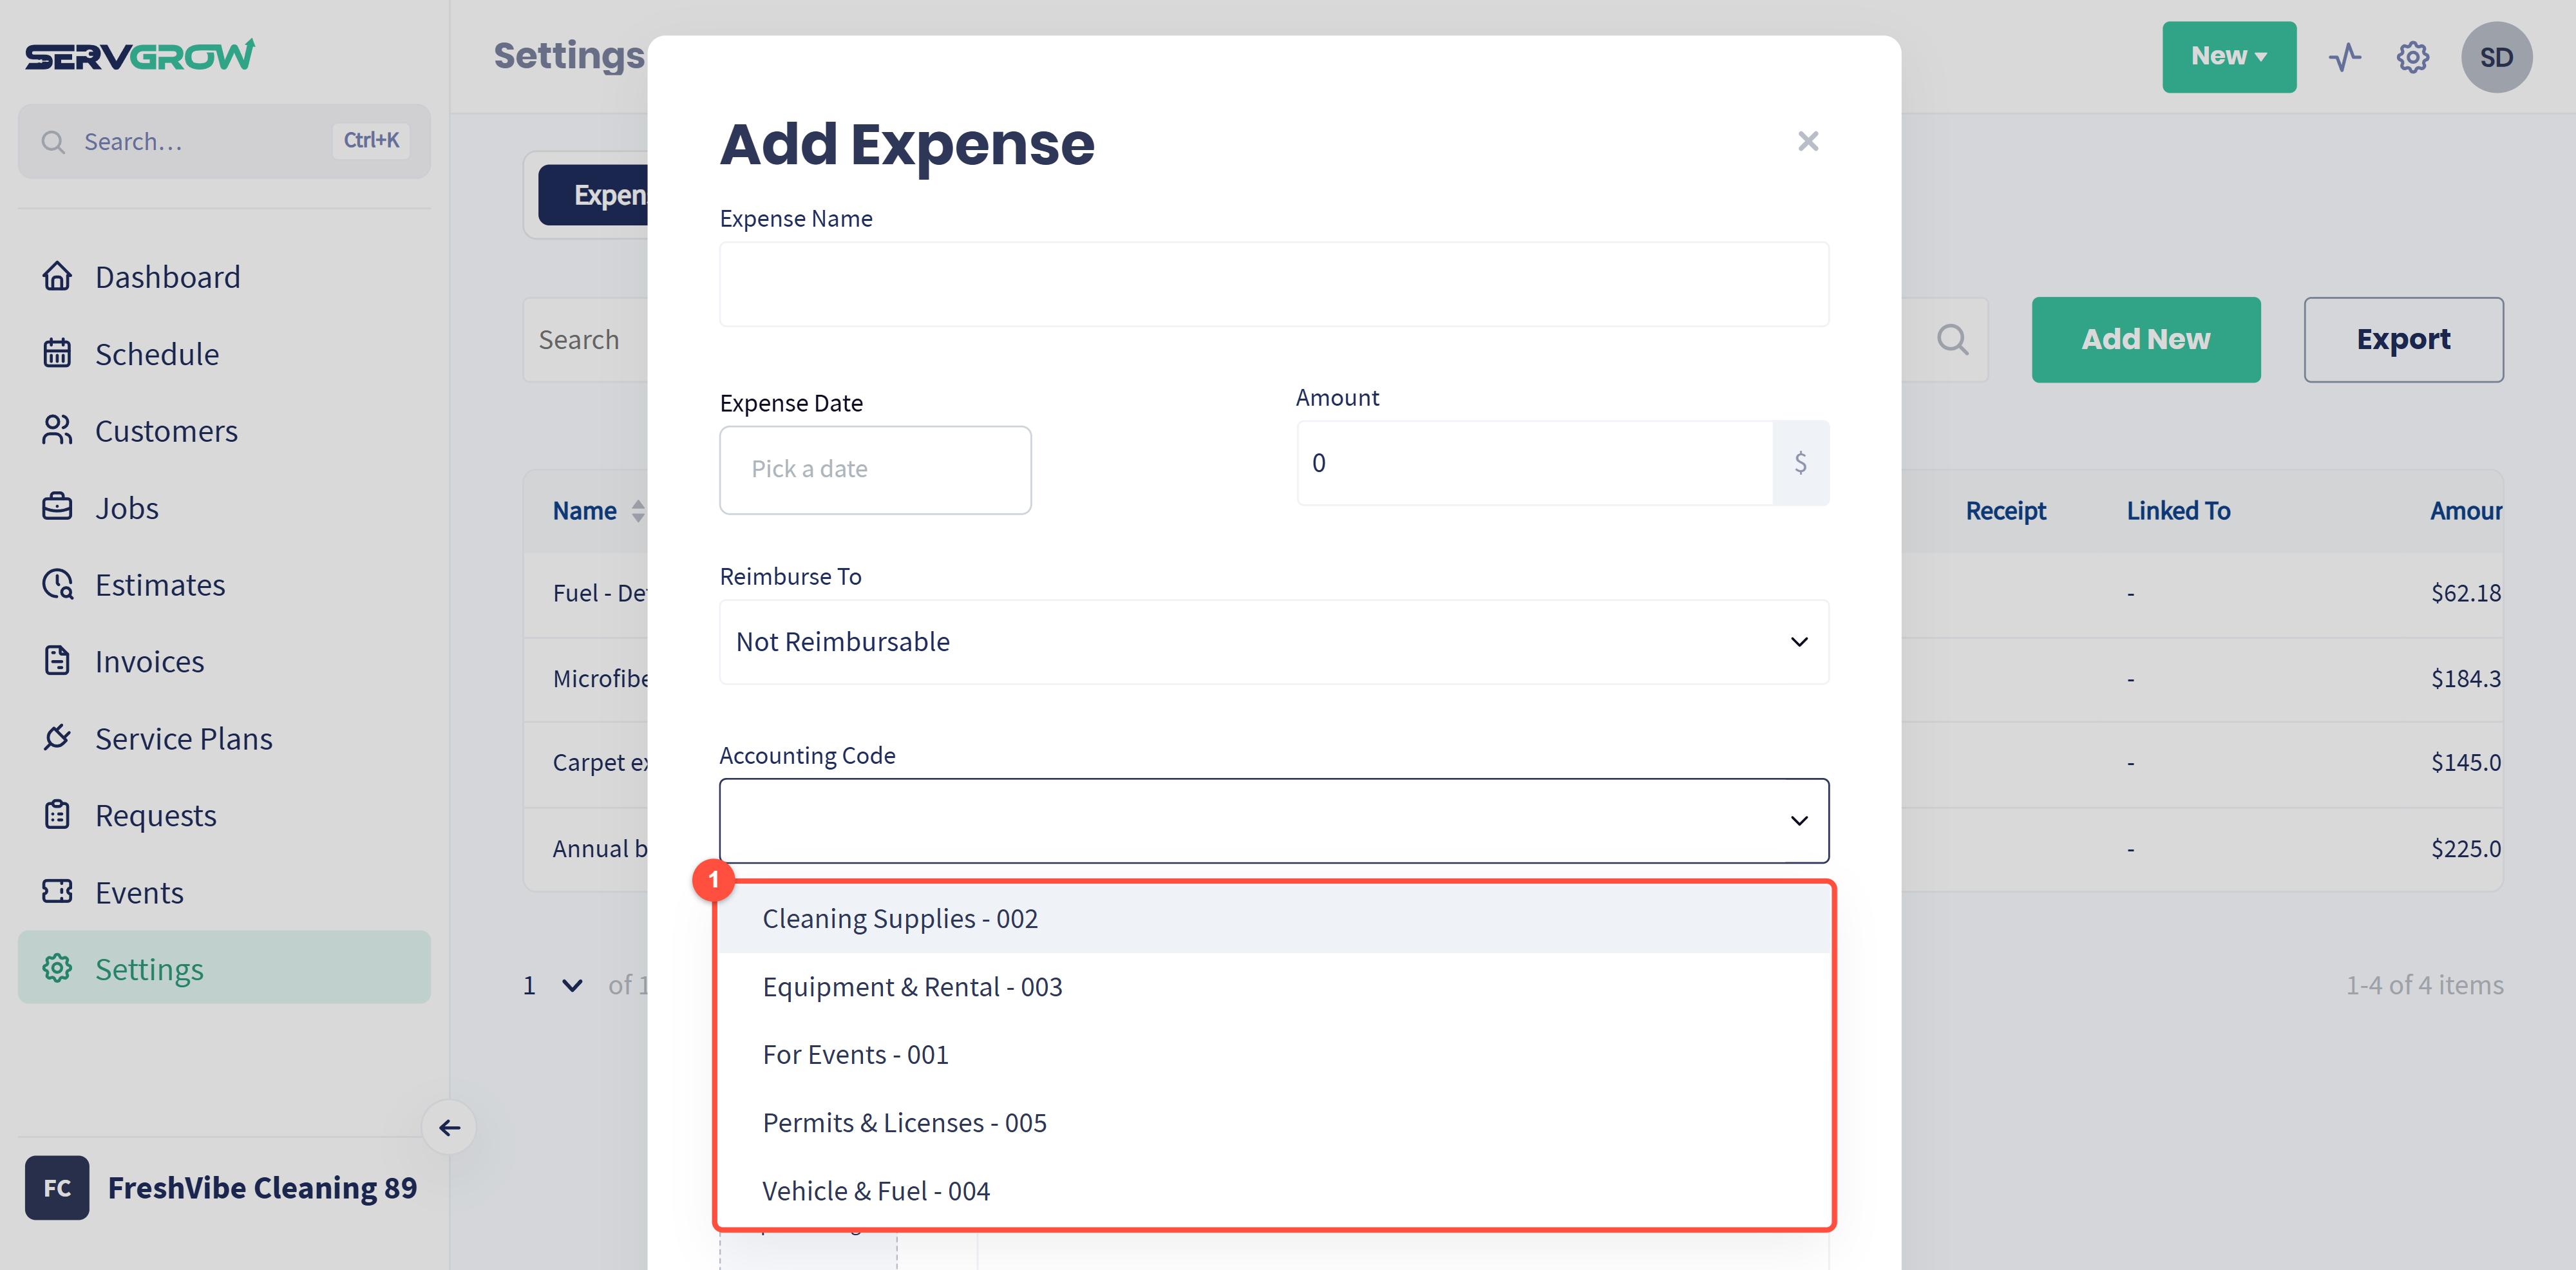
Repeat for each category you want to track. Four or five is usually plenty to start: supplies, equipment and rental, vehicle and fuel, and permits and licenses will cover most of what a service business spends.
Tip: keep the list short. Codes only help if your team picks the right one, and a list of thirty guarantees they won't.
Part 2: Log an expense
Click the Expenses tab.
Click Add New.
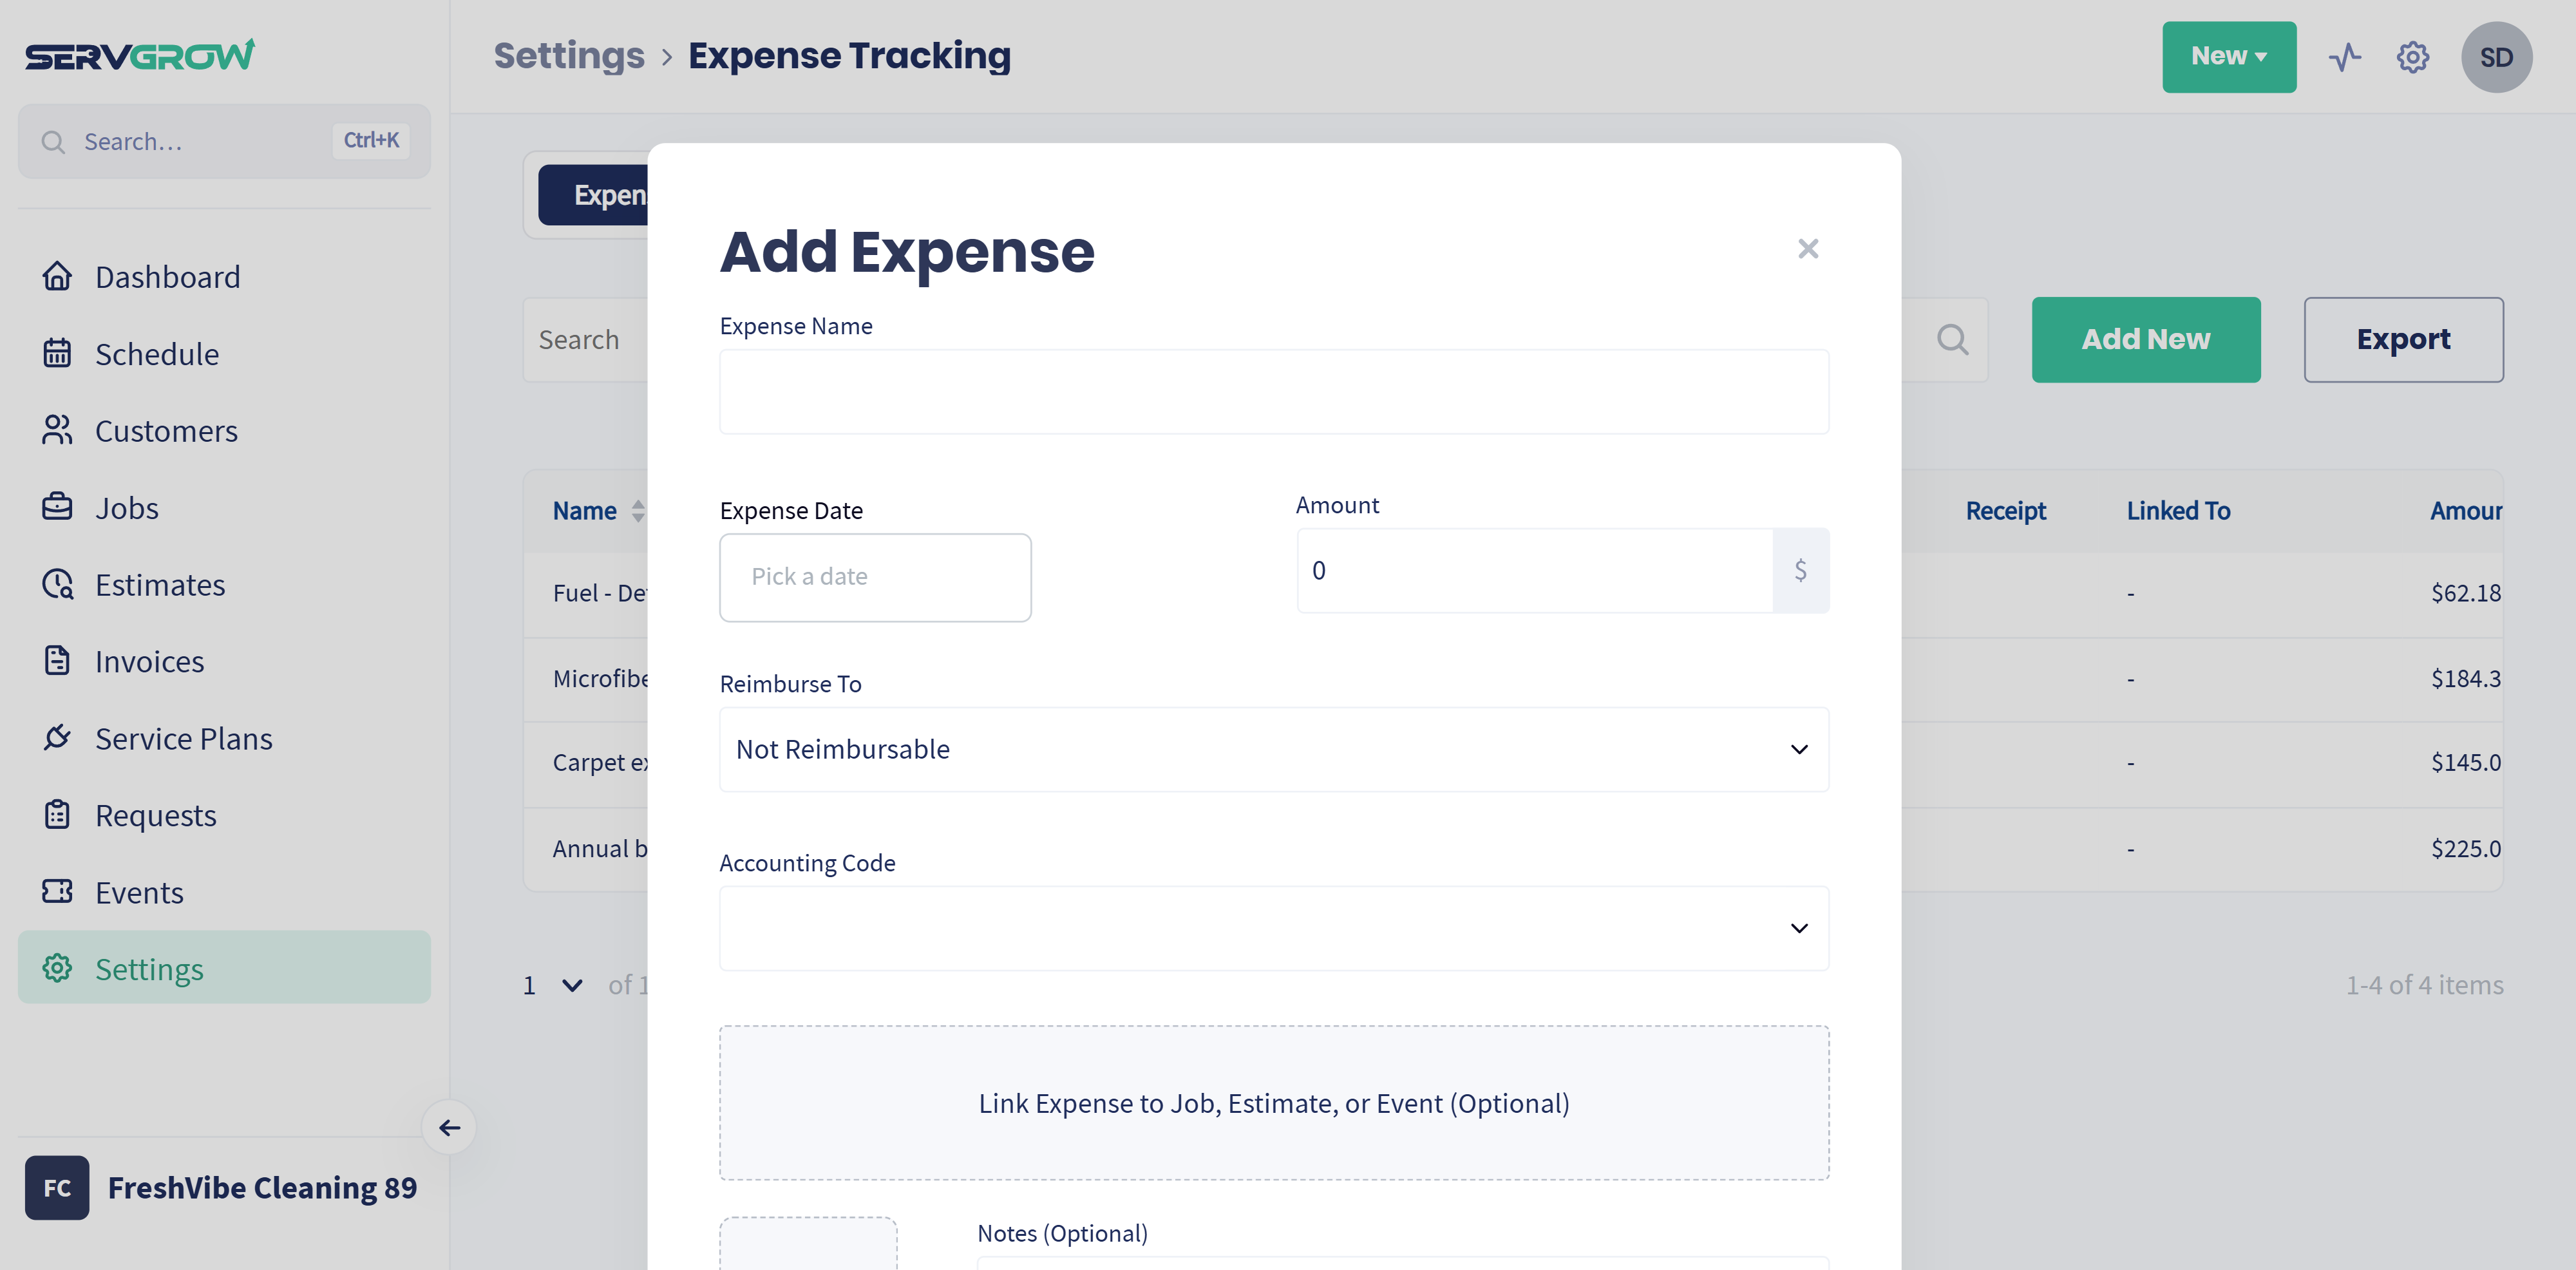
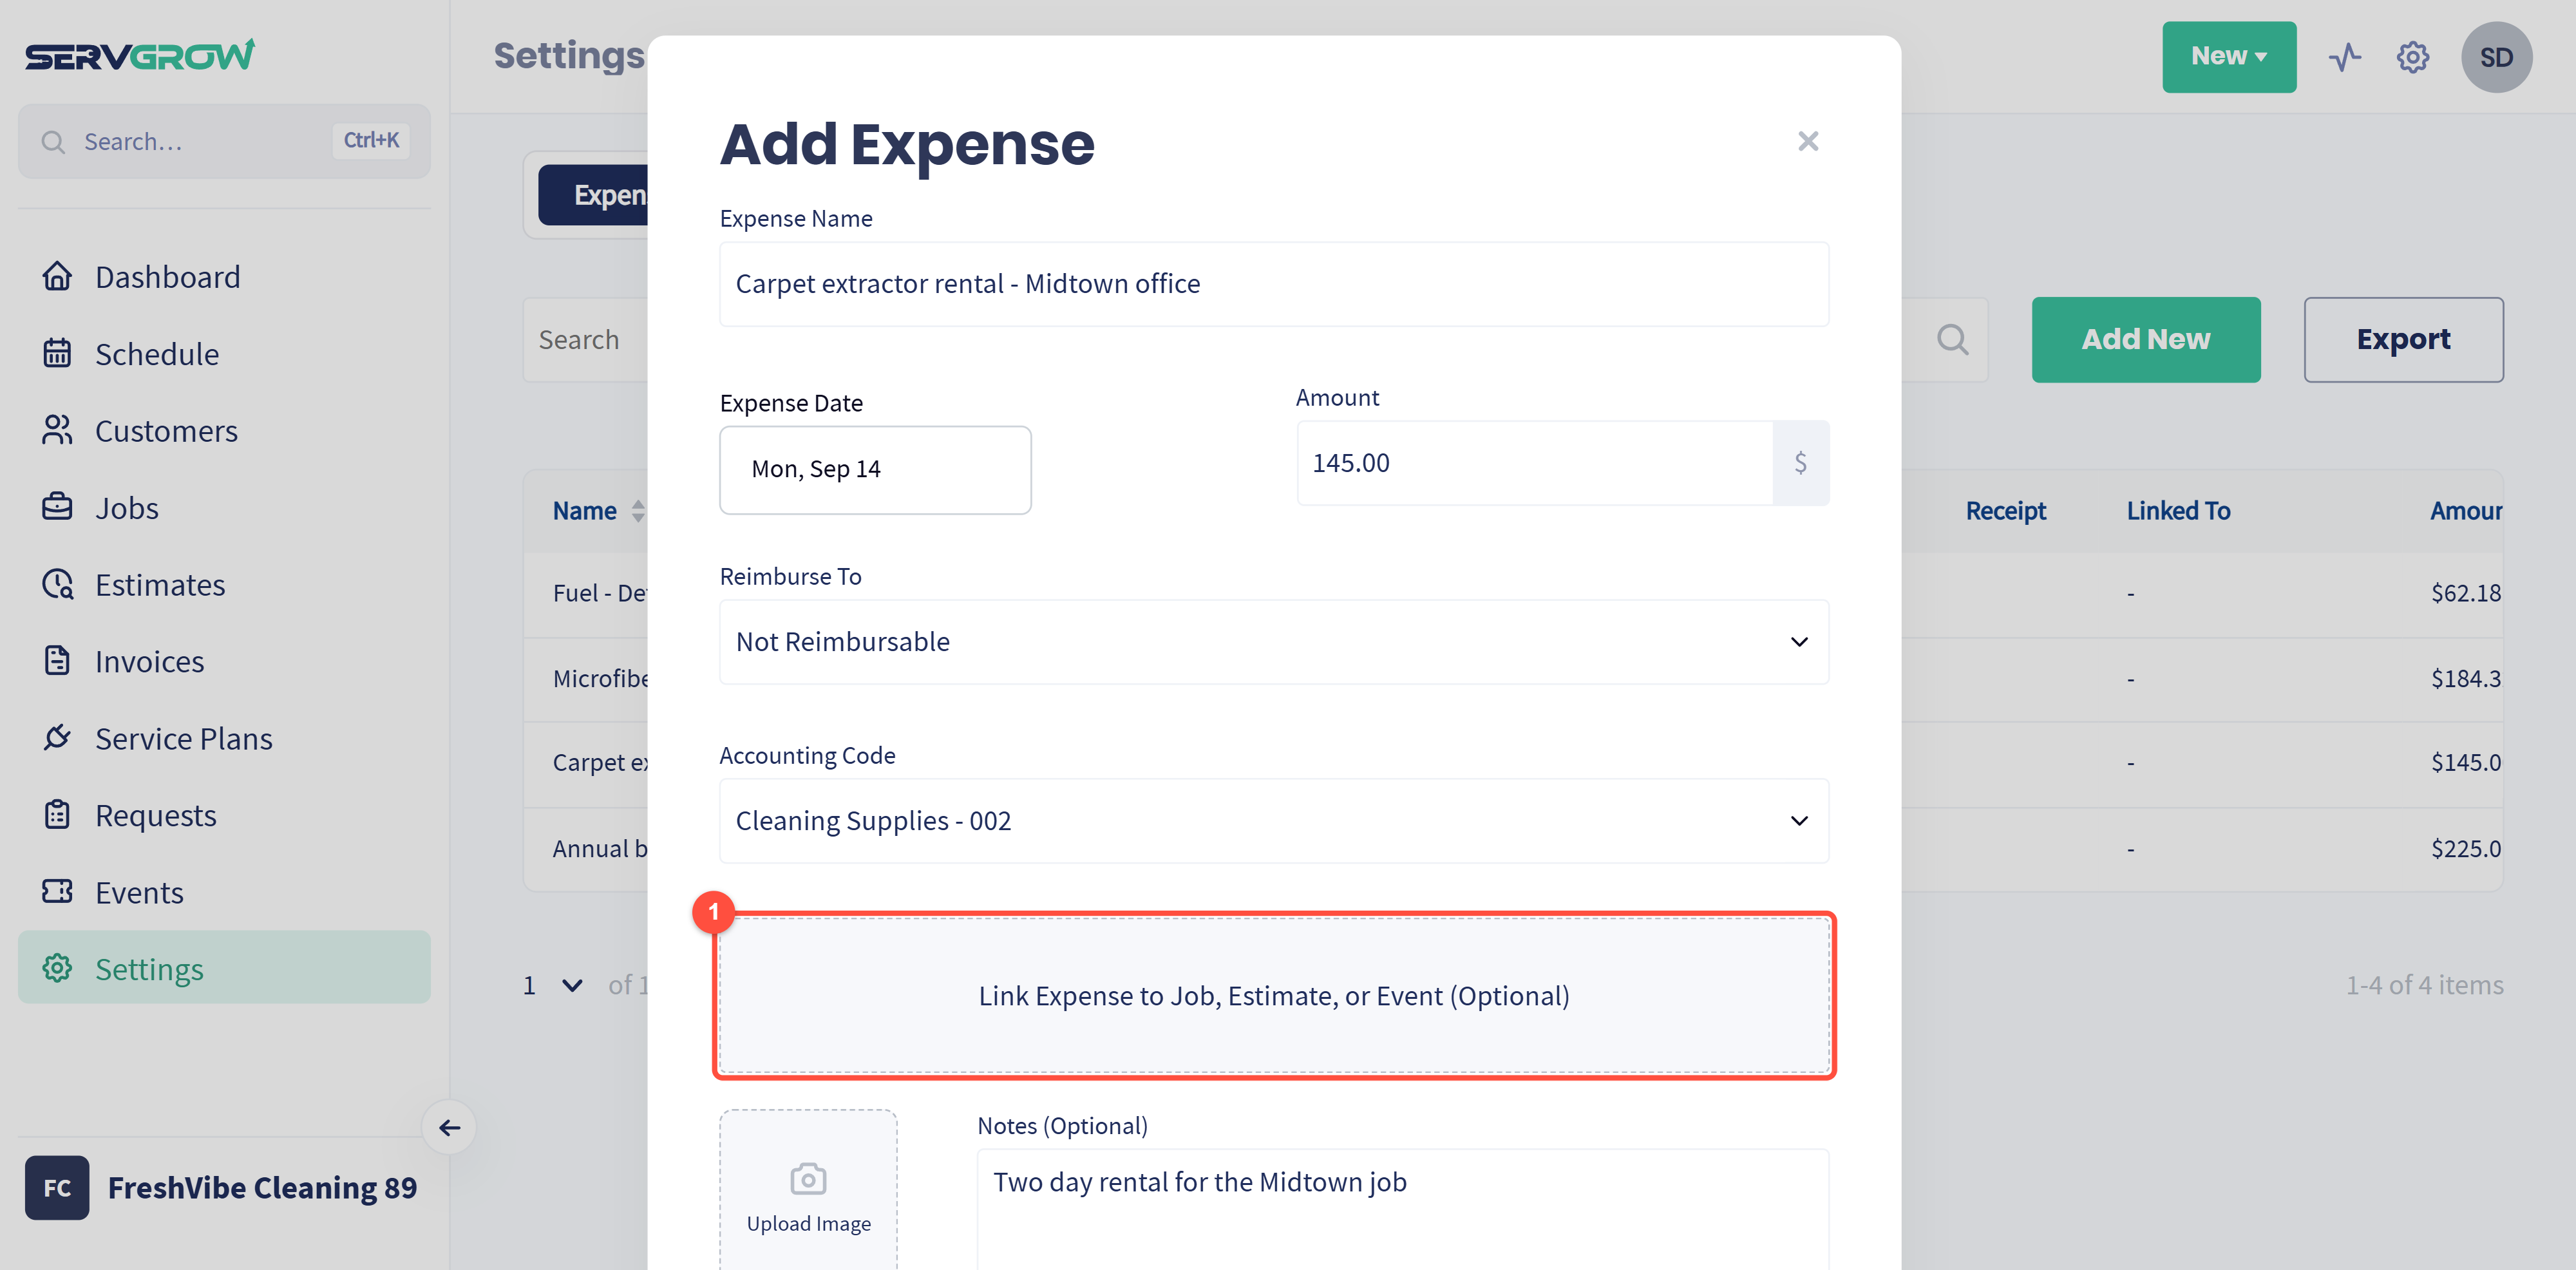
Enter an Expense Name. Be specific enough that it means something in three months. "Carpet extractor rental - Midtown office" beats "rental".
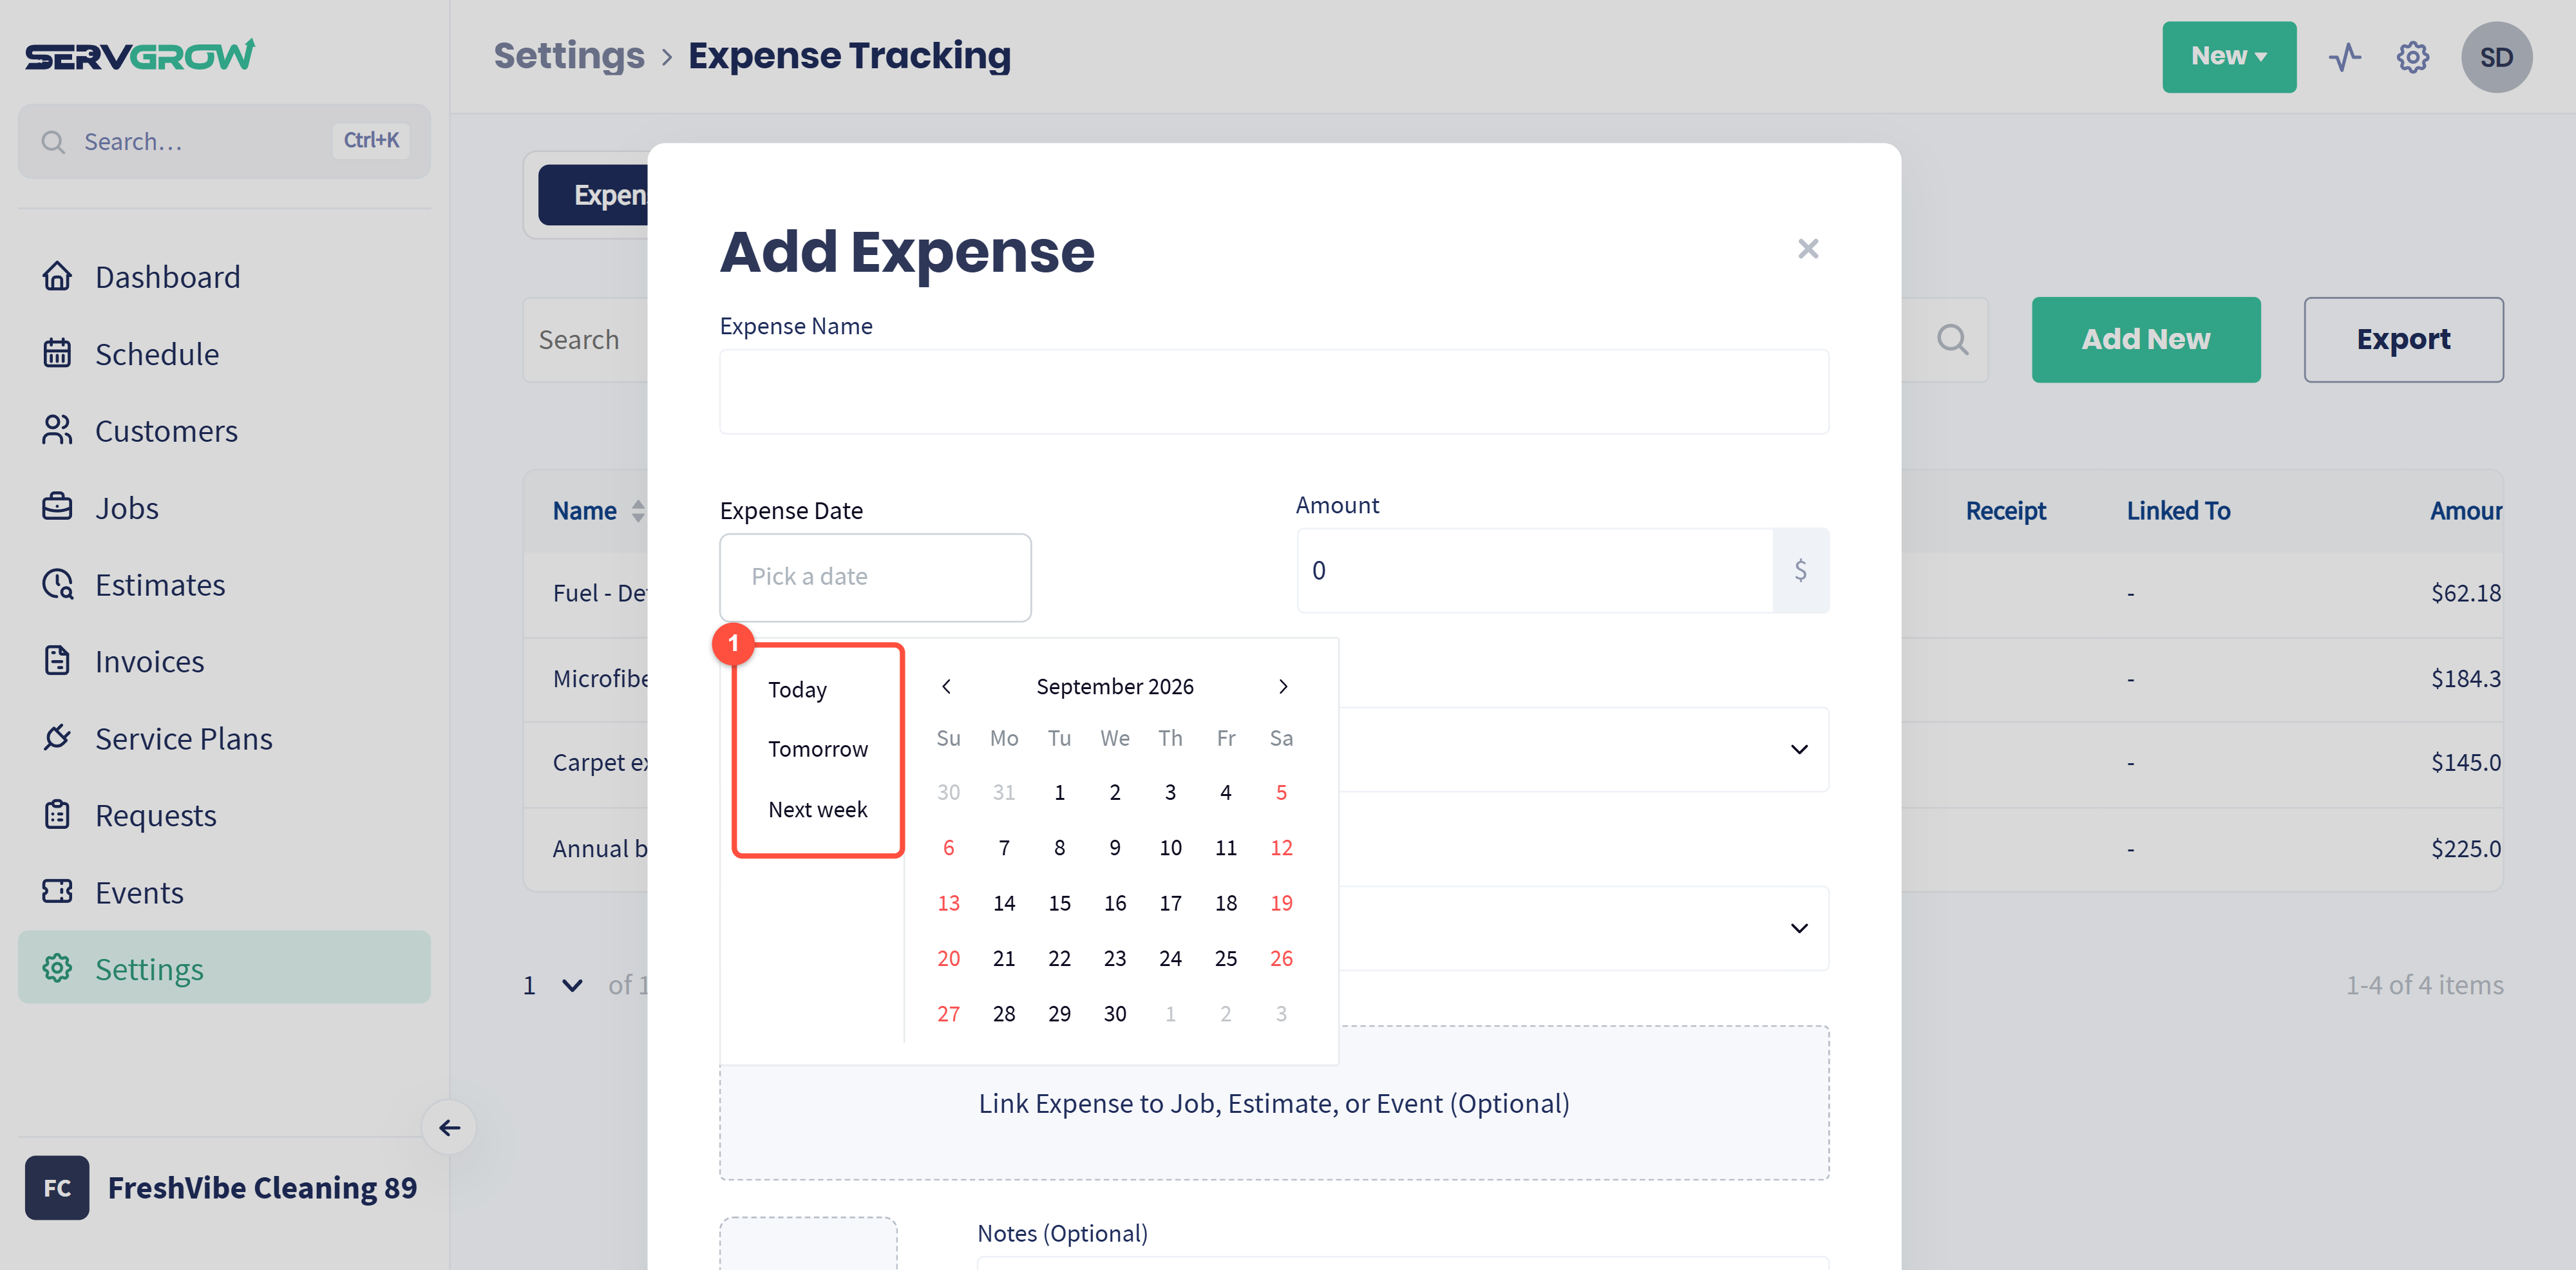
Click Expense Date and pick the date from the calendar. There are shortcuts for Today, Tomorrow and Next week down the left side.
Enter the Amount.
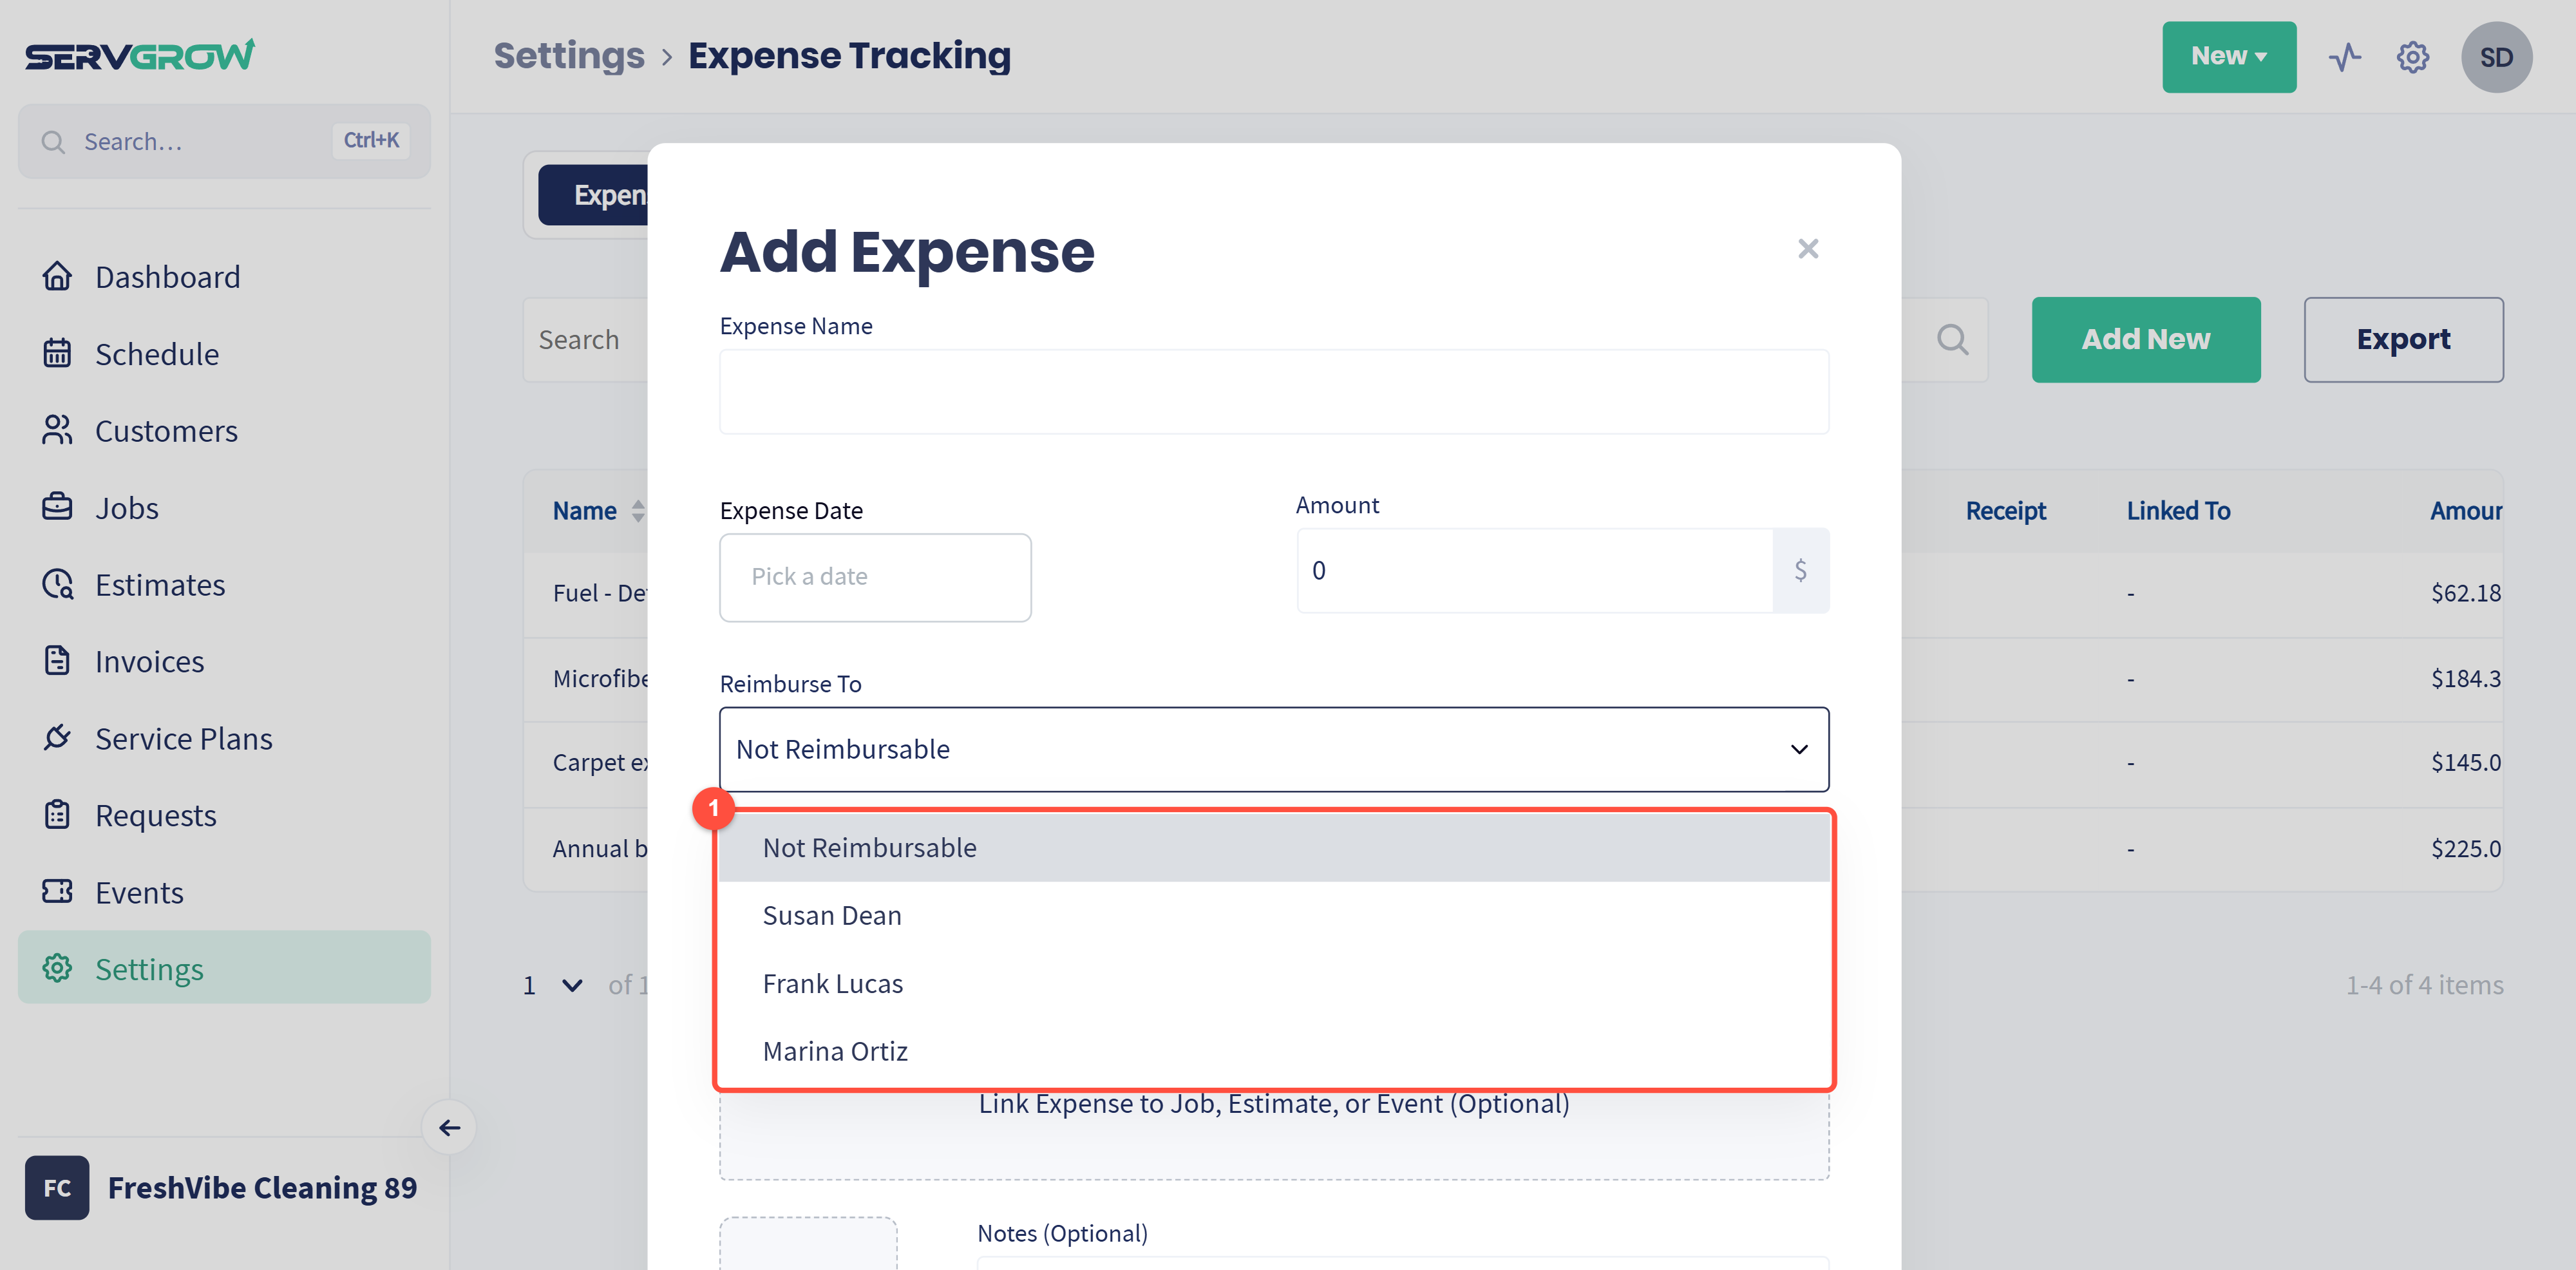
Set Reimburse To. This defaults to Not Reimbursable. If a team member paid out of pocket, pick their name from the list instead, and the expense is recorded as owed to them.
Choose an Accounting Code from the dropdown.
Use Link Expense to Job, Estimate, or Event (Optional) to attach the expense to the work it belongs to. This is the step that makes job costing work, so it's worth doing even though it's optional.
Click Upload Image to attach the receipt. Photograph it at the counter rather than trying to find it later.
Add Notes (Optional) for anything the name doesn't cover.
Click Add Expense.
That's it. The expense appears in your list straight away.
Part 3: Review and export
The Expenses tab shows everything you've logged, with columns for Name, Expense Date, Accounting Code, Notes, Reimburse, Receipt, Linked To and Amount. Click any column heading to sort by it, or use the Search box to find a specific expense.
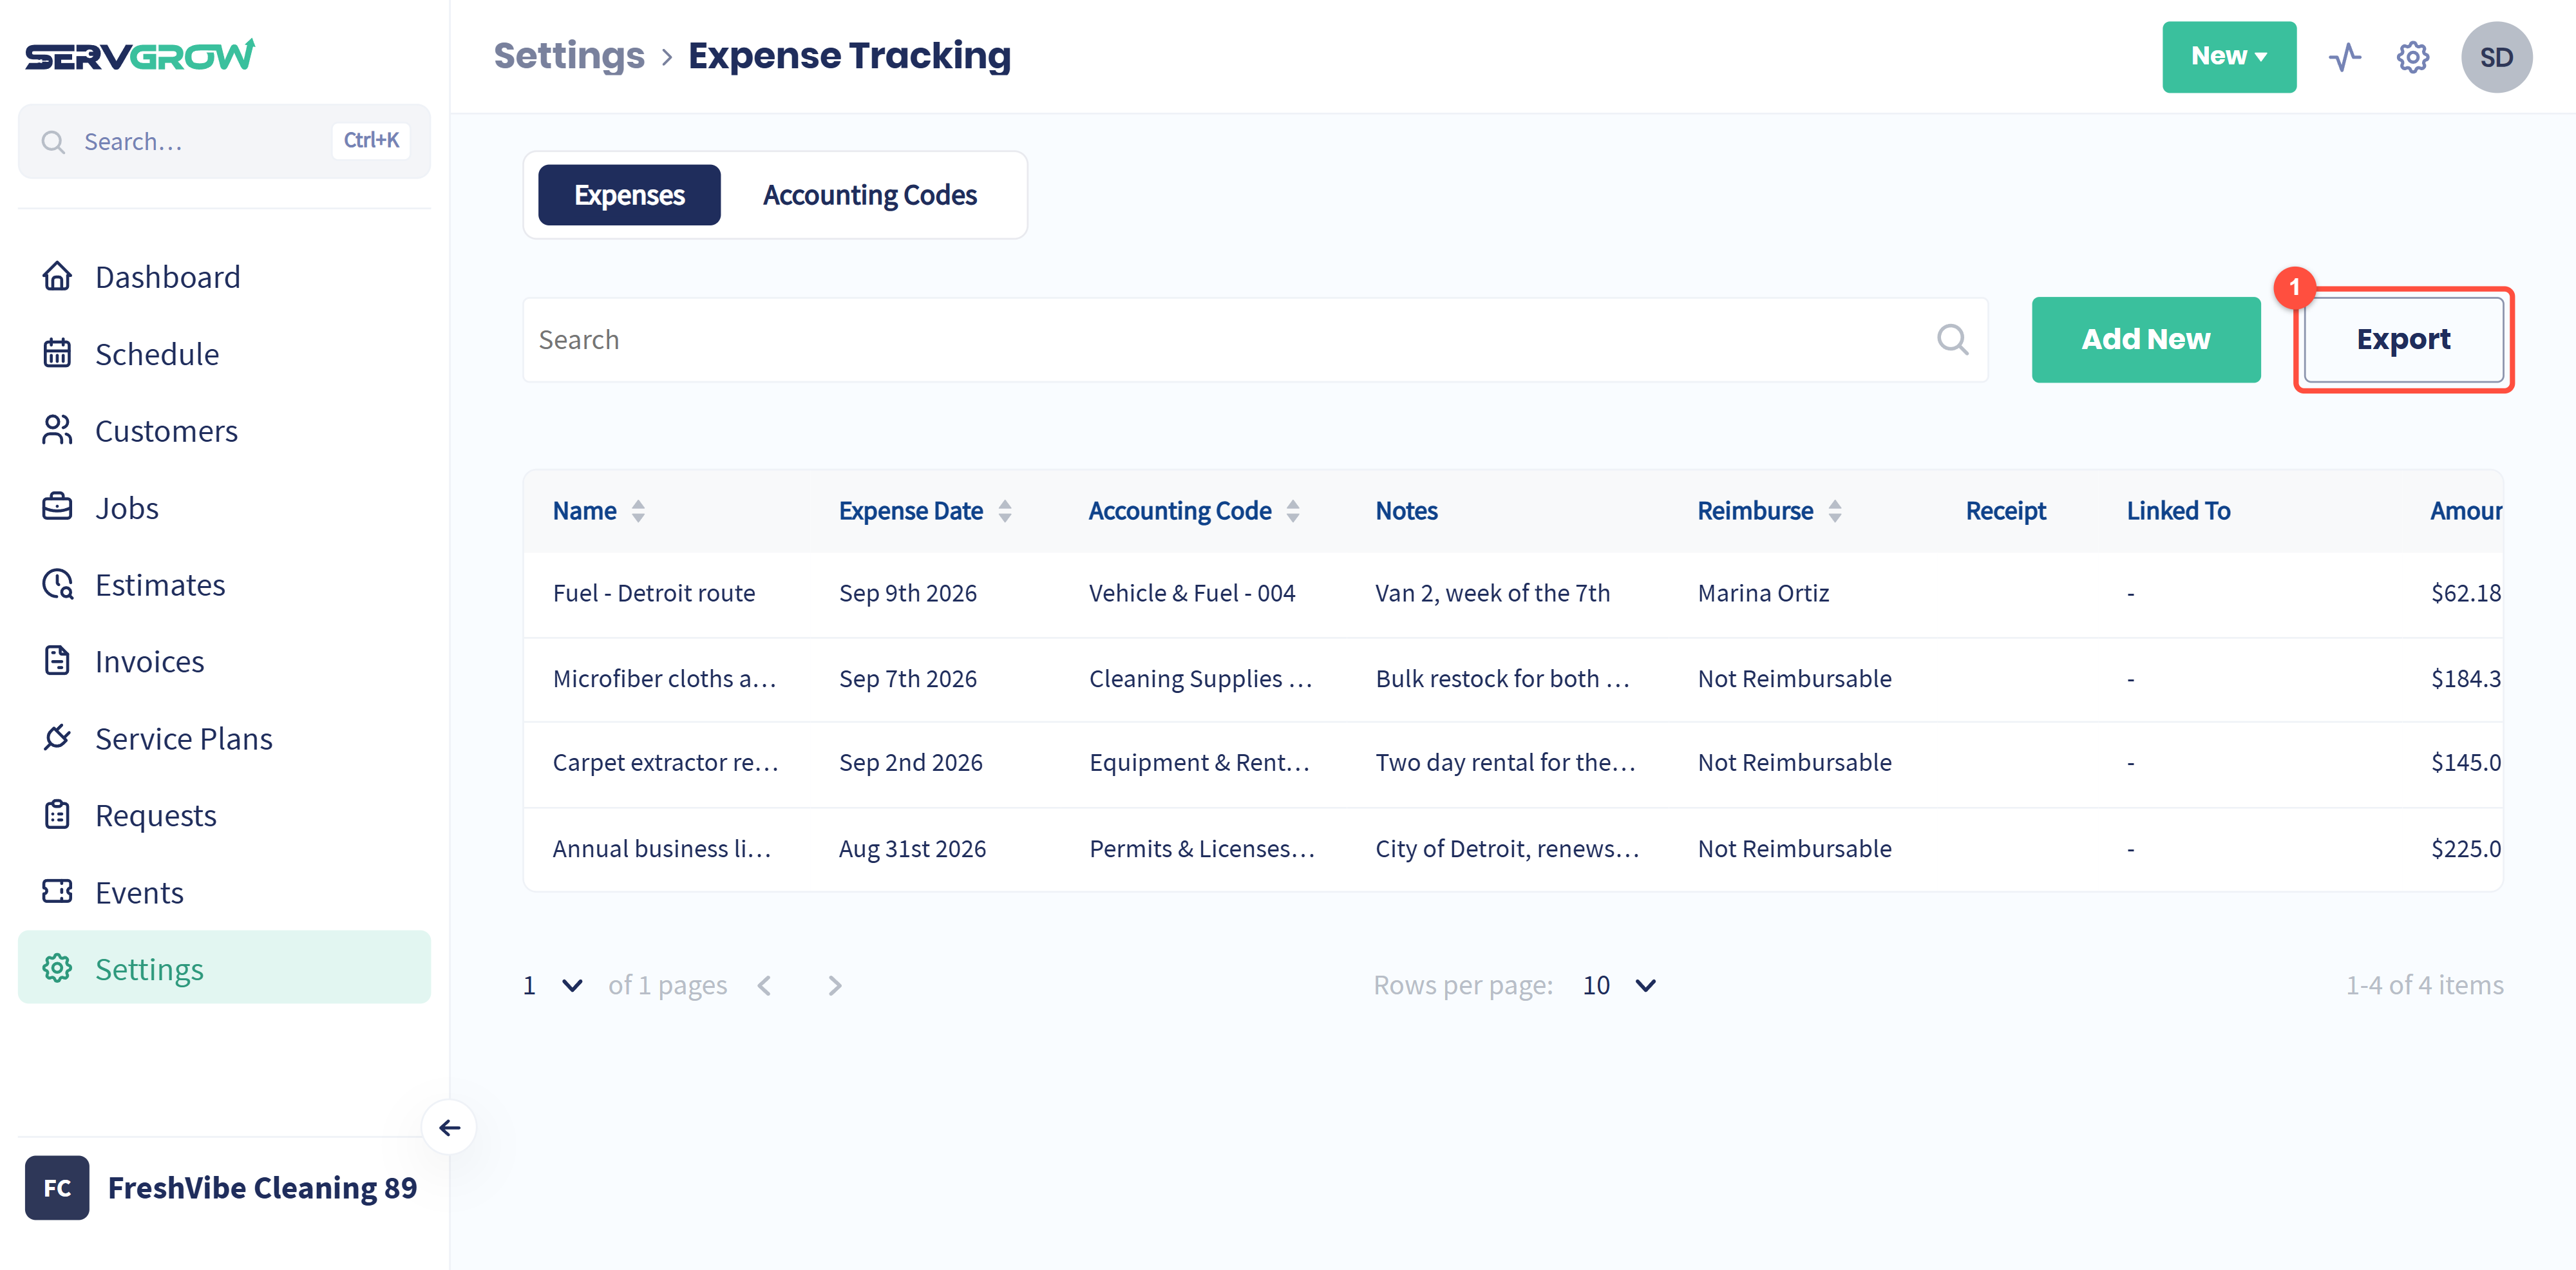
When you need the data somewhere else, click Export. Servgrow downloads your expenses as a CSV file you can hand to your bookkeeper or open in a spreadsheet.
Putting it to work
The habit is the hard part, not the software. Two things make it stick:
Log it on the spot. An expense entered at the counter is accurate. One entered a week later is a guess with a receipt missing.
Always link it to the job. An unlinked expense still shows in your totals, but it can't tell you which work was profitable, and that's the whole reason to track it.
Do both, and by the end of your first quarter you'll know exactly which jobs are worth repeating.
Related articles