
An estimate is a sales pitch that has to survive a customer thinking about it. The estimate page is where you make that easy for them: a clear price, optional extras they can add themselves, a deposit that locks the work in, and a one-click approval. Then the same screen turns the approved quote into a booked job without retyping a thing.
It also tells you something the customer never sees: what this job is worth to you before you commit to it.
Open an estimate
Click Estimates in the left menu and click the one you want, or open it from the customer's page.
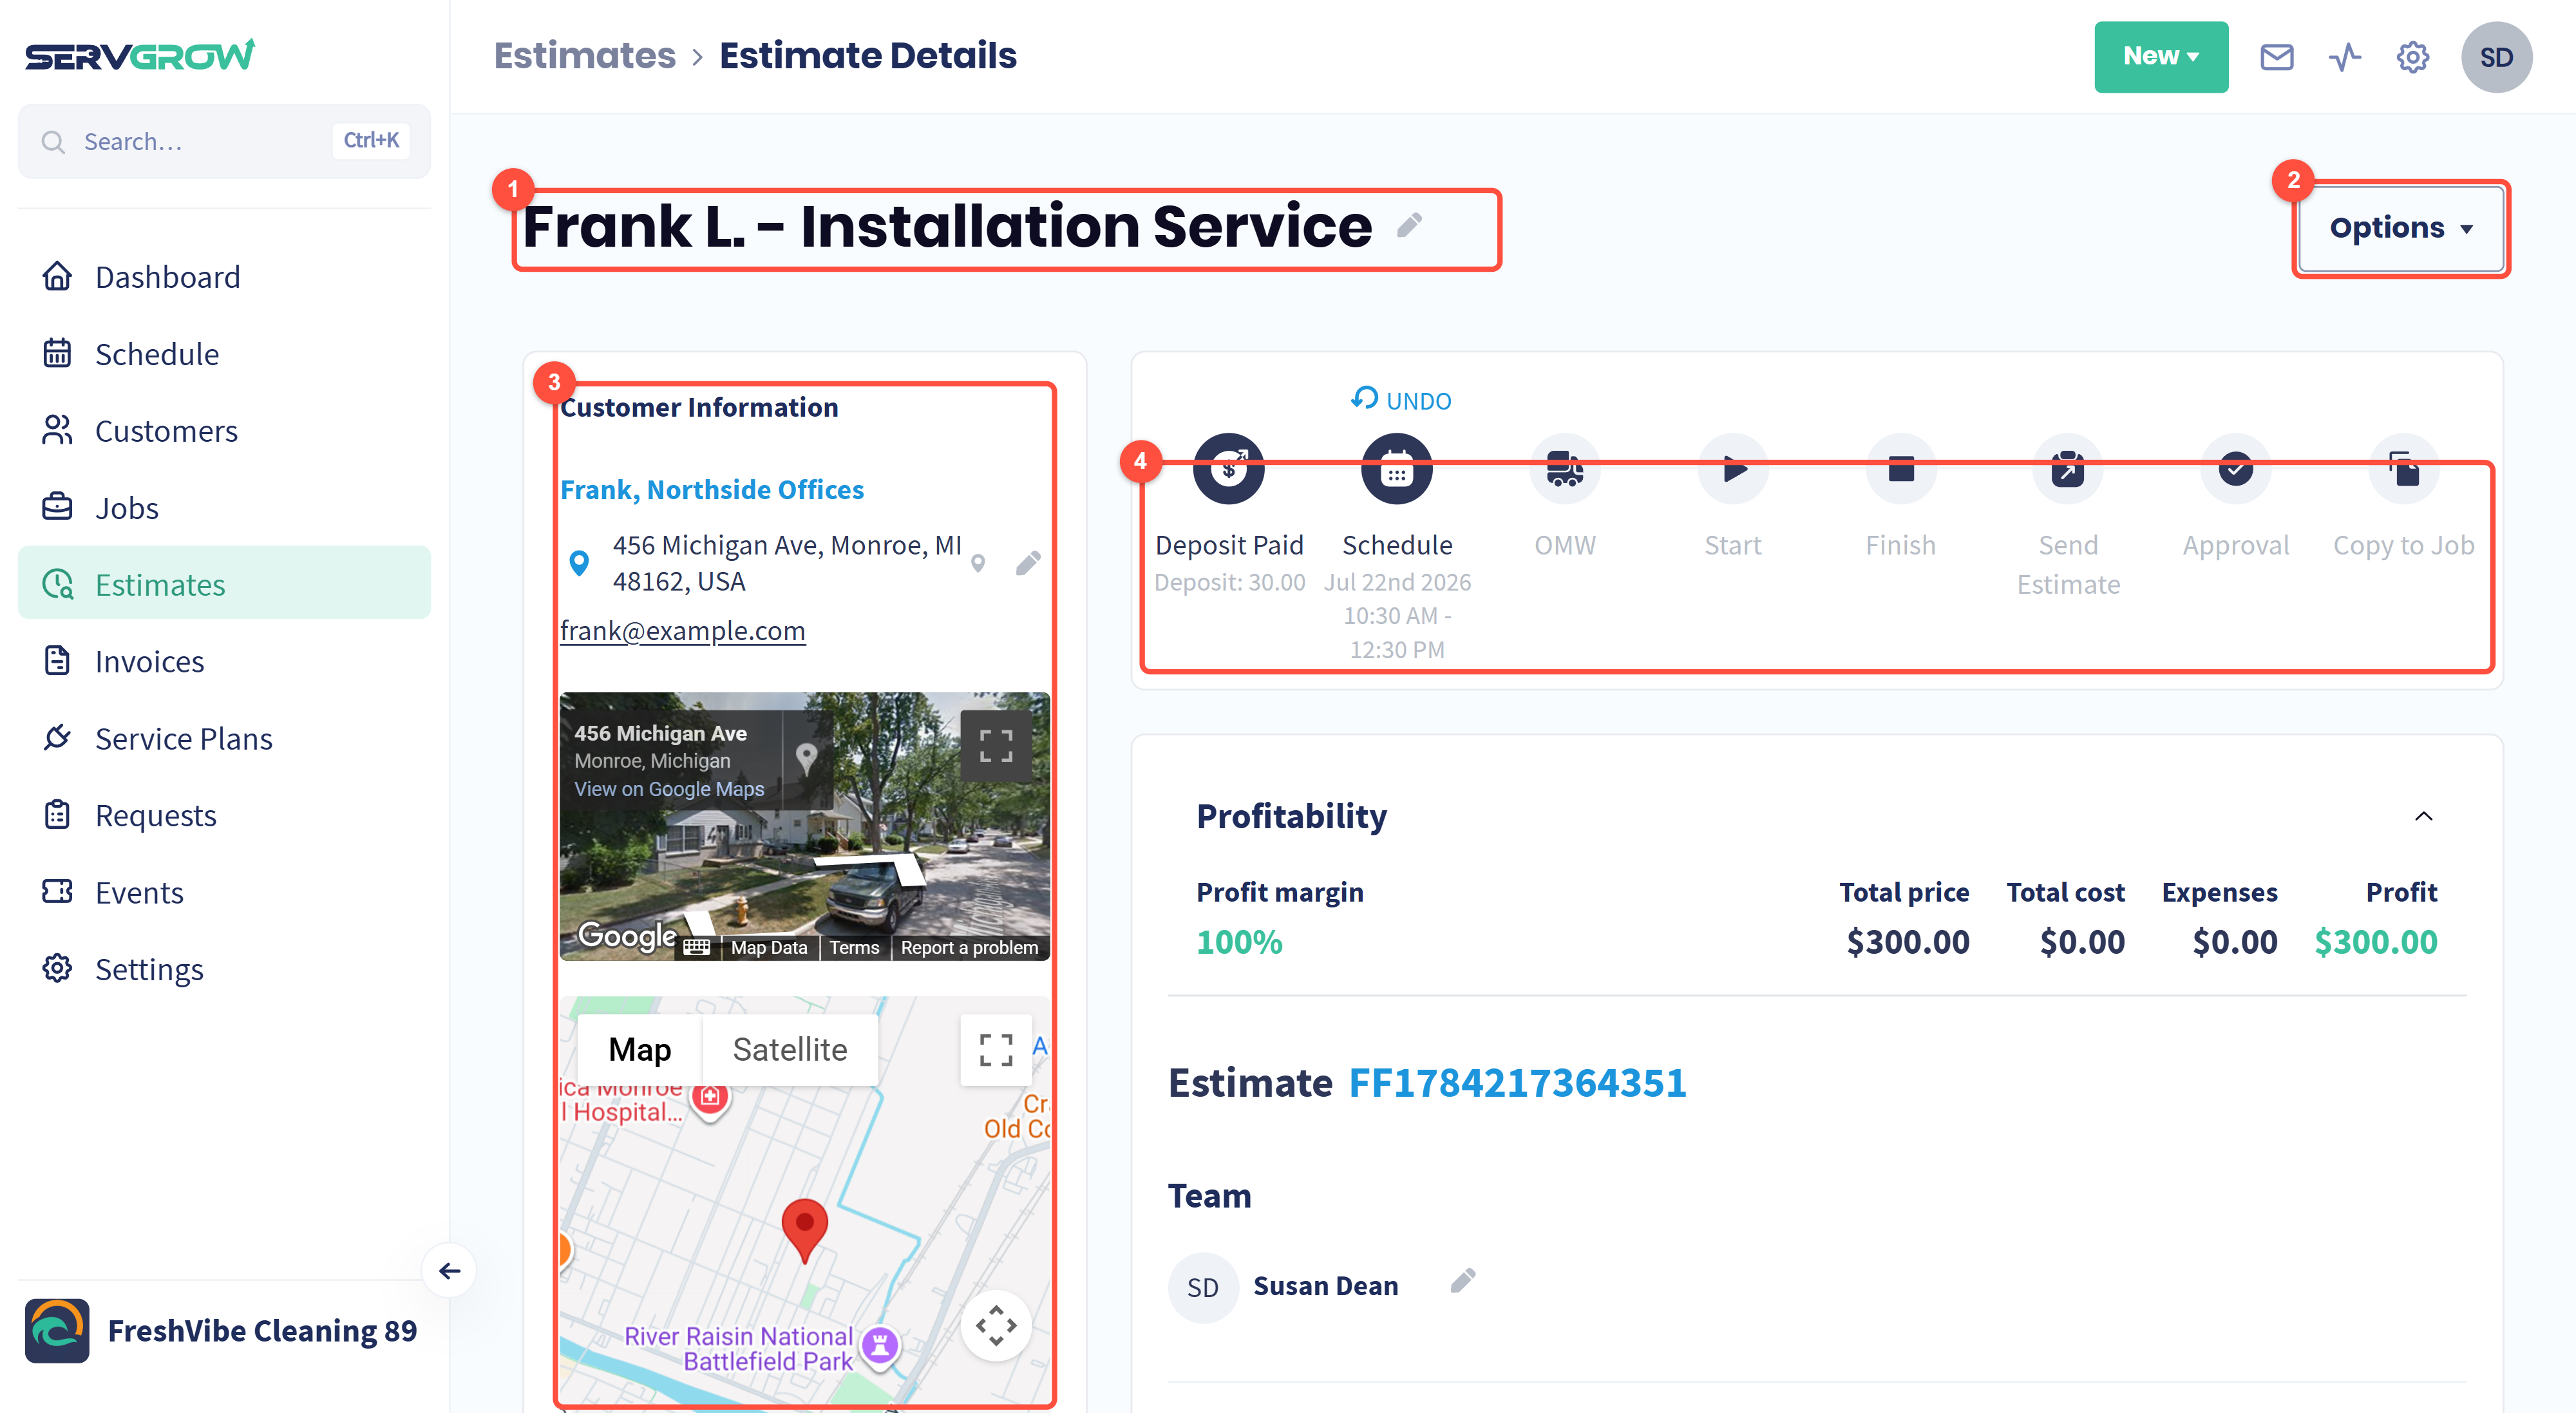
The estimate title, with a pencil to rename it.
Options: versions, printing, and cancelling or deleting the estimate.
Customer Information: who it is for, the address, their email, and a street view and map of the property.
The progress bar: where the quote has got to.
The progress bar, from quote to job
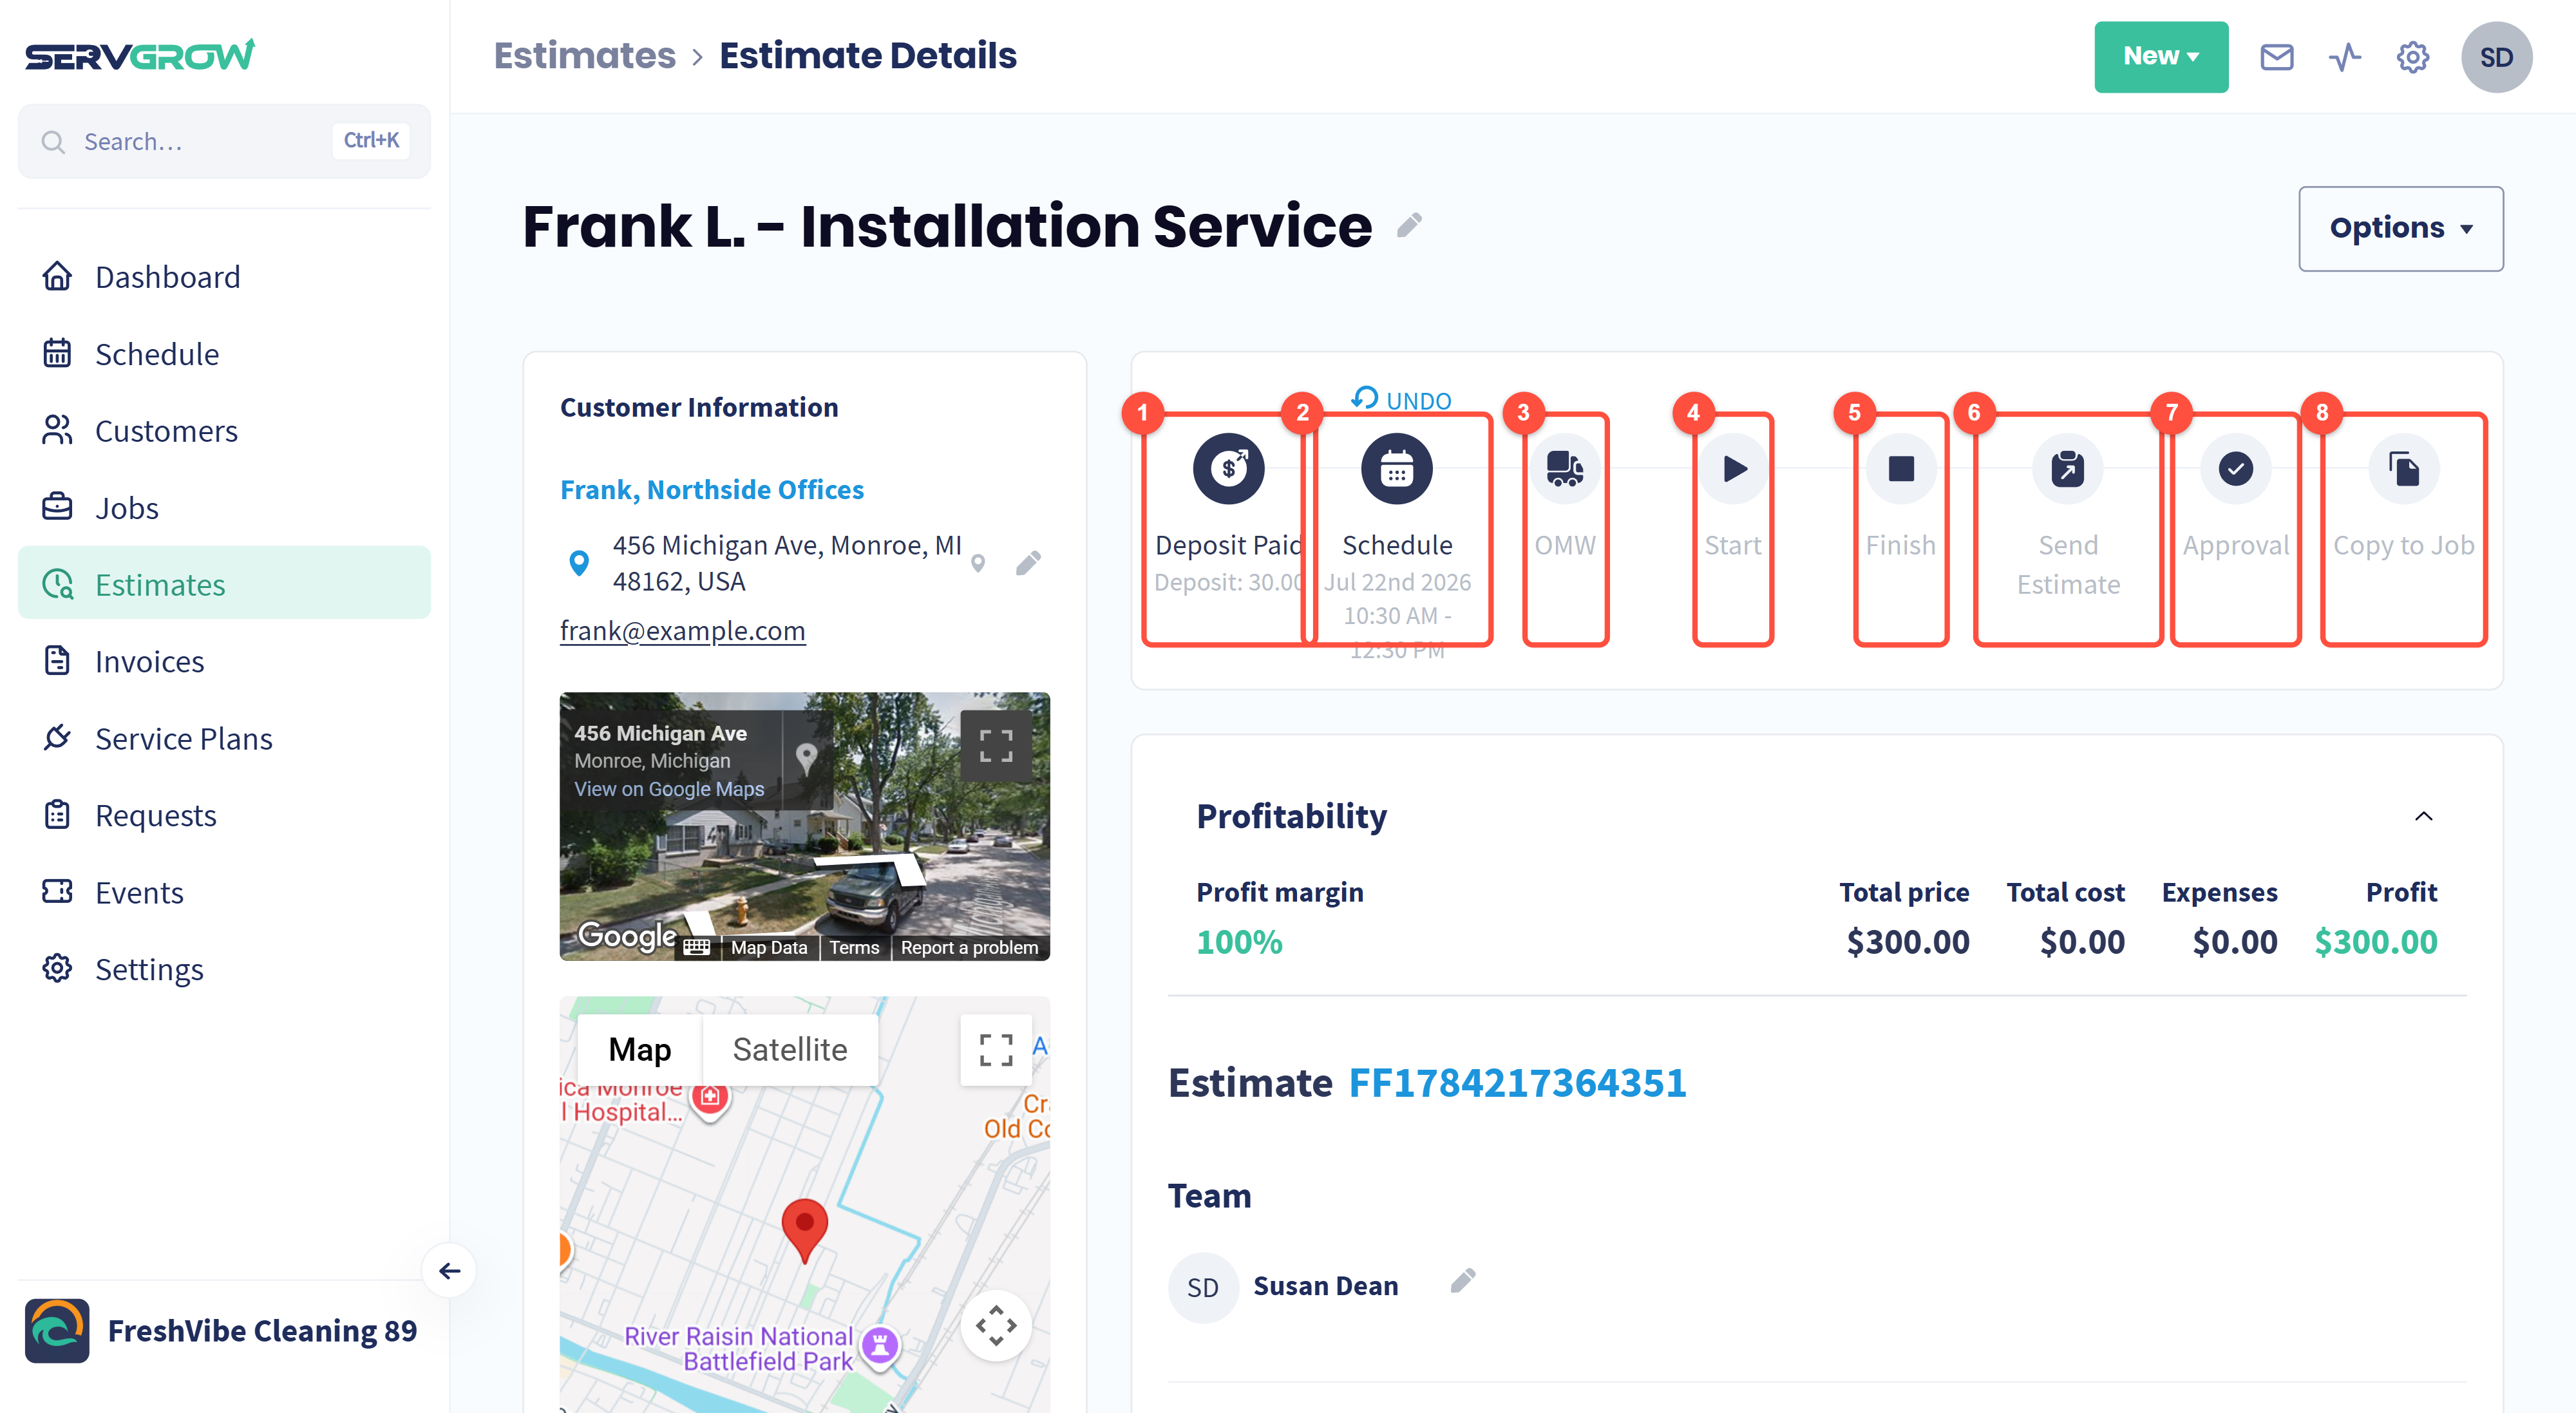
Deposit Paid: the upfront payment has landed, with the amount underneath.
Schedule: the date and time pencilled in for the work.
OMW: your tech is on the way, if you are visiting to quote.
Start: the visit has begun.
Finish: the visit is done.
Send Estimate: the quote goes to the customer.
Approval: the customer has said yes.
Copy to Job: turn the approved quote into a job, carrying the line items and prices over.
Completed steps are solid and stamped with a date and time, and an UNDO link appears above them if you marked one too early.
Know what the job is worth before you send it
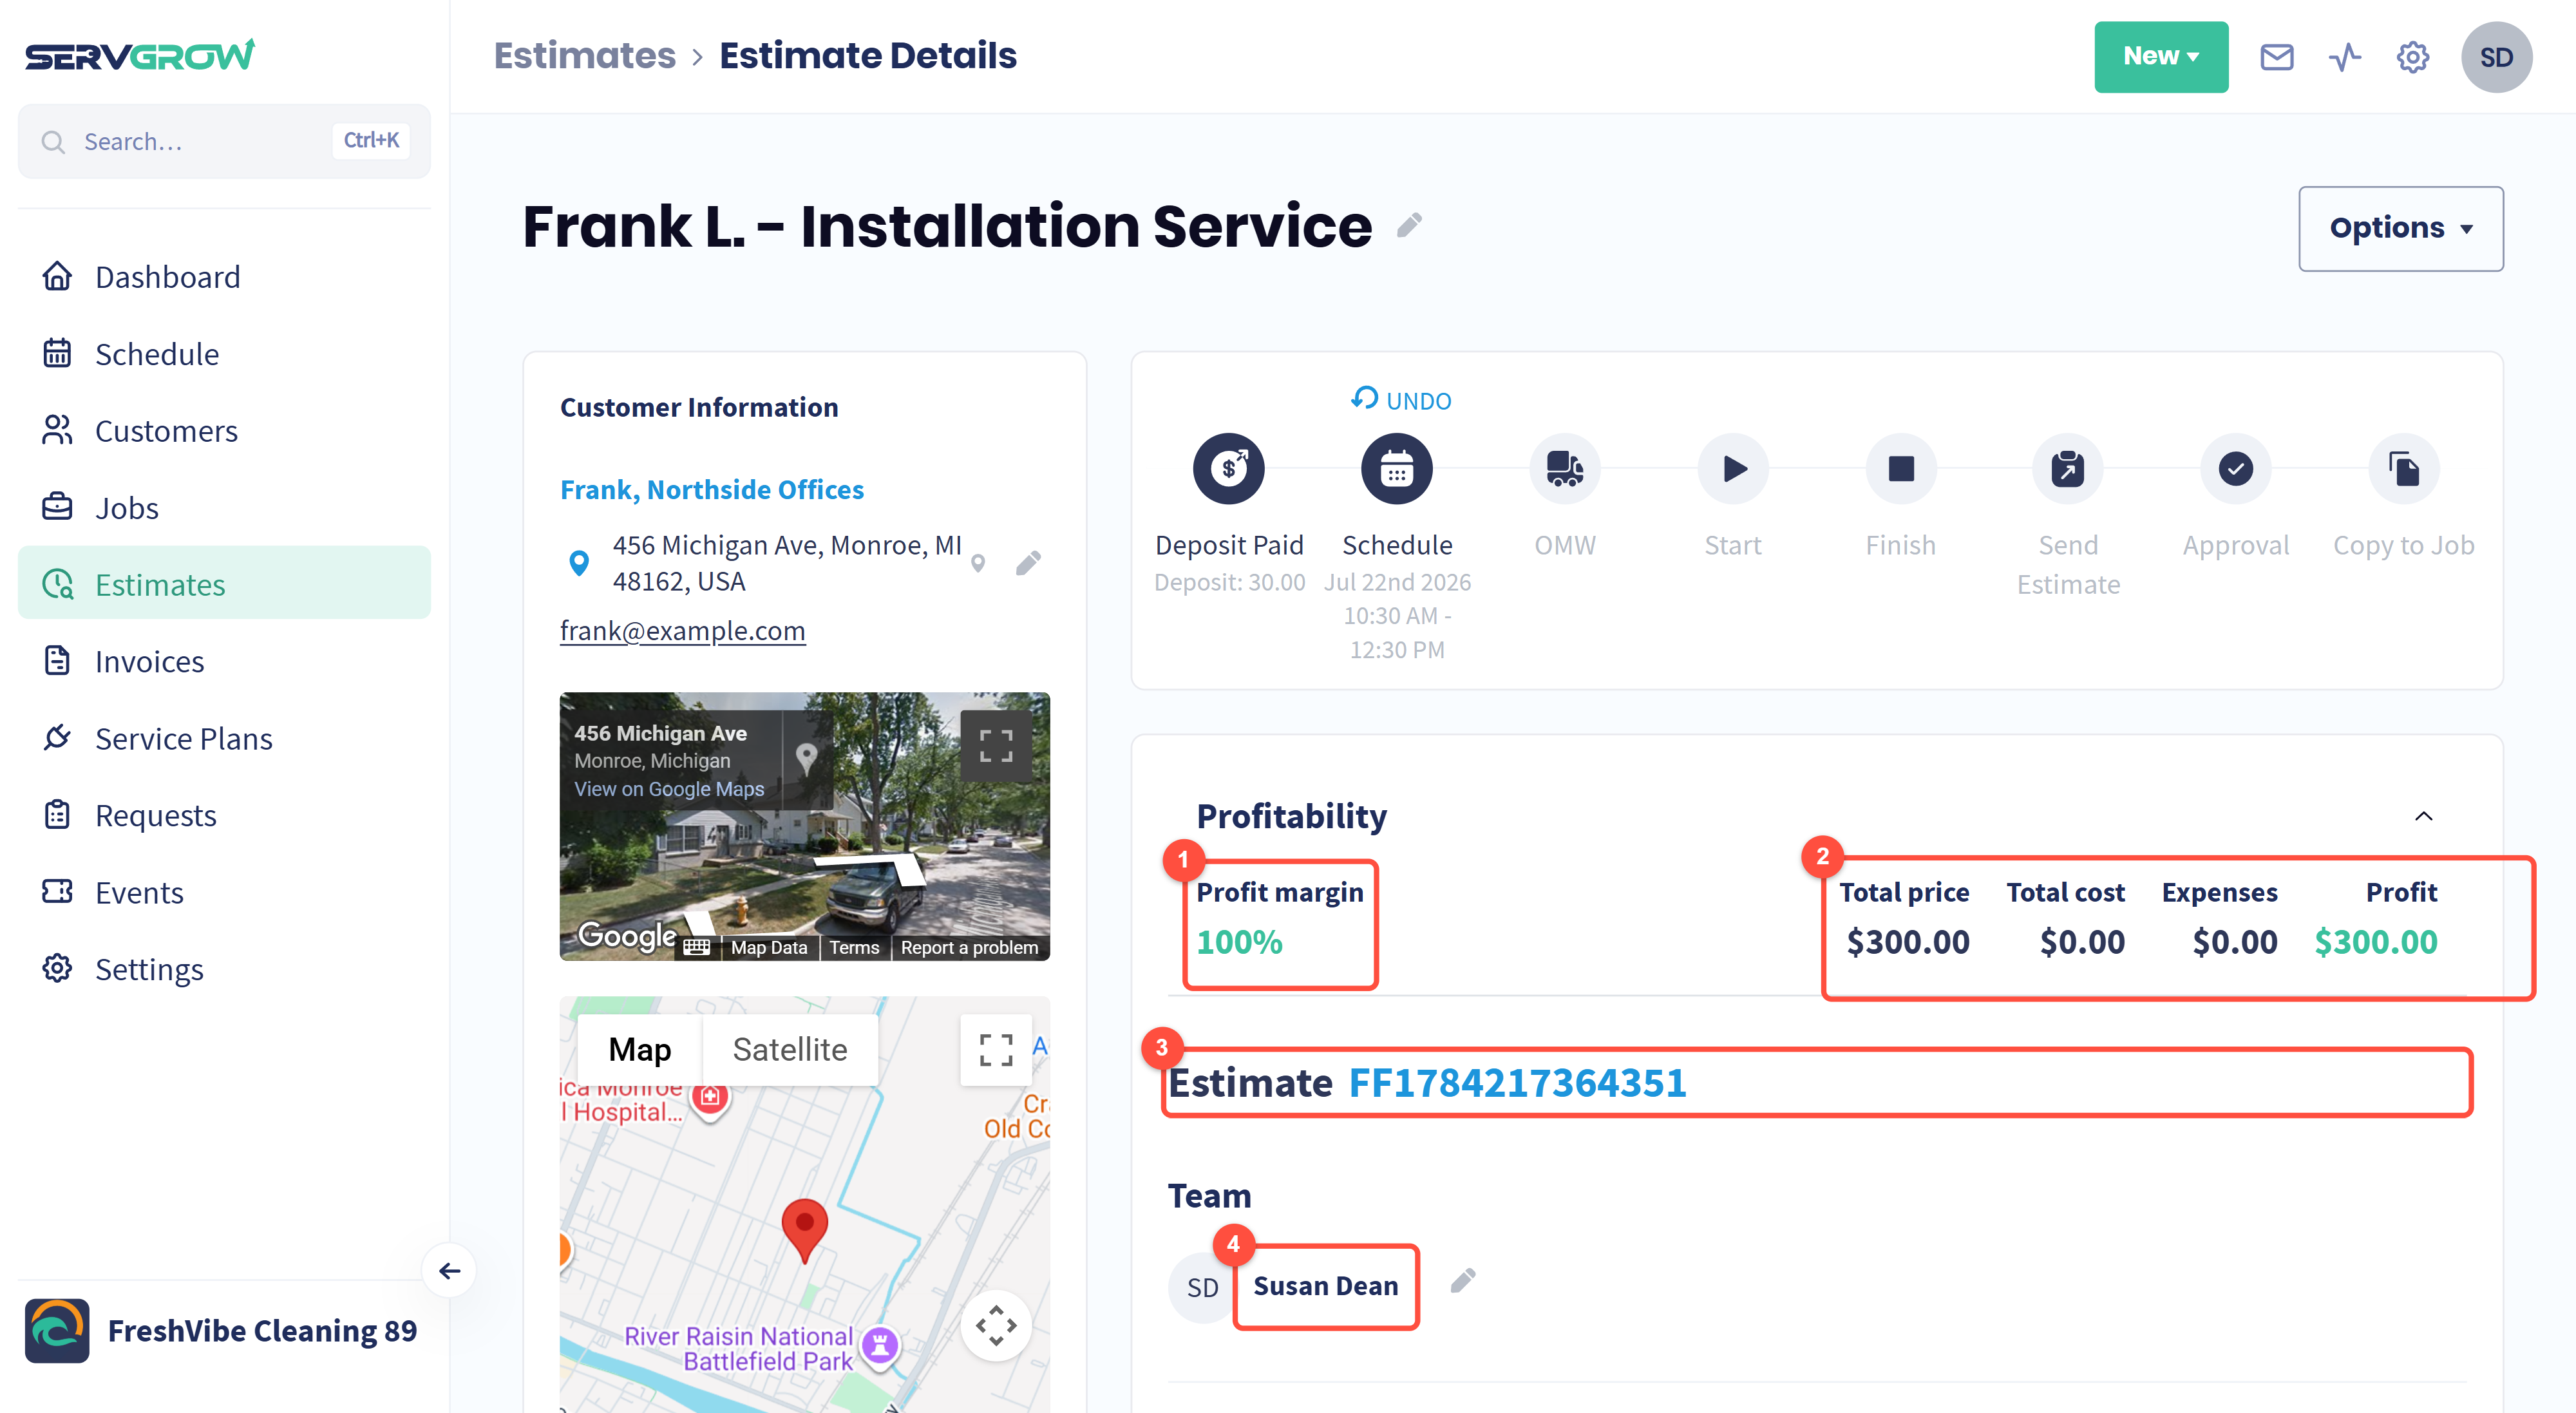
Profit margin: the percentage you keep if the customer says yes at this price.
Total price, Total cost, Expenses and Profit. Drop the price and watch the margin move before you discount anything.
The estimate number, which is what the customer quotes back at you.
Team: who is lined up for the work. The pencil changes it.
What you are quoting
The Service / Material list is what the customer has to buy: "These items will be required for the customer."
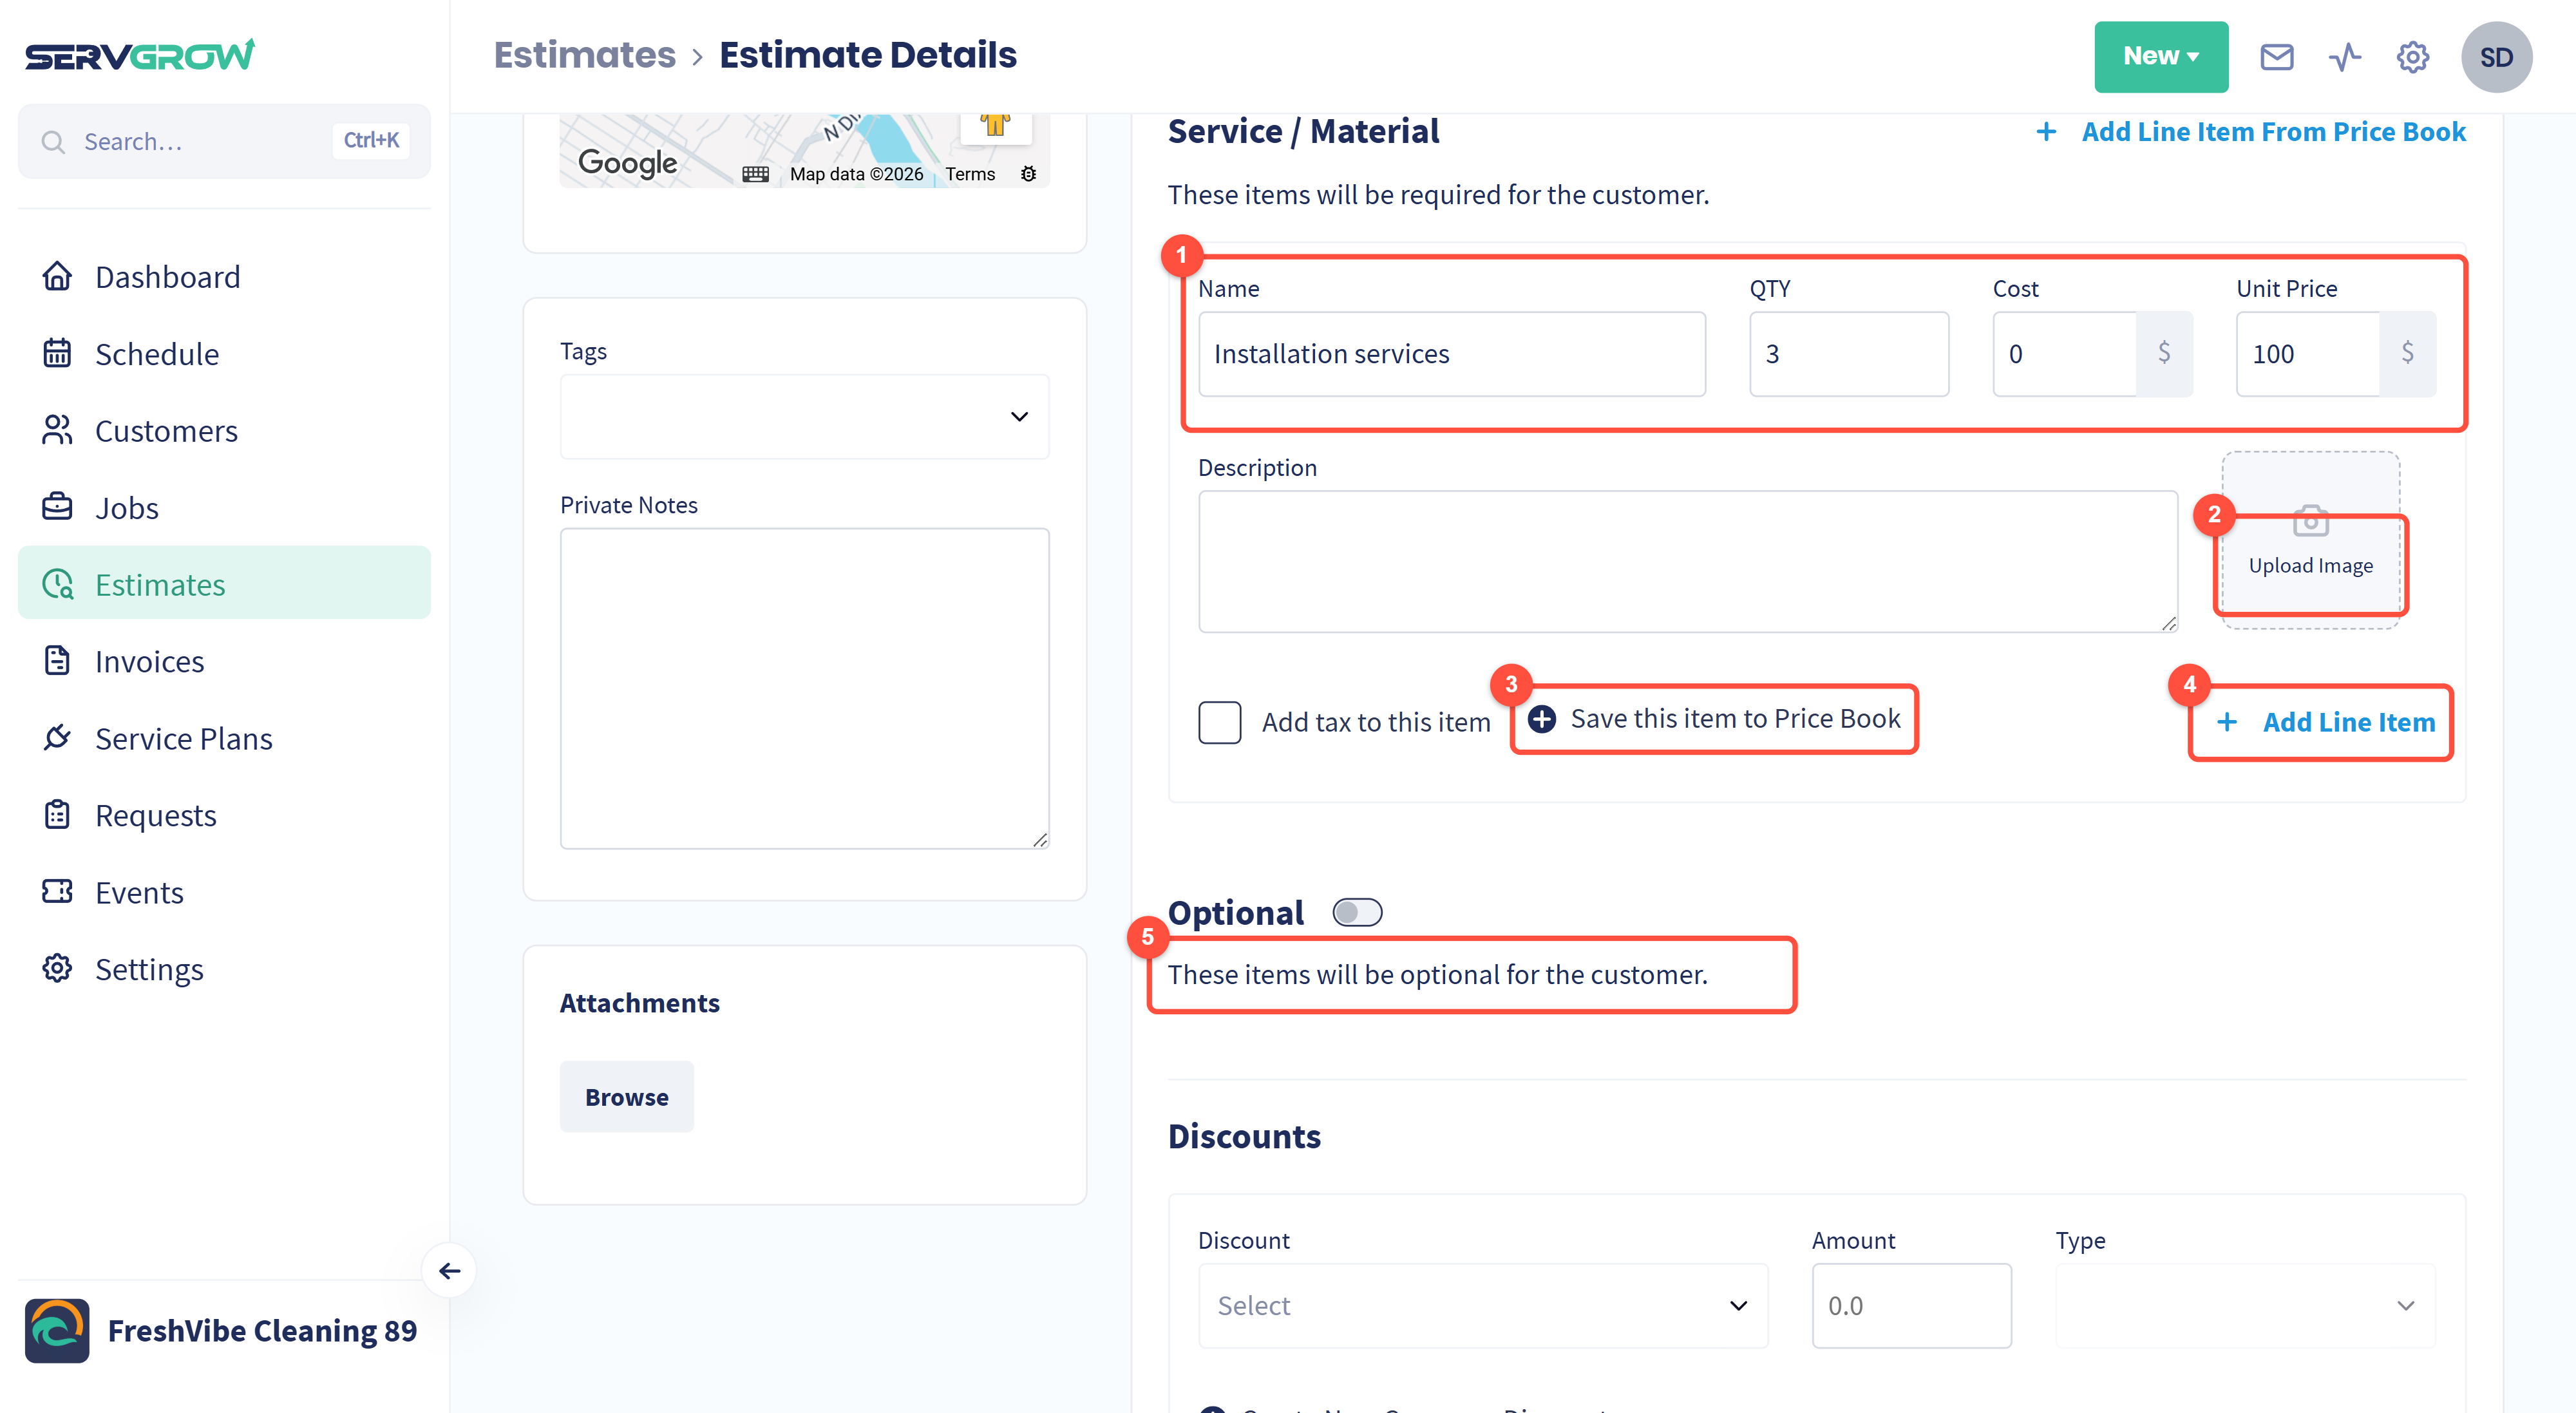
Name, QTY, Cost and Unit Price. Cost is yours, unit price is theirs, and the gap is the profit above.
Upload Image: show the customer exactly what they are buying.
Save this item to Price Book: keep it for the next quote.
Add Line Item: another line. Add Line Item From Price Book at the top pulls in something you have already priced.
Optional: turn this on and you get a second list of extras the customer can choose to add. This is the quiet way to sell more, because the upsell is sitting right there when they approve.
Discounts
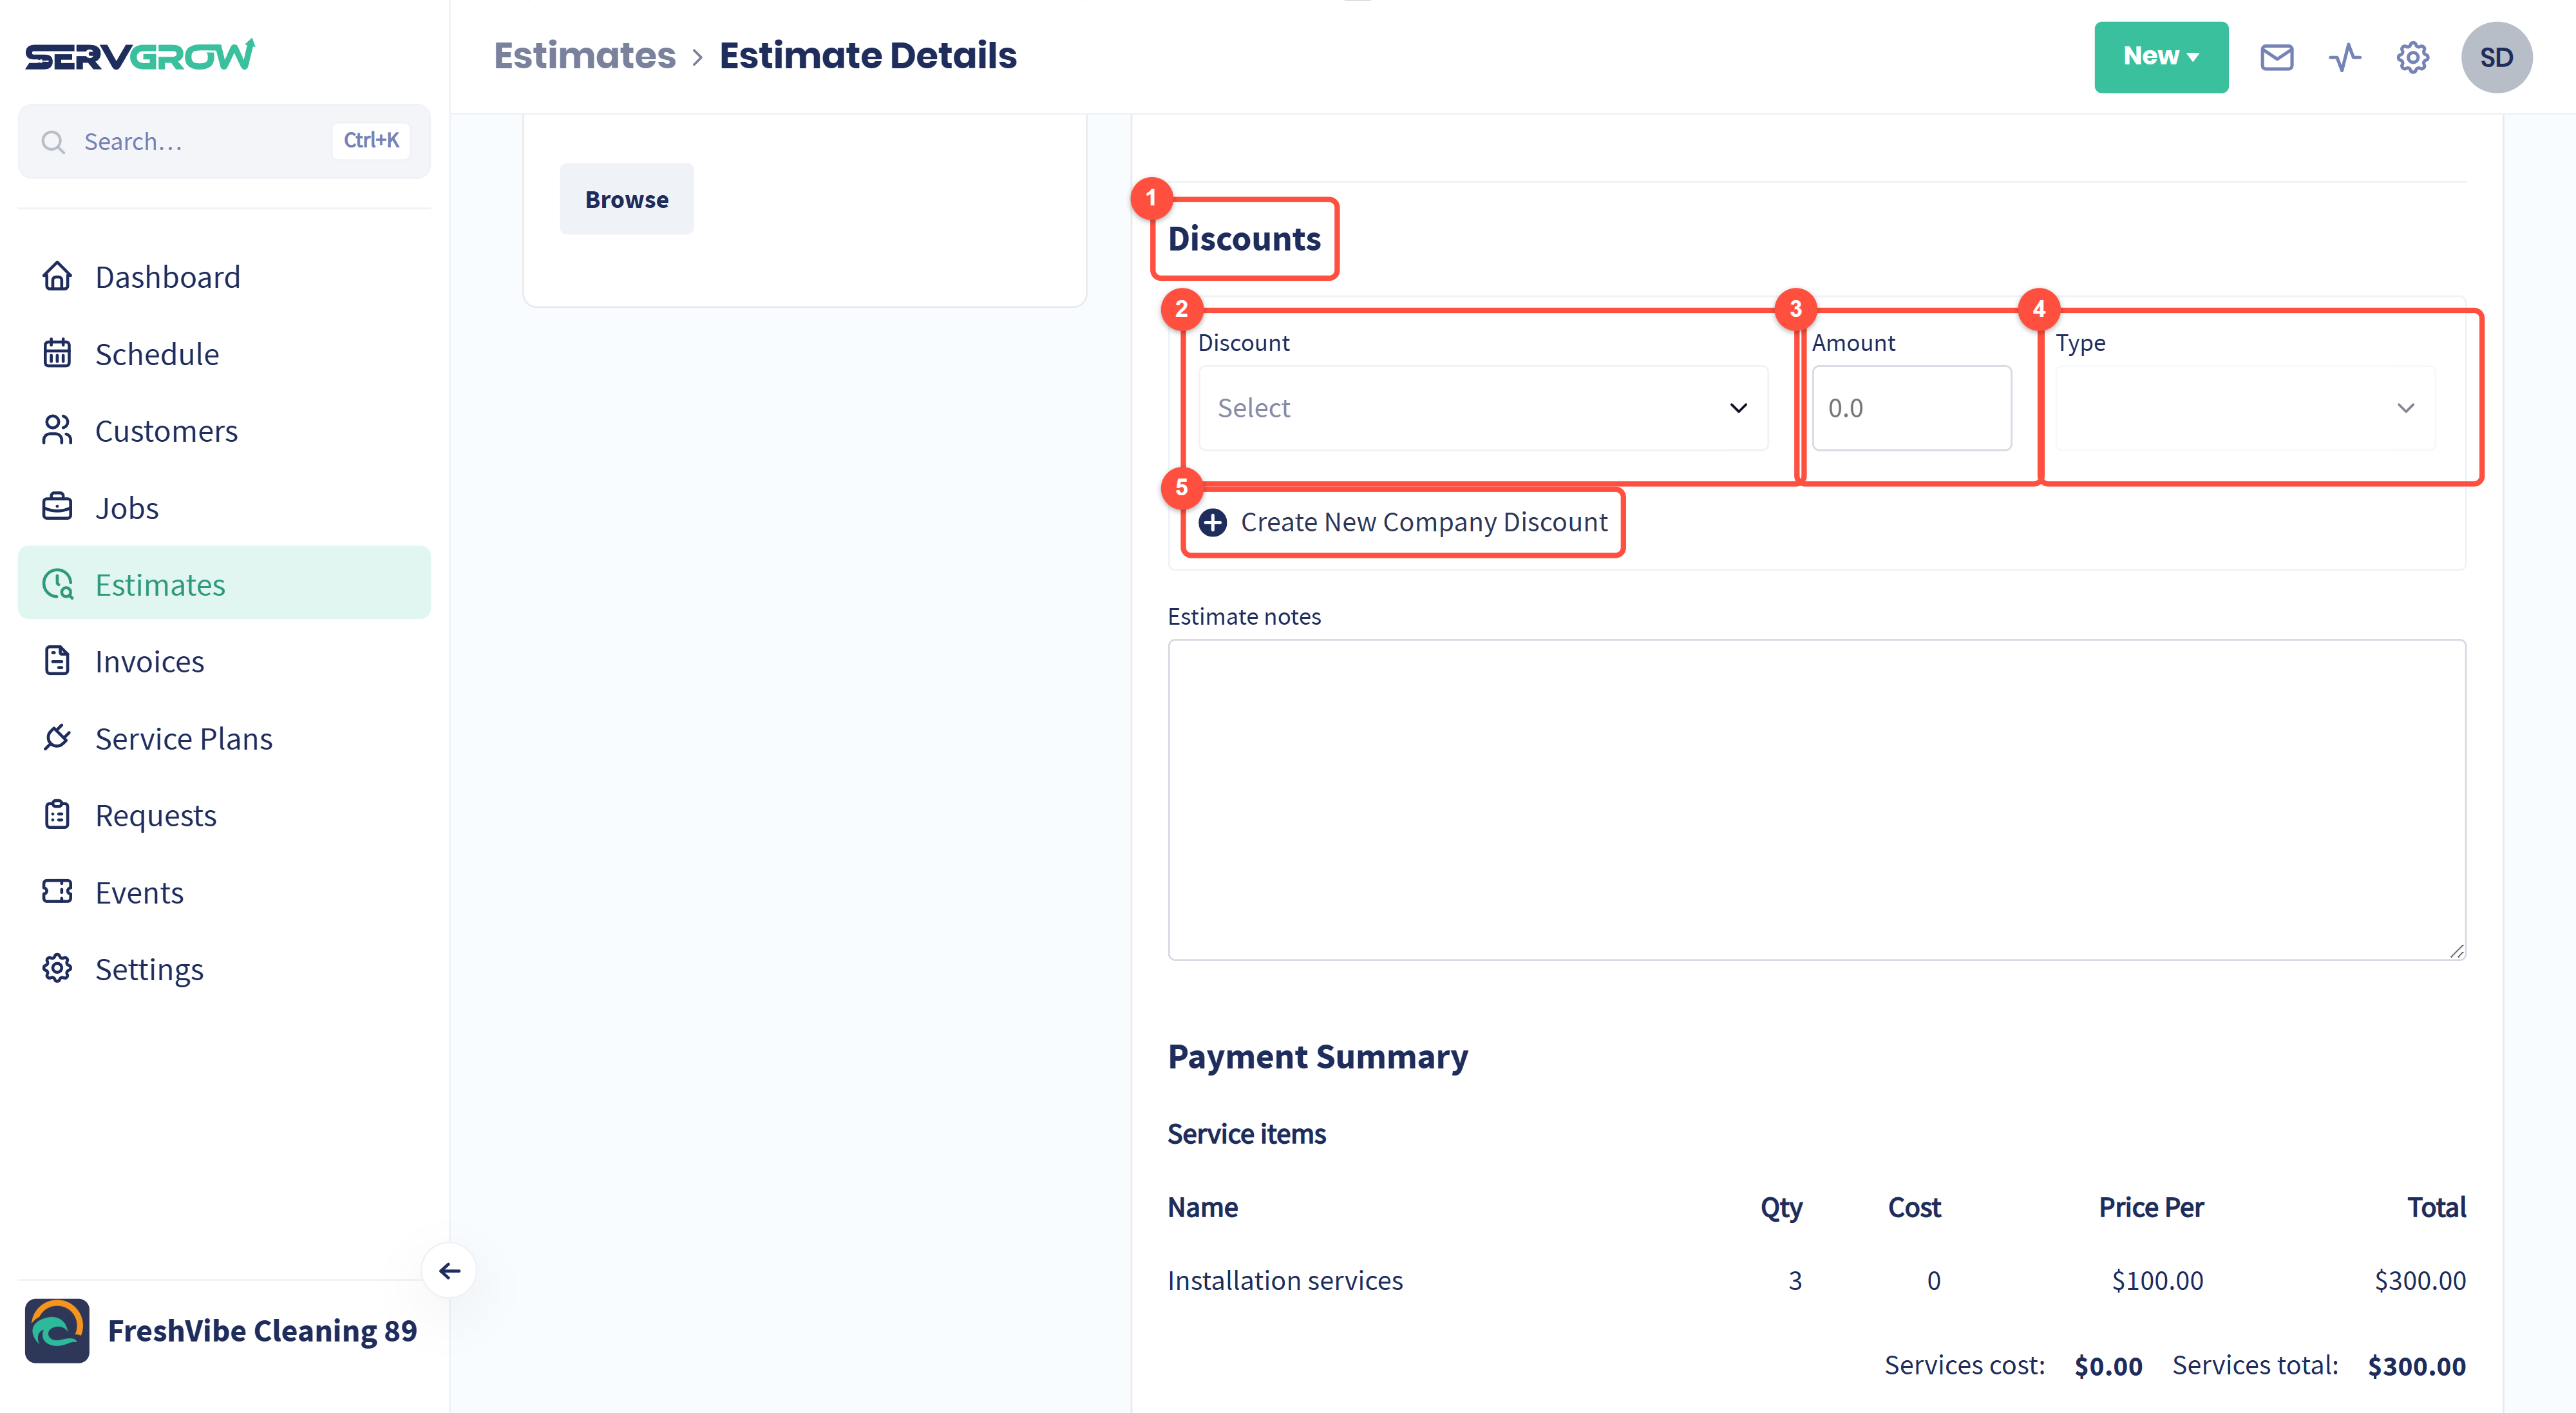
The Discounts section applies to the whole estimate.
Pick a discount you have already set up.
Amount: how much comes off.
Type: a percentage or a fixed sum.
Create New Company Discount saves it for everyone to use again.
The numbers at the bottom
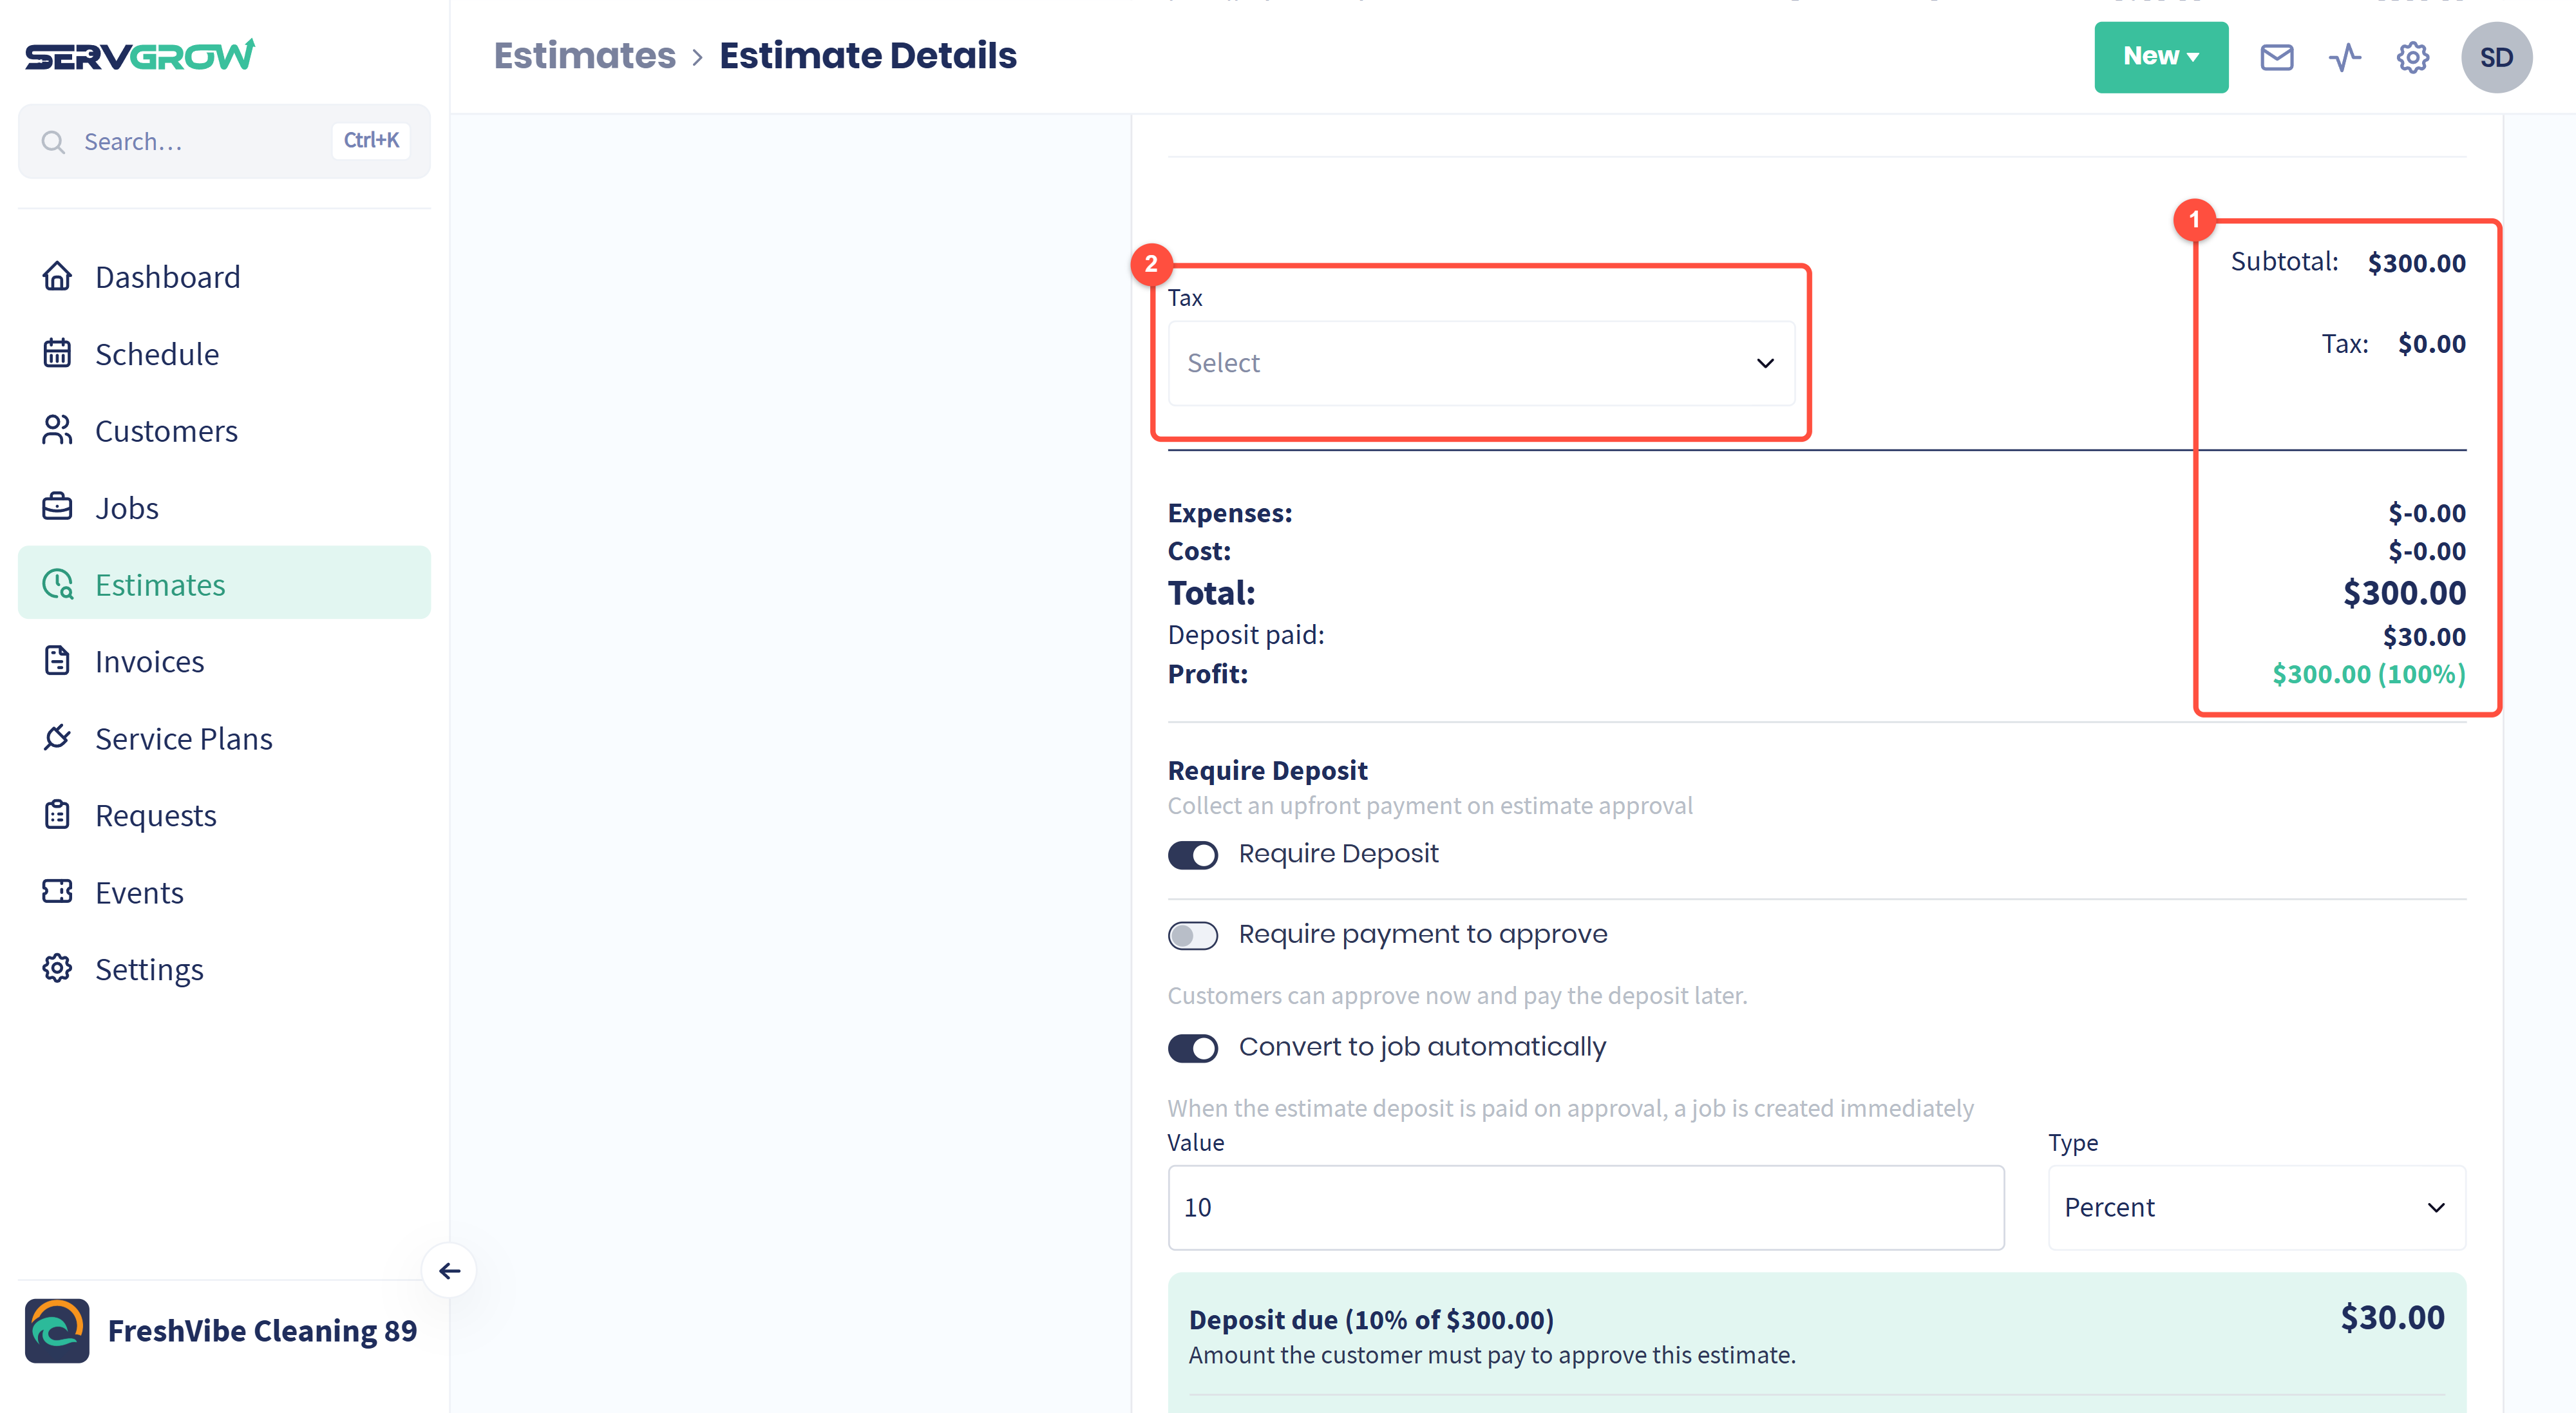
Subtotal, tax, the total, any deposit already paid, and the profit left after cost and expenses.
Tax: pick the rate that applies.
Take a deposit to lock the work in
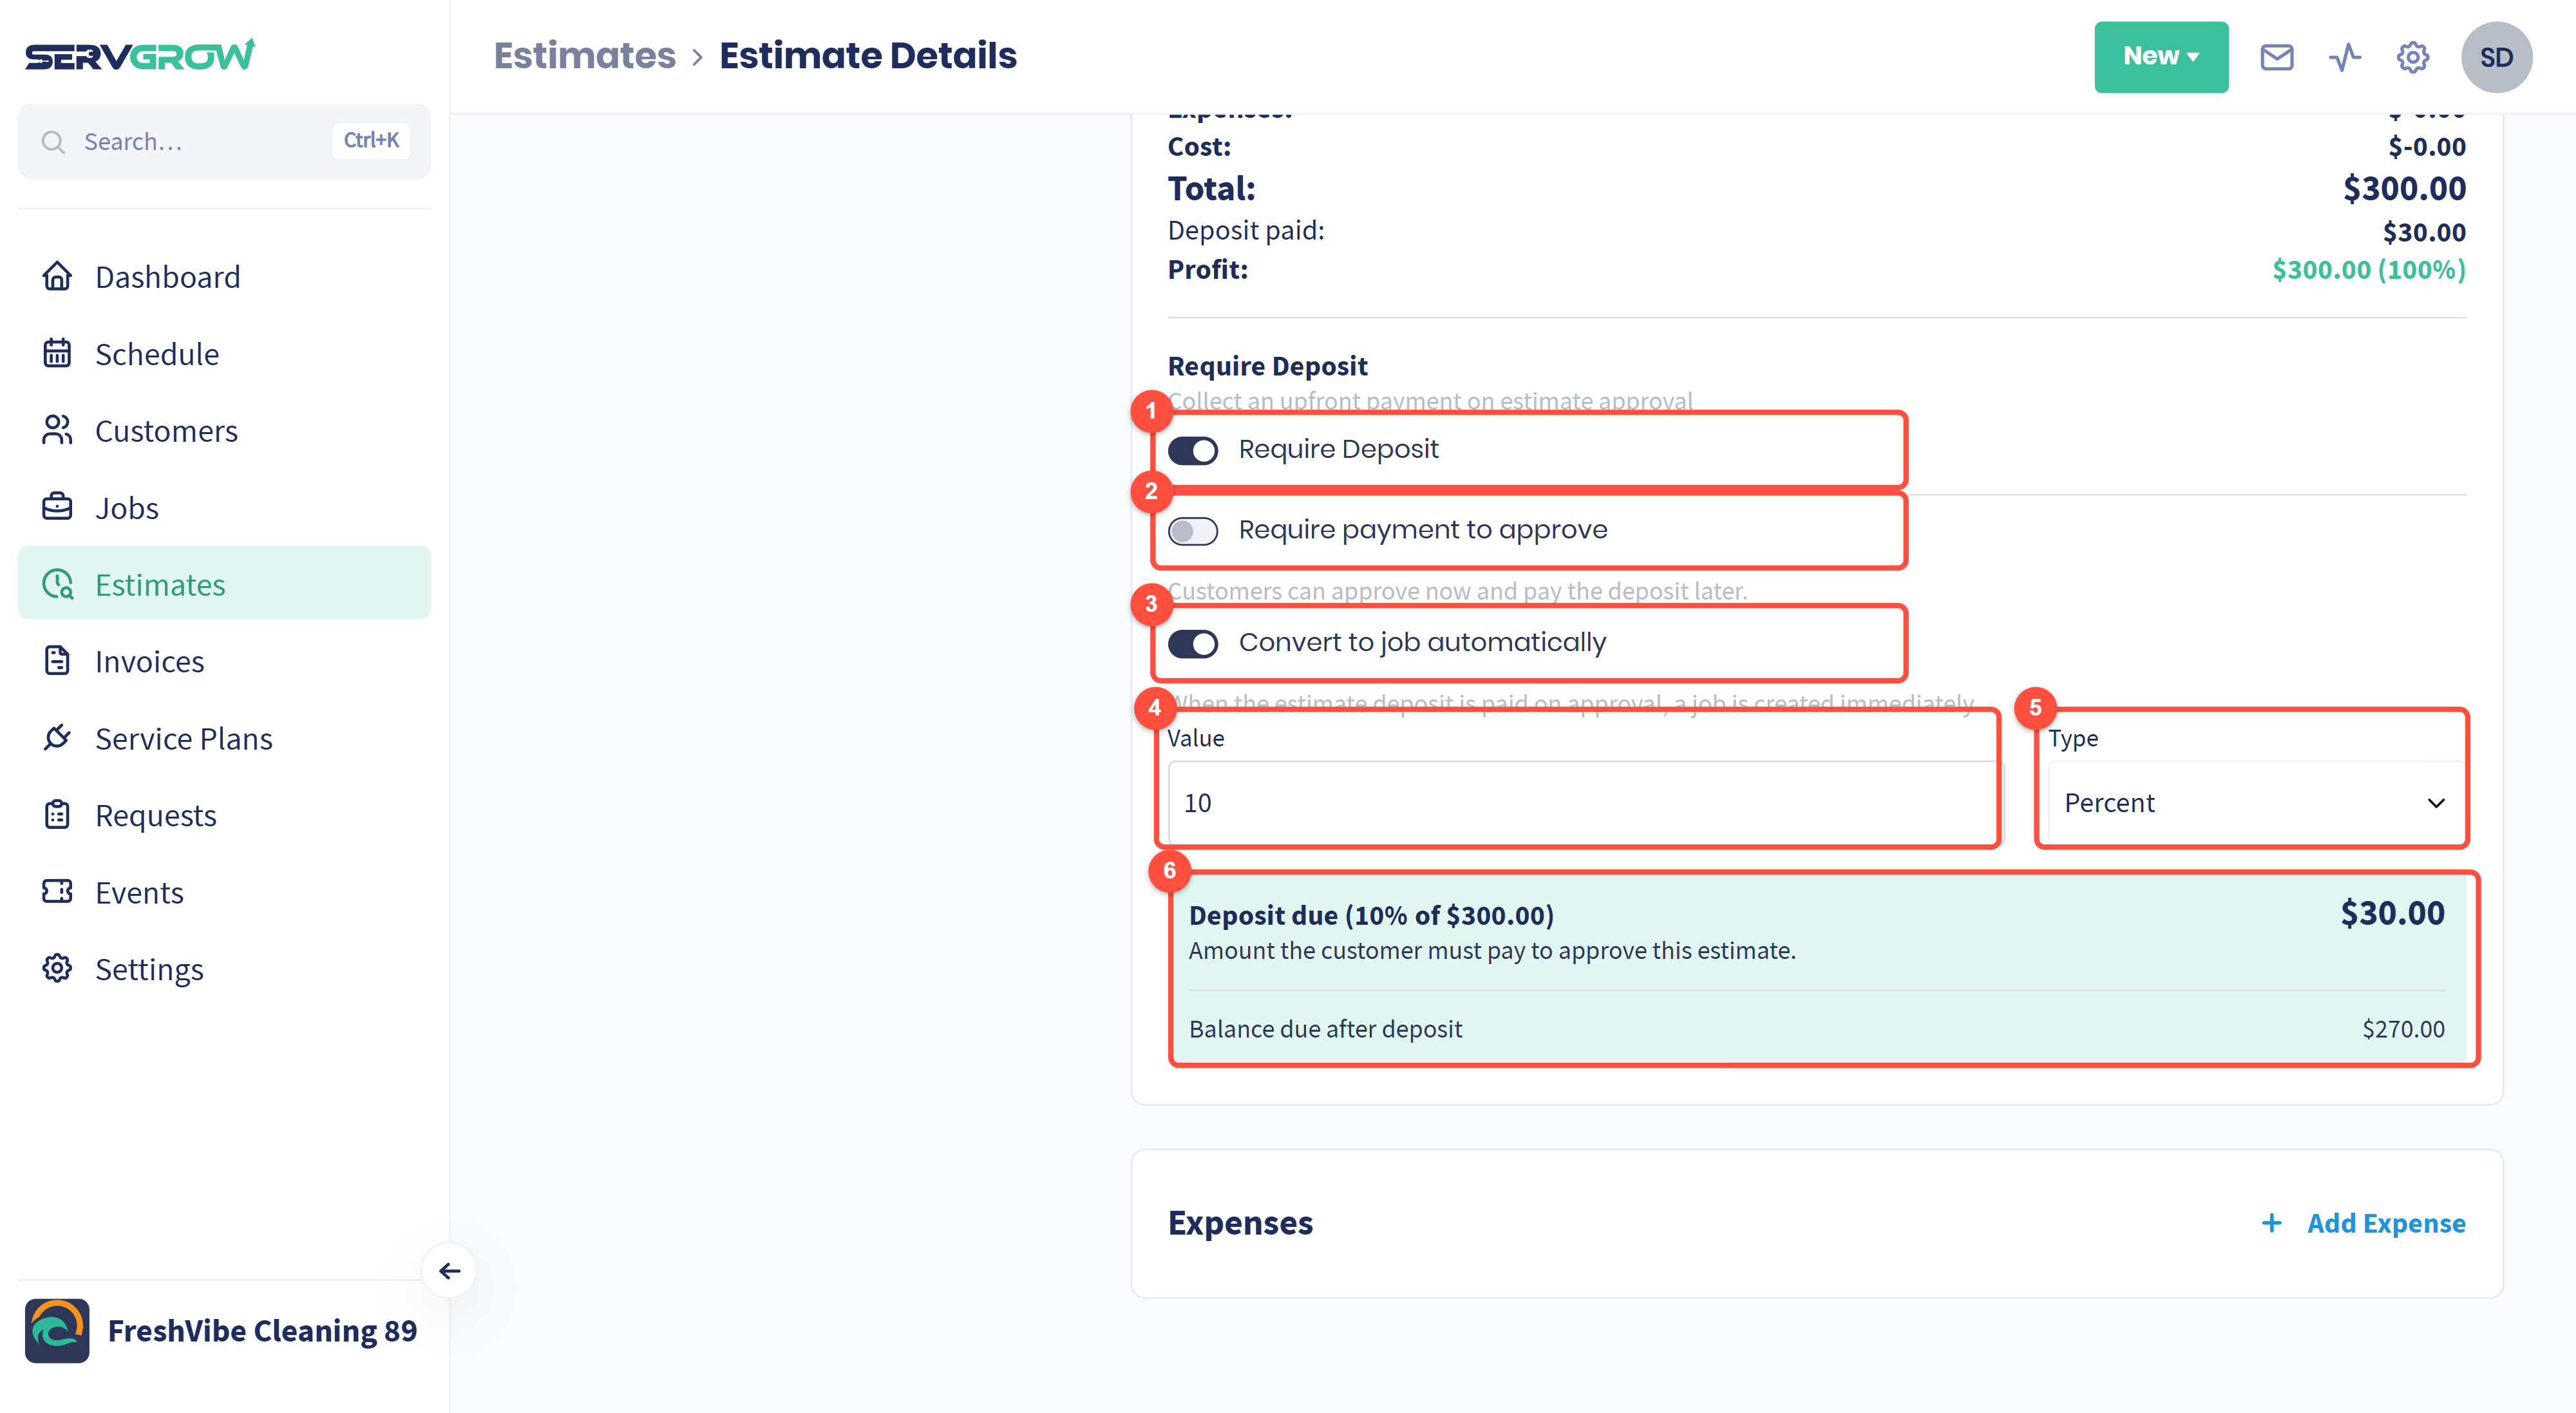
Require Deposit: collect an upfront payment on approval. A customer who has paid something is a customer who turns up.
Require payment to approve: leave it off and customers can approve now and pay the deposit later. Turn it on and the money has to land before the estimate counts as approved.
Convert to job automatically: when the deposit is paid on approval, Servgrow creates the job for you straight away.
Value: how much.
Type: a percentage of the total or a fixed amount.
Deposit due spells out what the customer must pay to approve, and Balance due after deposit is what is left to collect when the work is done.
Notes, tags and attachments
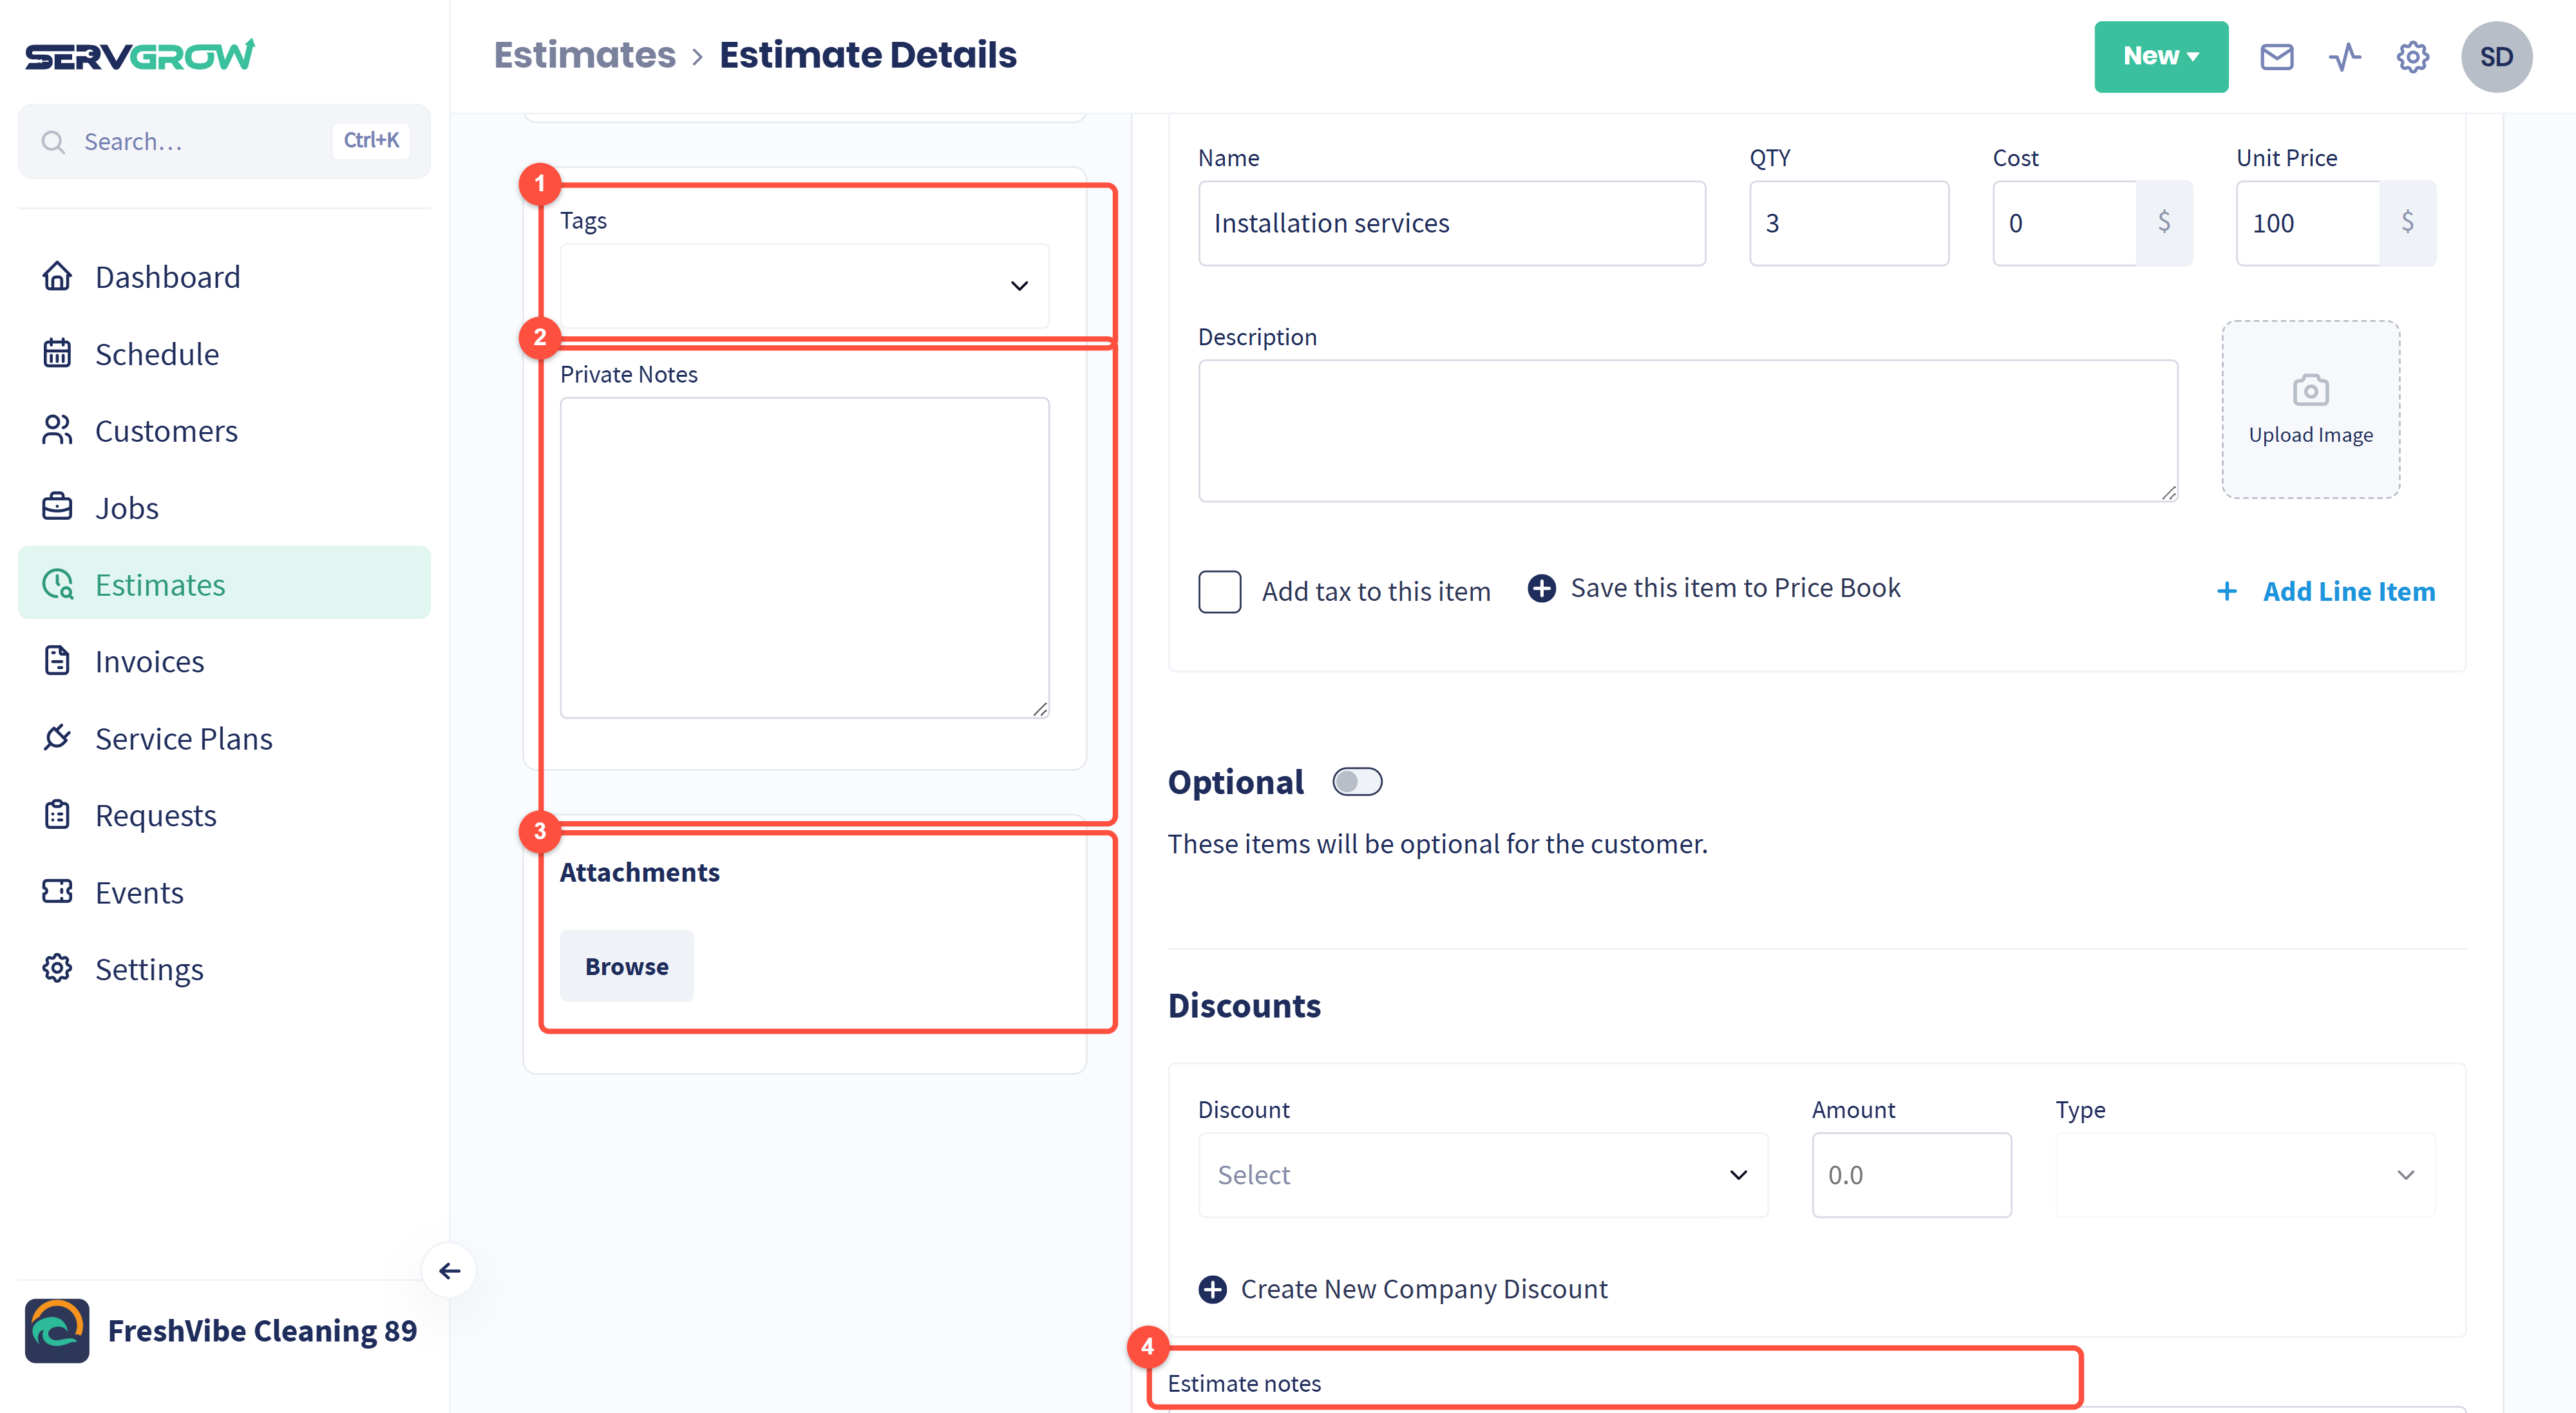
Tags: label the estimate so you can pull it out of the list later.
Private Notes: for your team only. The customer never sees these.
Attachments: add a survey, a photo or a spec sheet.
Estimate notes: this one the customer does read, so it is the place for what is included and what is not.
The Options menu
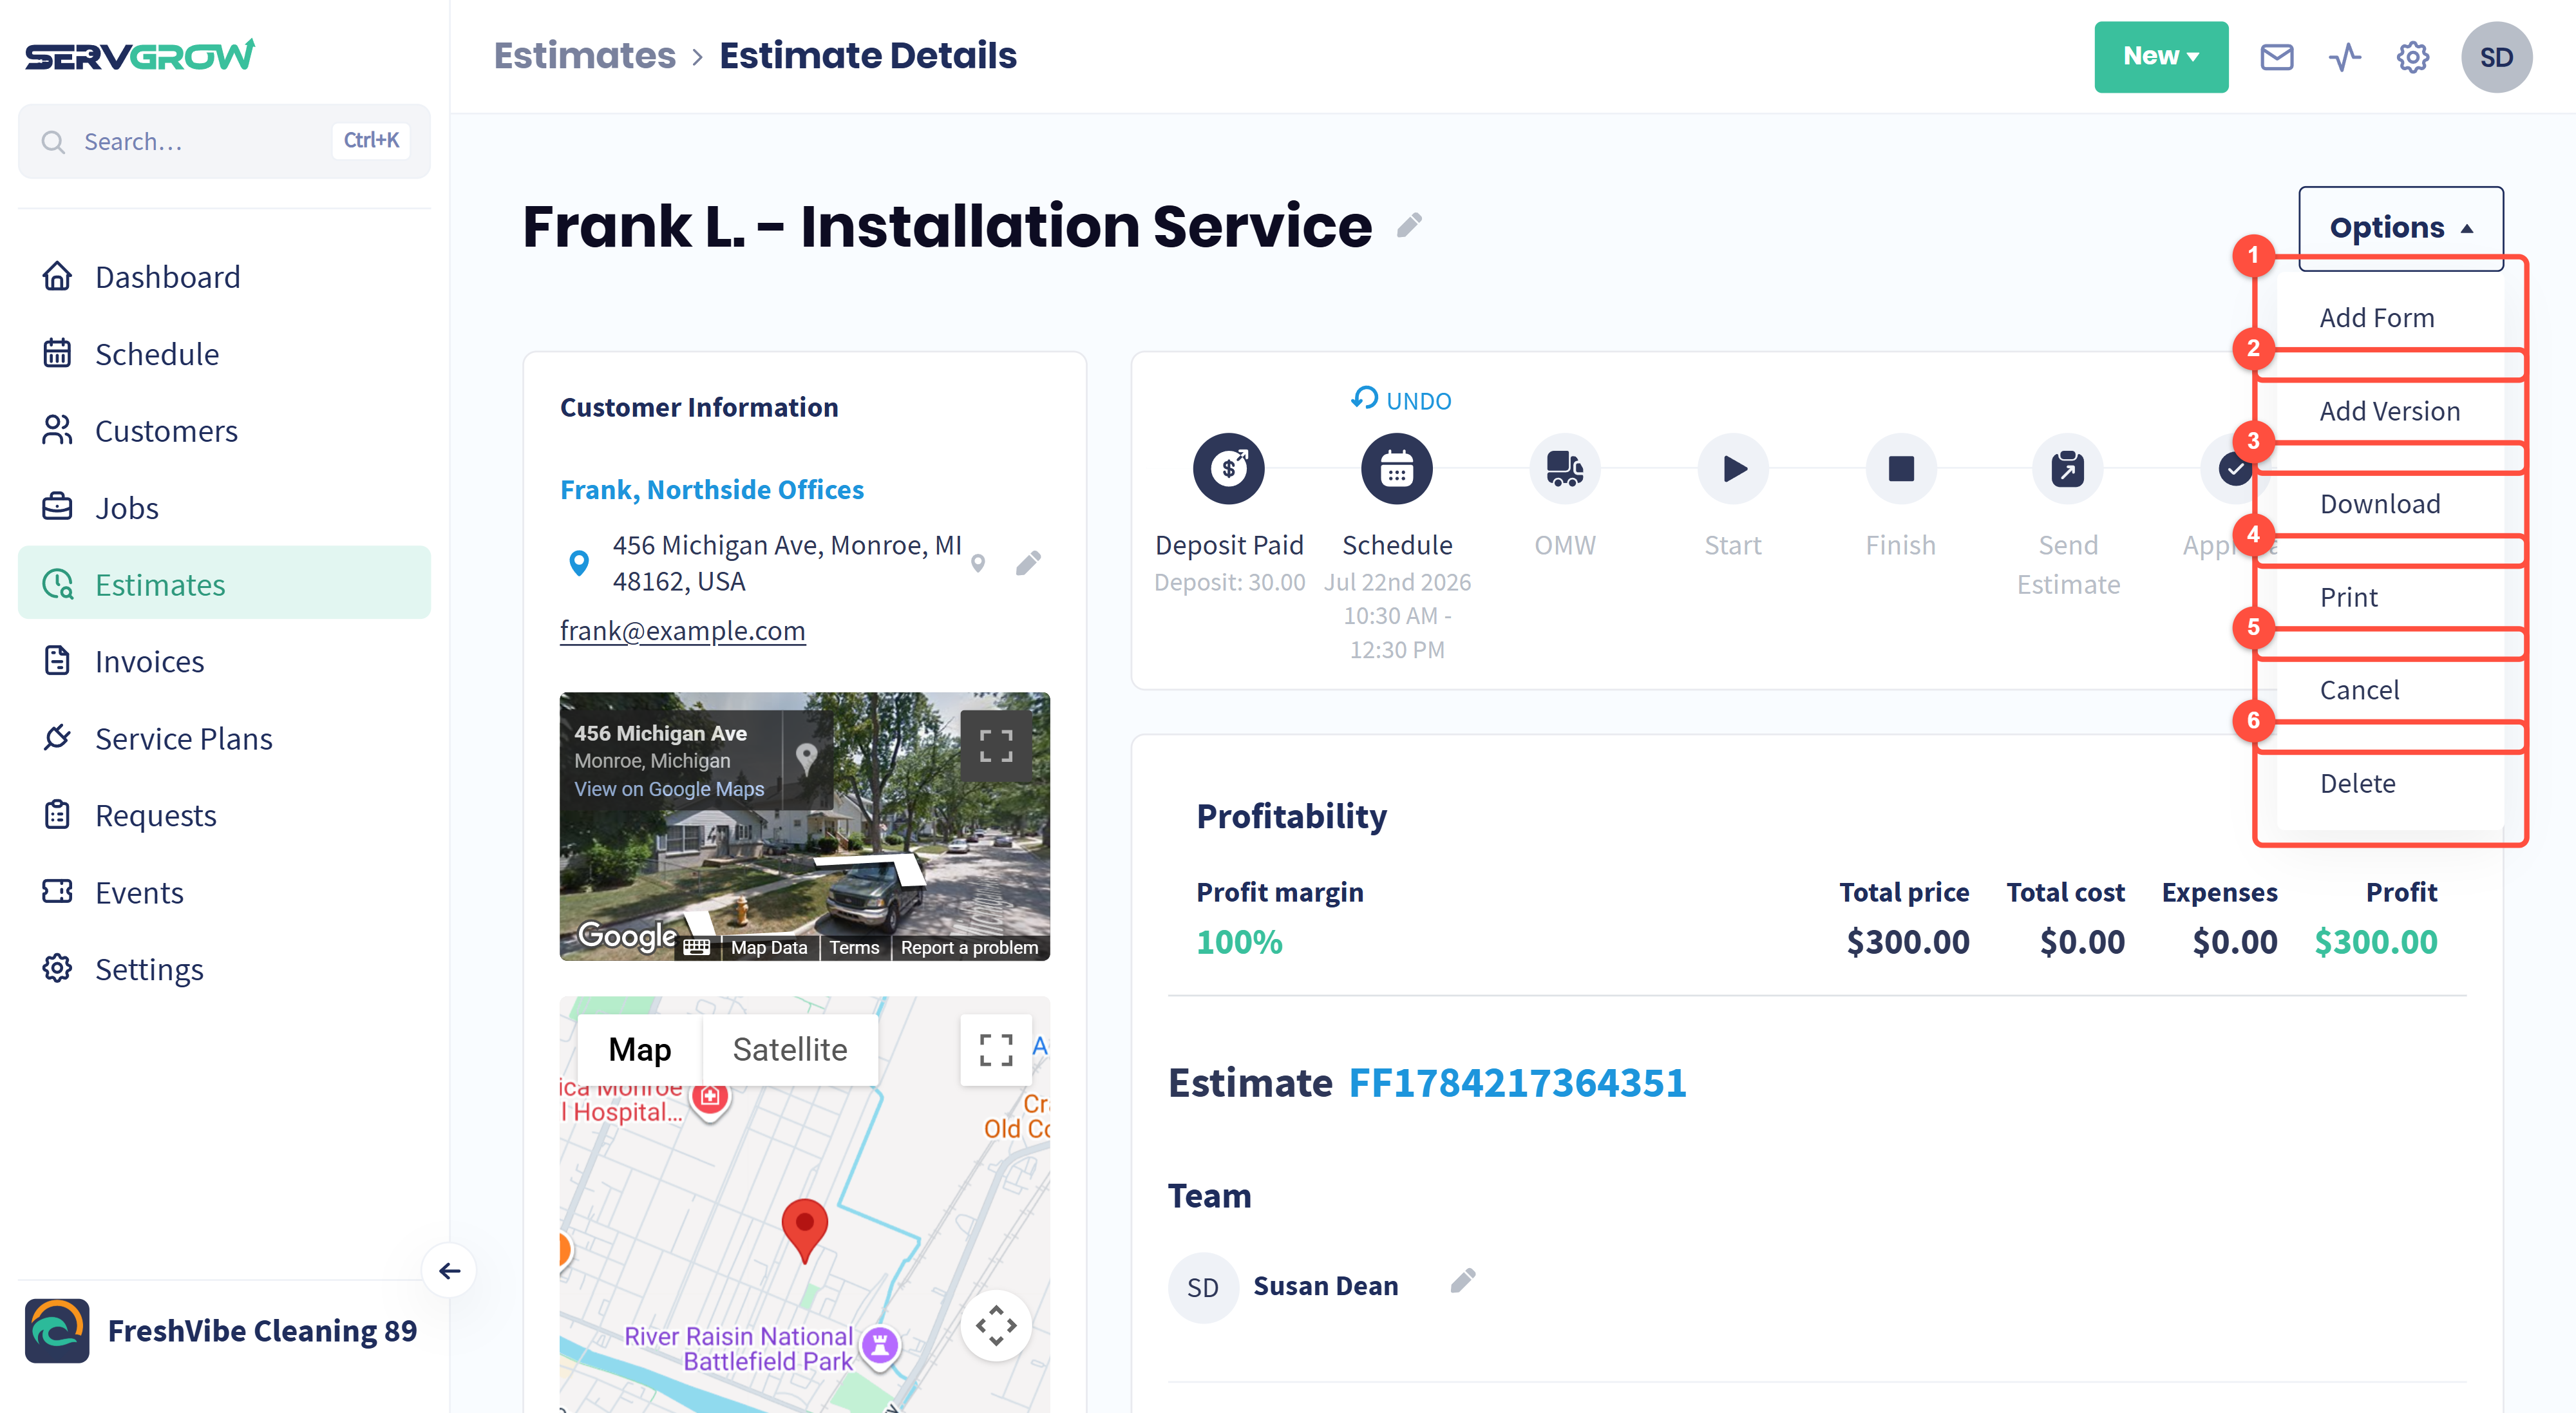
Add Form: attach a checklist or a sign-off sheet, for example a site survey you fill in while you are quoting.
Add Version: a second version of the same quote, for example a cheaper way of doing the job. Let the customer pick.
Download: save it as a file.
Print: a paper copy.
Cancel: call it off but keep the record.
Delete: remove it for good.
Nothing is saved until you say so
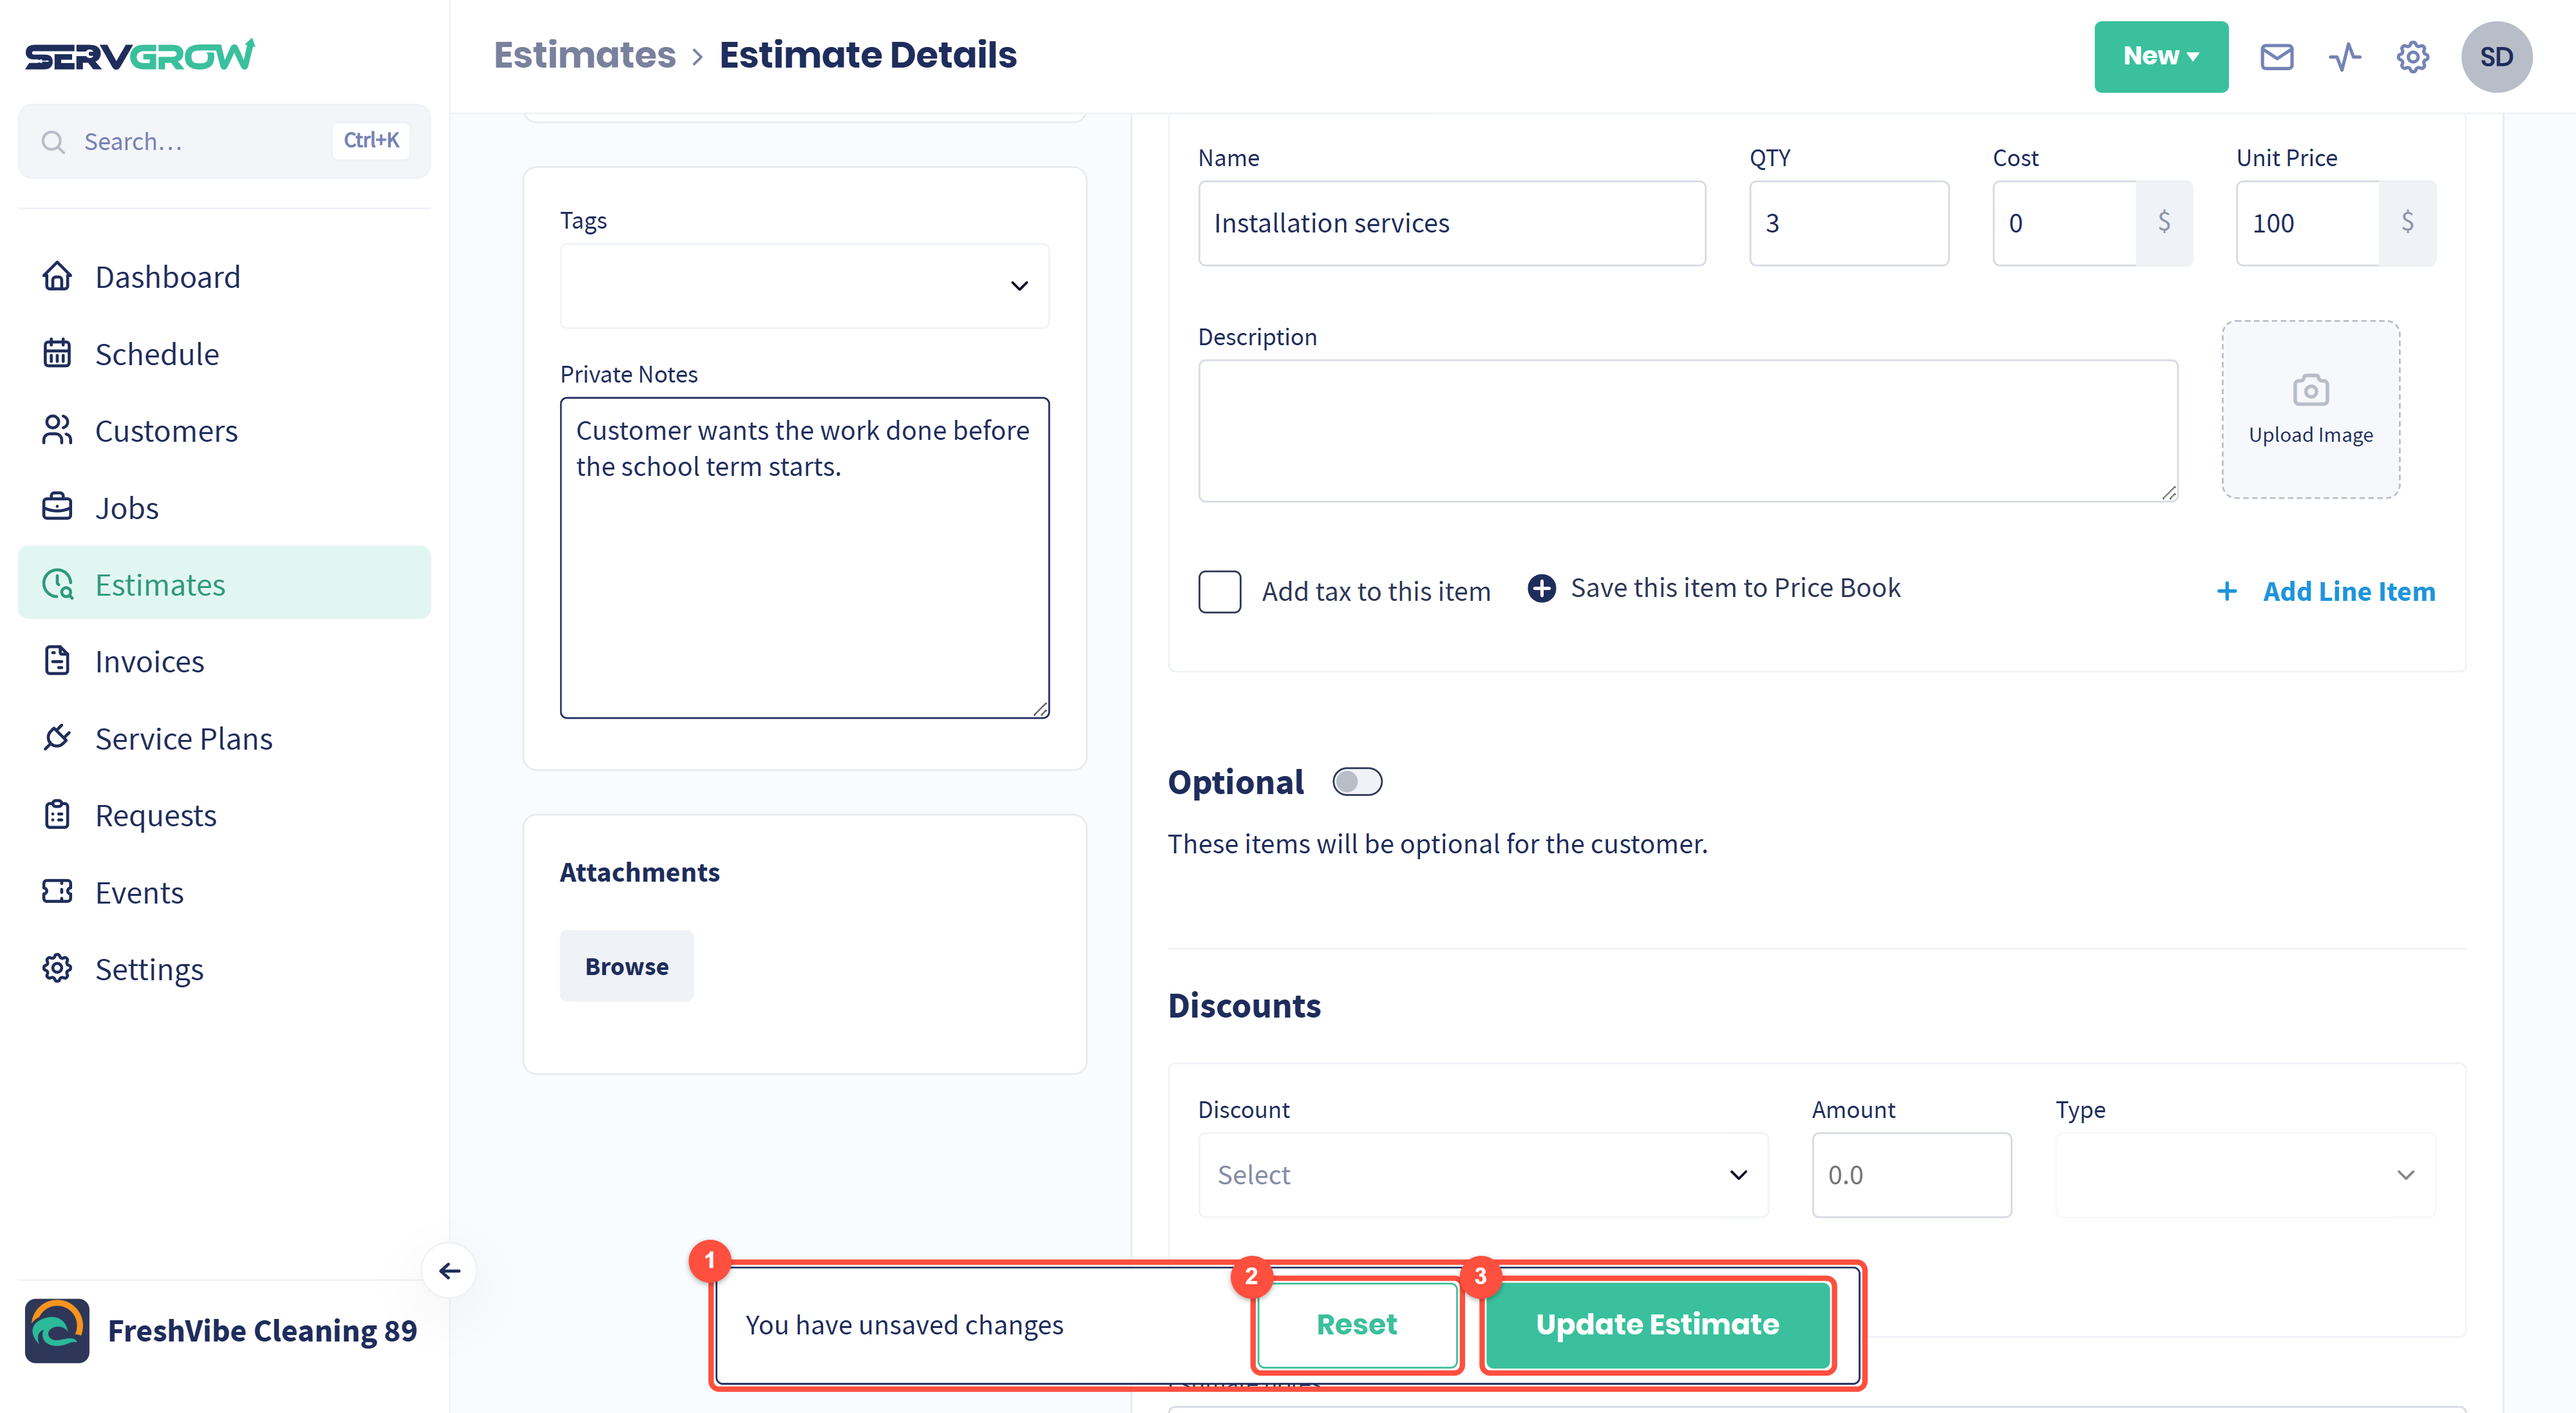
Change anything and a bar tells you there are unsaved changes.
Reset discards them.
Update Estimate saves them. Leave without it and the edit is gone.
Tips
Put one or two optional items on every quote. They cost nothing to offer and the customer adds them themselves.
Ask for a deposit on bigger jobs. It filters out the people who were never going to book, and it pays for materials.
Check the margin before you discount. The profit figure updates as you type, so you can see what a ten percent discount really costs you.
Use a version instead of editing a sent quote. The customer can then compare the two rather than wonder what changed.
Related articles