
Everything you need to run one job lives on one screen. Where the work has got to, who is doing it, what the customer is paying, what you are keeping, and the bar across the top that walks the job from booked to paid without you hunting through menus.
Learn this page and the rest of Servgrow follows, because a job is where the schedule, your team, your price book, the invoice and your profit all meet.
Open a job
Click a job on your Schedule, or a row in your Jobs list.
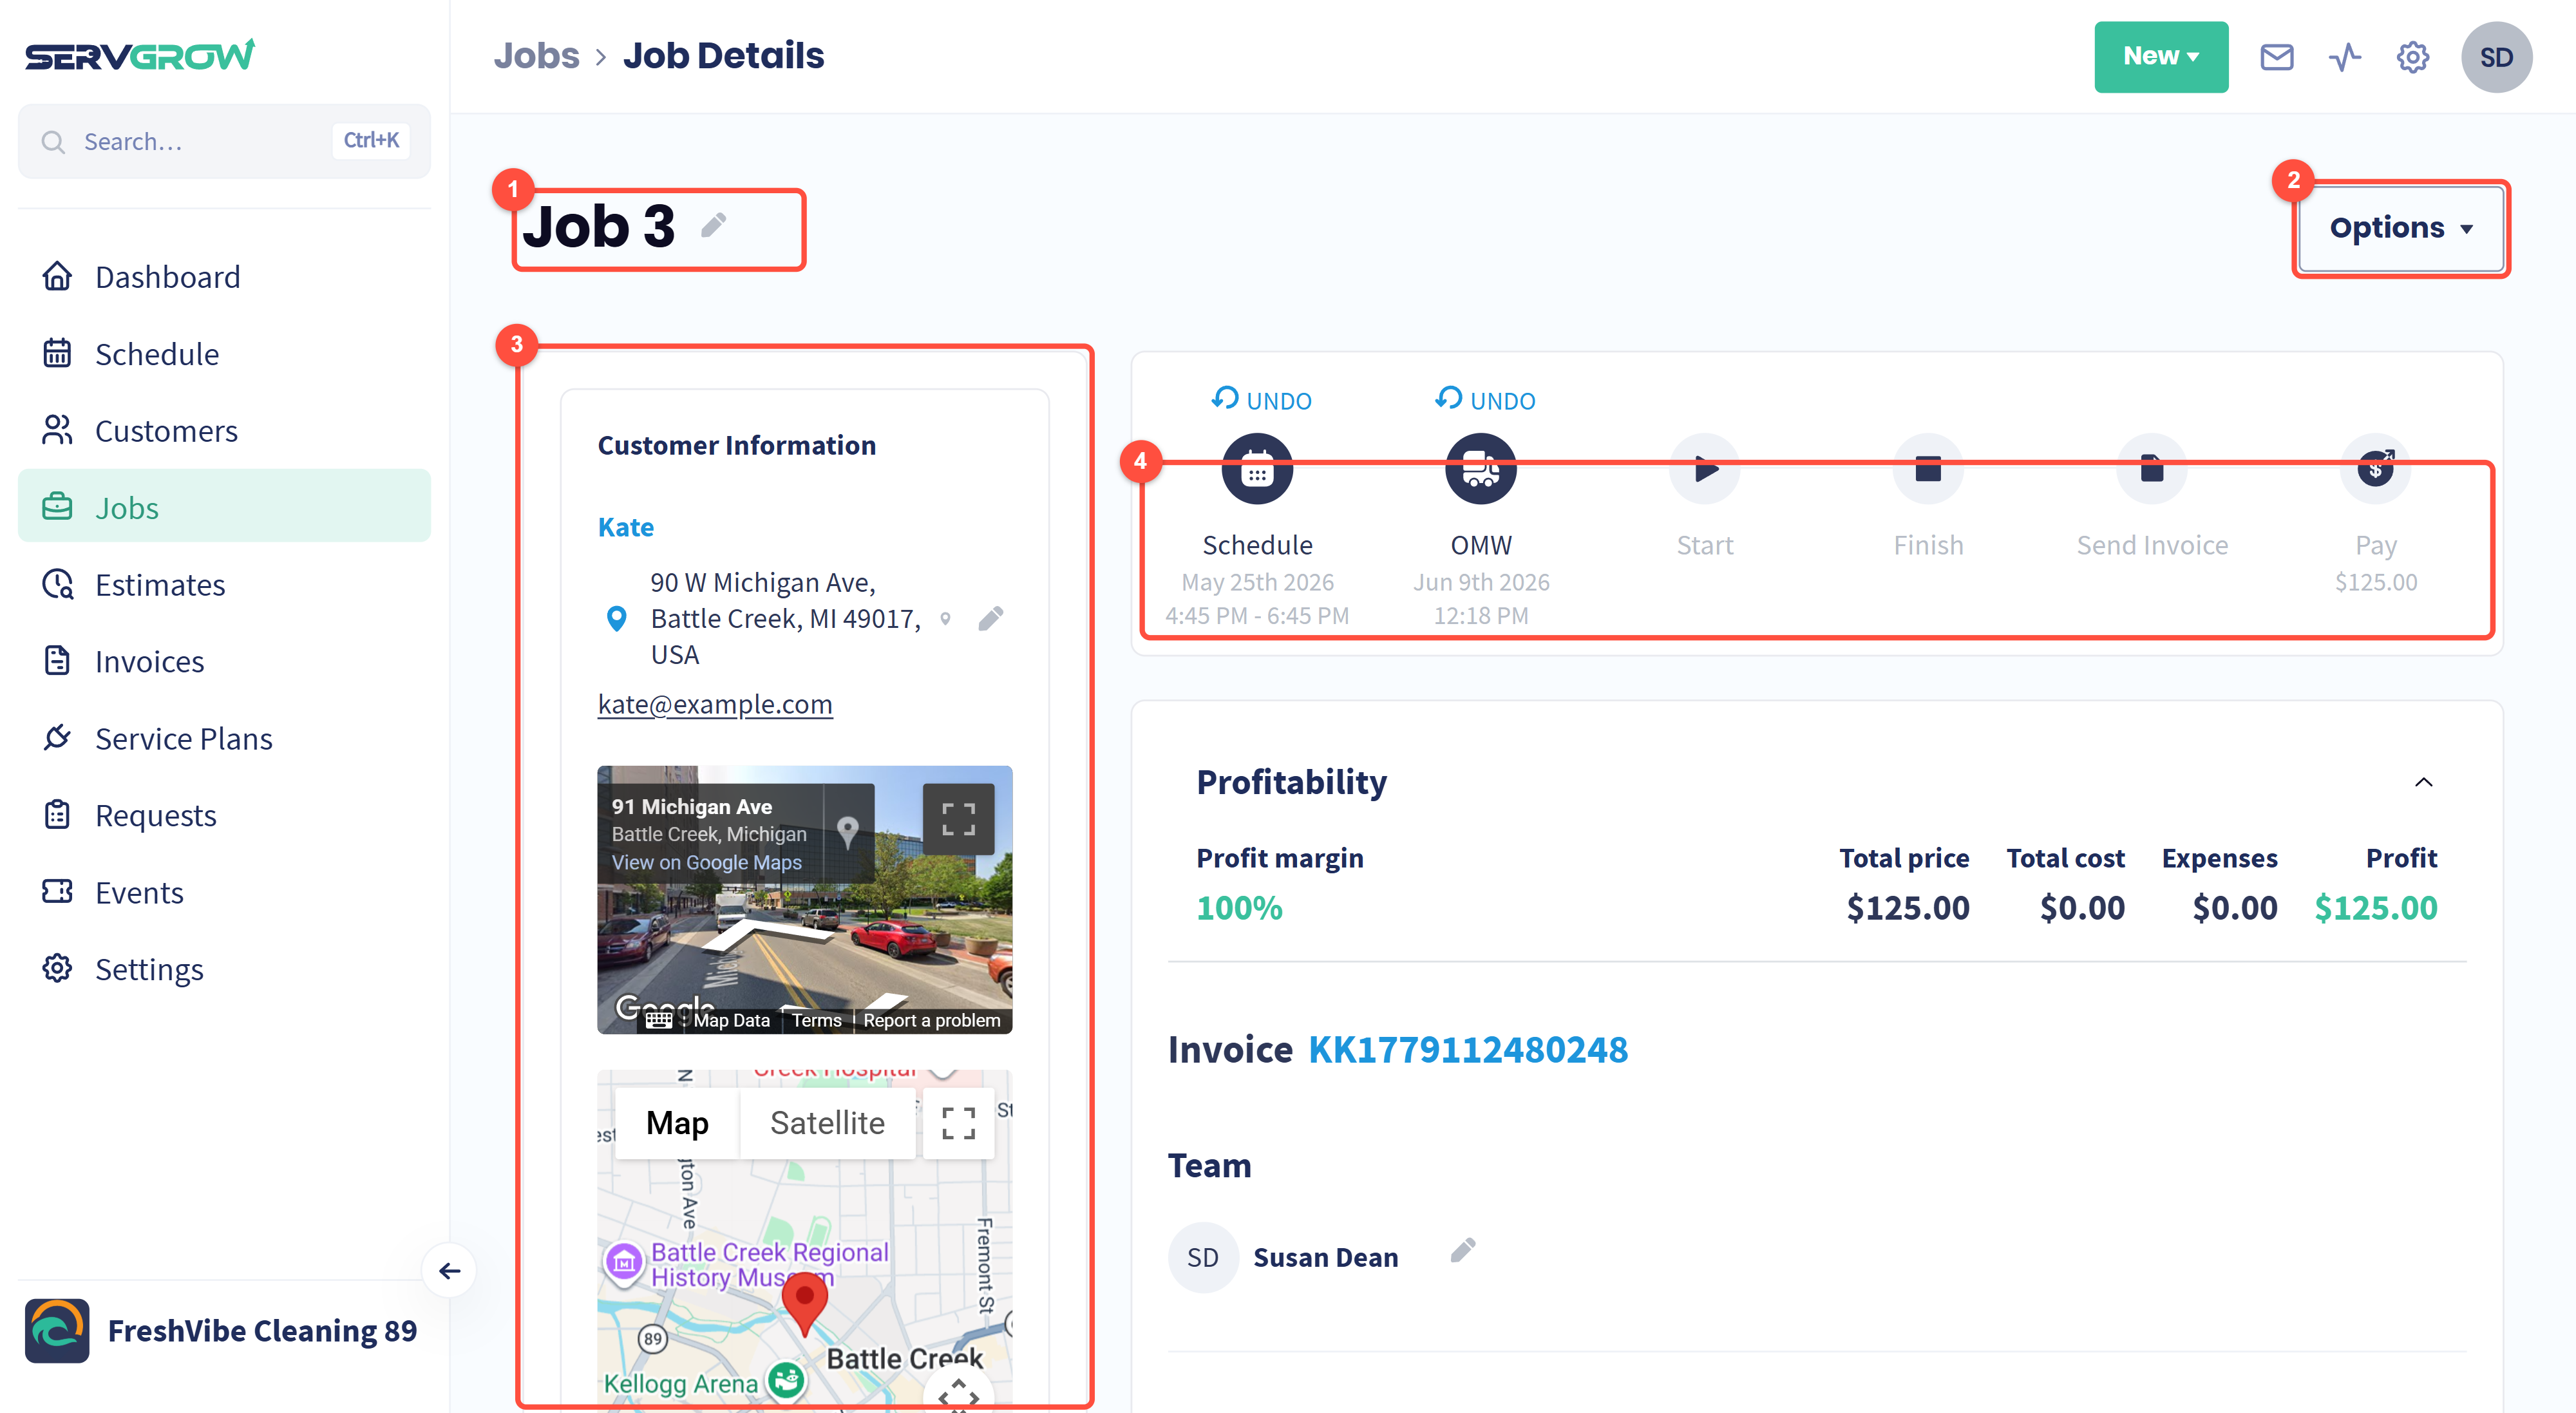
The job title. Click the pencil to rename it, so "Job 3" becomes something your crew recognises.
Options: everything you can do to the job as a whole, from adding a form to cancelling it.
Customer Information: who the job is for and where it is.
The progress bar: where this job has got to.
The progress bar takes the job from booked to paid
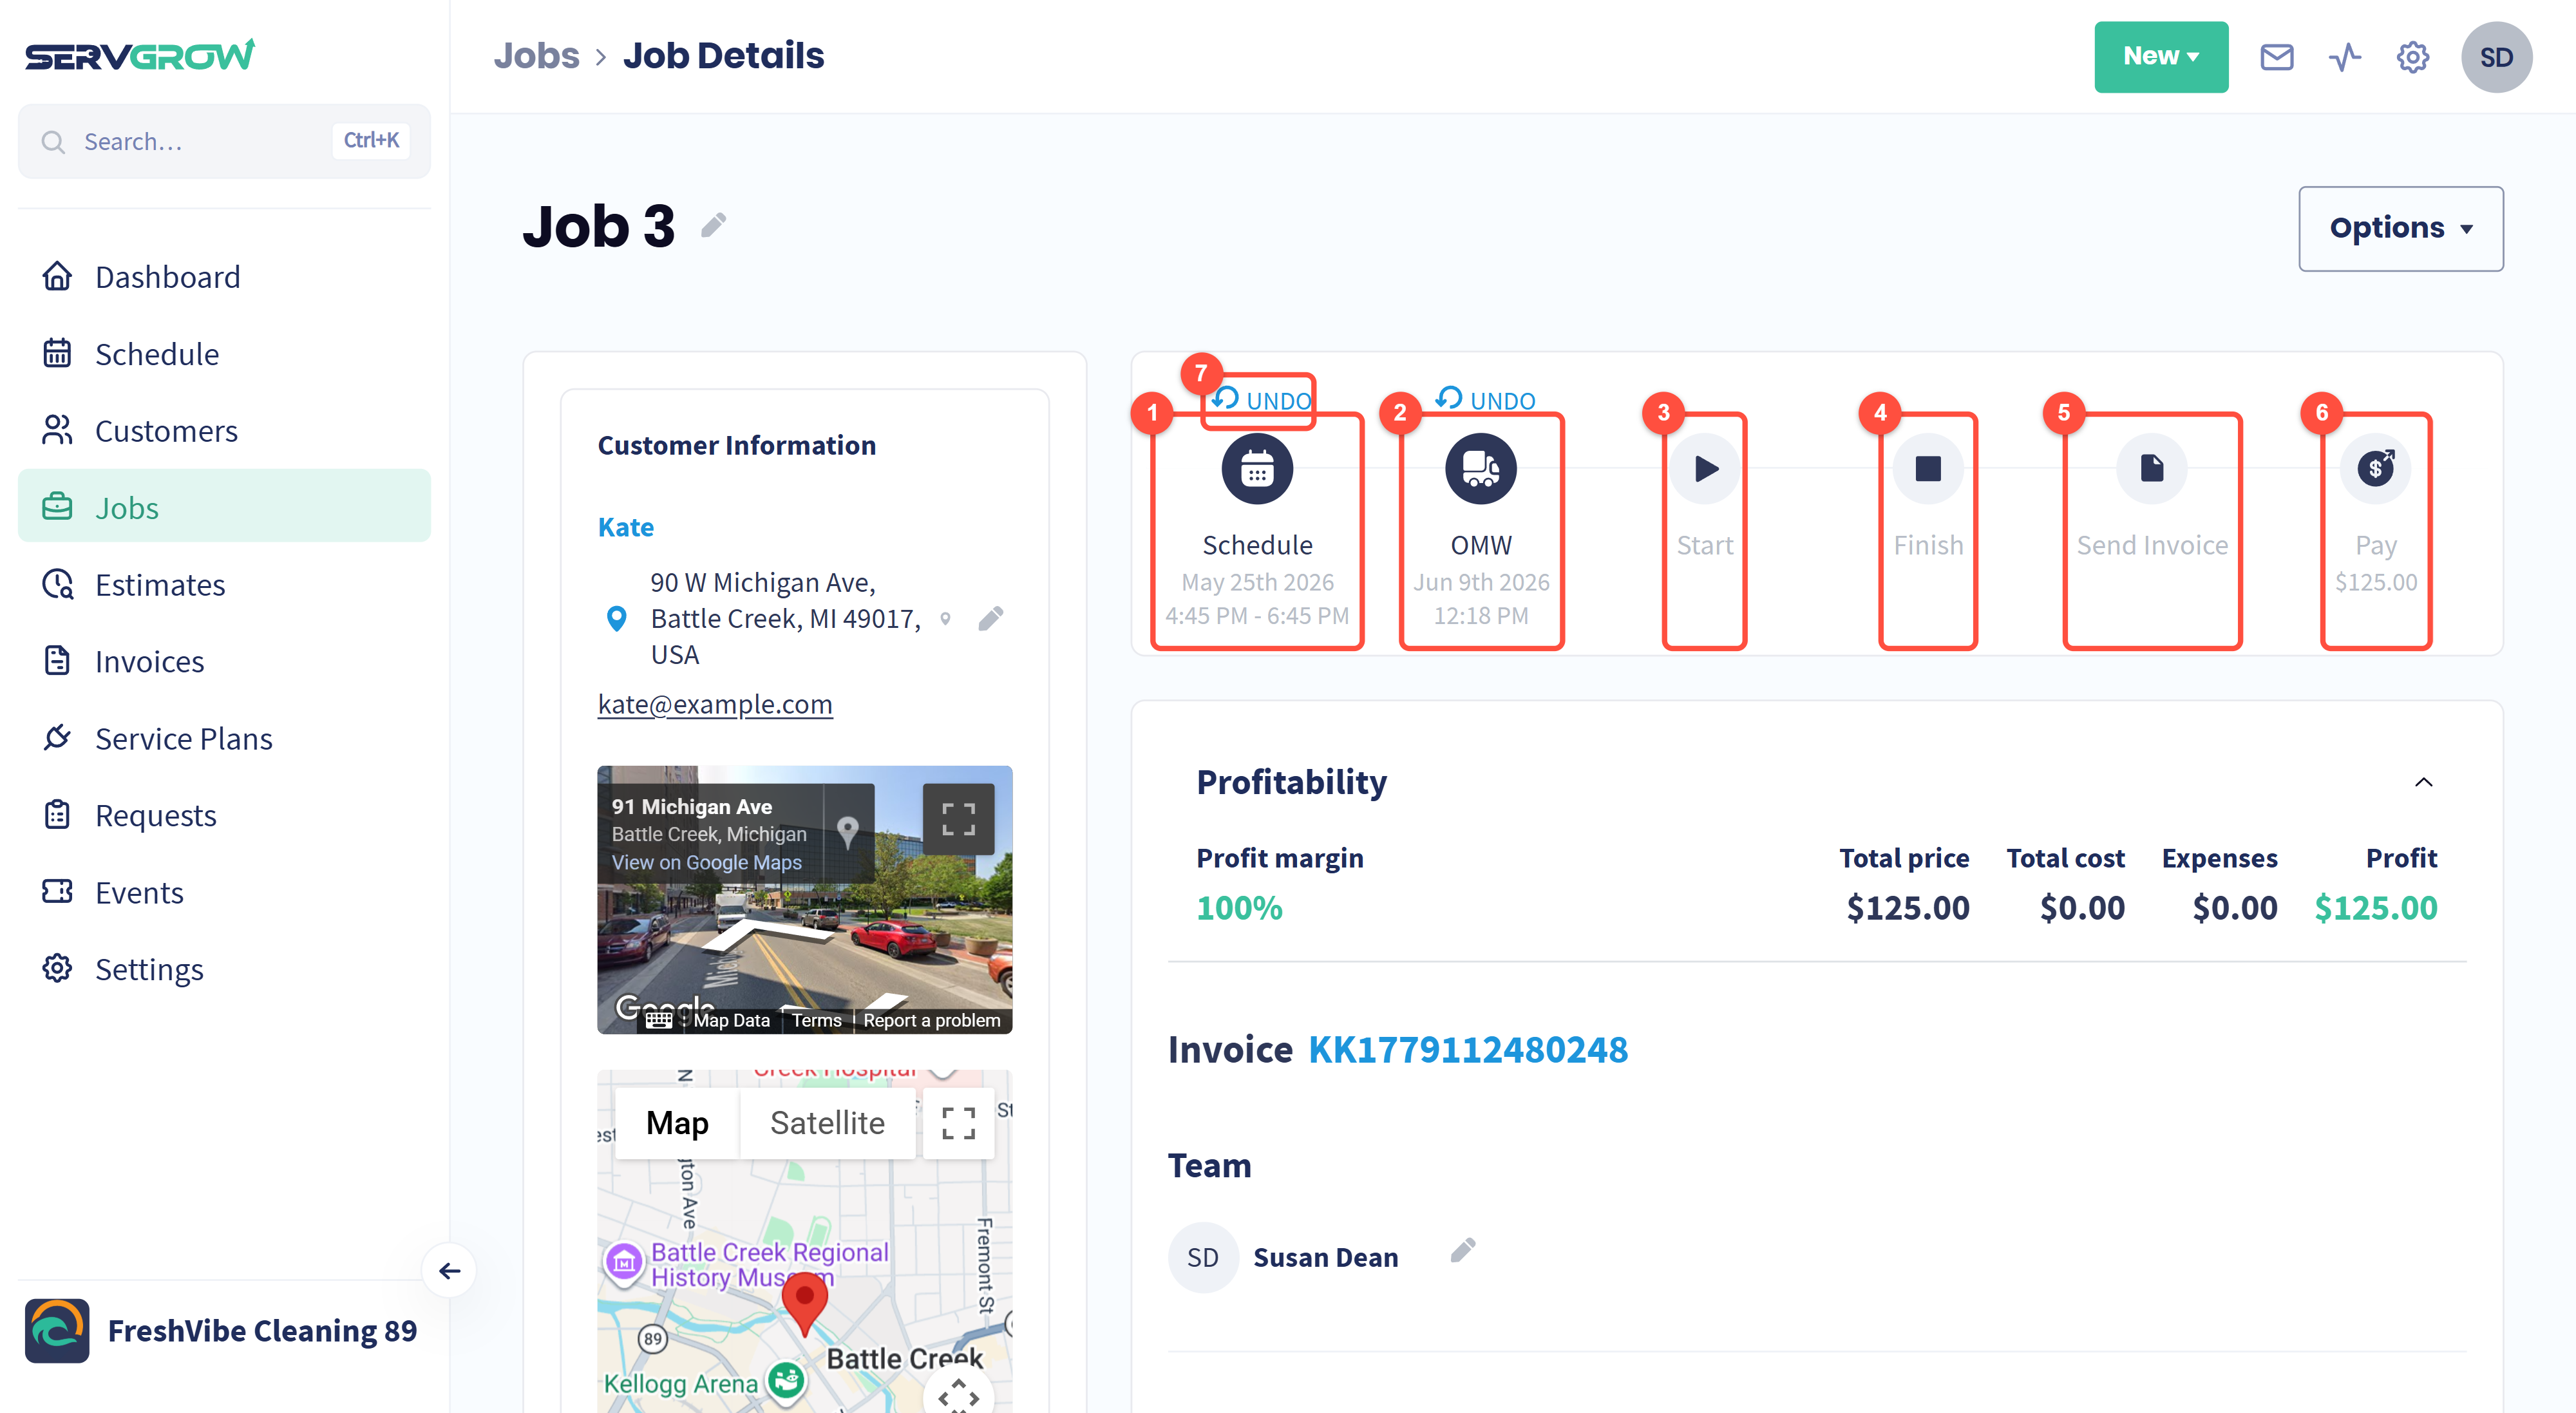
Schedule: the date and time window the job is booked for.
OMW: your tech is on the way. Marking it texts the customer, so nobody is left wondering.
Start: work has begun. The time is stamped for you.
Finish: the work is done.
Send Invoice: bill the customer for the job.
Pay: take the payment. The amount outstanding sits under it.
Marked something too early? UNDO above a completed step puts it back.
Each step you complete stamps the date and time, so the bar doubles as a record of what happened and when.
What a finished job looks like
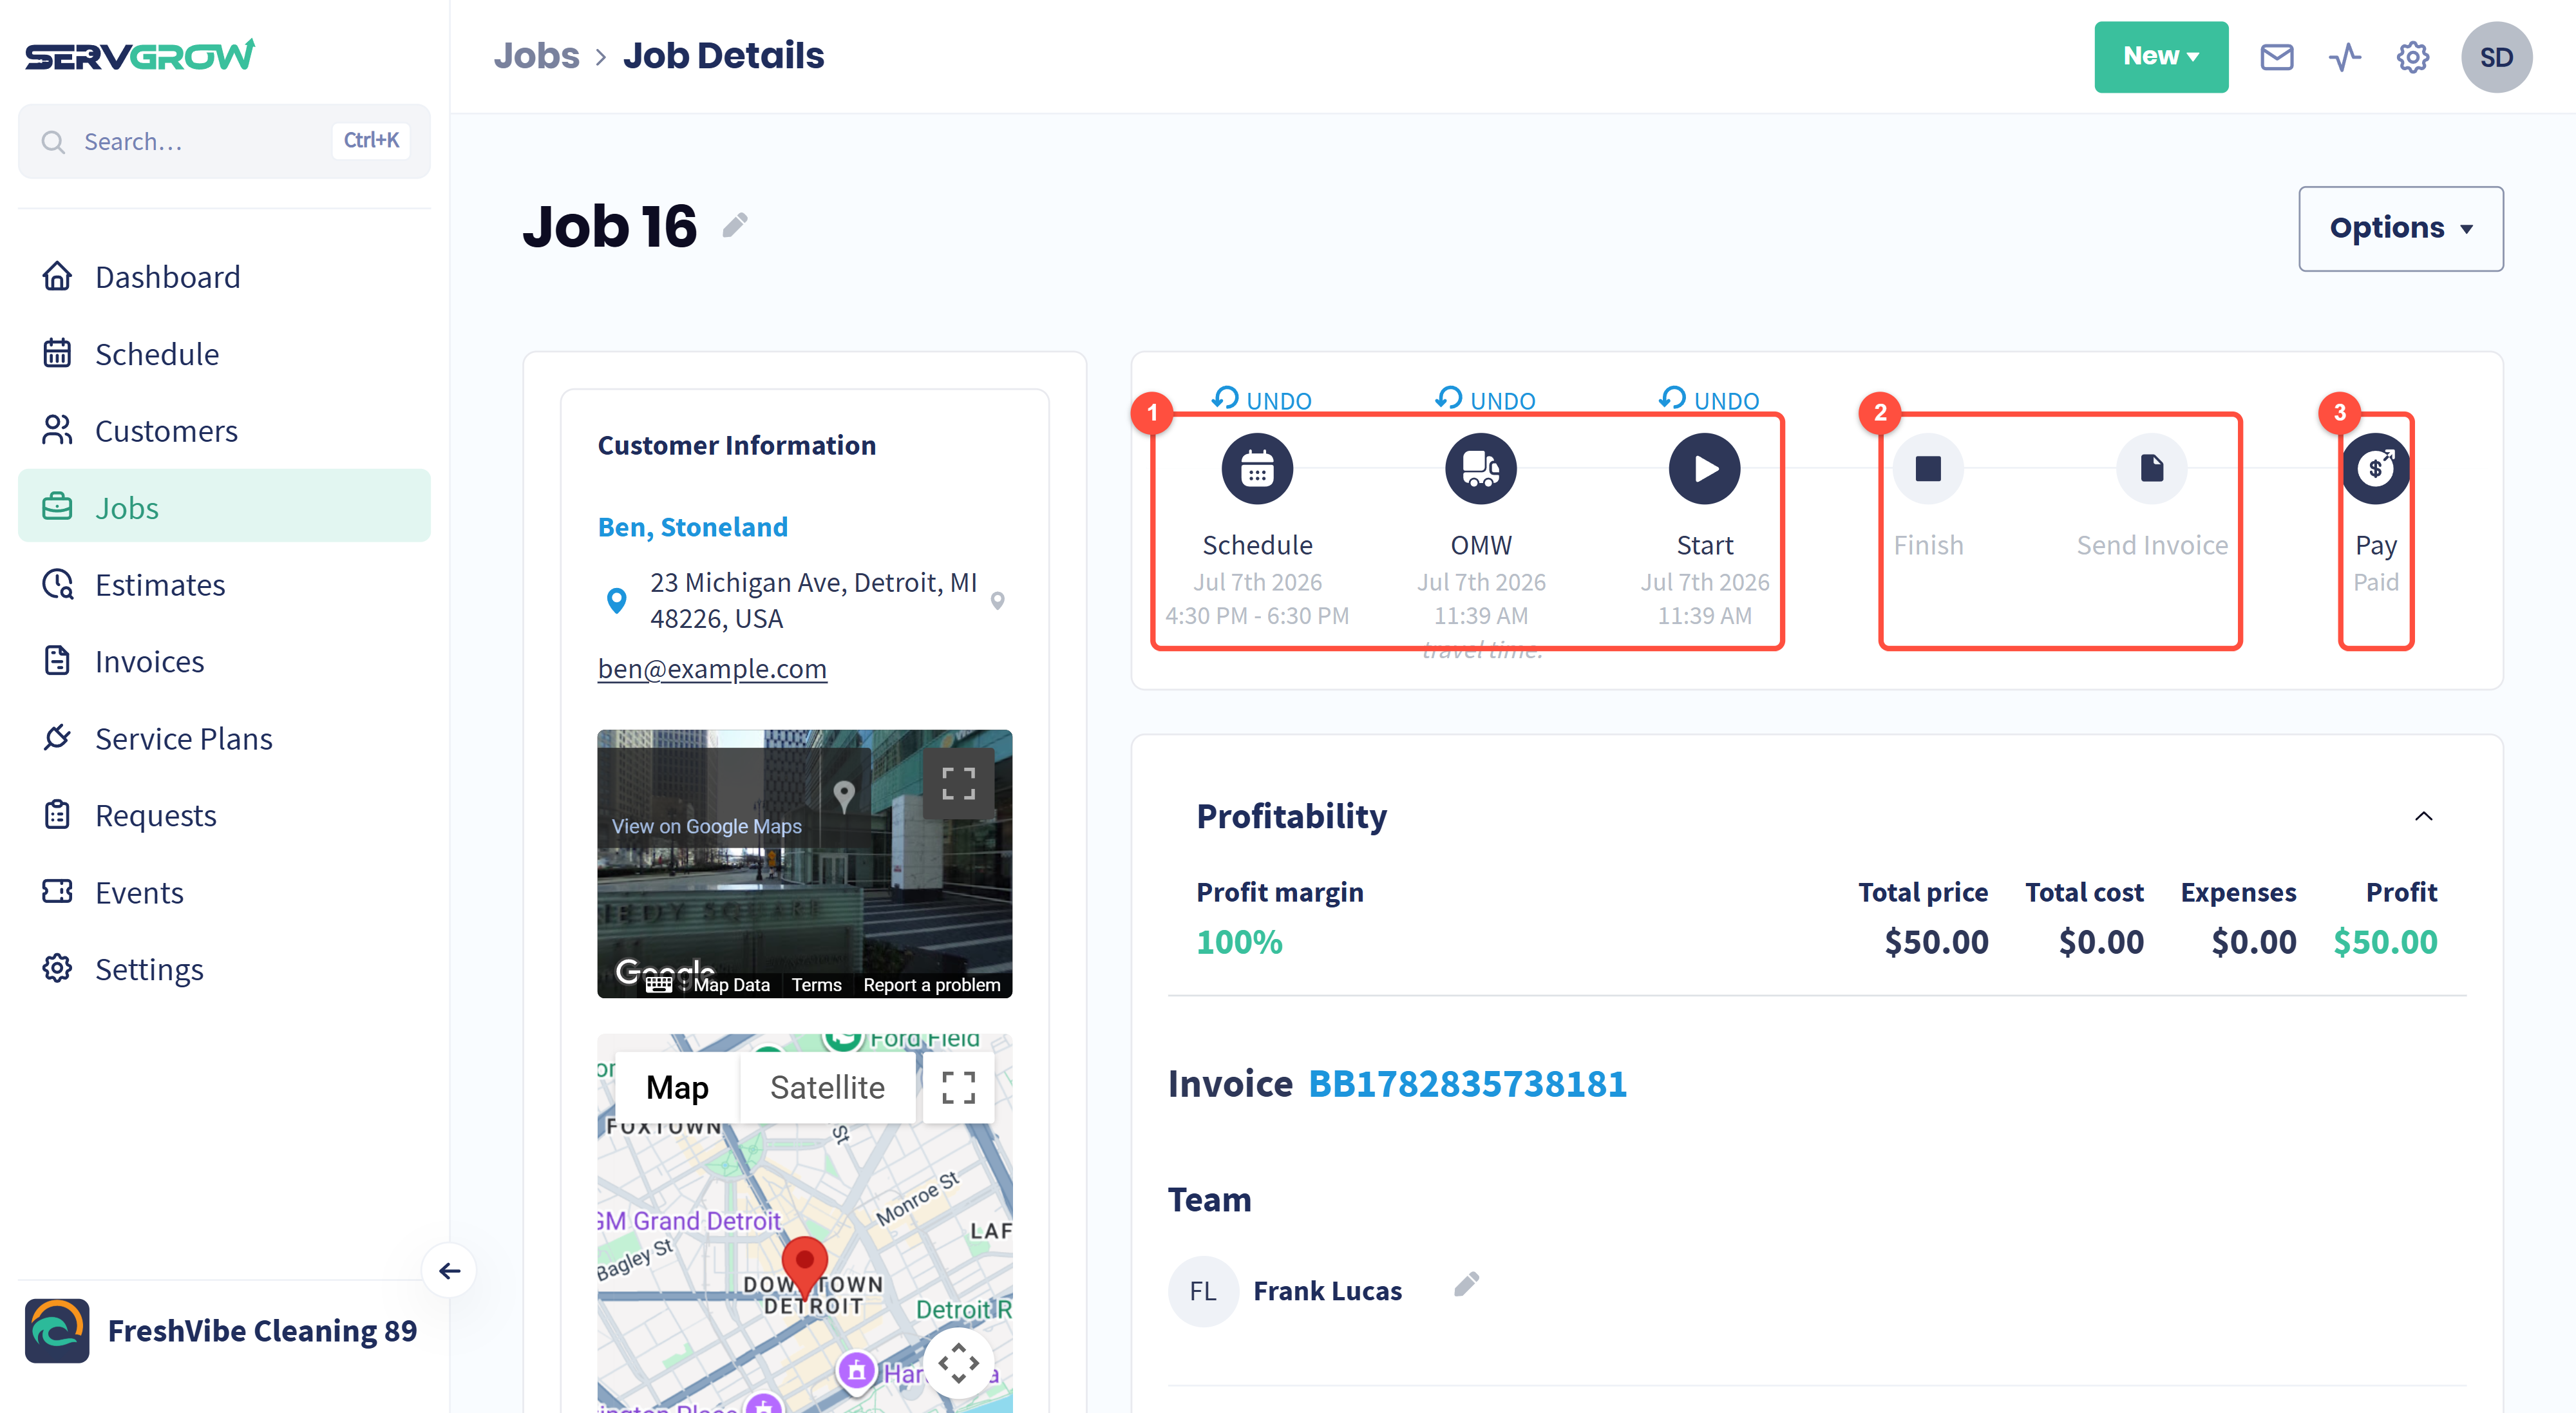
Completed steps are solid, with their dates and times underneath.
Steps nobody marked stay grey. Handy when you want to know whether the invoice was actually sent.
Once the money is in, Pay reads Paid instead of an amount.
Customer and location
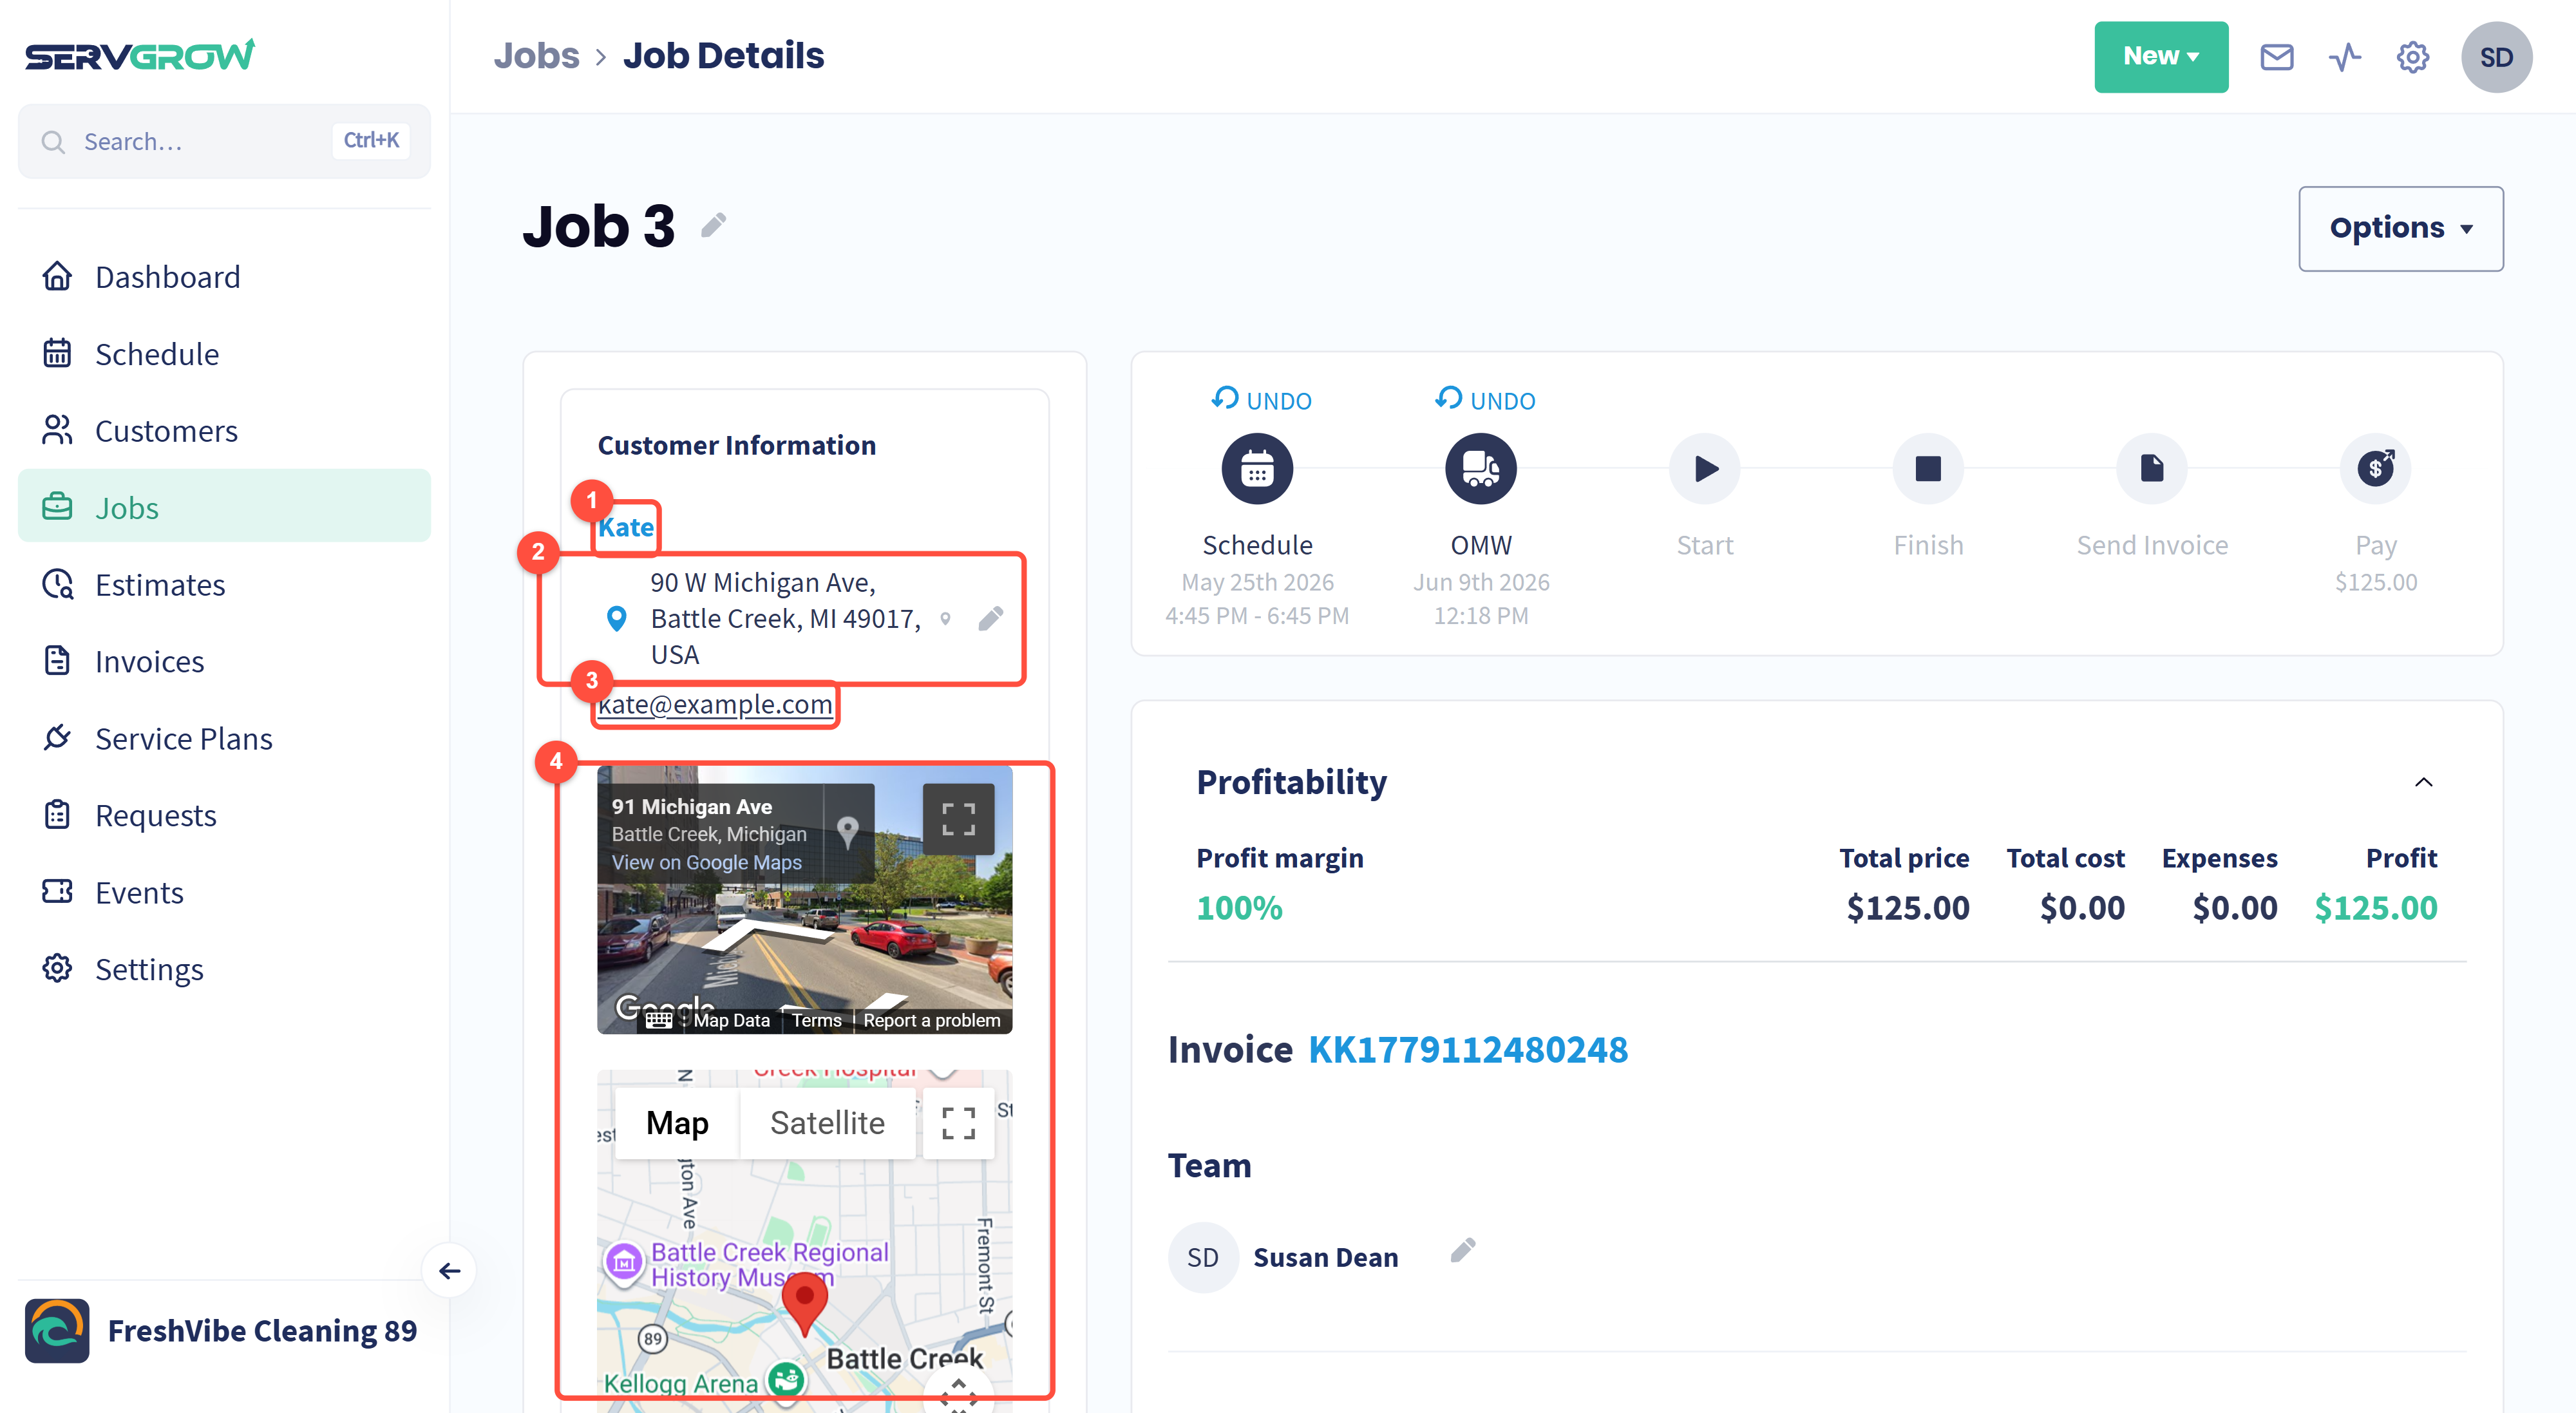
The customer's name opens their customer page, with every other job, estimate and invoice they have.
The service address, with a pencil to change where this job is happening.
Their email address.
A street view and map of the property, so your tech knows what they are looking for before they pull up.
Know what you are making before you finish
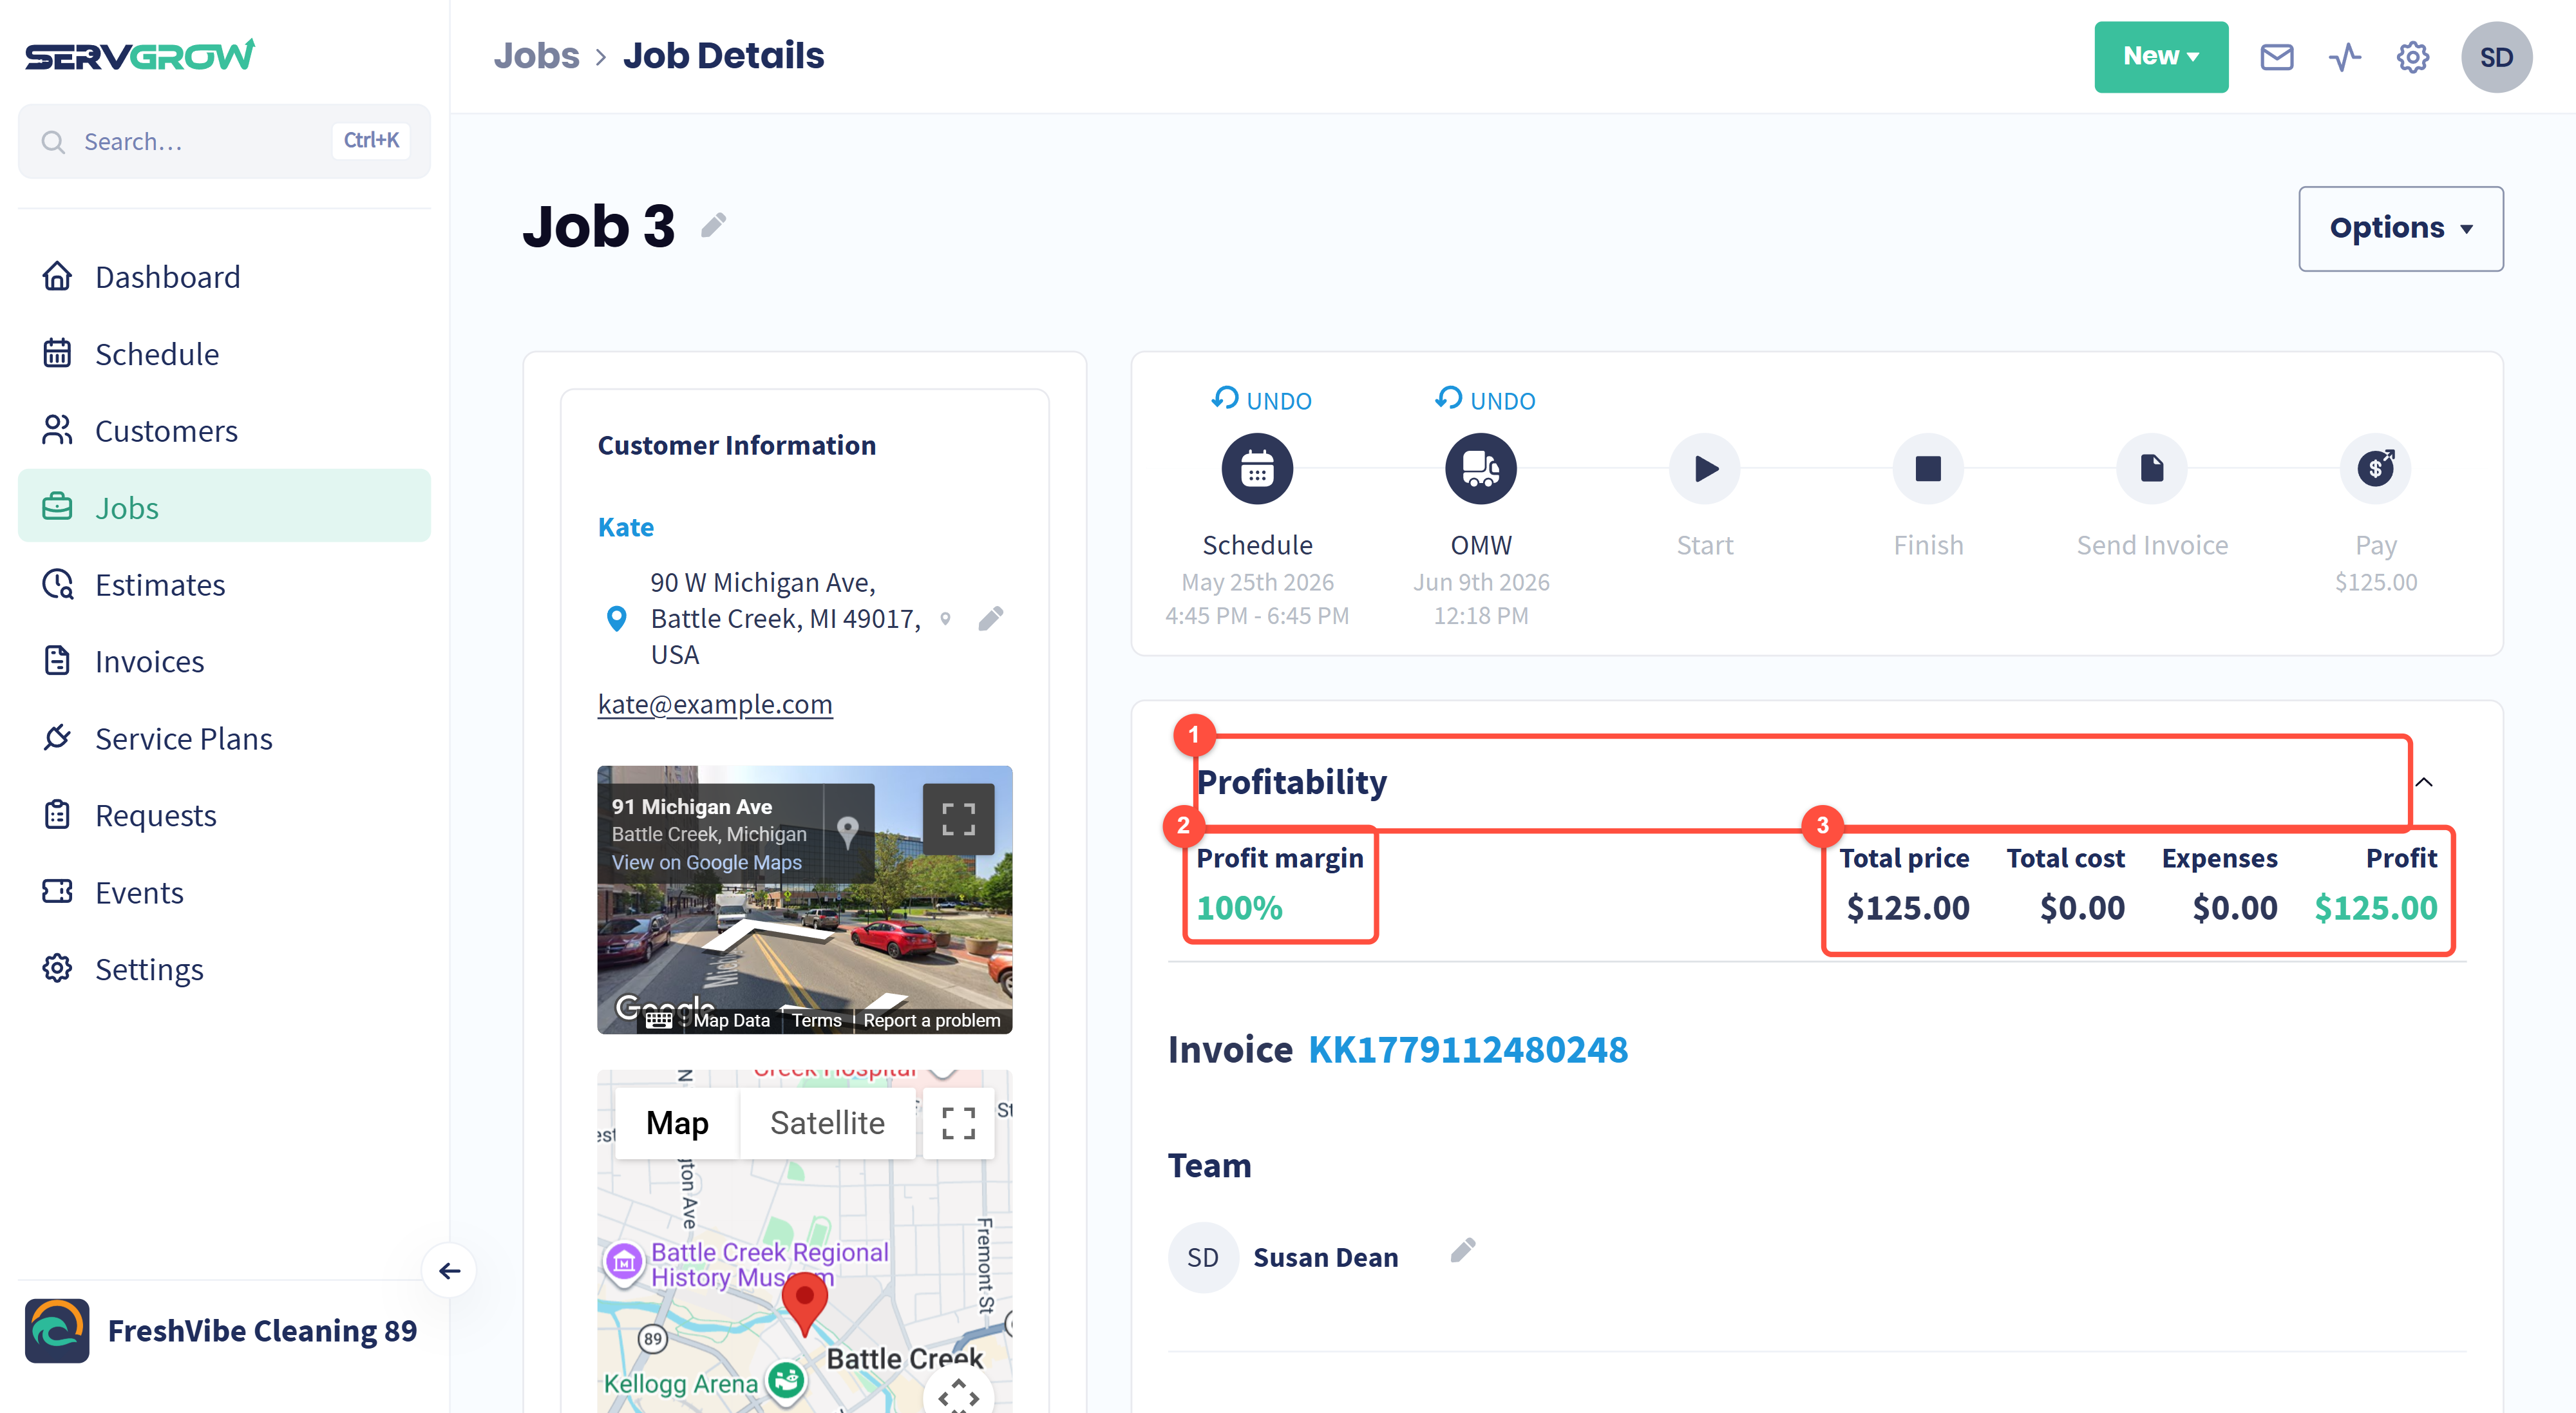
Profitability opens and closes, and stays as you leave it.
Profit margin: the percentage you are keeping on this job.
Total price, Total cost, Expenses and Profit. Costs come from your line items, expenses from what you log against the job.
The invoice and the crew
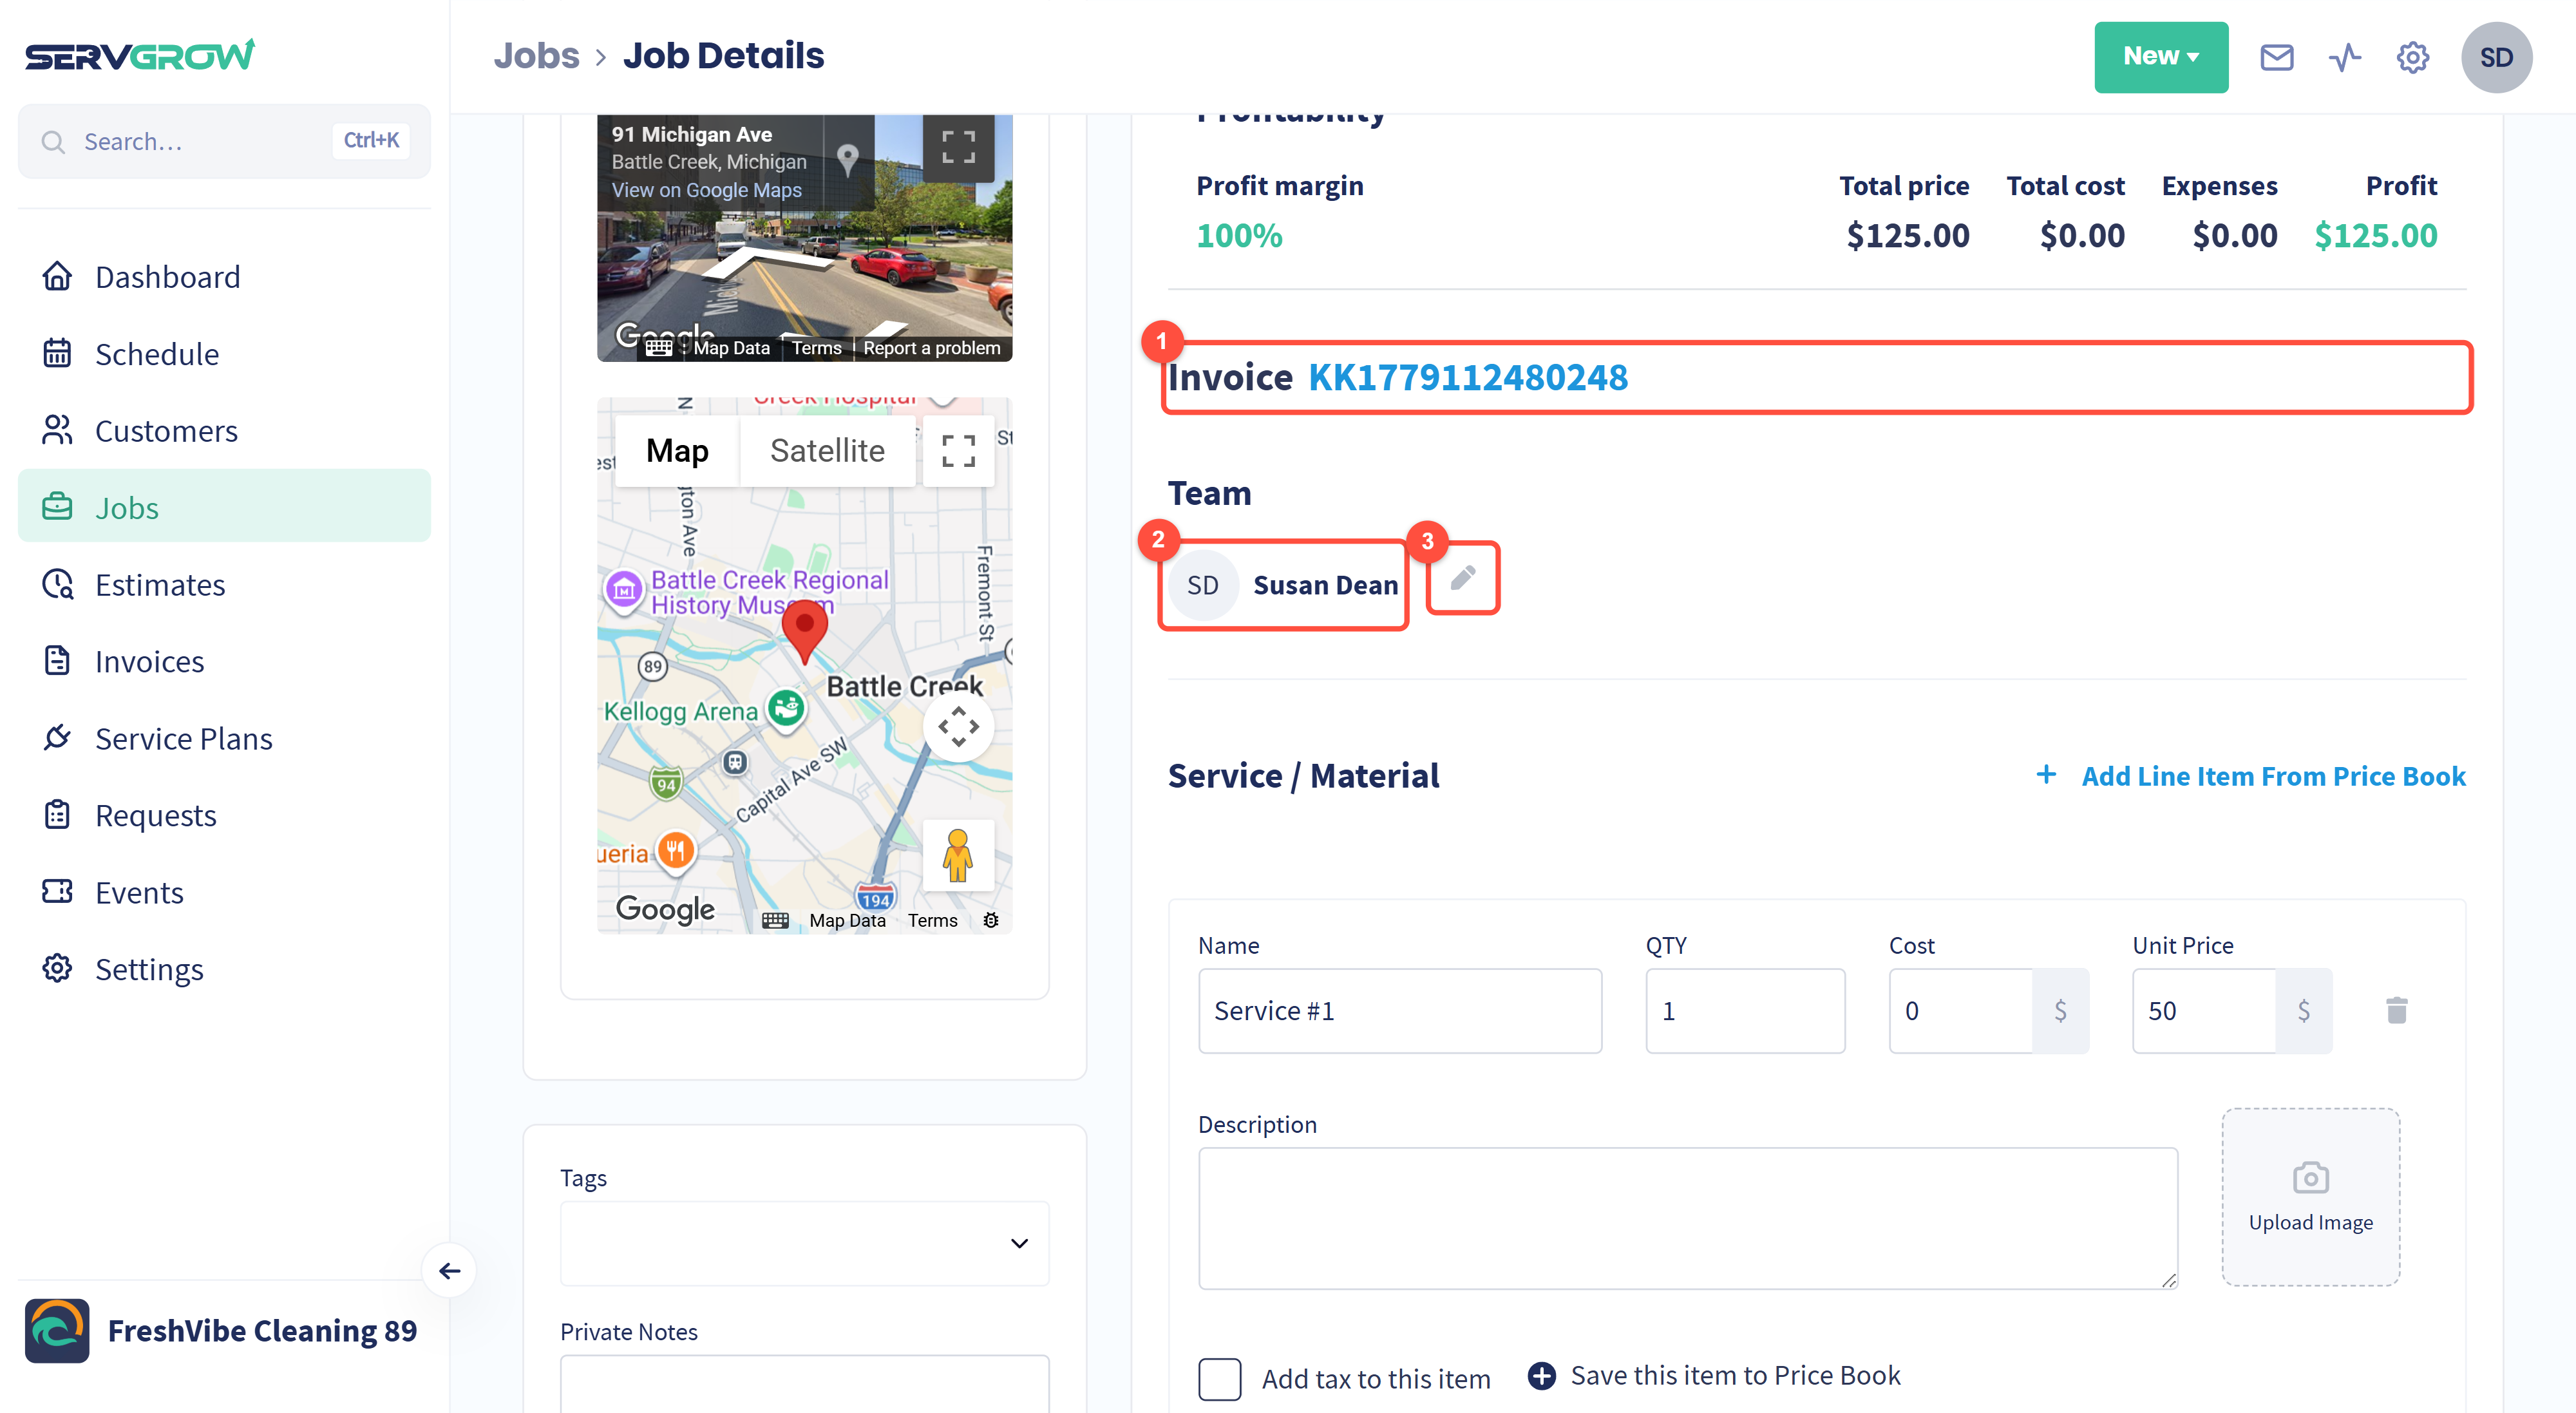
The invoice number opens the invoice for this job.
Team: who is assigned.
The pencil changes the crew, for example when someone calls in sick.
What the customer is paying for
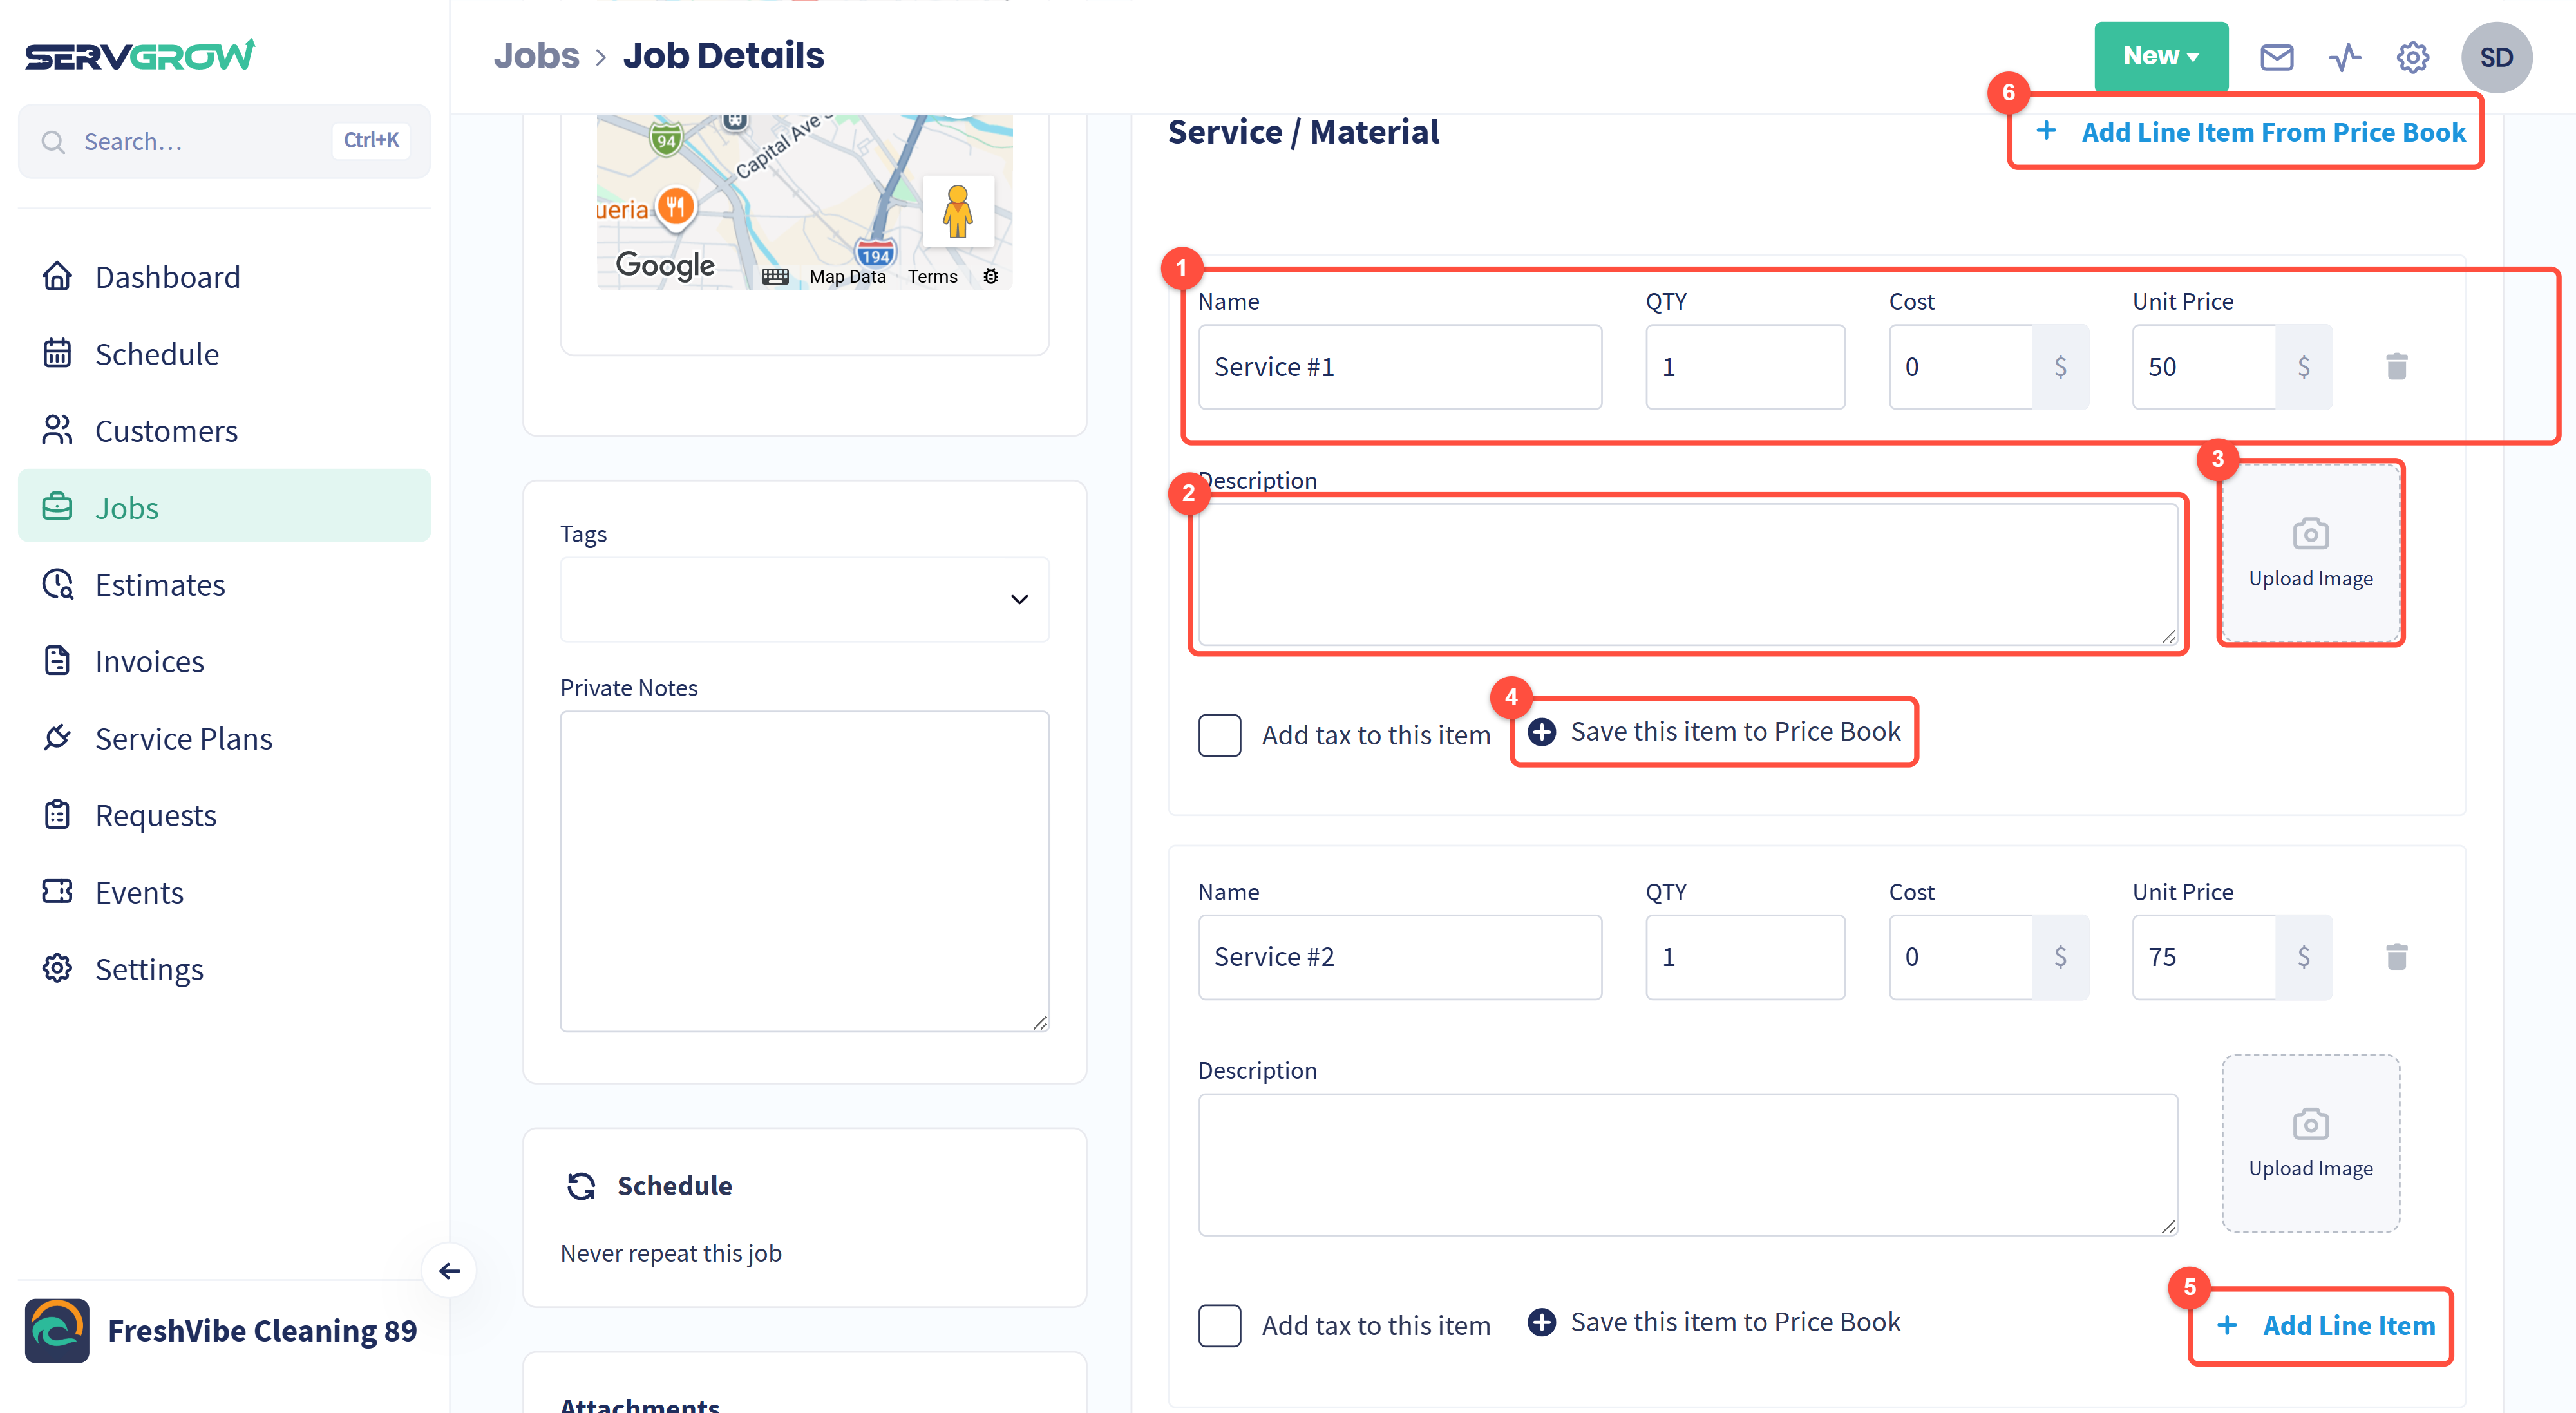
Name, QTY, Cost and Unit Price. Cost is what it costs you, unit price is what you charge, and the gap between them is the profit you saw above.
Description: the detail the customer reads on the invoice.
Upload Image: add a photo to the line, for example the part you fitted.
Save this item to Price Book: keep it for next time instead of typing it again.
Add Line Item: another line, typed from scratch.
Add Line Item From Price Book: pull in a service you have already priced.
There is also an Add tax to this item tick box on each line, so tax follows the item rather than the whole job.
Notes, tags and attachments
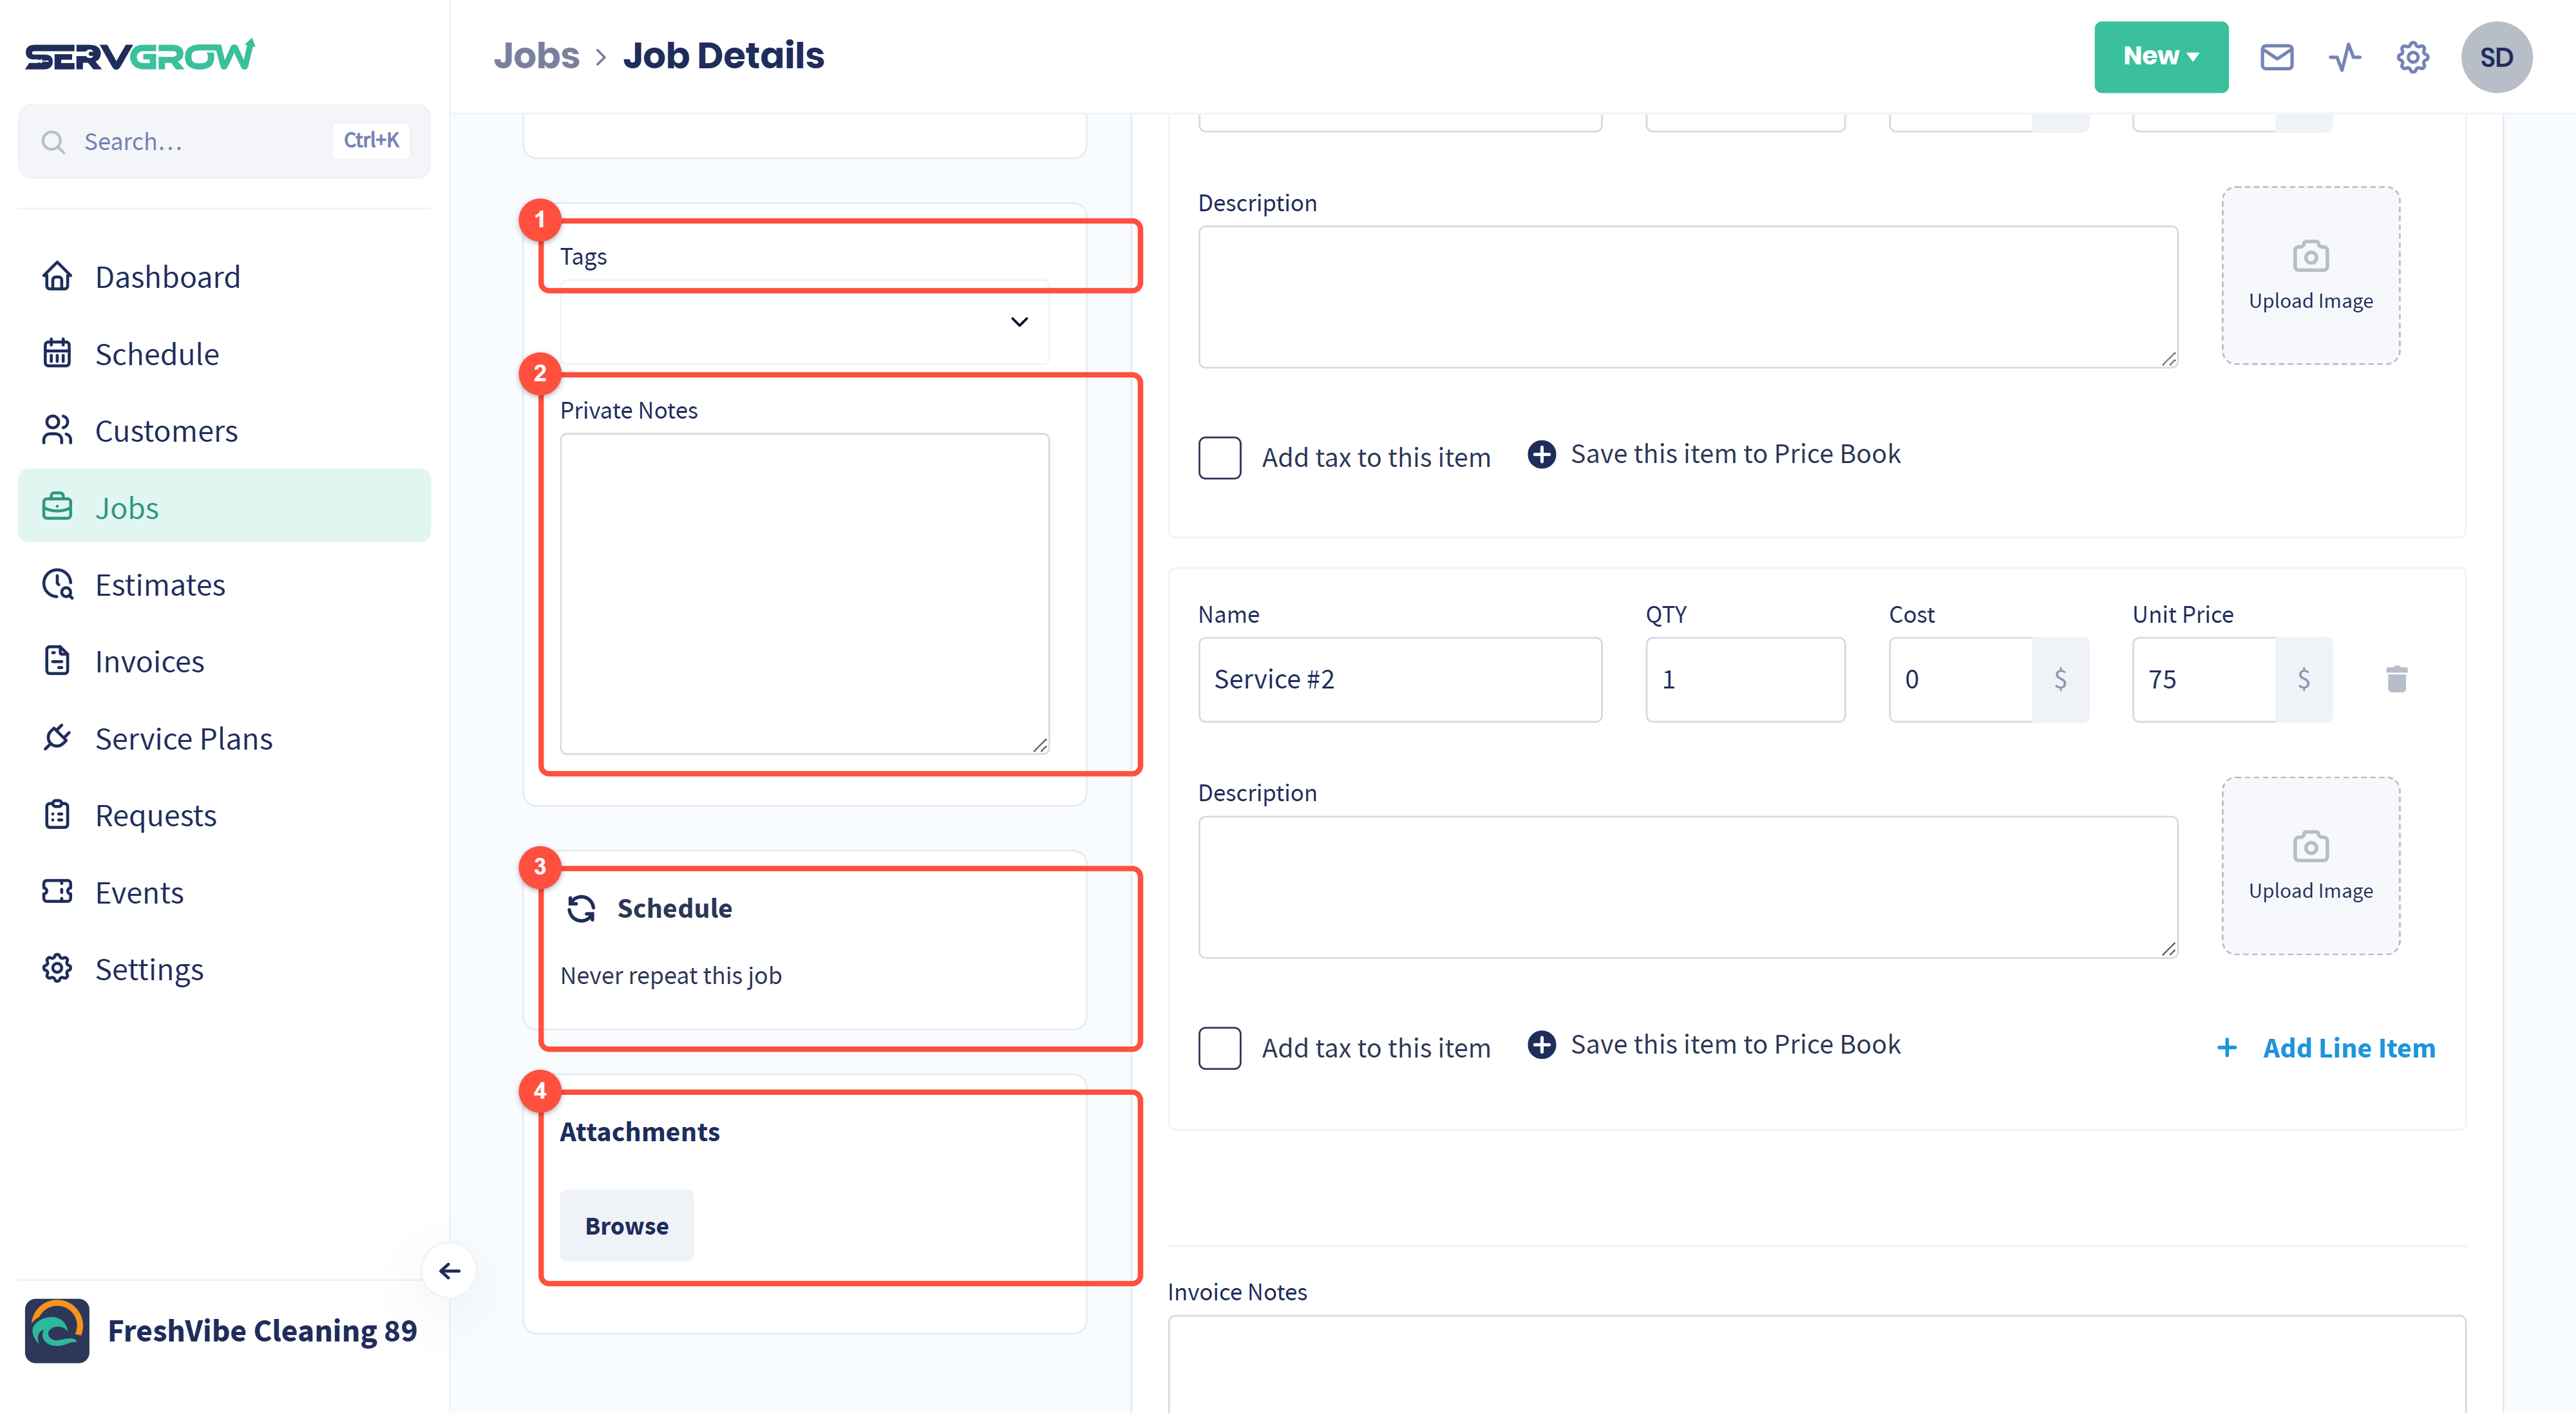
Tags: label the job so you can pull it back out of the Jobs list later.
Private Notes: gate codes, the dog in the back garden, where the water shut-off is. Your team sees these, the customer does not.
Schedule: whether the job repeats. A one-off says "Never repeat this job".
Attachments: Browse to add files to the job, for example a plan or a warranty.
Nothing is saved until you say so
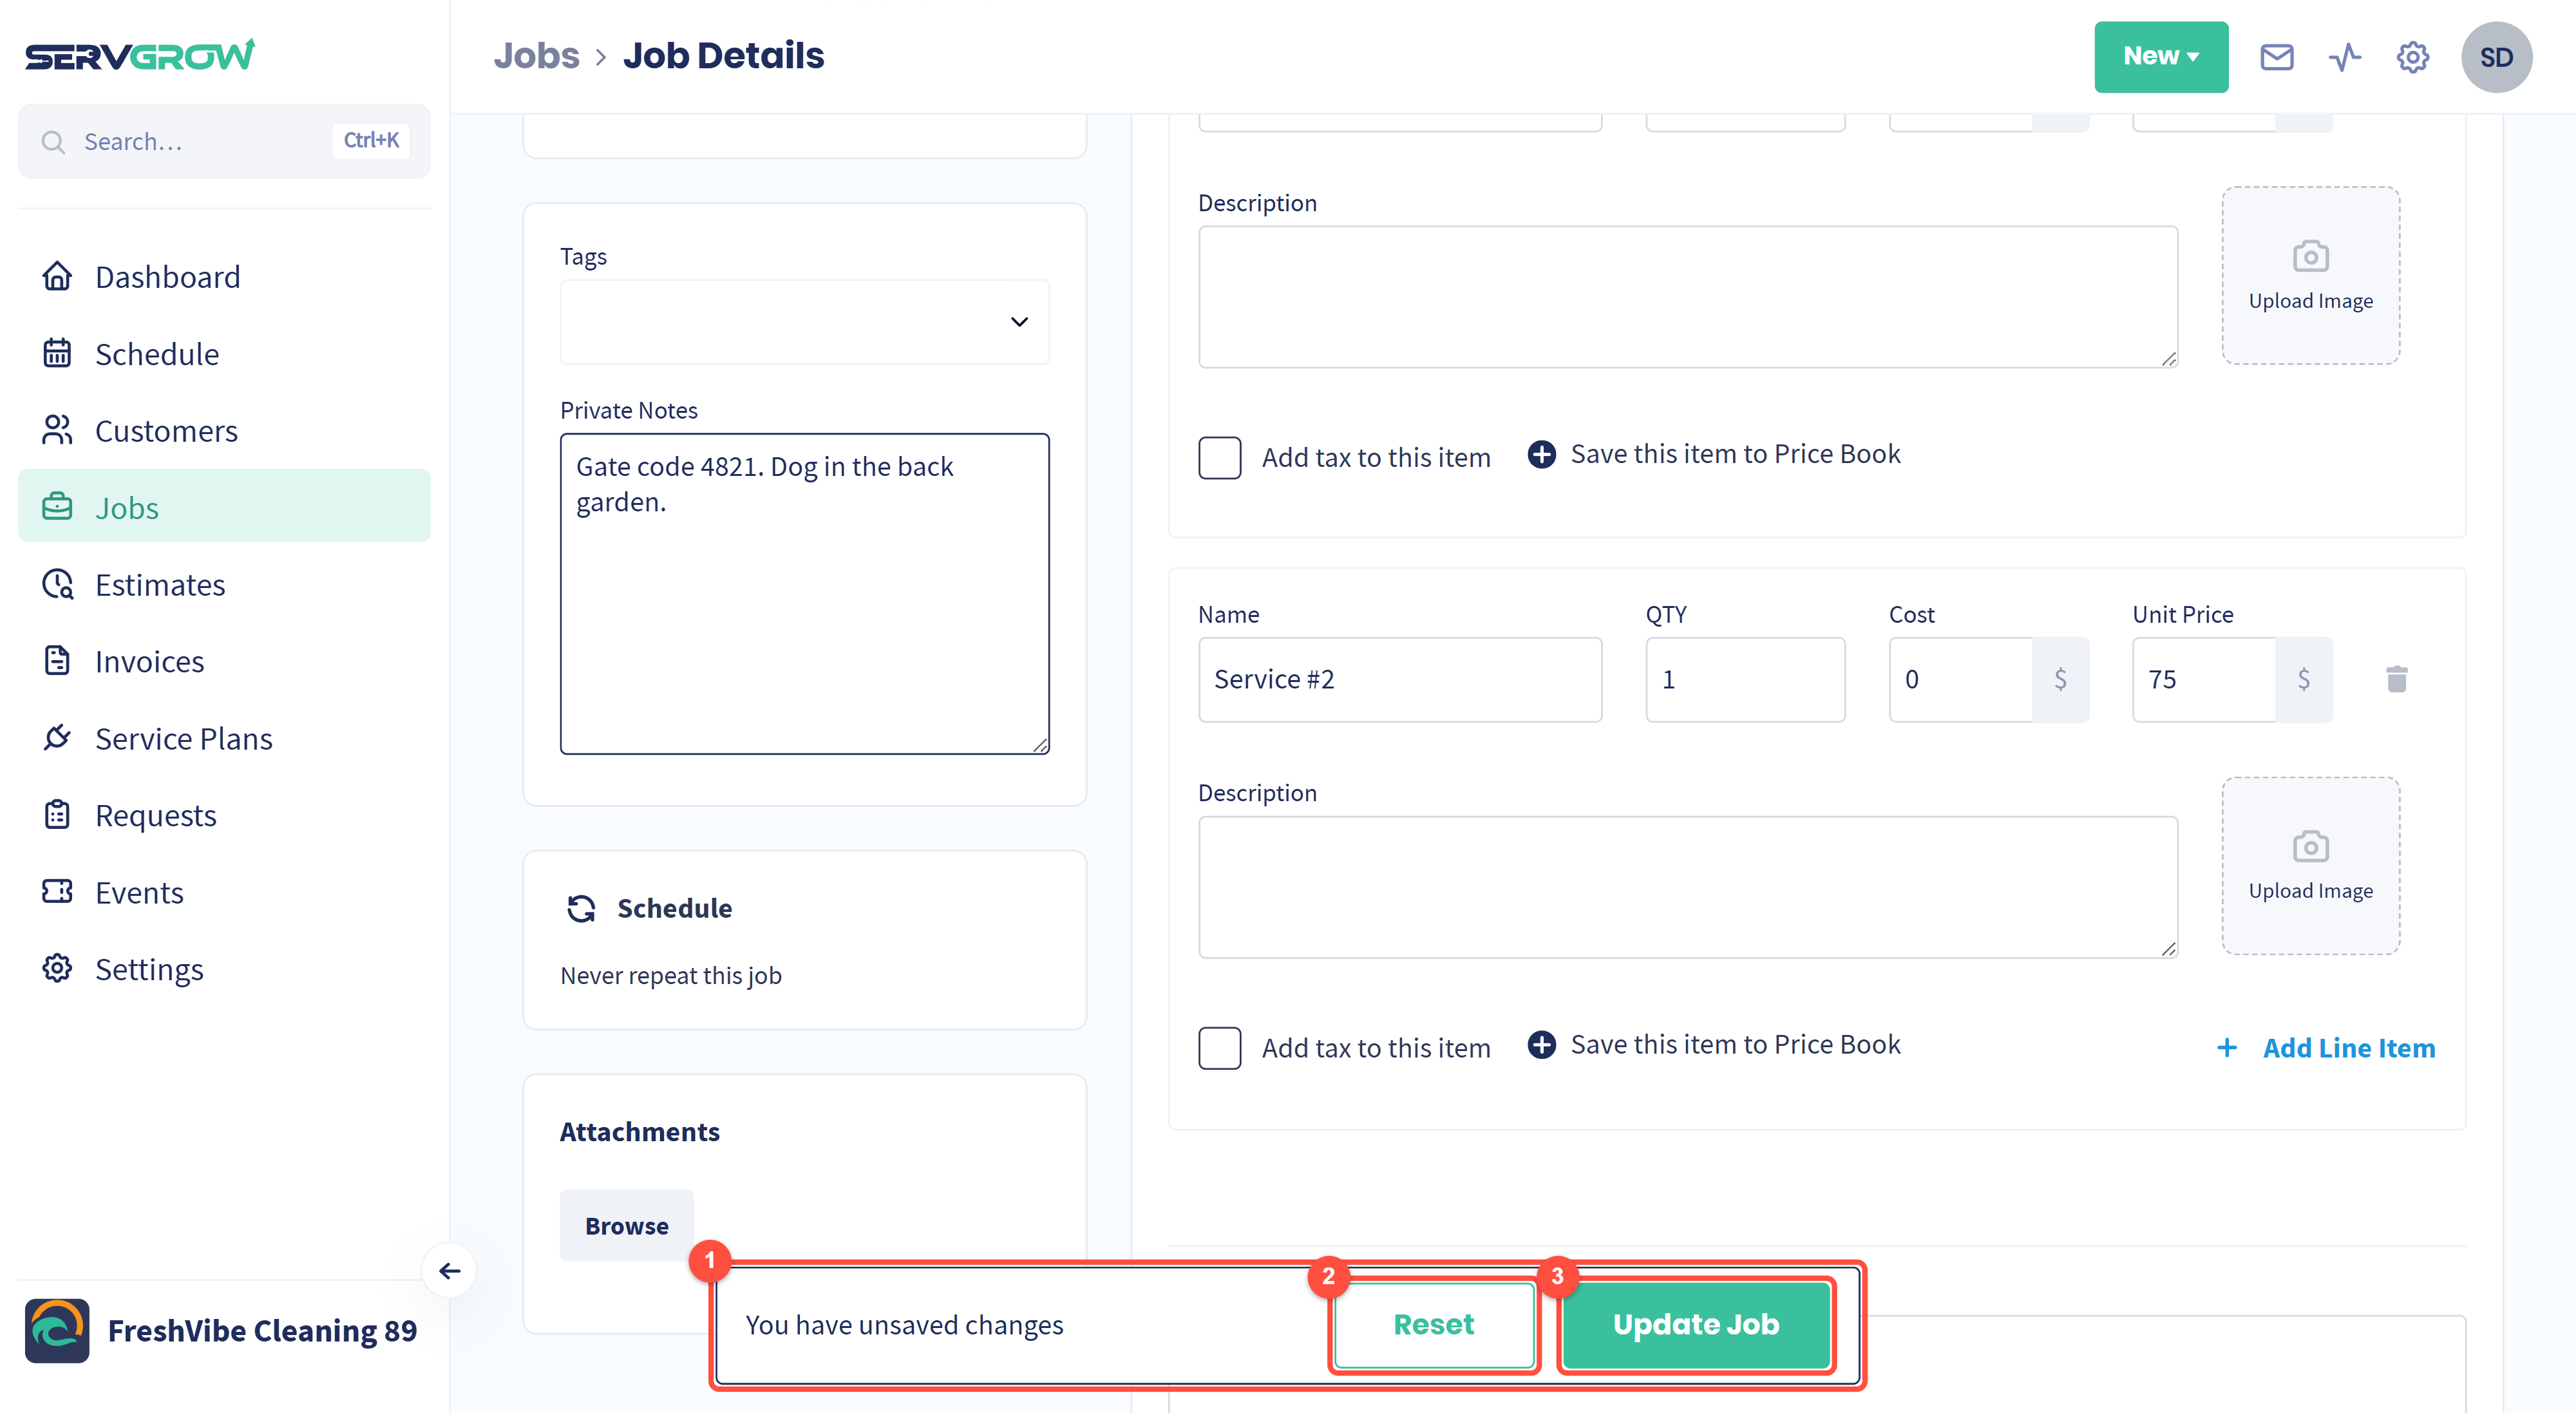
Change anything on the page and a bar appears telling you there are unsaved changes.
Reset throws your edits away.
Update Job saves them. Leave the page without it and nothing sticks.
Totals, deposits and expenses
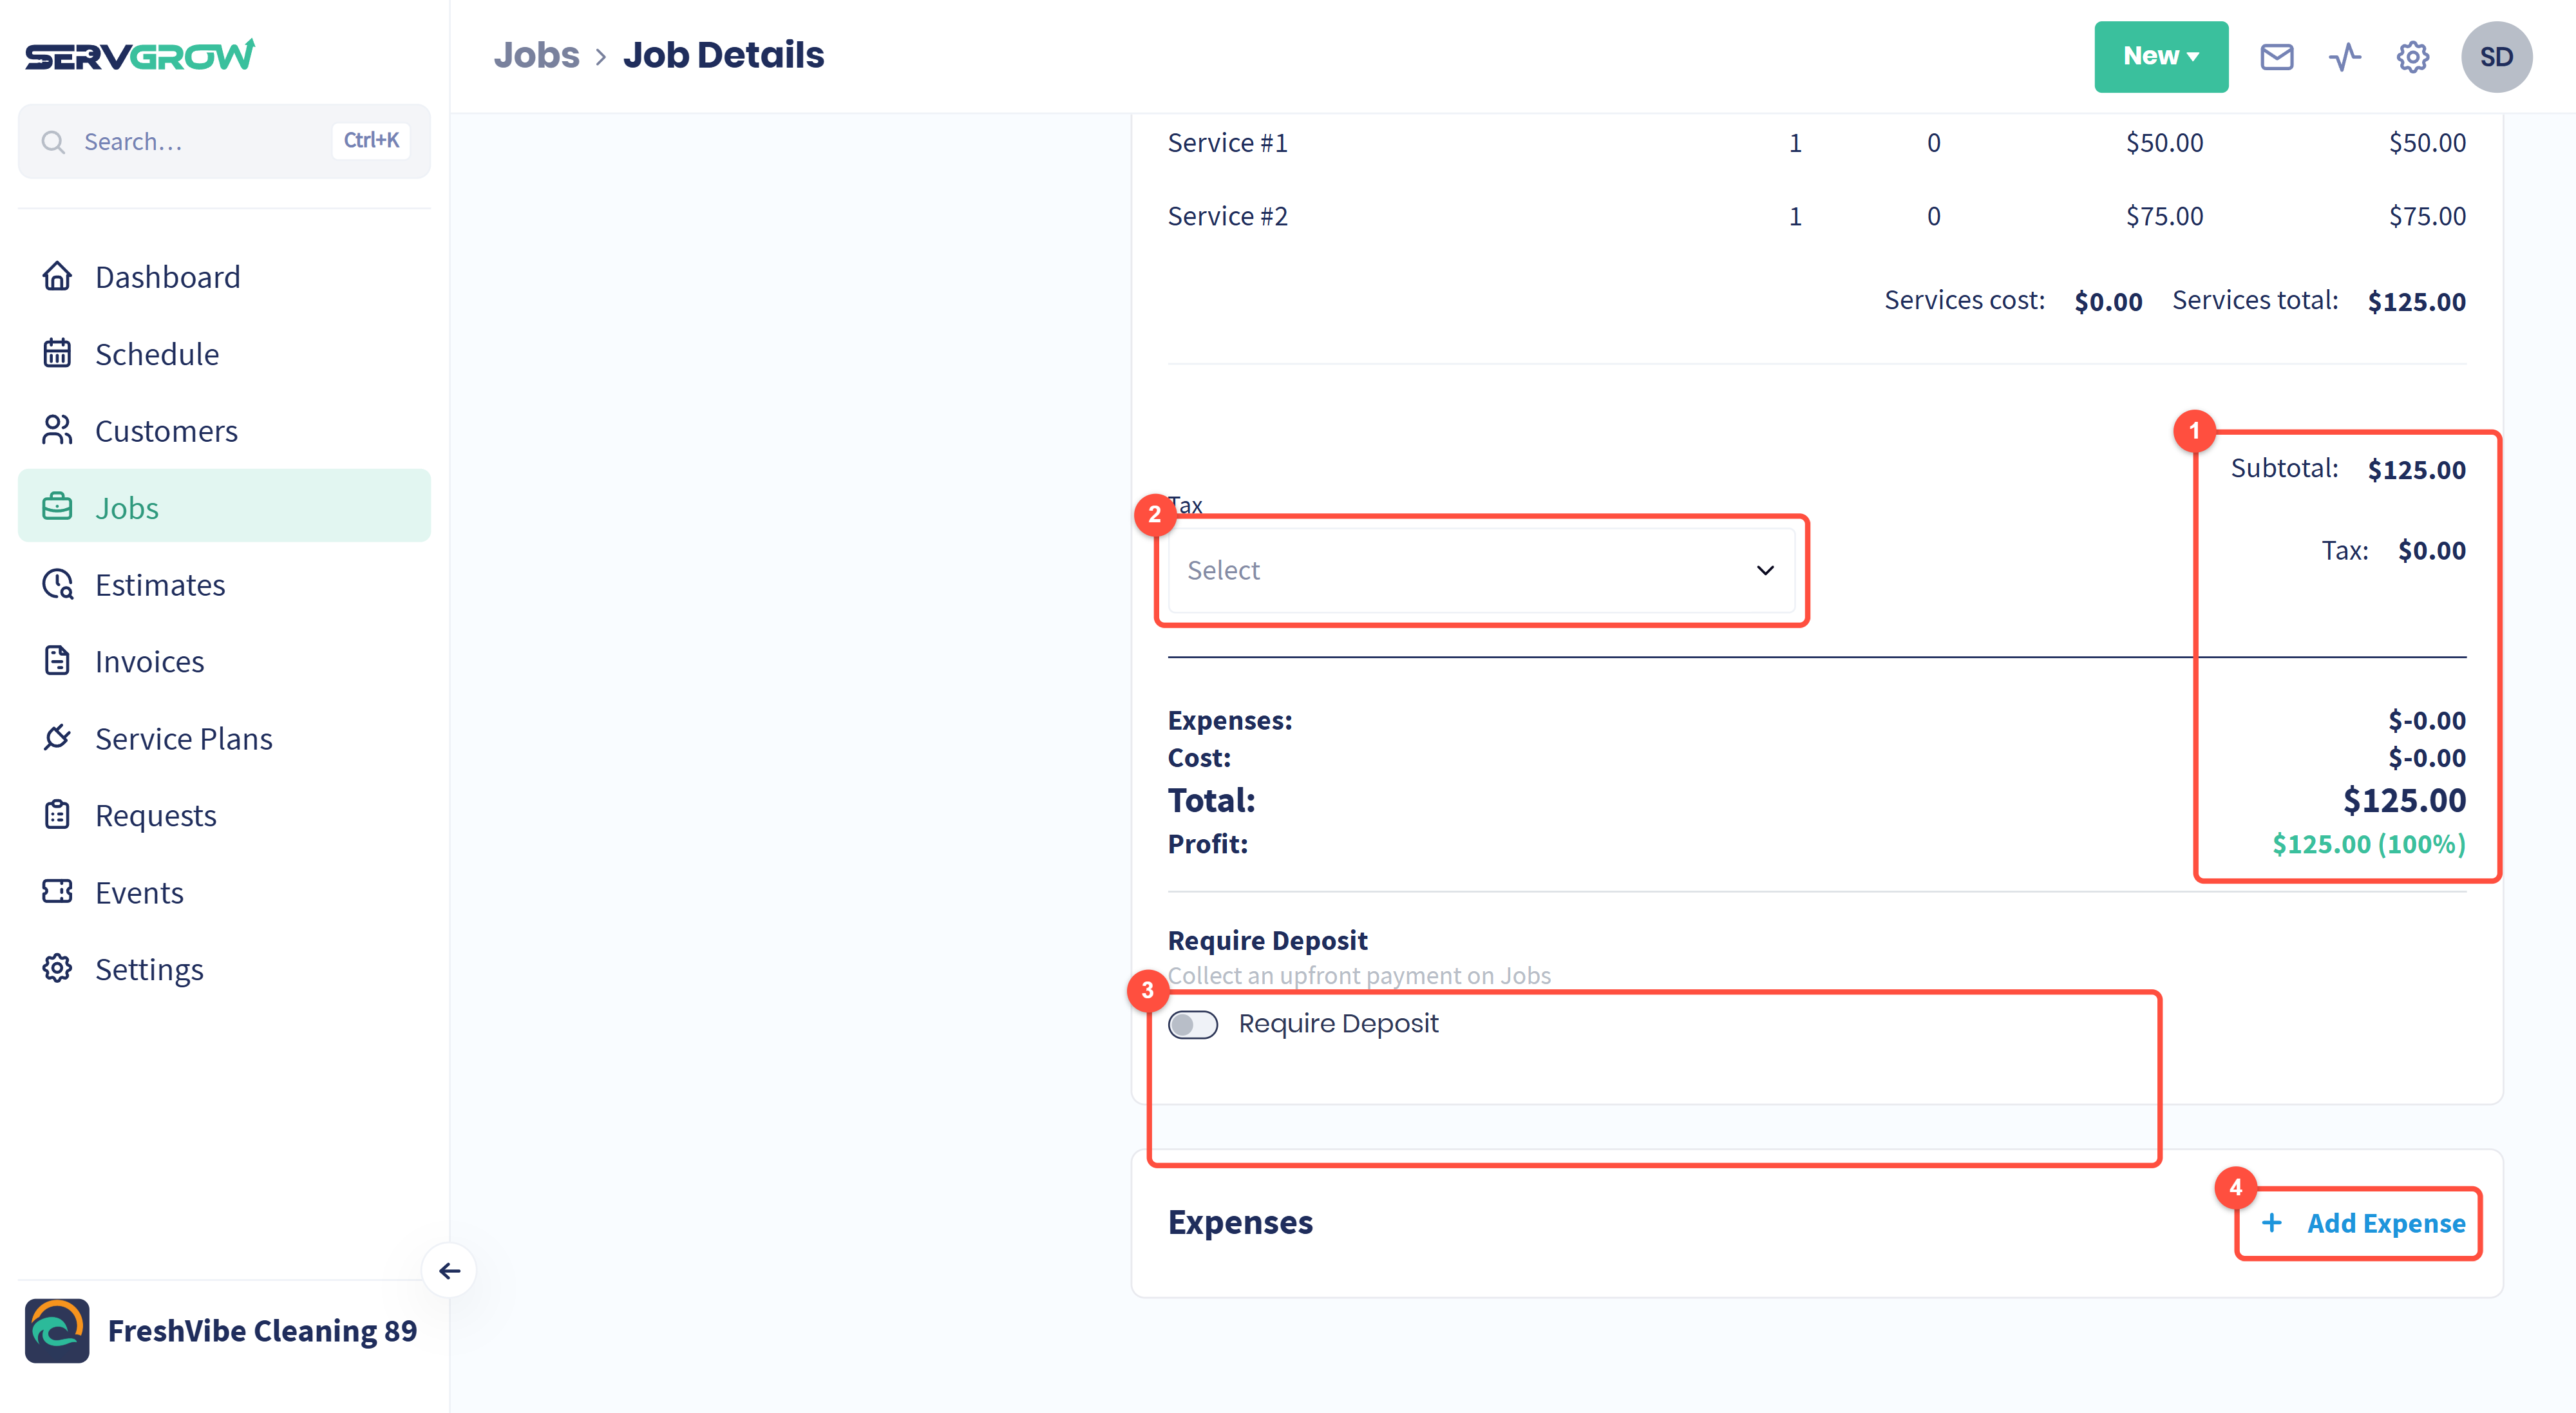
The totals: subtotal, tax, the job total, and the profit left after cost and expenses.
Tax: pick the tax rate for this job.
Require Deposit: ask for an upfront payment before the work goes ahead.
Add Expense: log what you spent on the job, for example materials or parking. It comes straight off the profit above.
The Options menu
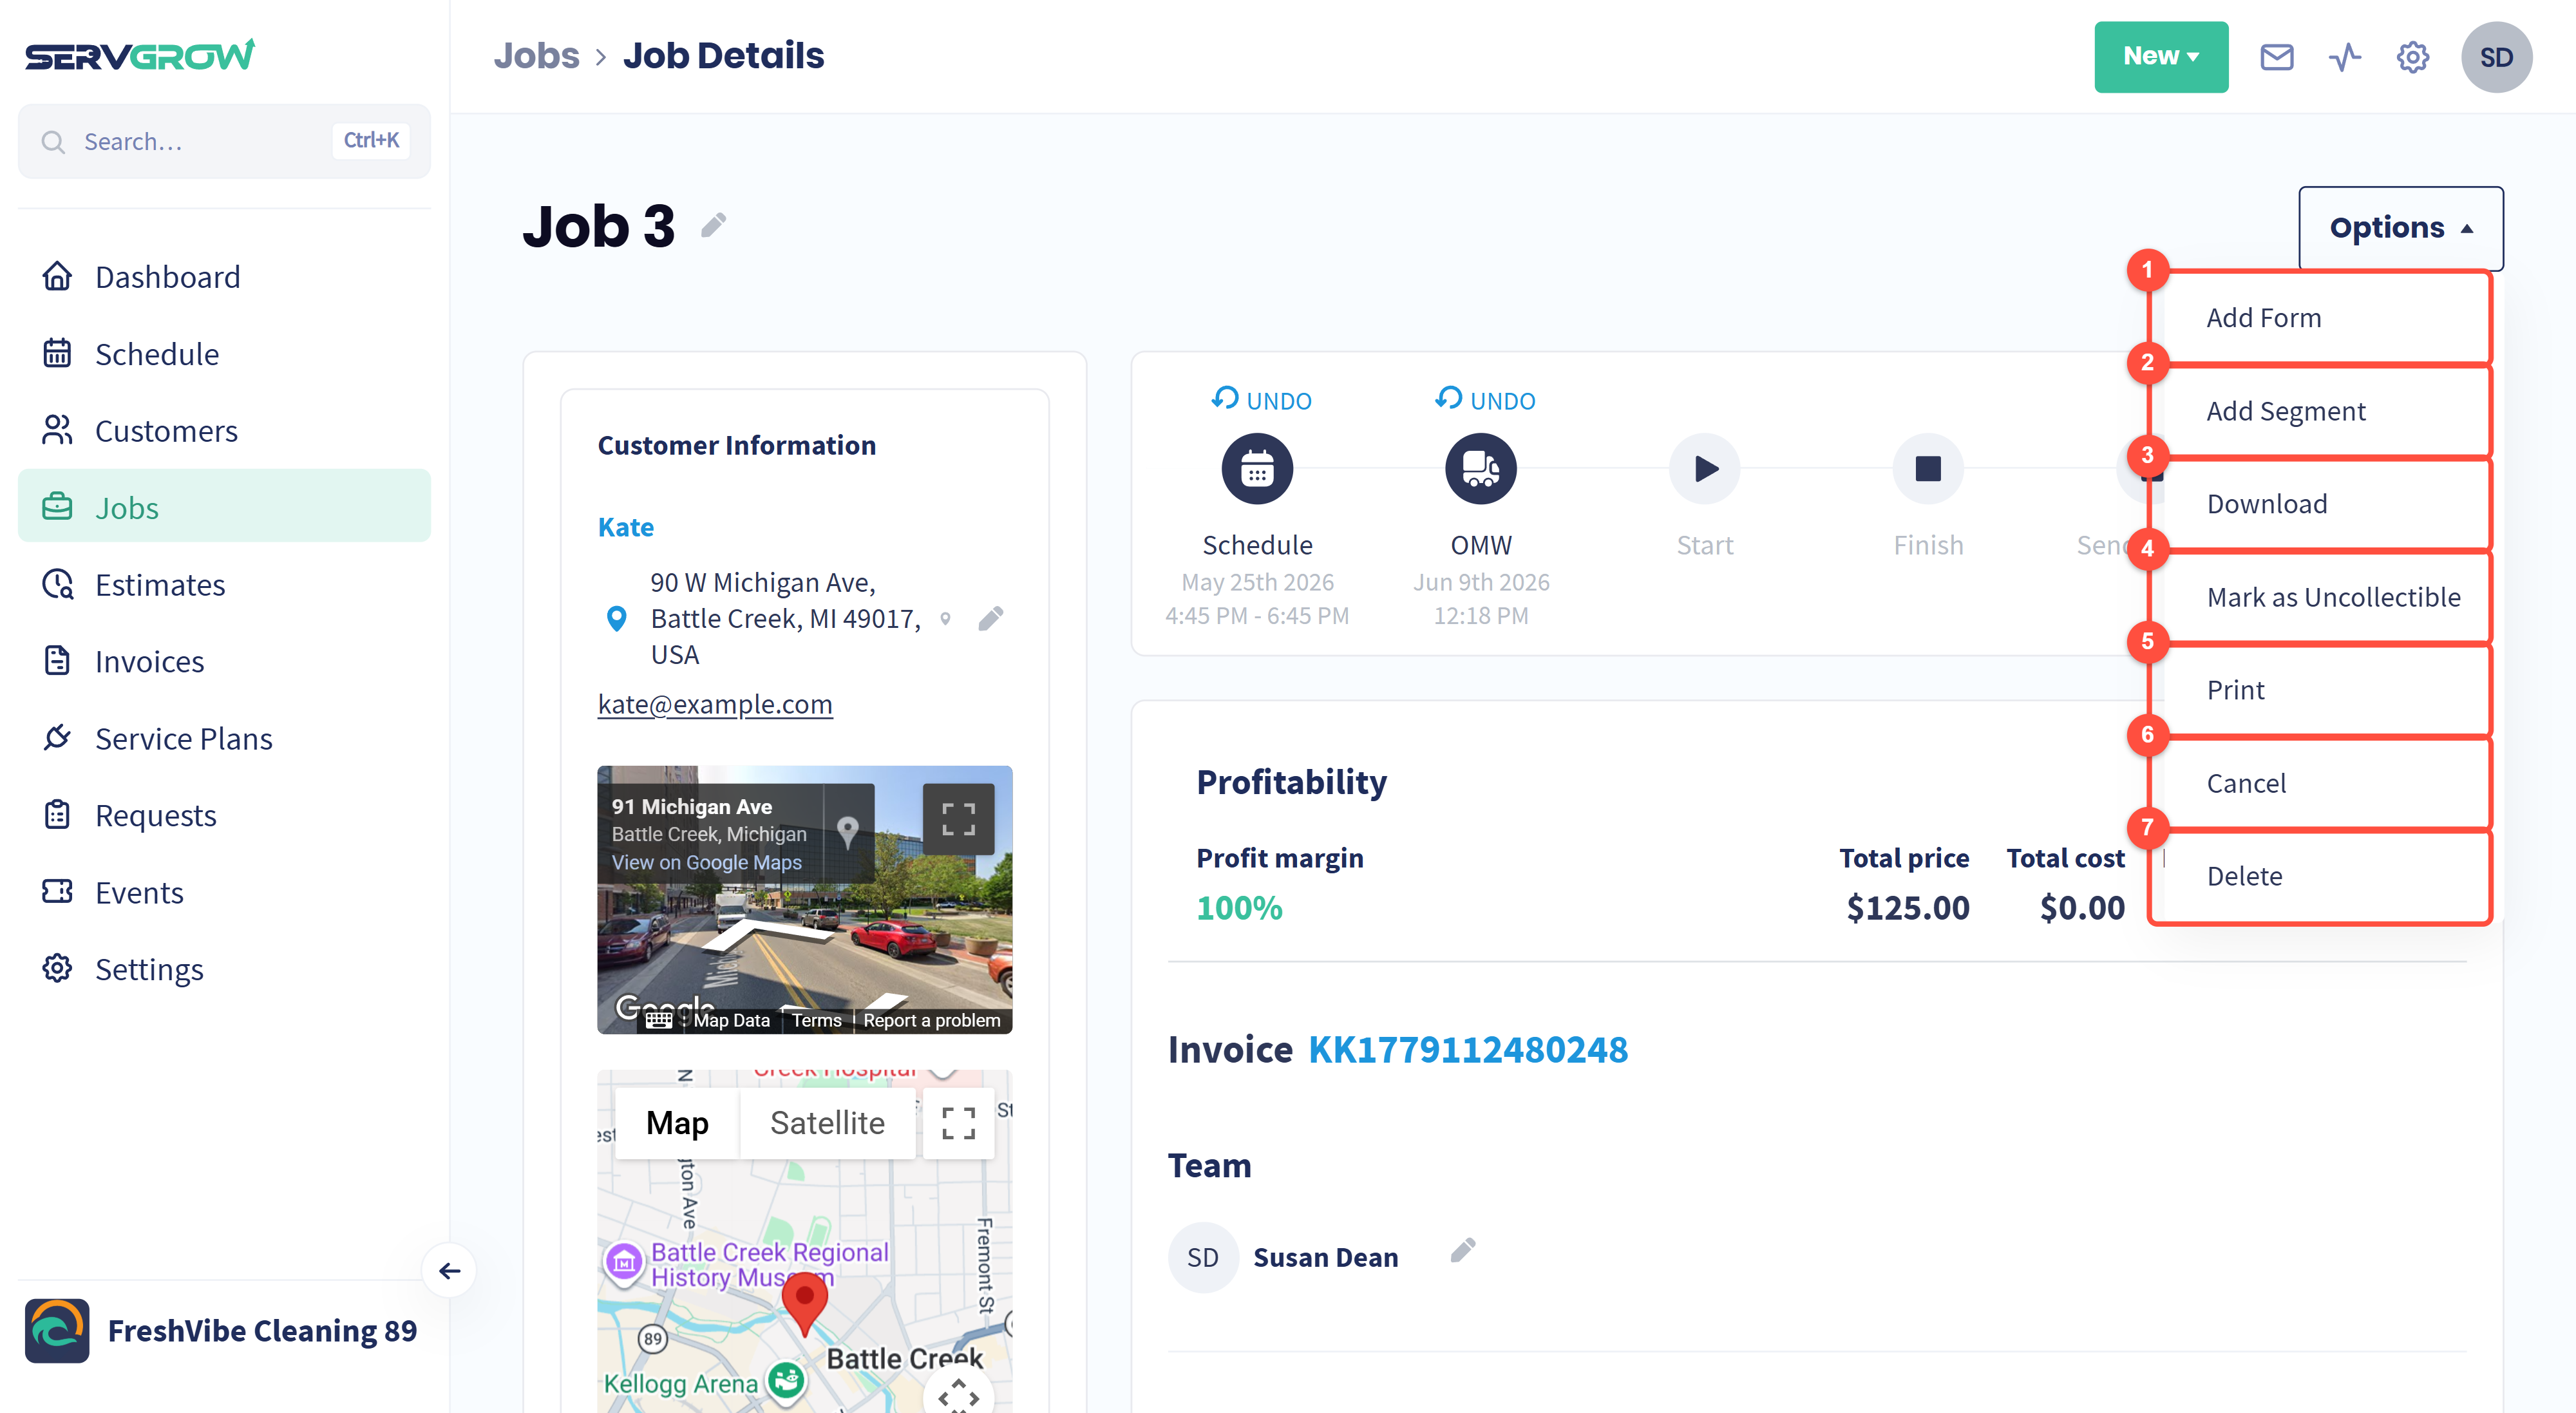
Add Form: attach a checklist, photo or sign-off sheet for the crew to fill in.
Add Segment: split the job into separate visits, for example two half-days.
Download: save the job as a file.
Mark as Uncollectible: write the money off when a customer is never going to pay.
Print: a paper copy for the van.
Cancel: call the job off but keep the record.
Delete: remove it for good, invoice included.
Tips
Mark OMW as you set off, every time. It is one tap, the customer gets a text, and it cuts the "where are you?" calls.
Put the cost in, not just the price. Profitability is only as good as the numbers you give it, and a job you thought was a winner can turn out not to be.
Private notes are for the next visit. Anything that slowed you down today goes in there so nobody learns it the hard way twice.
Watch for the unsaved changes bar. If it is showing, your edit is not saved yet.
Related articles