
Checklists on paper get lost, skipped or filled in from memory at the end of the day. When a customer says something was missed, or a new hire does a job differently from everyone else, you have no record to point to.
Custom Forms put your checklists, inspections and sign-offs right on the job. Your team ticks items off as they go, snaps before and after photos and gets the customer's signature on the spot. You can require a form before a job can be finished, send it to the customer automatically when the work is done, and share a live link with anyone who needs to see it. Every job gets done the same way, and you have proof of the work.
Where forms live
Click the gear icon, then Forms.
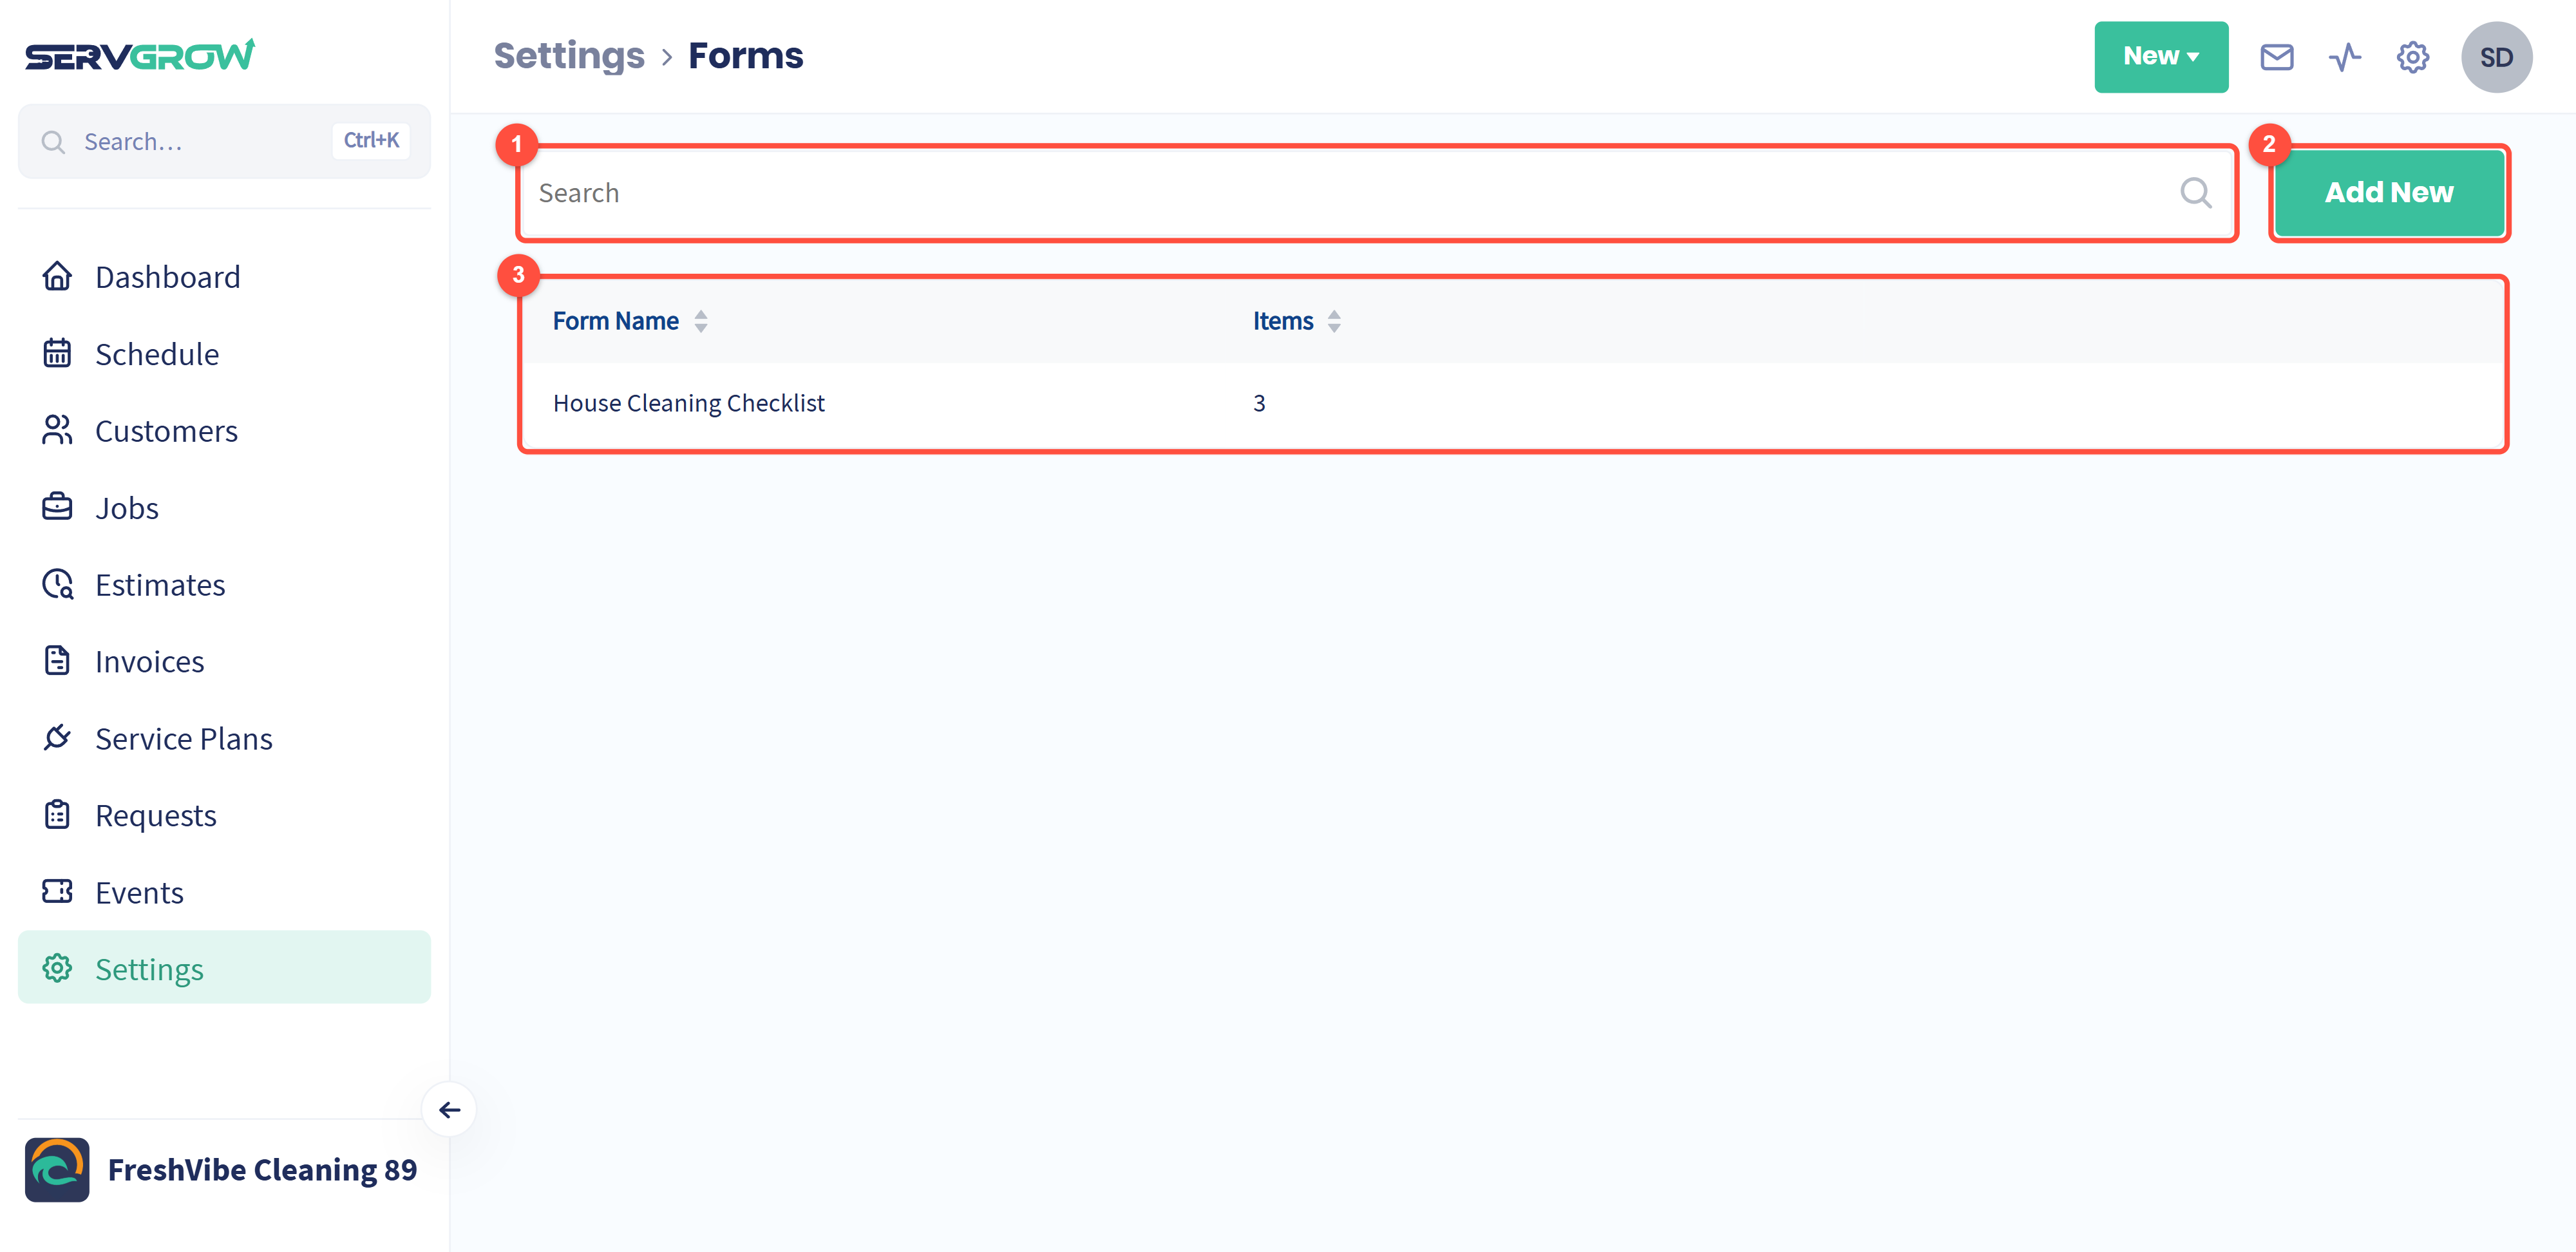
Search your forms by name.
Add New: build a new form.
Your forms.
You build forms here on the web. Your team can fill them in on the web or in the mobile app. You can make as many forms as you like and attach more than one to the same job, estimate or visit.
Build a form
Click Add New.
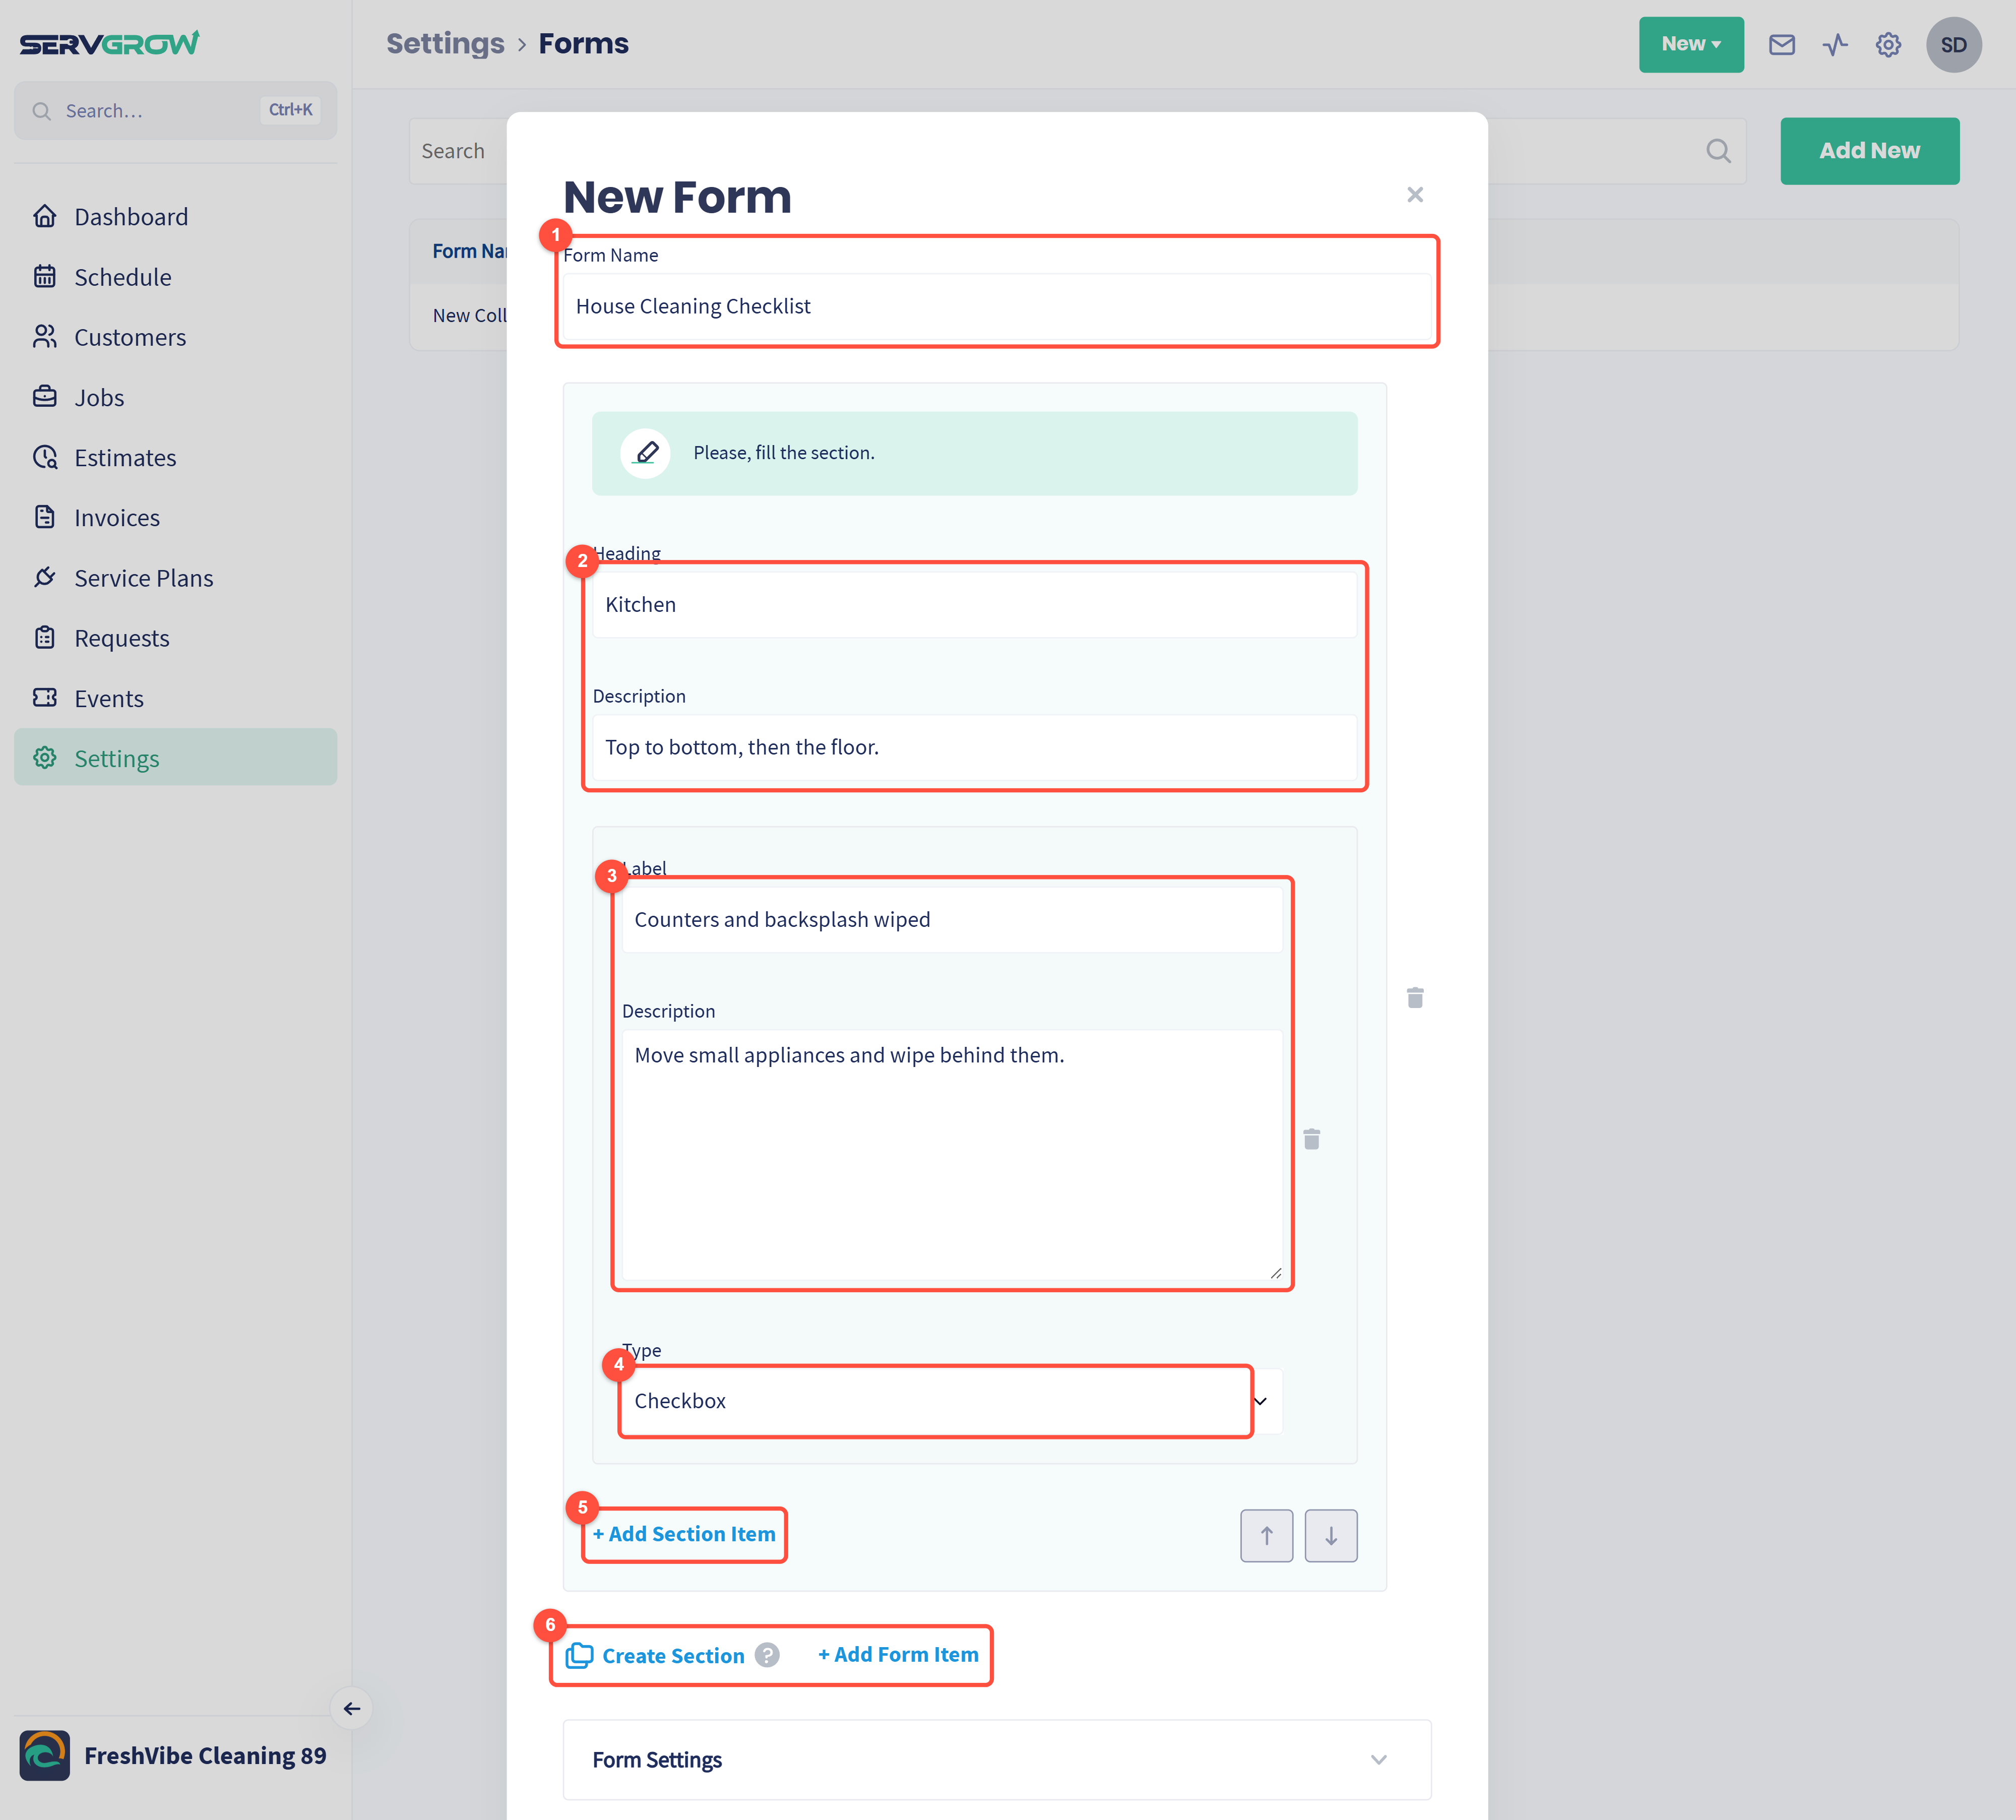
Form Name: name it after the work, such as House Cleaning Checklist or Final Walkthrough.
A section: click Create Section to group items under a Heading, such as Kitchen or Bathrooms, with an optional Description for instructions.
Each item has a Label (the task or question) and an optional Description for extra direction.
Type: how the item is answered (see below).
+ Add Section Item adds another item to the same section.
Create Section starts a new section. + Add Form Item adds an item that is not in a section.
Use the arrows to move a section up or down, and the bin icon to delete an item or a section.
Item types

Pick the type that fits each item:
Checkbox: tick it off when it is done.
Small text (up to 60 characters): short answers, such as a gate code or meter reading.
Image(s): photos, up to 3 per item. Great for before and after shots.
Flag: mark the item Pass or Fail.
Condition: rate it Good, Fair or Poor.
Signature: the customer signs on screen. The description shows above the signature, so use it for the wording they are agreeing to.
Yes/No: a simple yes or no.
Long text (more than 60 characters): notes that can run to several paragraphs.
Multiple choice: add your own options with + Add Choice.
Form settings
Open Form Settings at the bottom of the form.
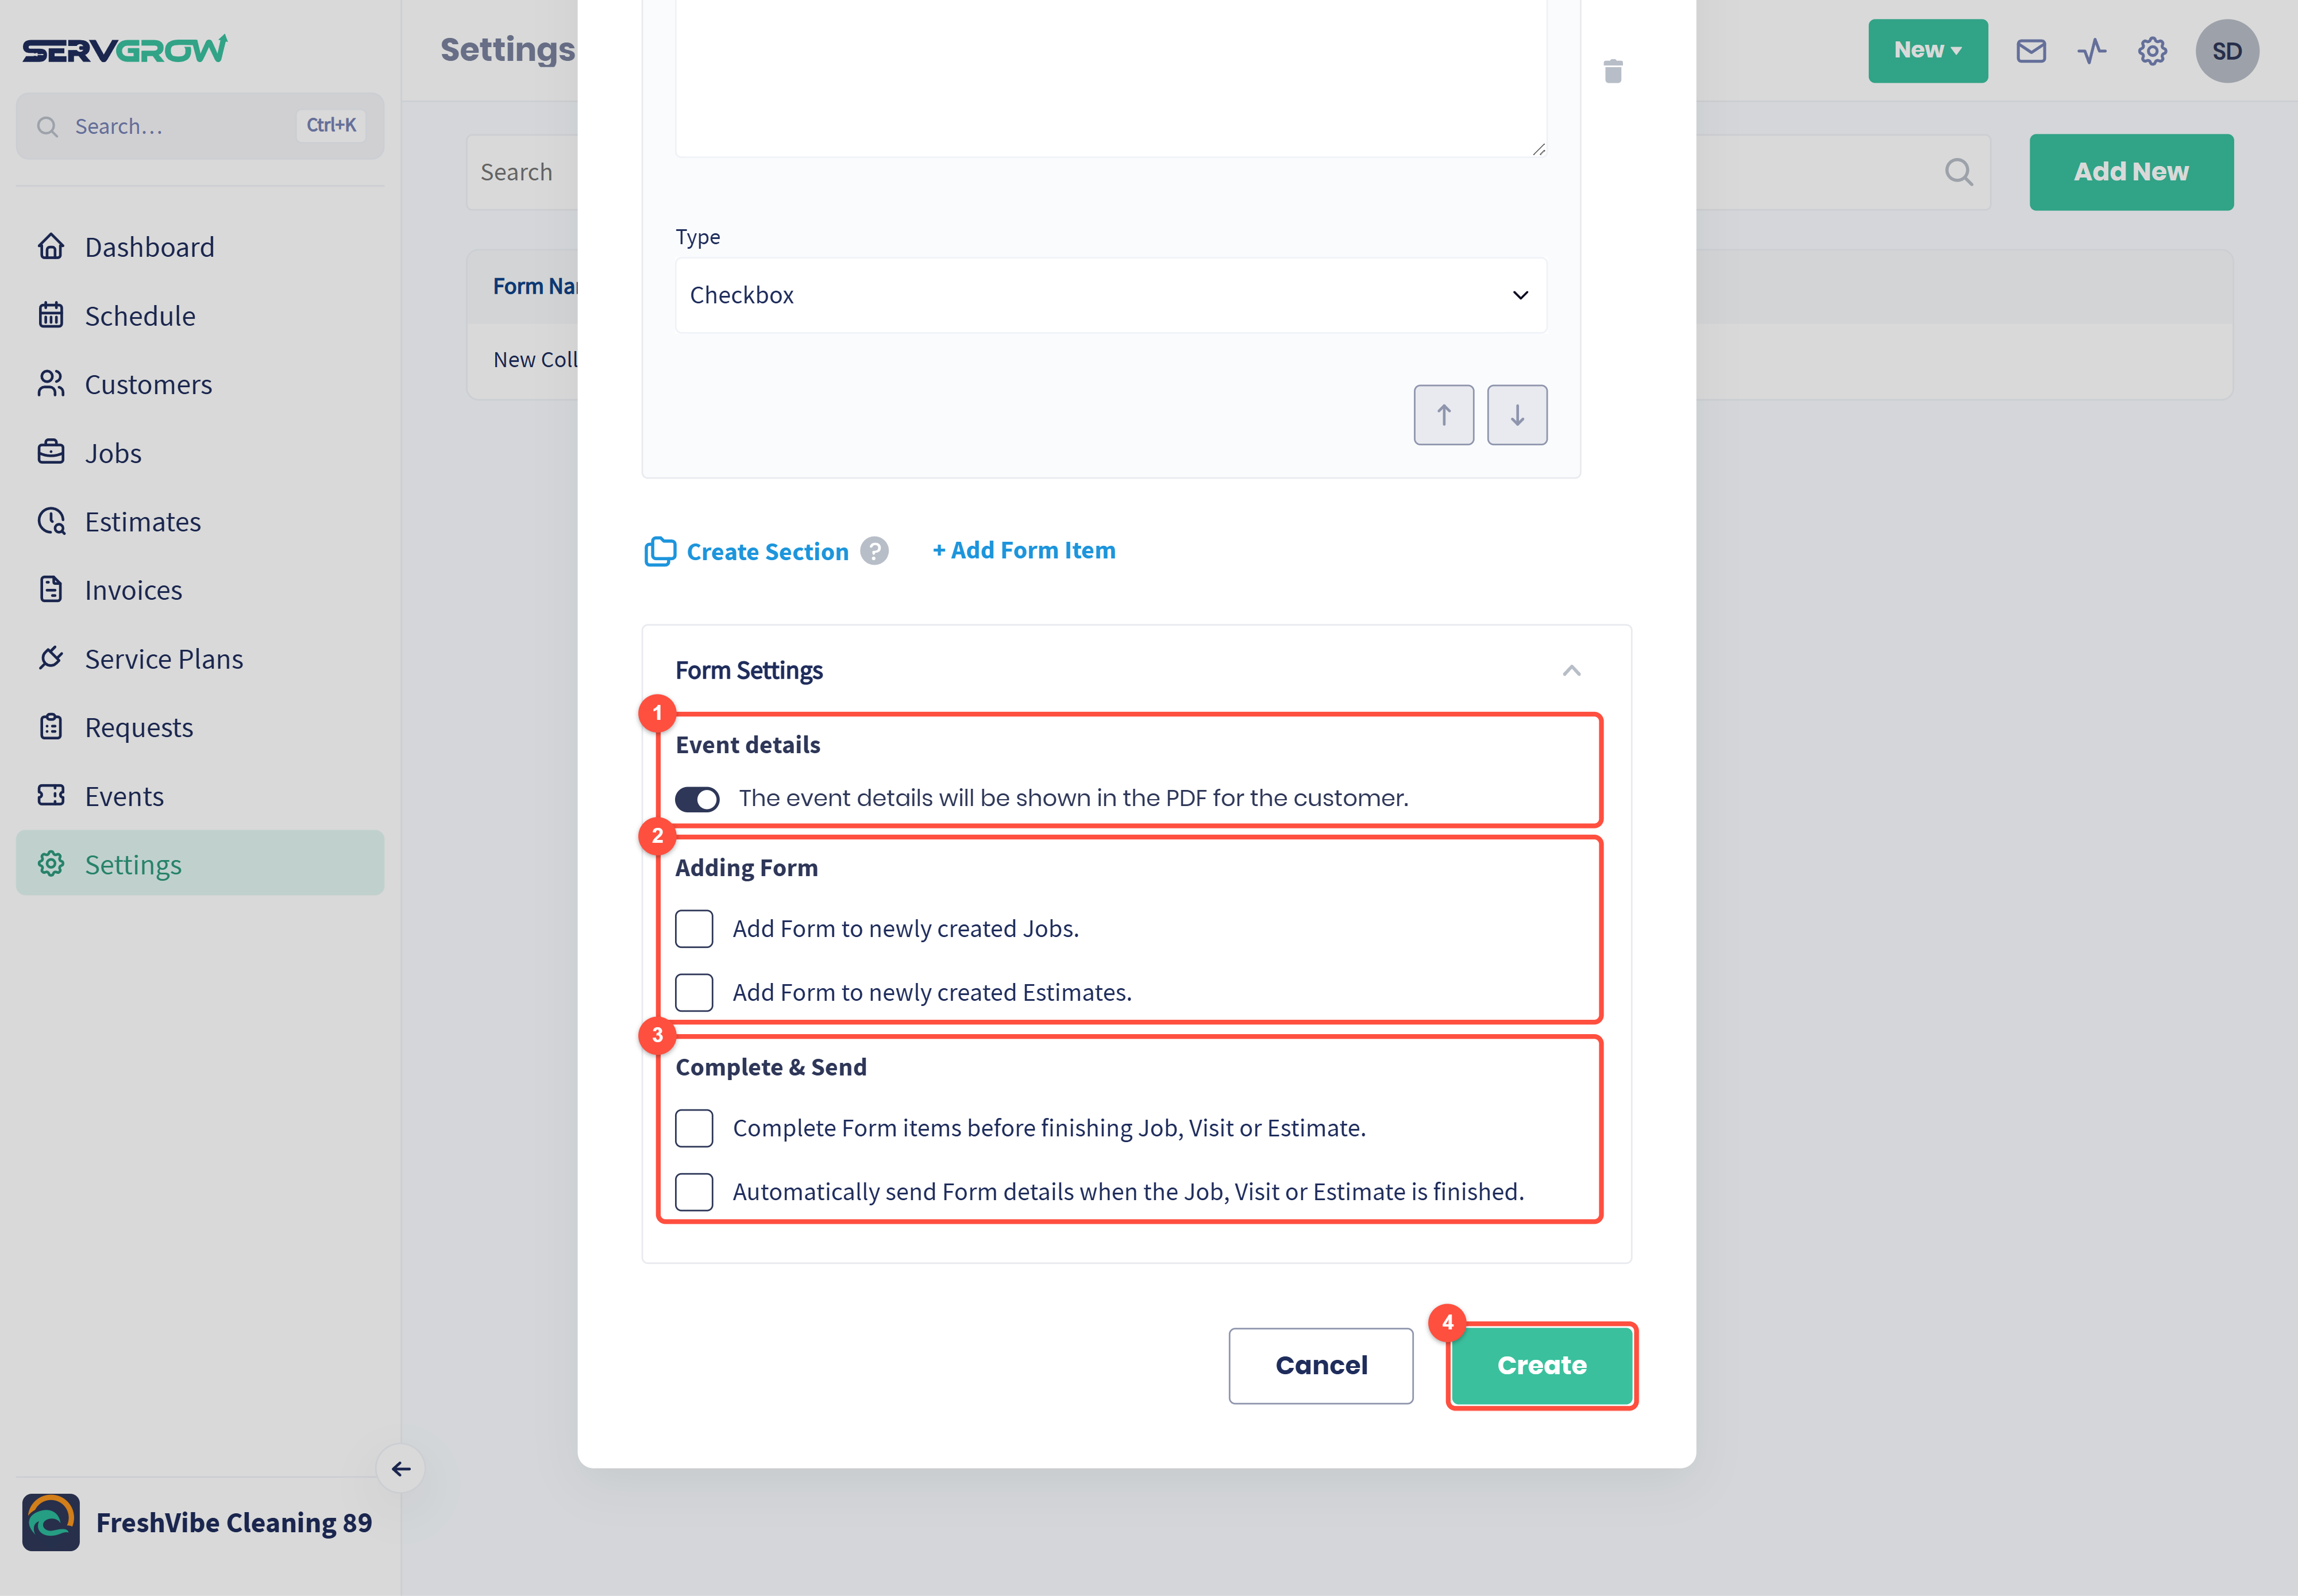
Event details: when it is on, the job details are shown on the PDF the customer gets.
Adding Form: add this form to every new job, every new estimate, or both, so nobody has to remember to attach it.
Complete & Send: require every item to be completed before the job, visit or estimate can be finished, and send the form to the customer automatically once it is finished.
Click Create.
Add a form to a job
Forms added automatically in Form Settings are already there. To add one by hand, open the job, estimate or visit and find Forms on the left, under the map.
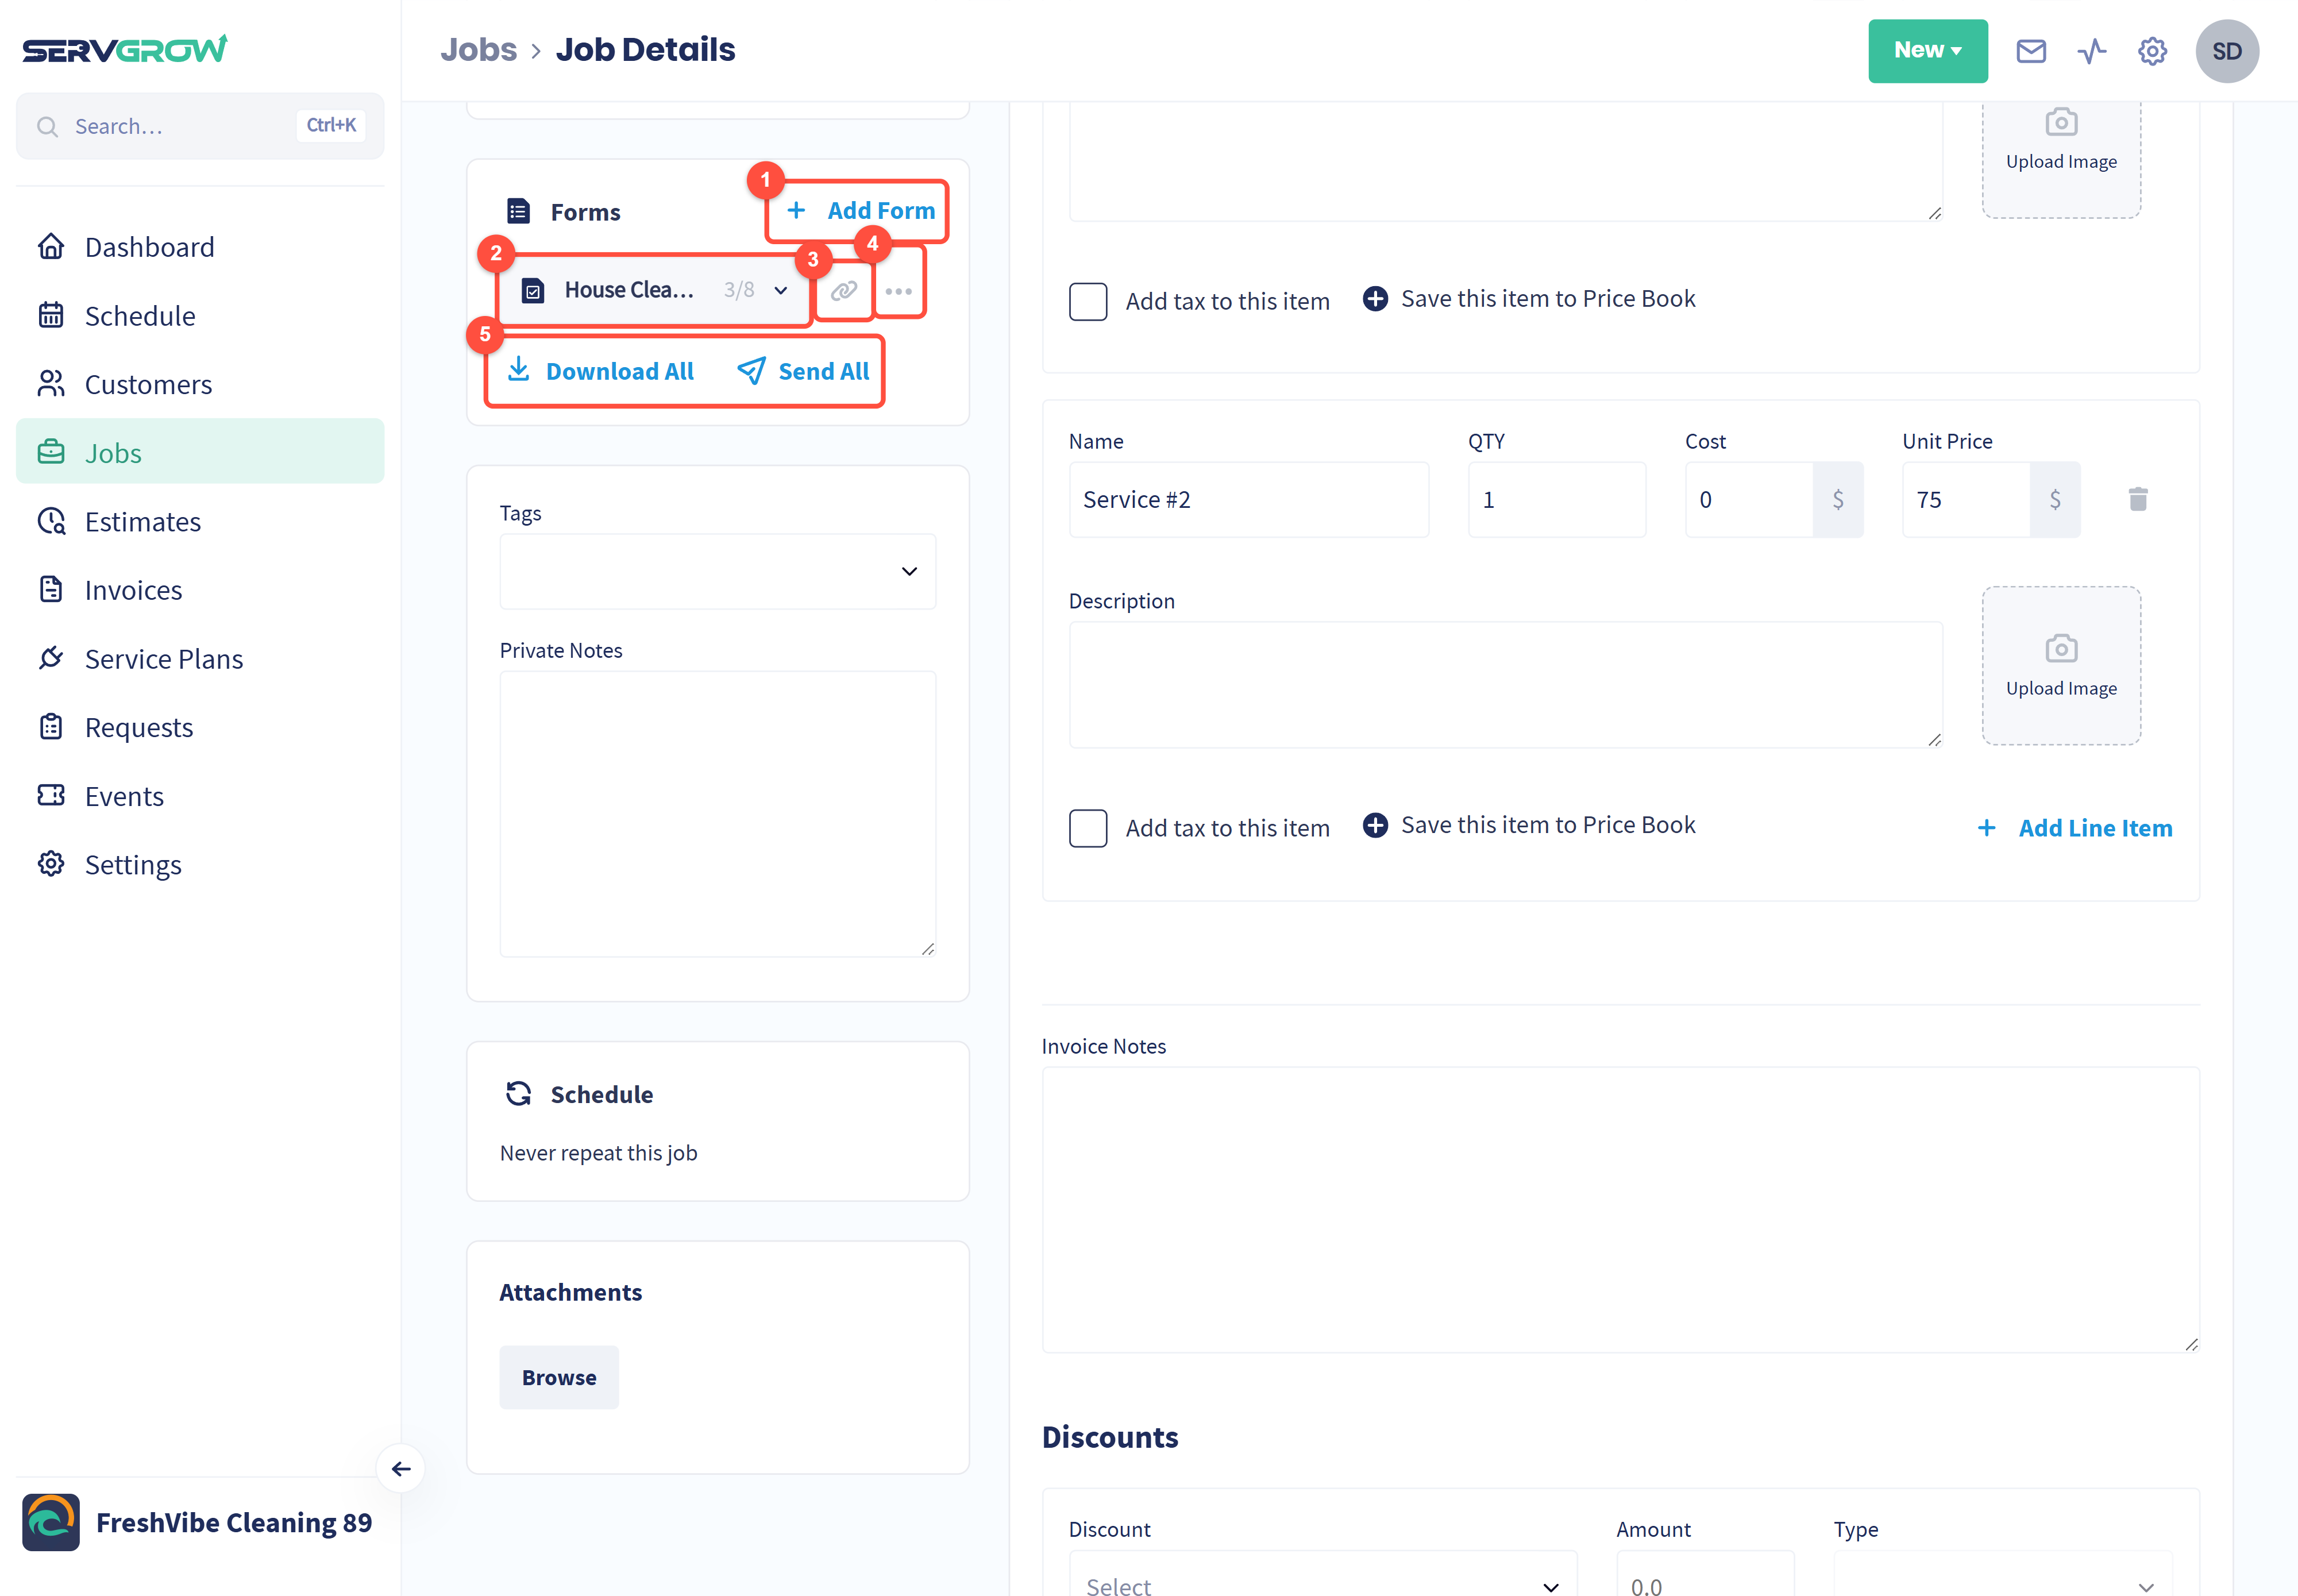
Add Form: pick which form to attach. You can also use Options, then Add Form, at the top of the job.
Each attached form, with how many items are done so far, such as 3/8. Click it to fill it in.
The link icon copies a link to the form that you can share with your team or the customer.
The ... menu: Download the form, Send it by email, or Remove it from the job.
Download All and Send All do the same for every form on the job at once.
Fill in a form
Click the form to open it. Everything saves to the job when you click Done.
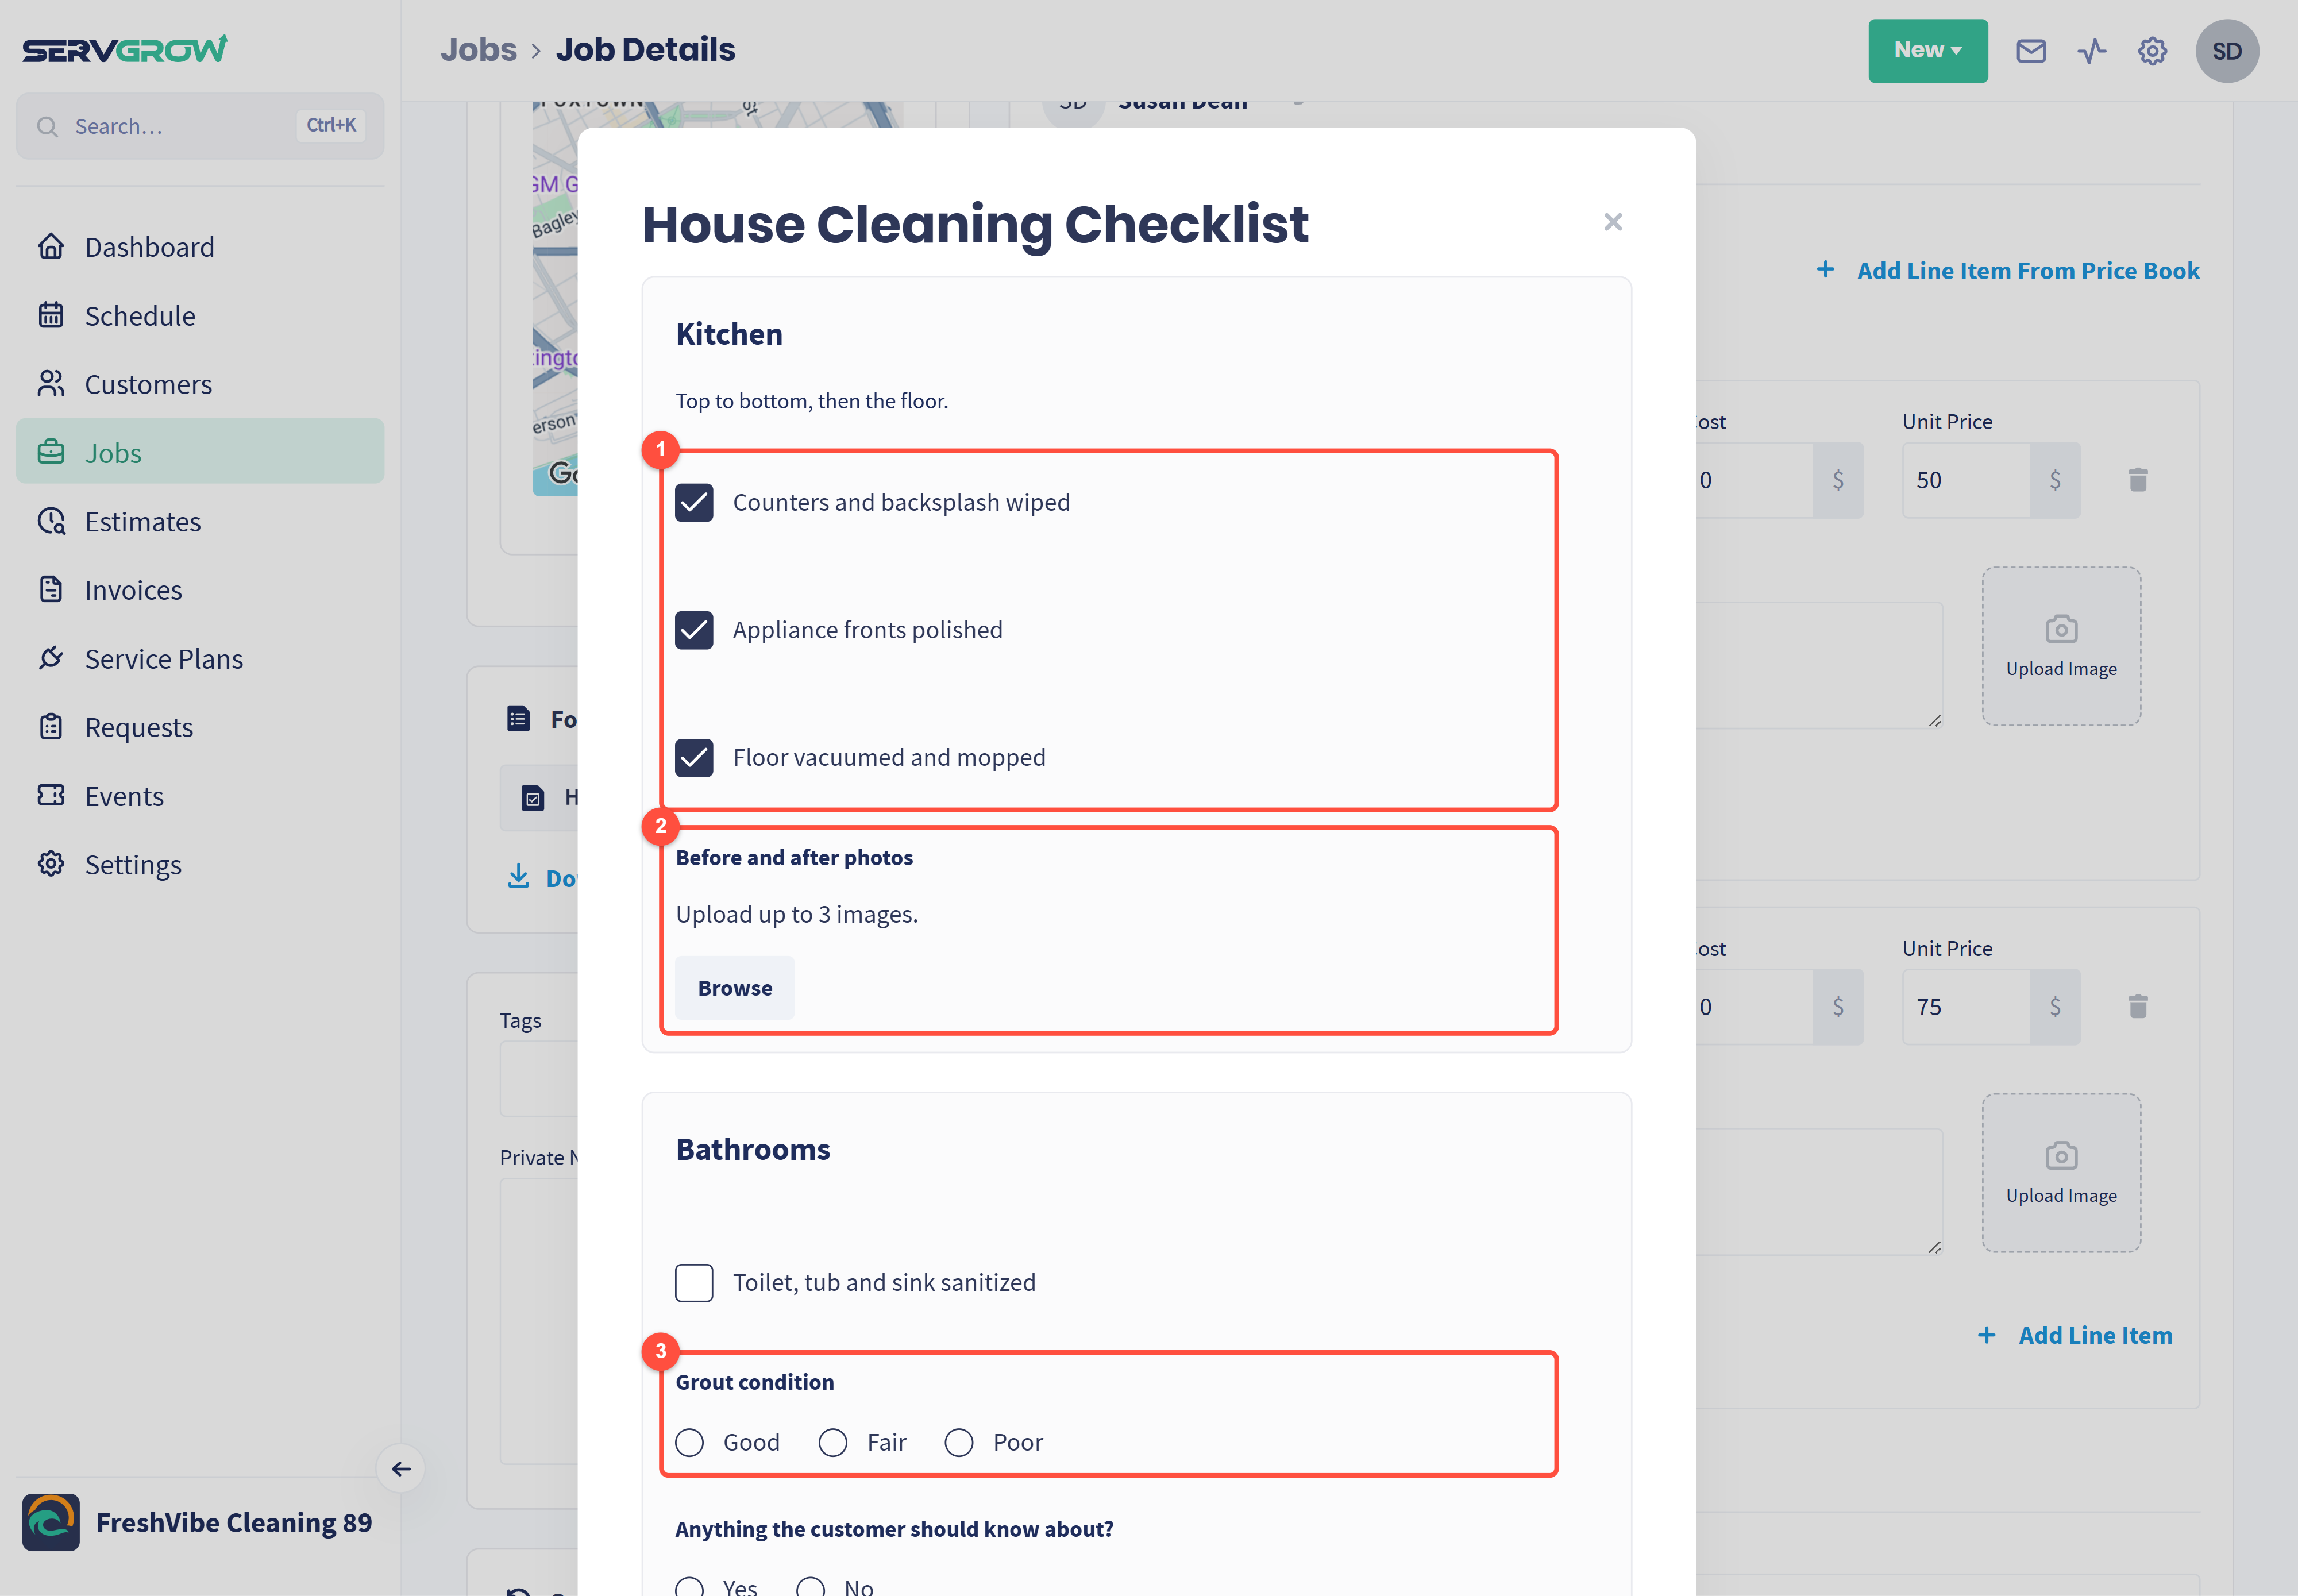
Tick items off as they are done.
Click Browse to add photos, up to 3 per item.
Pick an answer, such as Good, Fair or Poor.
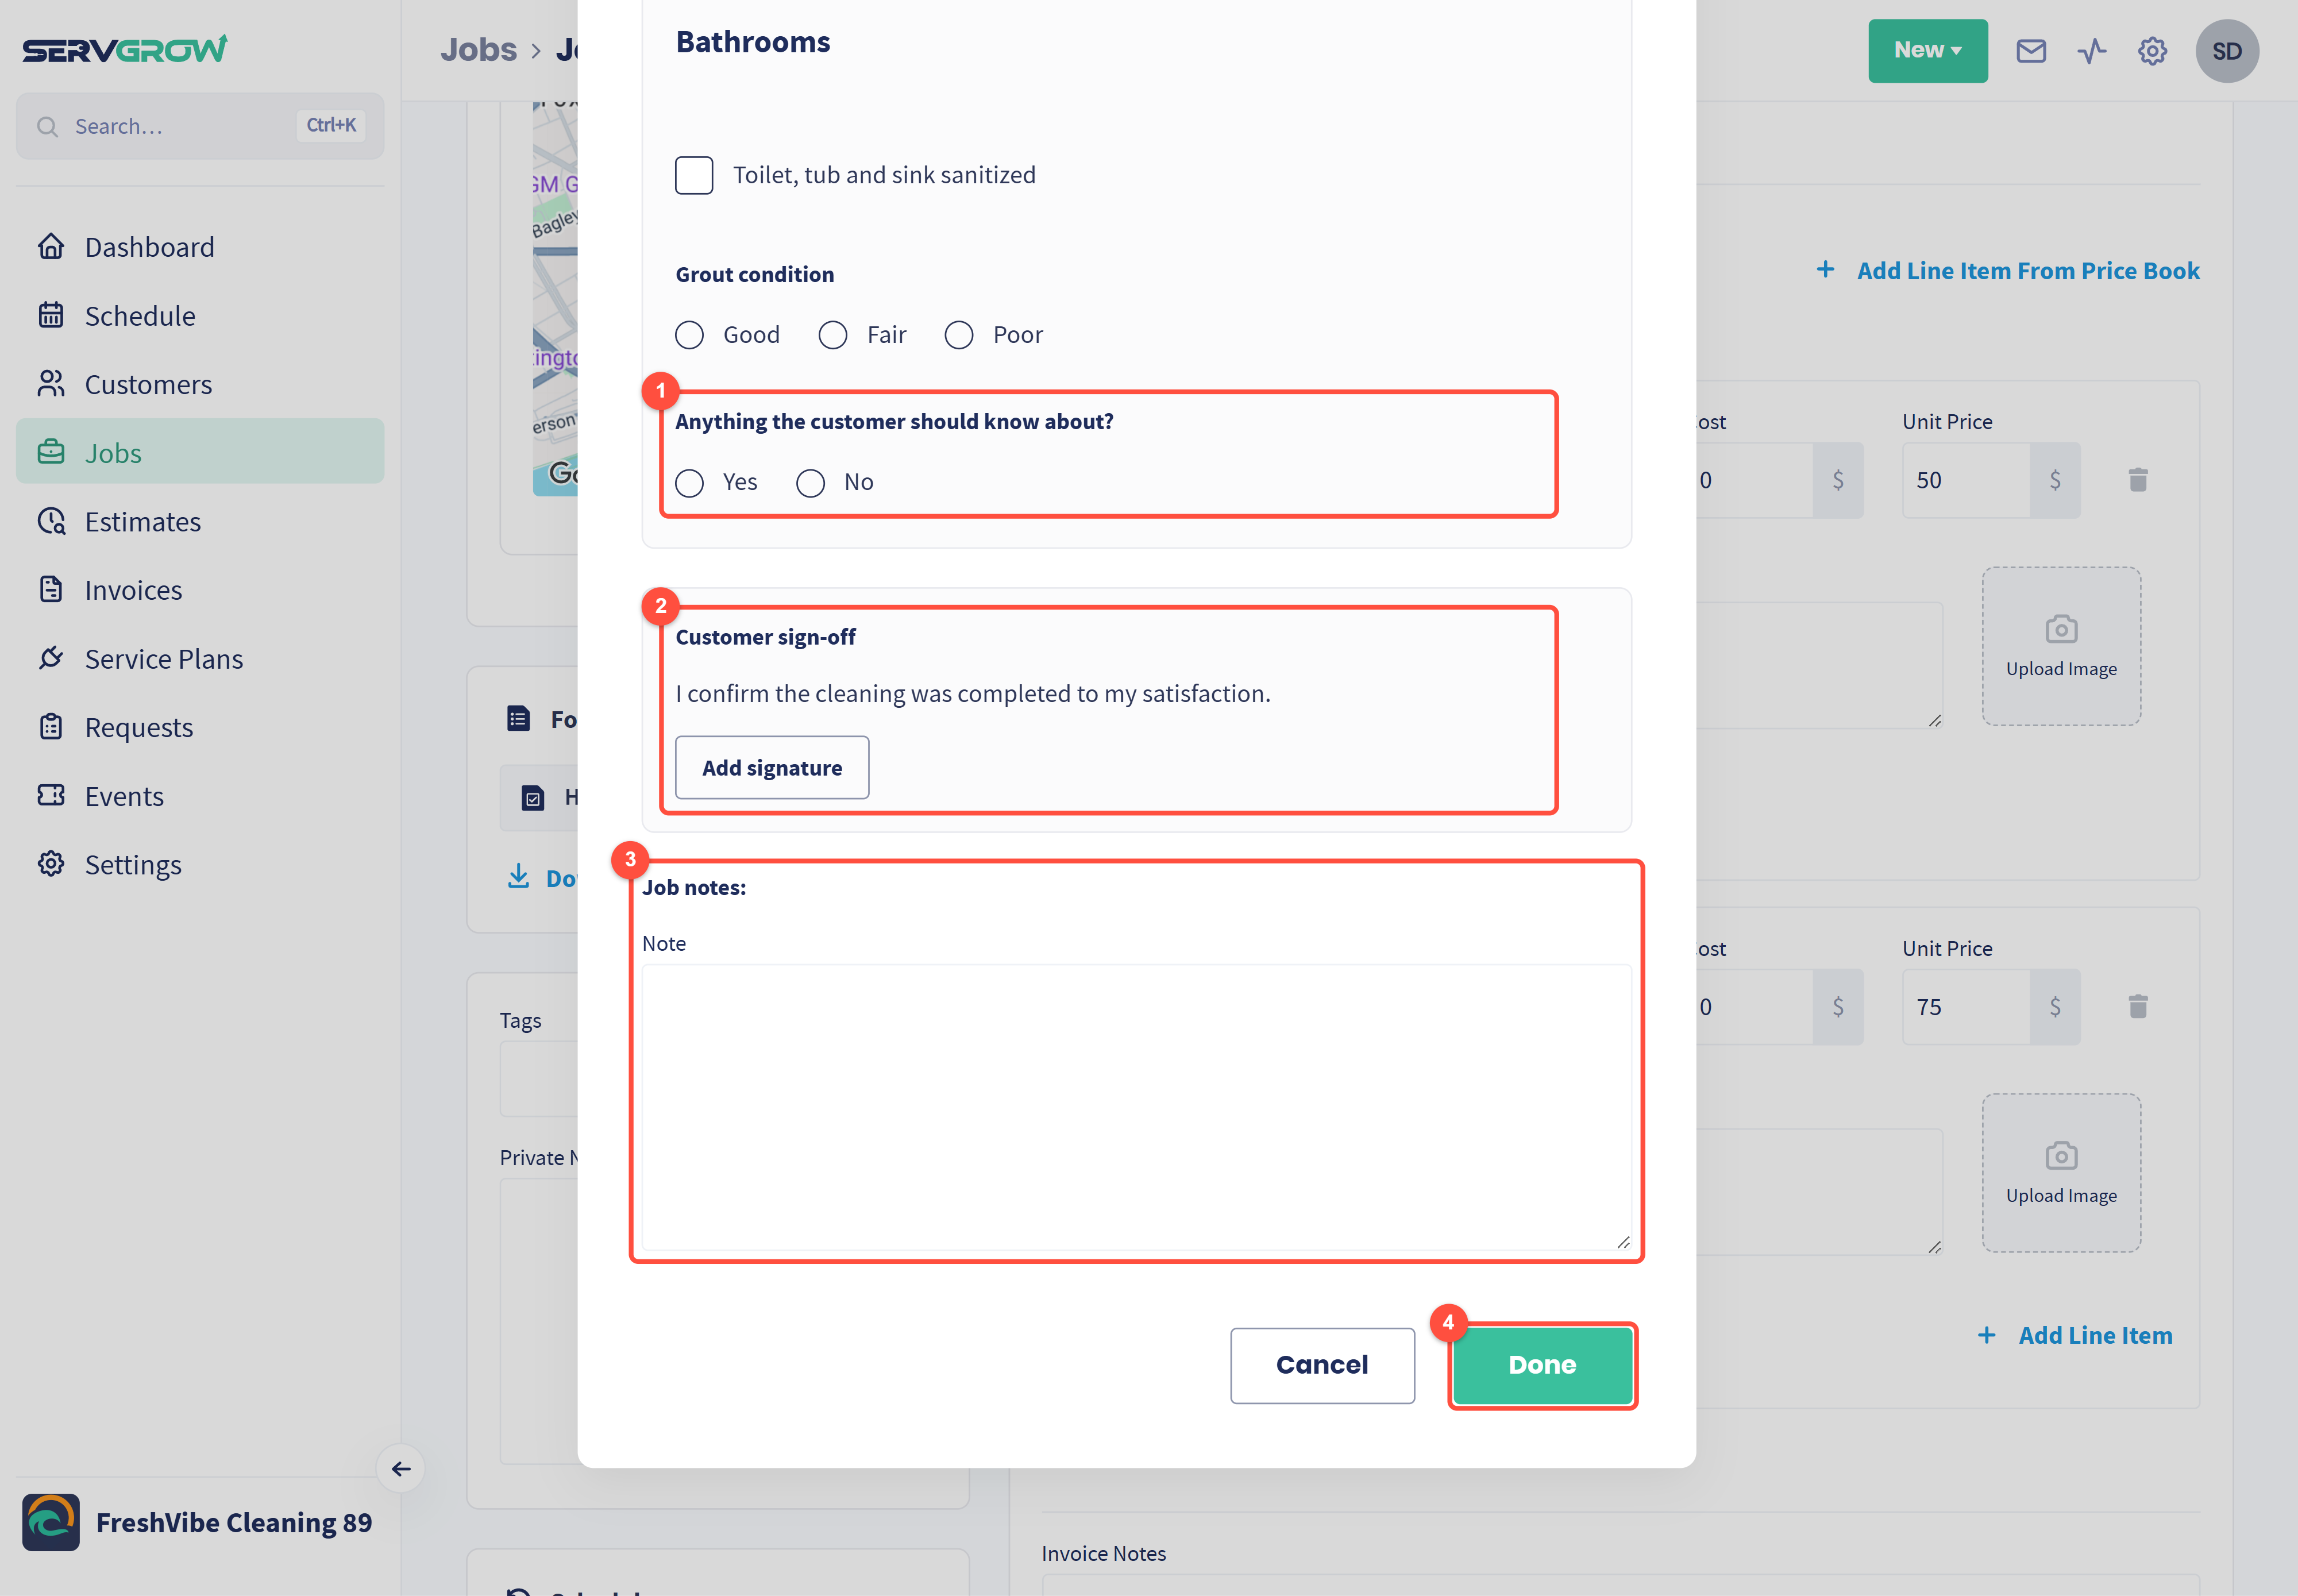
Answer Yes/No questions.
Click Add signature and hand the device to the customer to sign.
Job notes: anything else worth recording about the visit.
Click Done.
Send or share a form
Click Send All on the job, or Send in a form's ... menu.
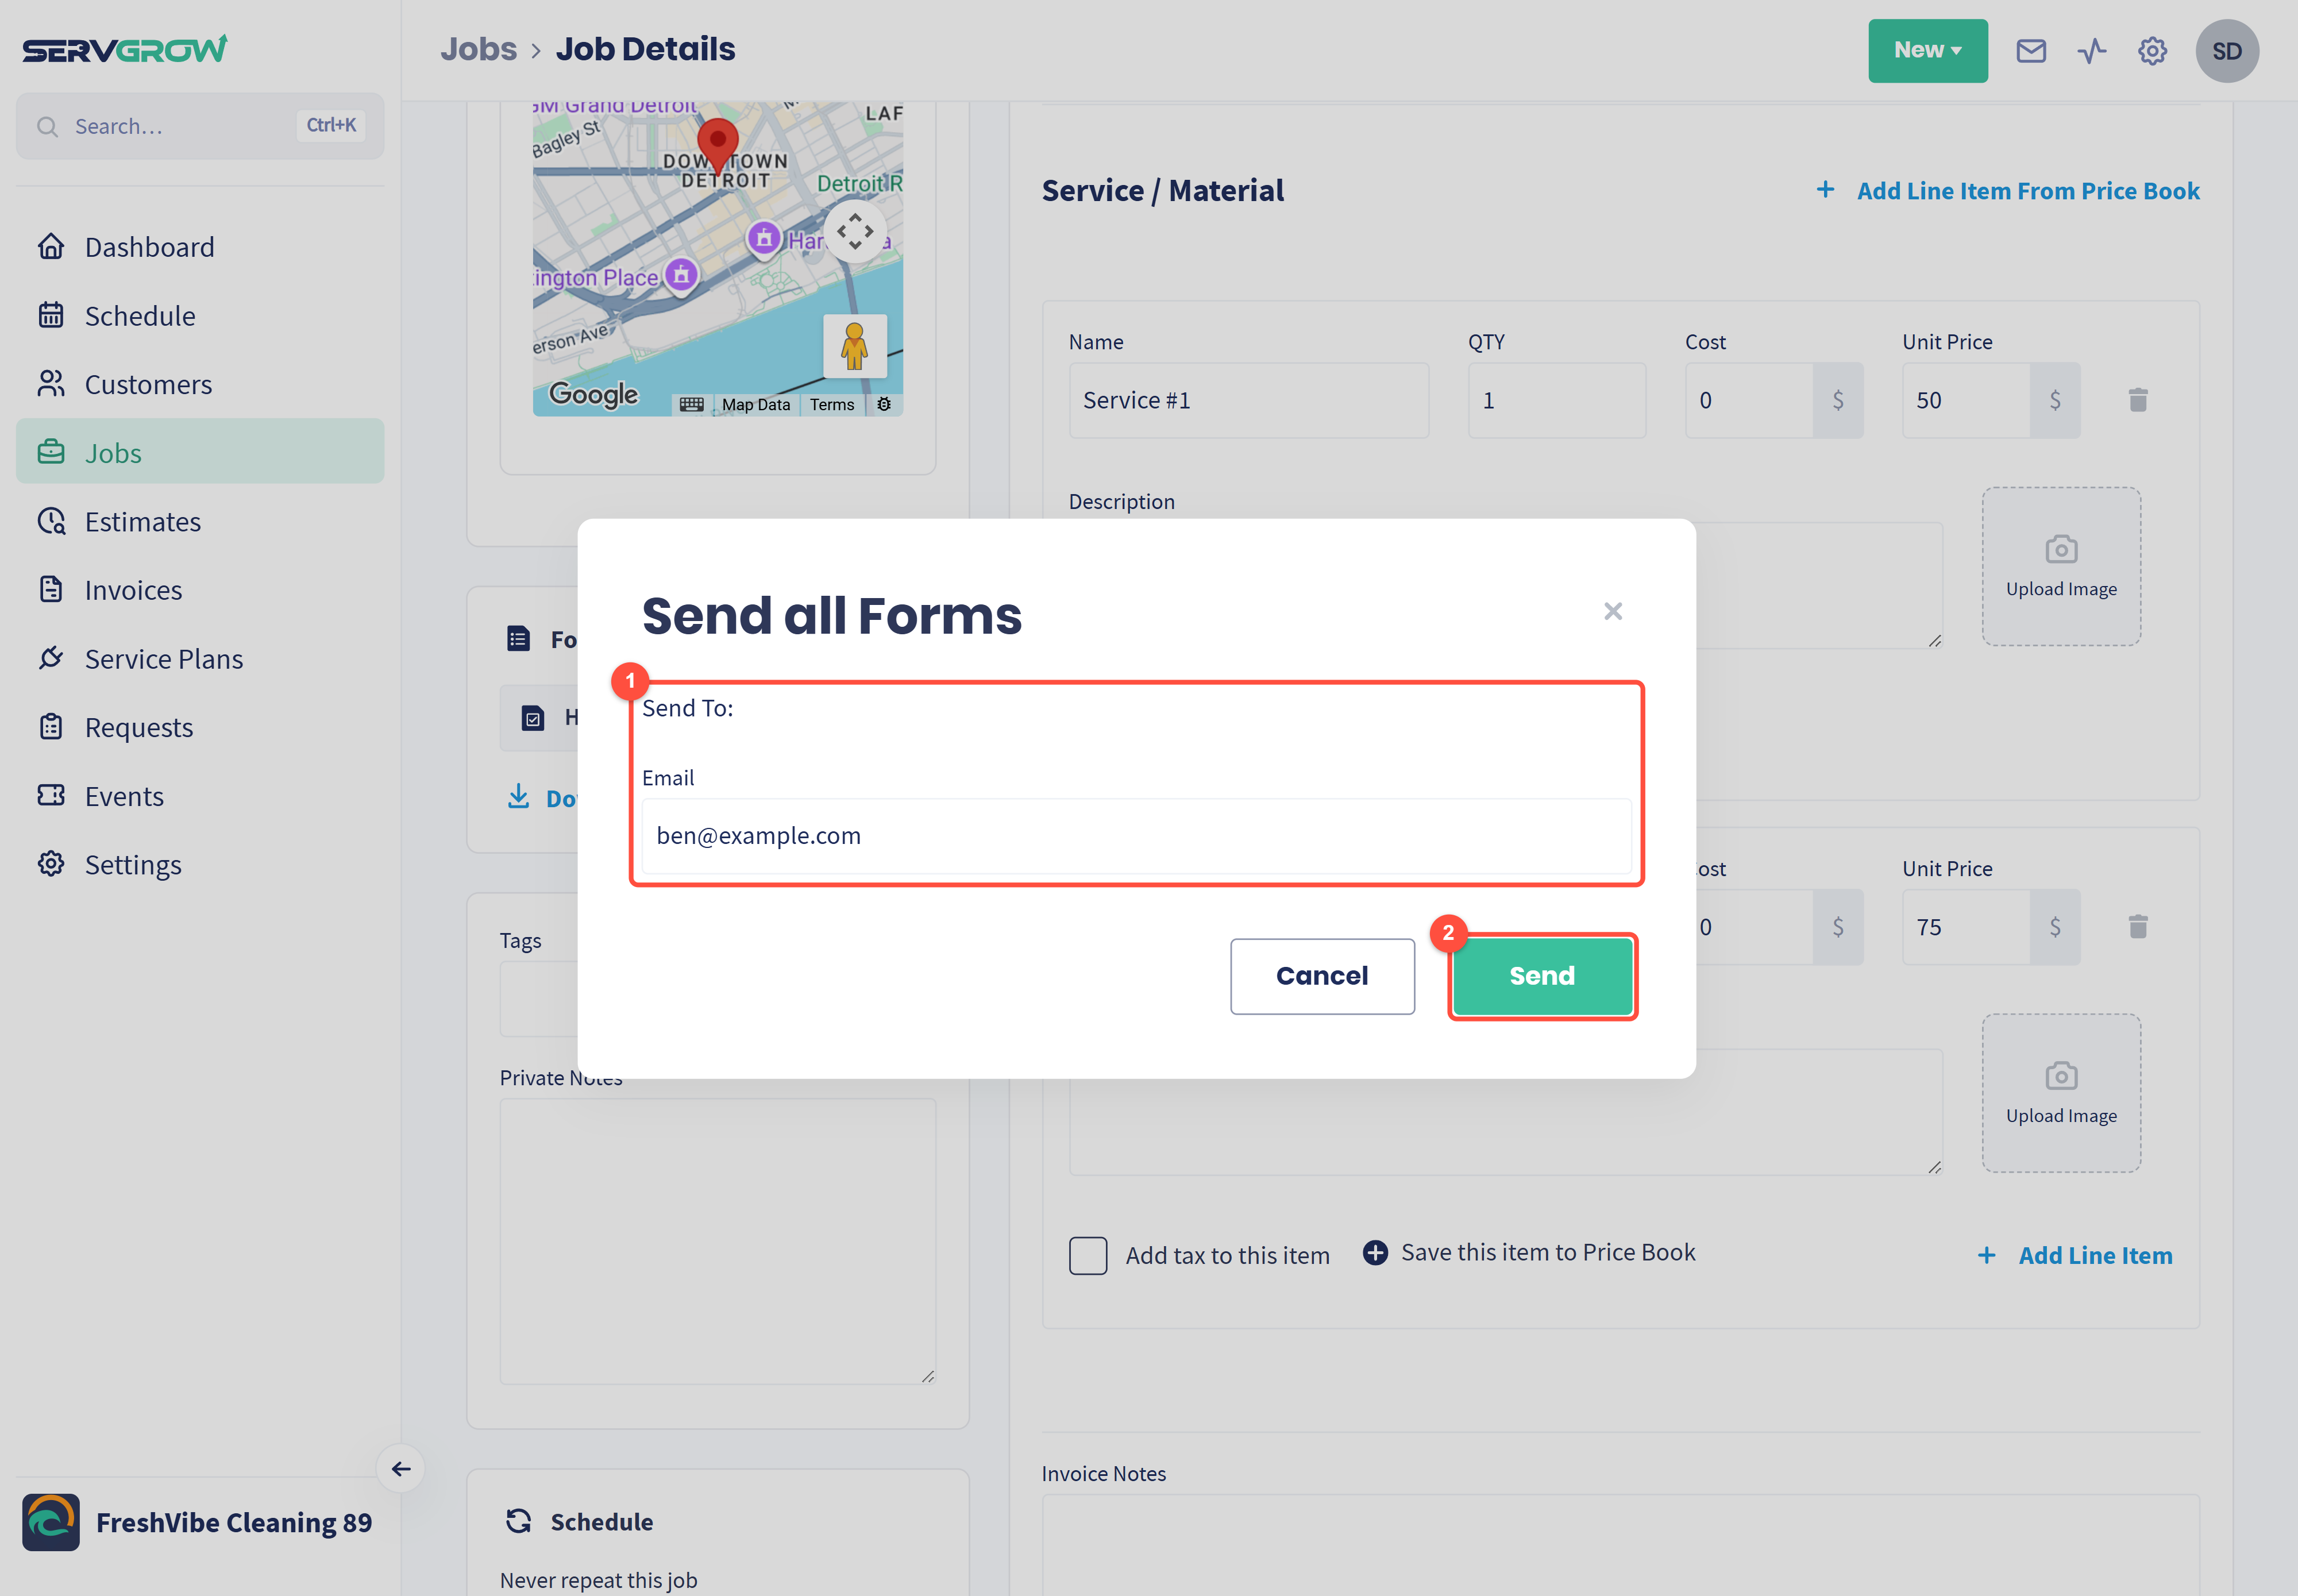
The customer's email is filled in for you. Change it to send the form to someone else, such as a property manager.
Click Send.
If you turned on automatic sending in Form Settings, the customer gets the form as soon as the job is finished, with no extra clicks.
To share a form without email, click the link icon next to it and paste the link wherever you like. Anyone with the link sees the form like this:
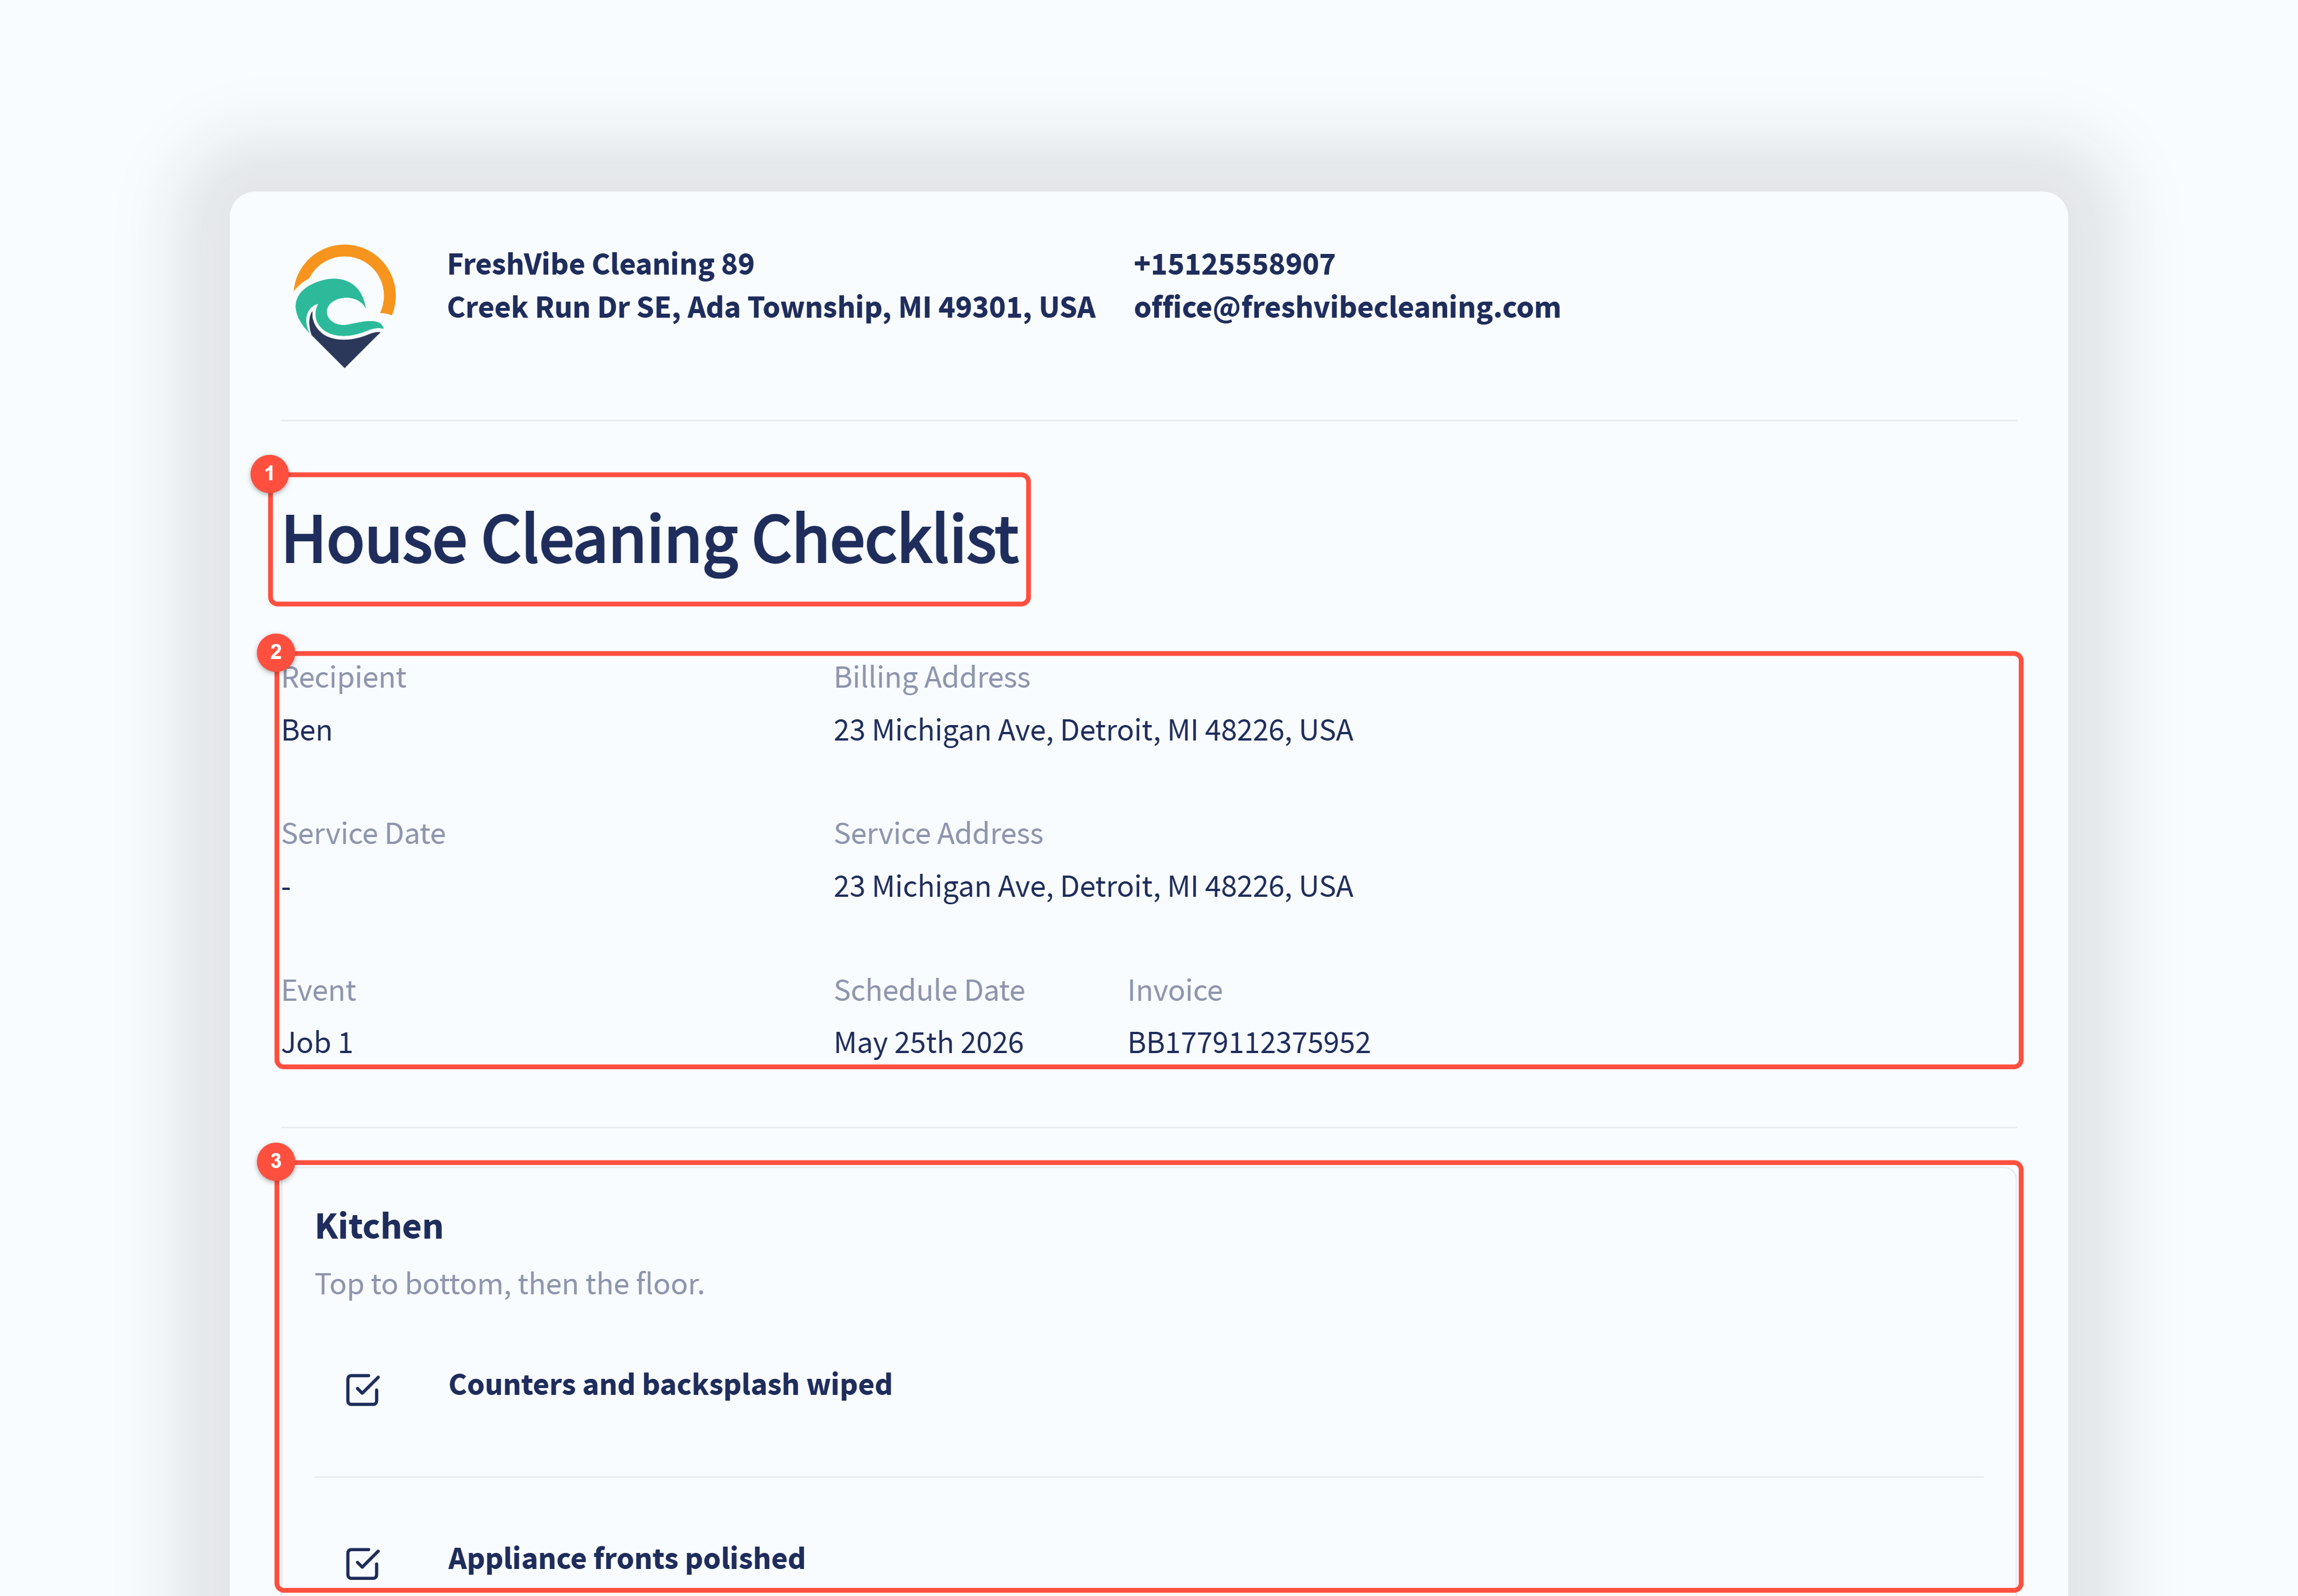
The form name, under your business name, address, phone and email.
Who it is for, the service address, the job and the invoice number.
Every section and item, with what has been completed.
Tips
Start from your best employee's routine. Turn how they do the job into the checklist, and everyone does it their way.
Make the important forms required. A walkthrough that has to be completed before a job can be finished never gets skipped.
Always add a photo item. Before and after photos settle "you missed a spot" in seconds.
End with a signature. A customer sign-off on the spot means fewer disputes later.
Related articles