
A job that lives in a notebook, a text thread and someone's memory is a job waiting to go wrong. The crew shows up at the wrong time, nobody tells the customer, the price gets argued about after the work is done and the invoice goes out a week late, if at all.
Creating the job in Servgrow puts everything in one place from the start. You pick the customer, the time and the crew, add the services from your Price Book so the price is right every time, and Servgrow notifies your team and your customer for you. Because the job already holds the work and the price, invoicing and getting paid are just the next steps. Most jobs take about two minutes to create.
Where to start
Go to Jobs in the left menu, click Add Job and choose New Job.
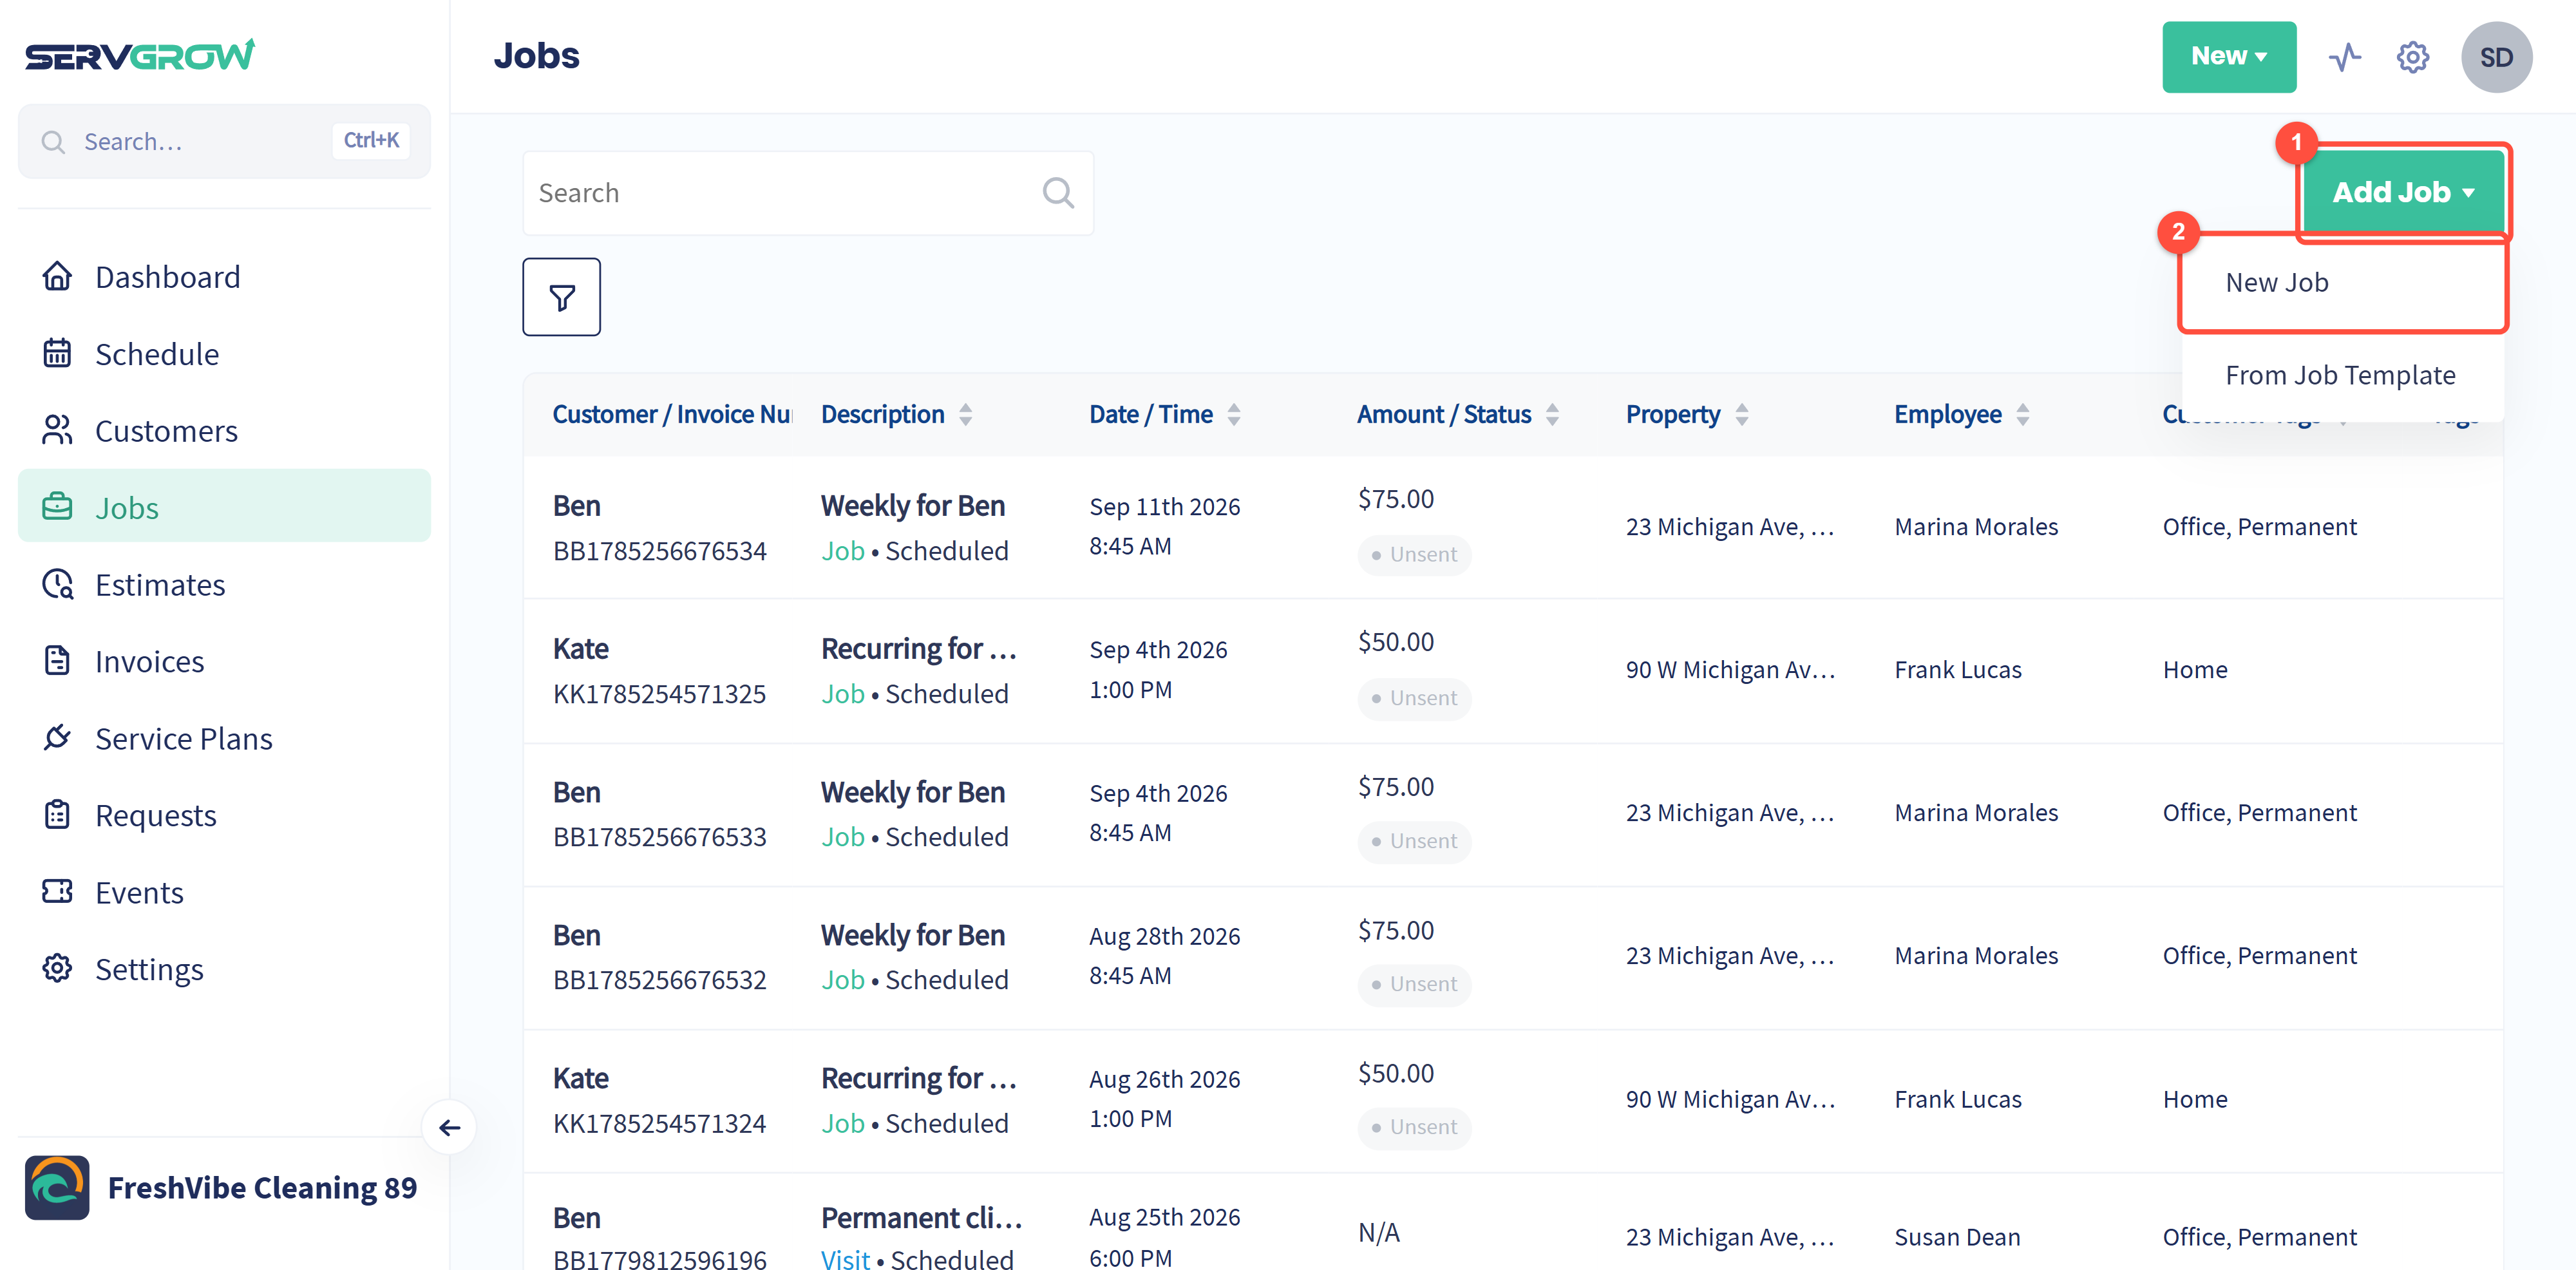
You can also click New at the top of any page and choose Job. Doing the same kind of job over and over? Choose From Job Template instead to start from a saved template. See Job & Estimate Templates.
Creating a job takes four steps: Customer Info, Schedule time, Line Items and Additional Info.
Step 1: Customer Info
Type the customer's name in Search.
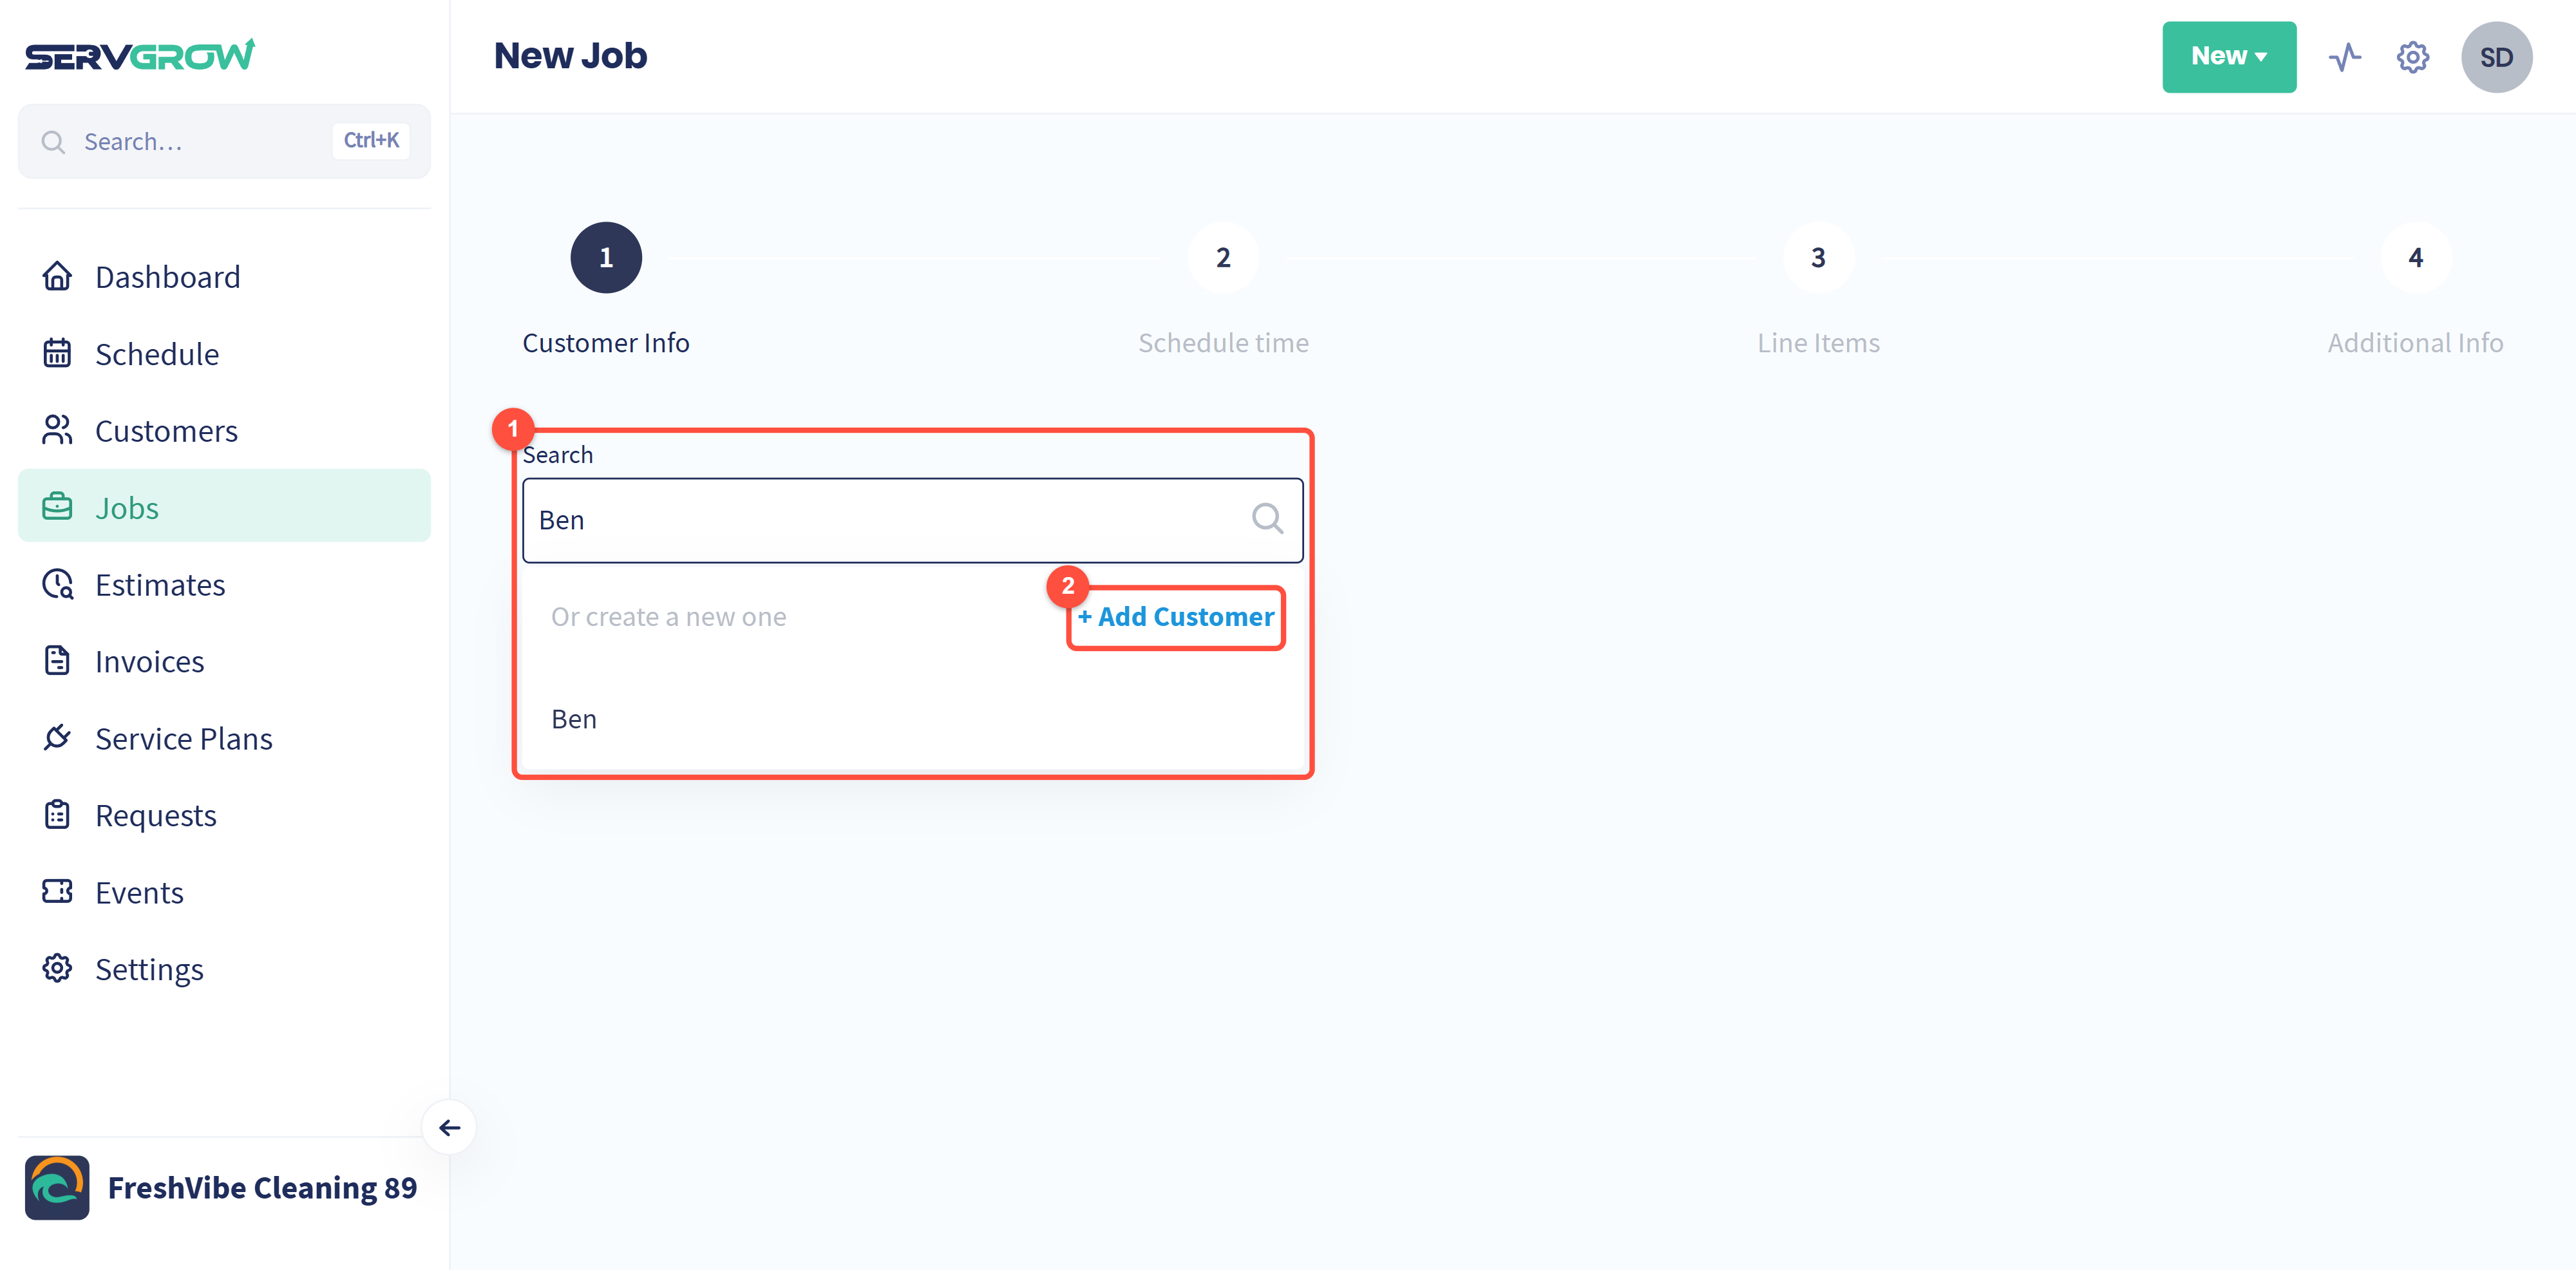
Click the customer in the results.
New customer? Click + Add Customer to add them without leaving the job. See How to Add a Customer.
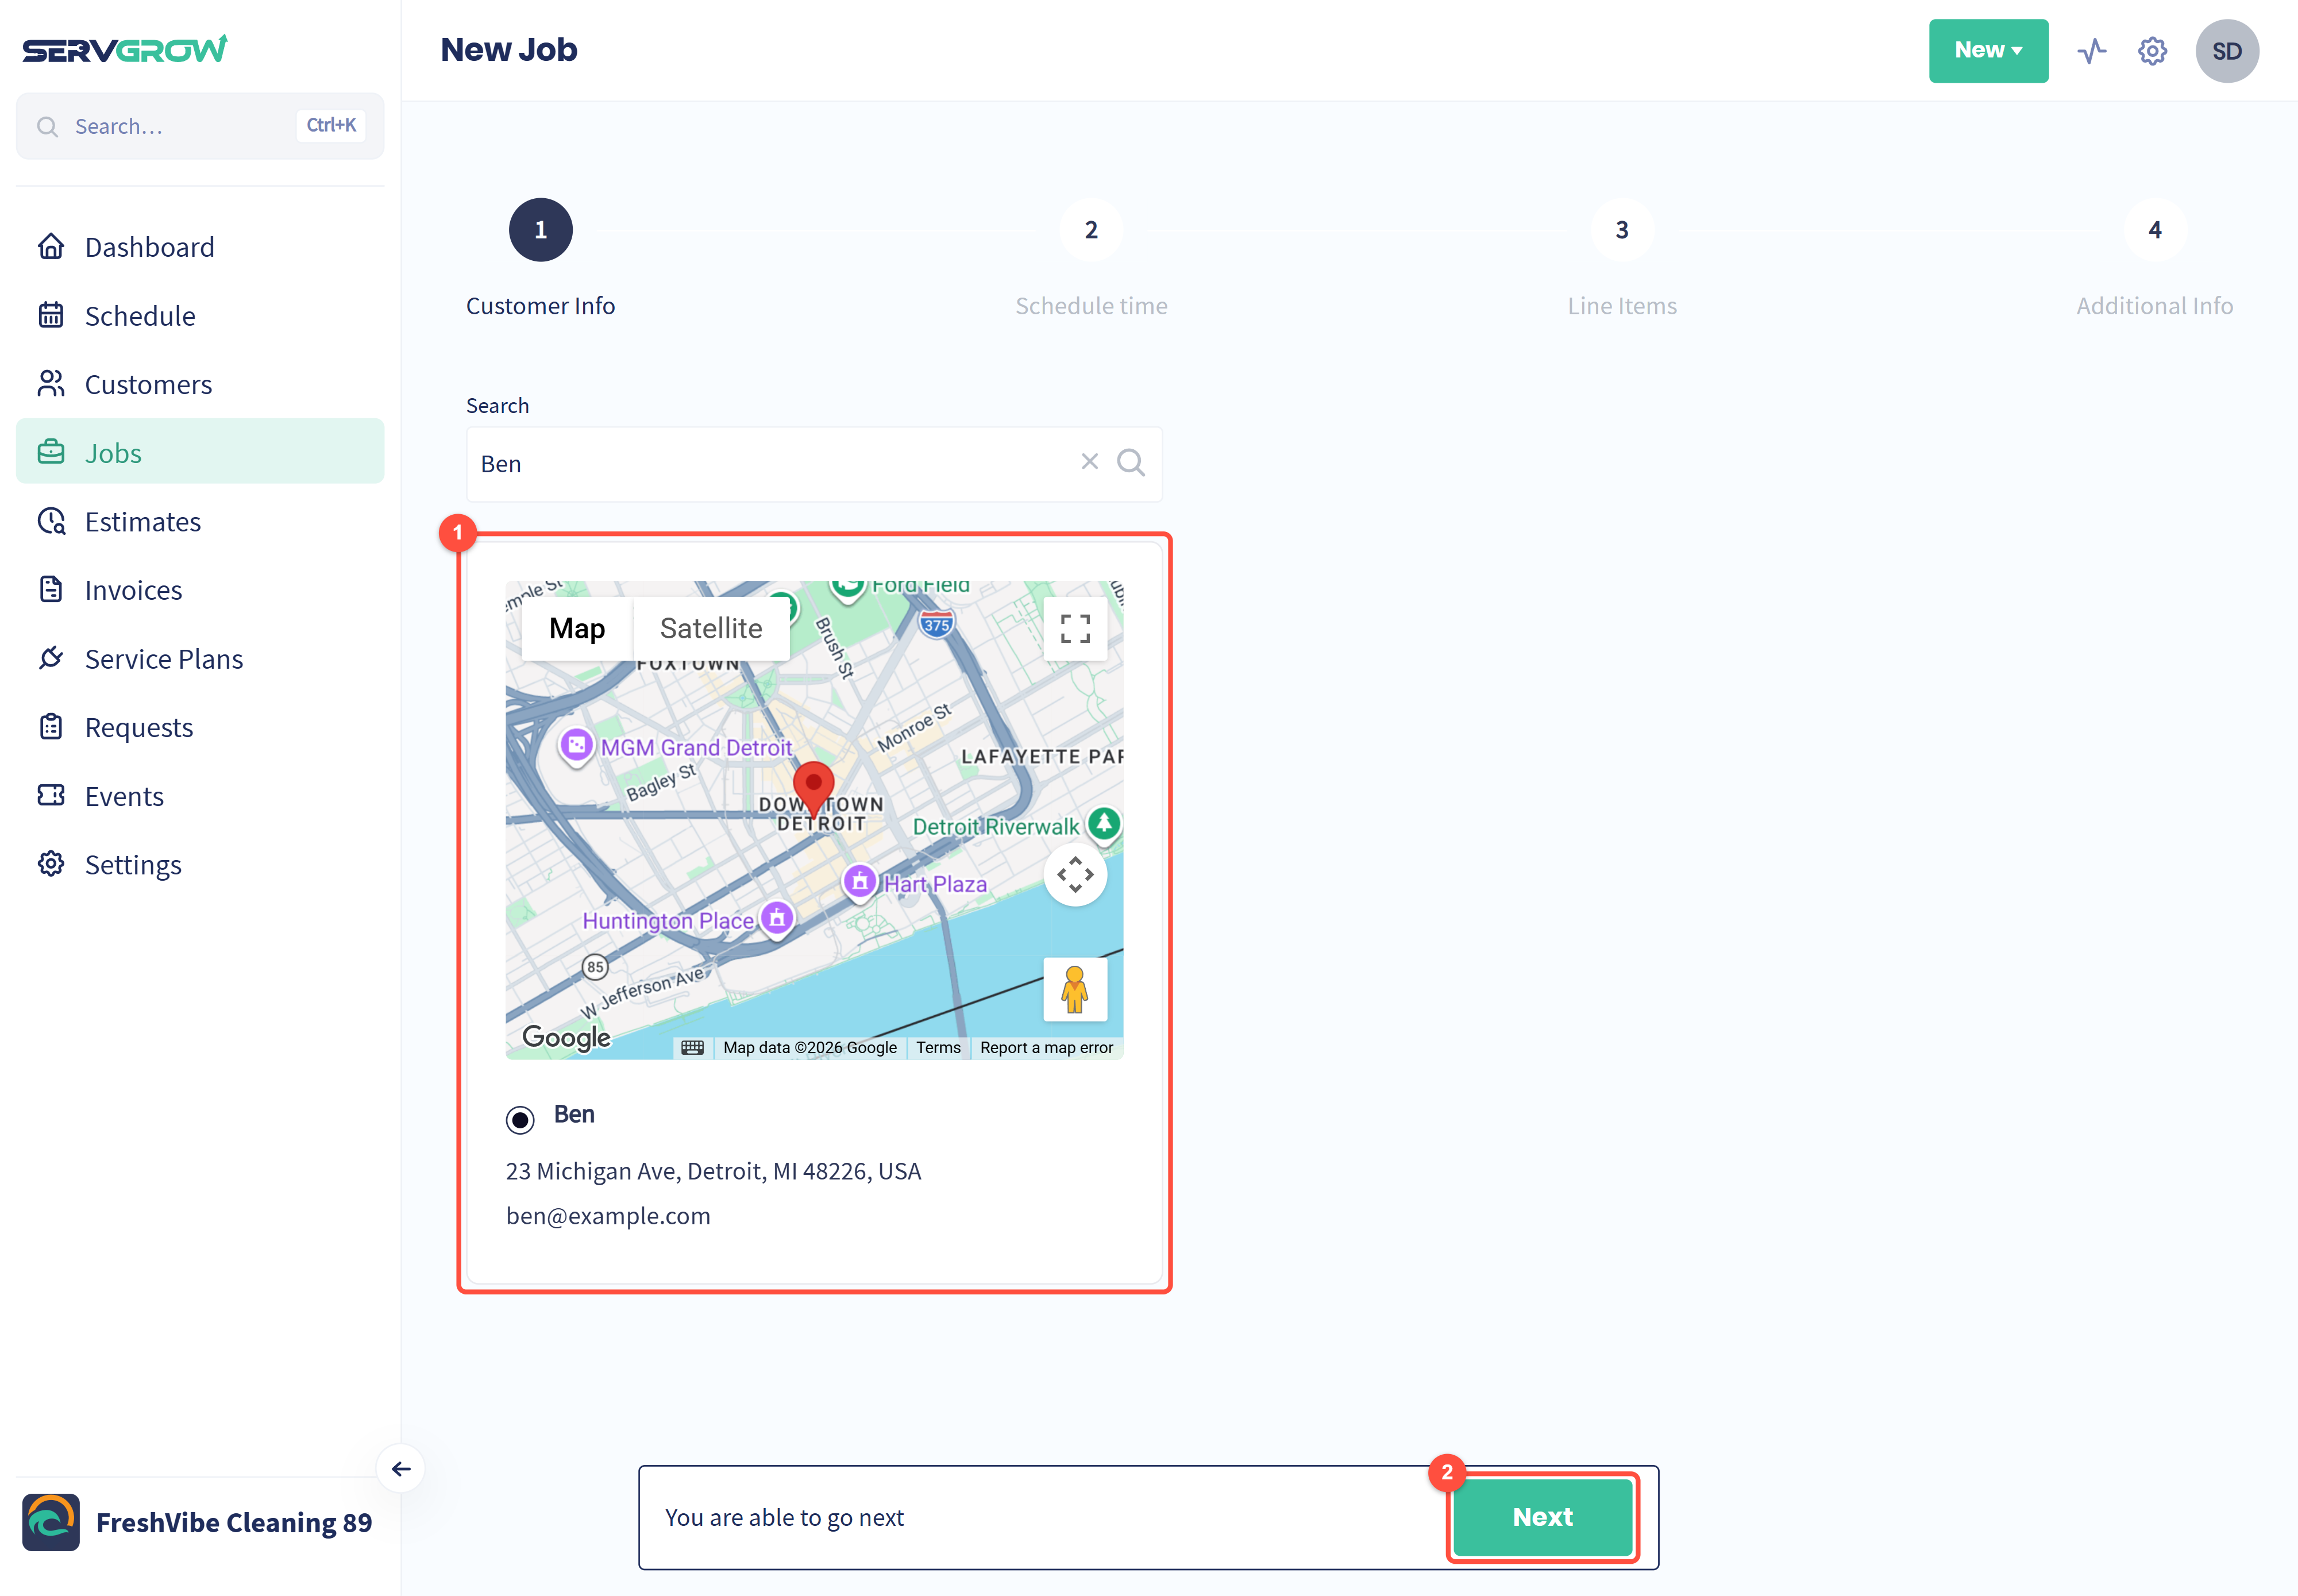
Check the service address and contact details on the customer card. The map shows where the crew is headed.
Click Next.
Step 2: Schedule time
Your calendar opens so you can see what is already booked before you choose a time.
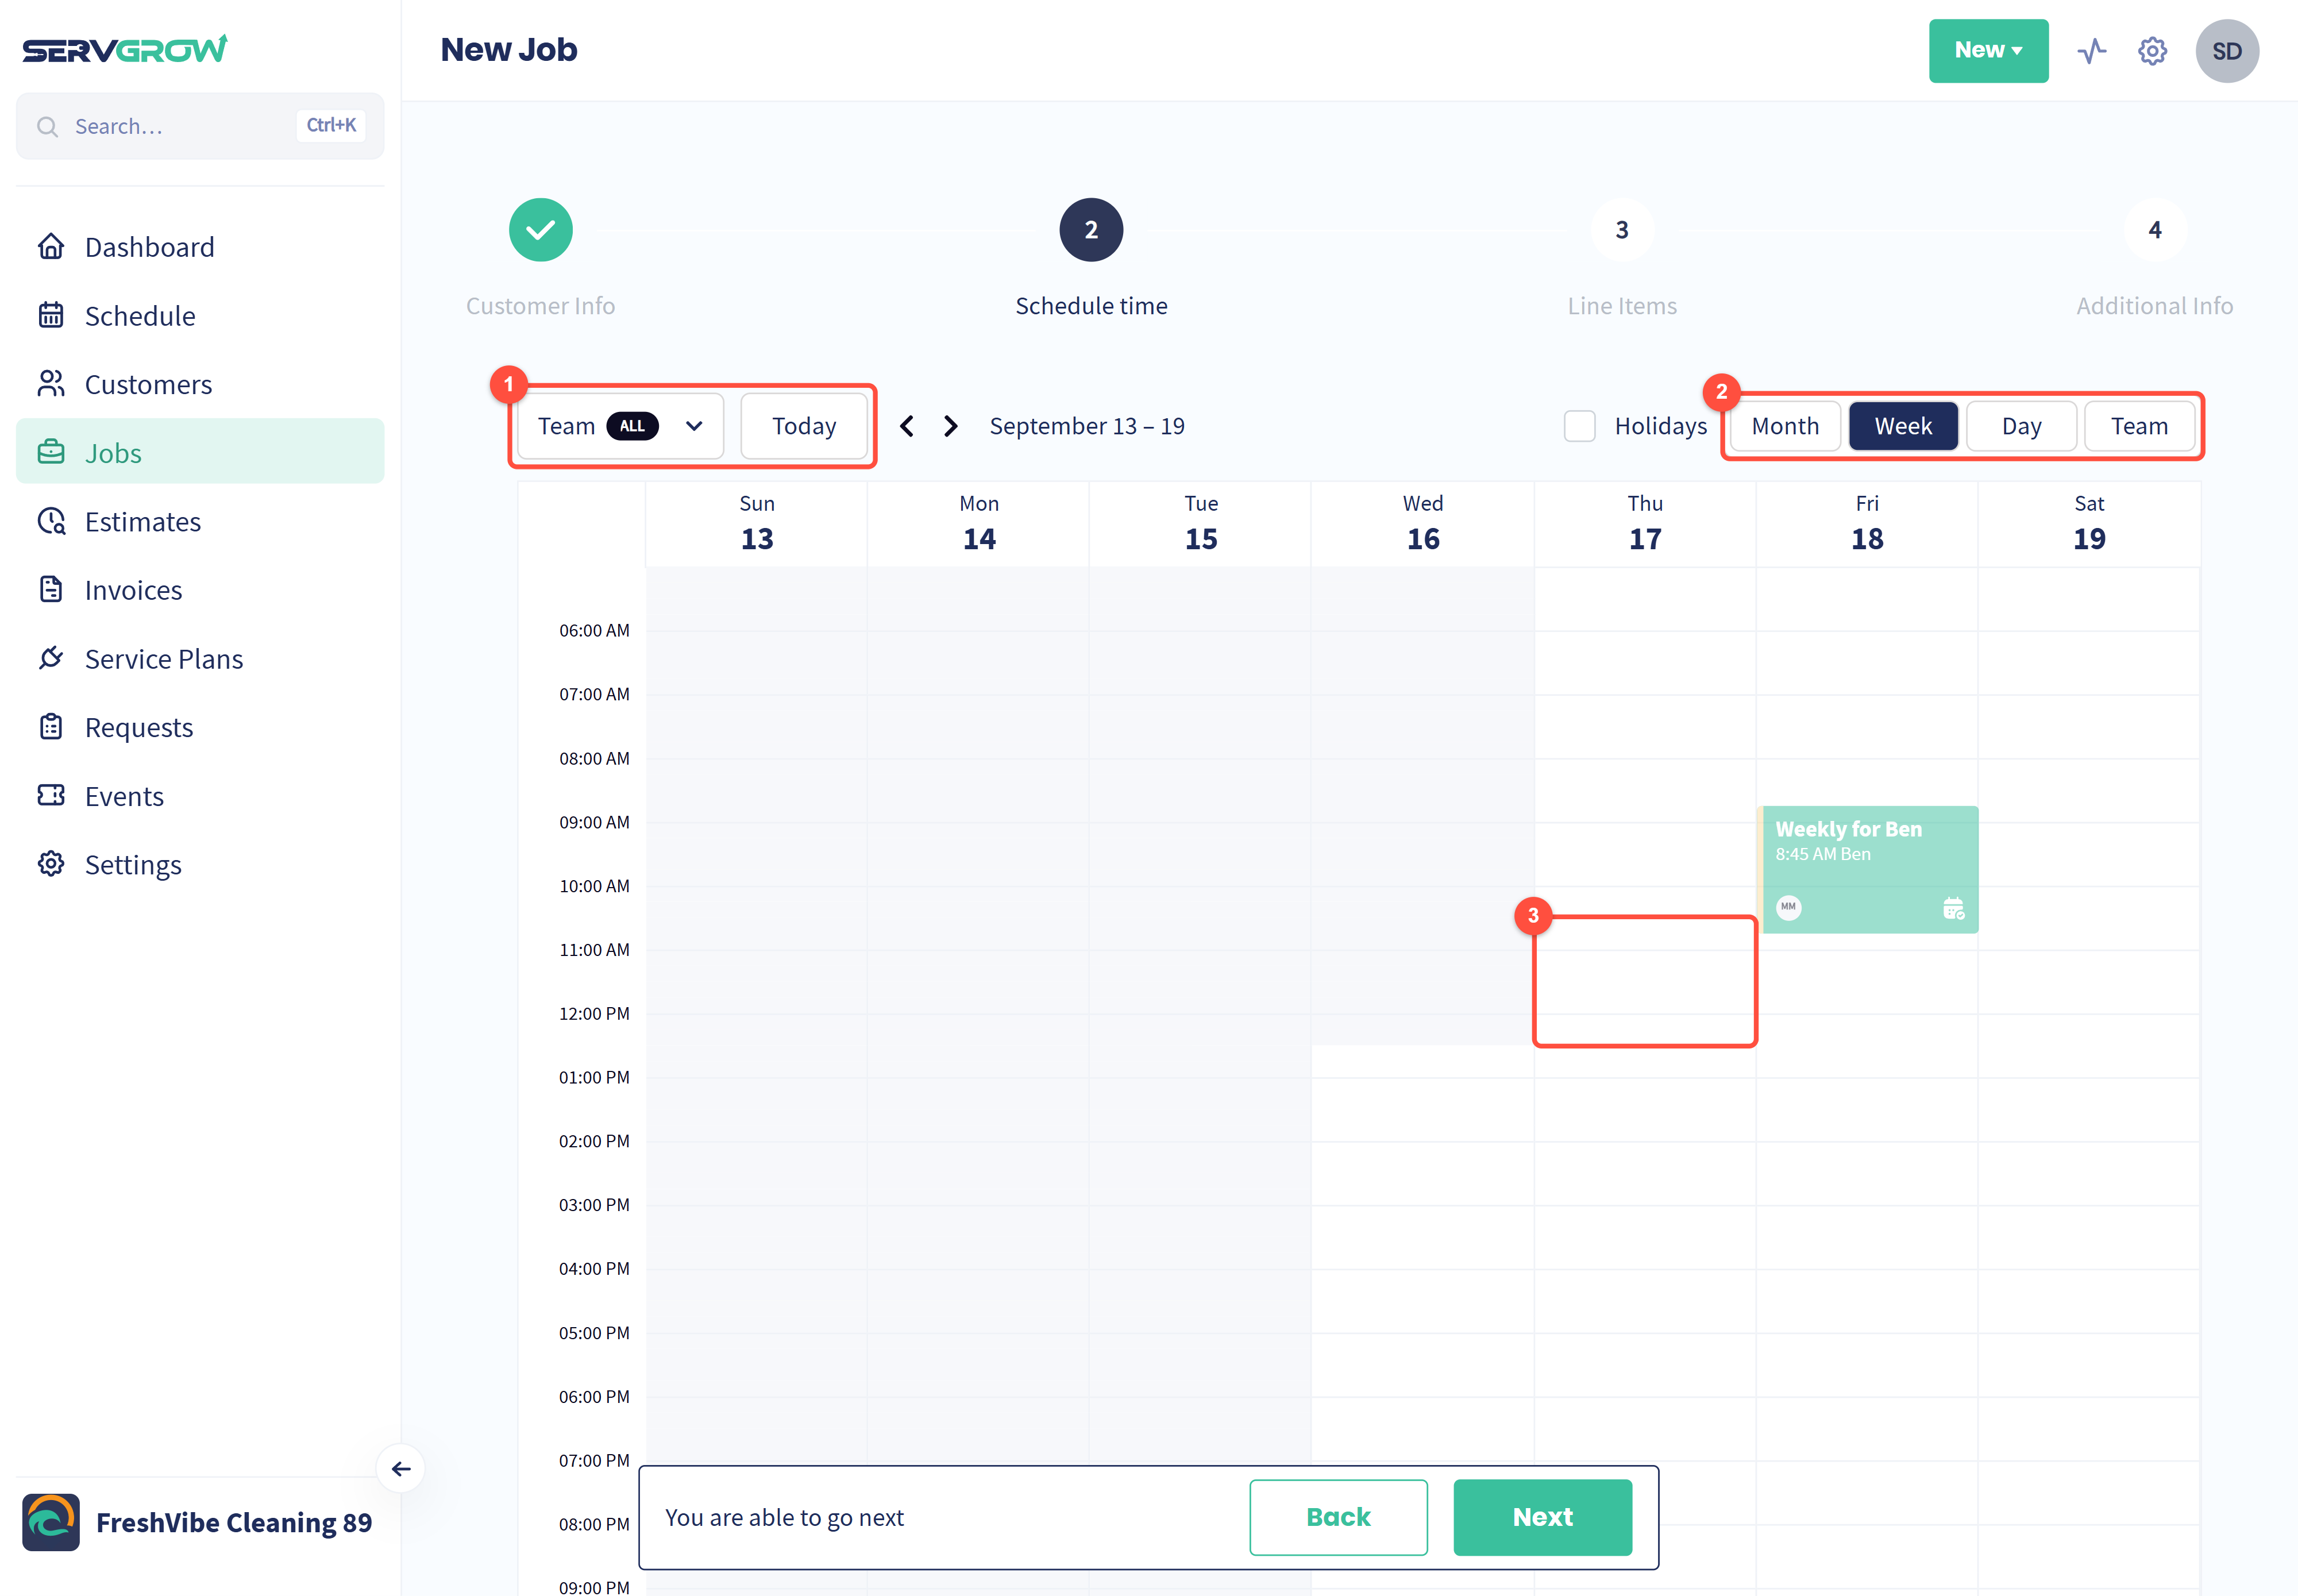
Use Team to show one person's schedule or everyone's, and Today and the arrows to move through the dates.
Switch between Month, Week, Day and Team views.
Click the day and time you want. The Schedule Details window opens with that time filled in.
Fill in the schedule details
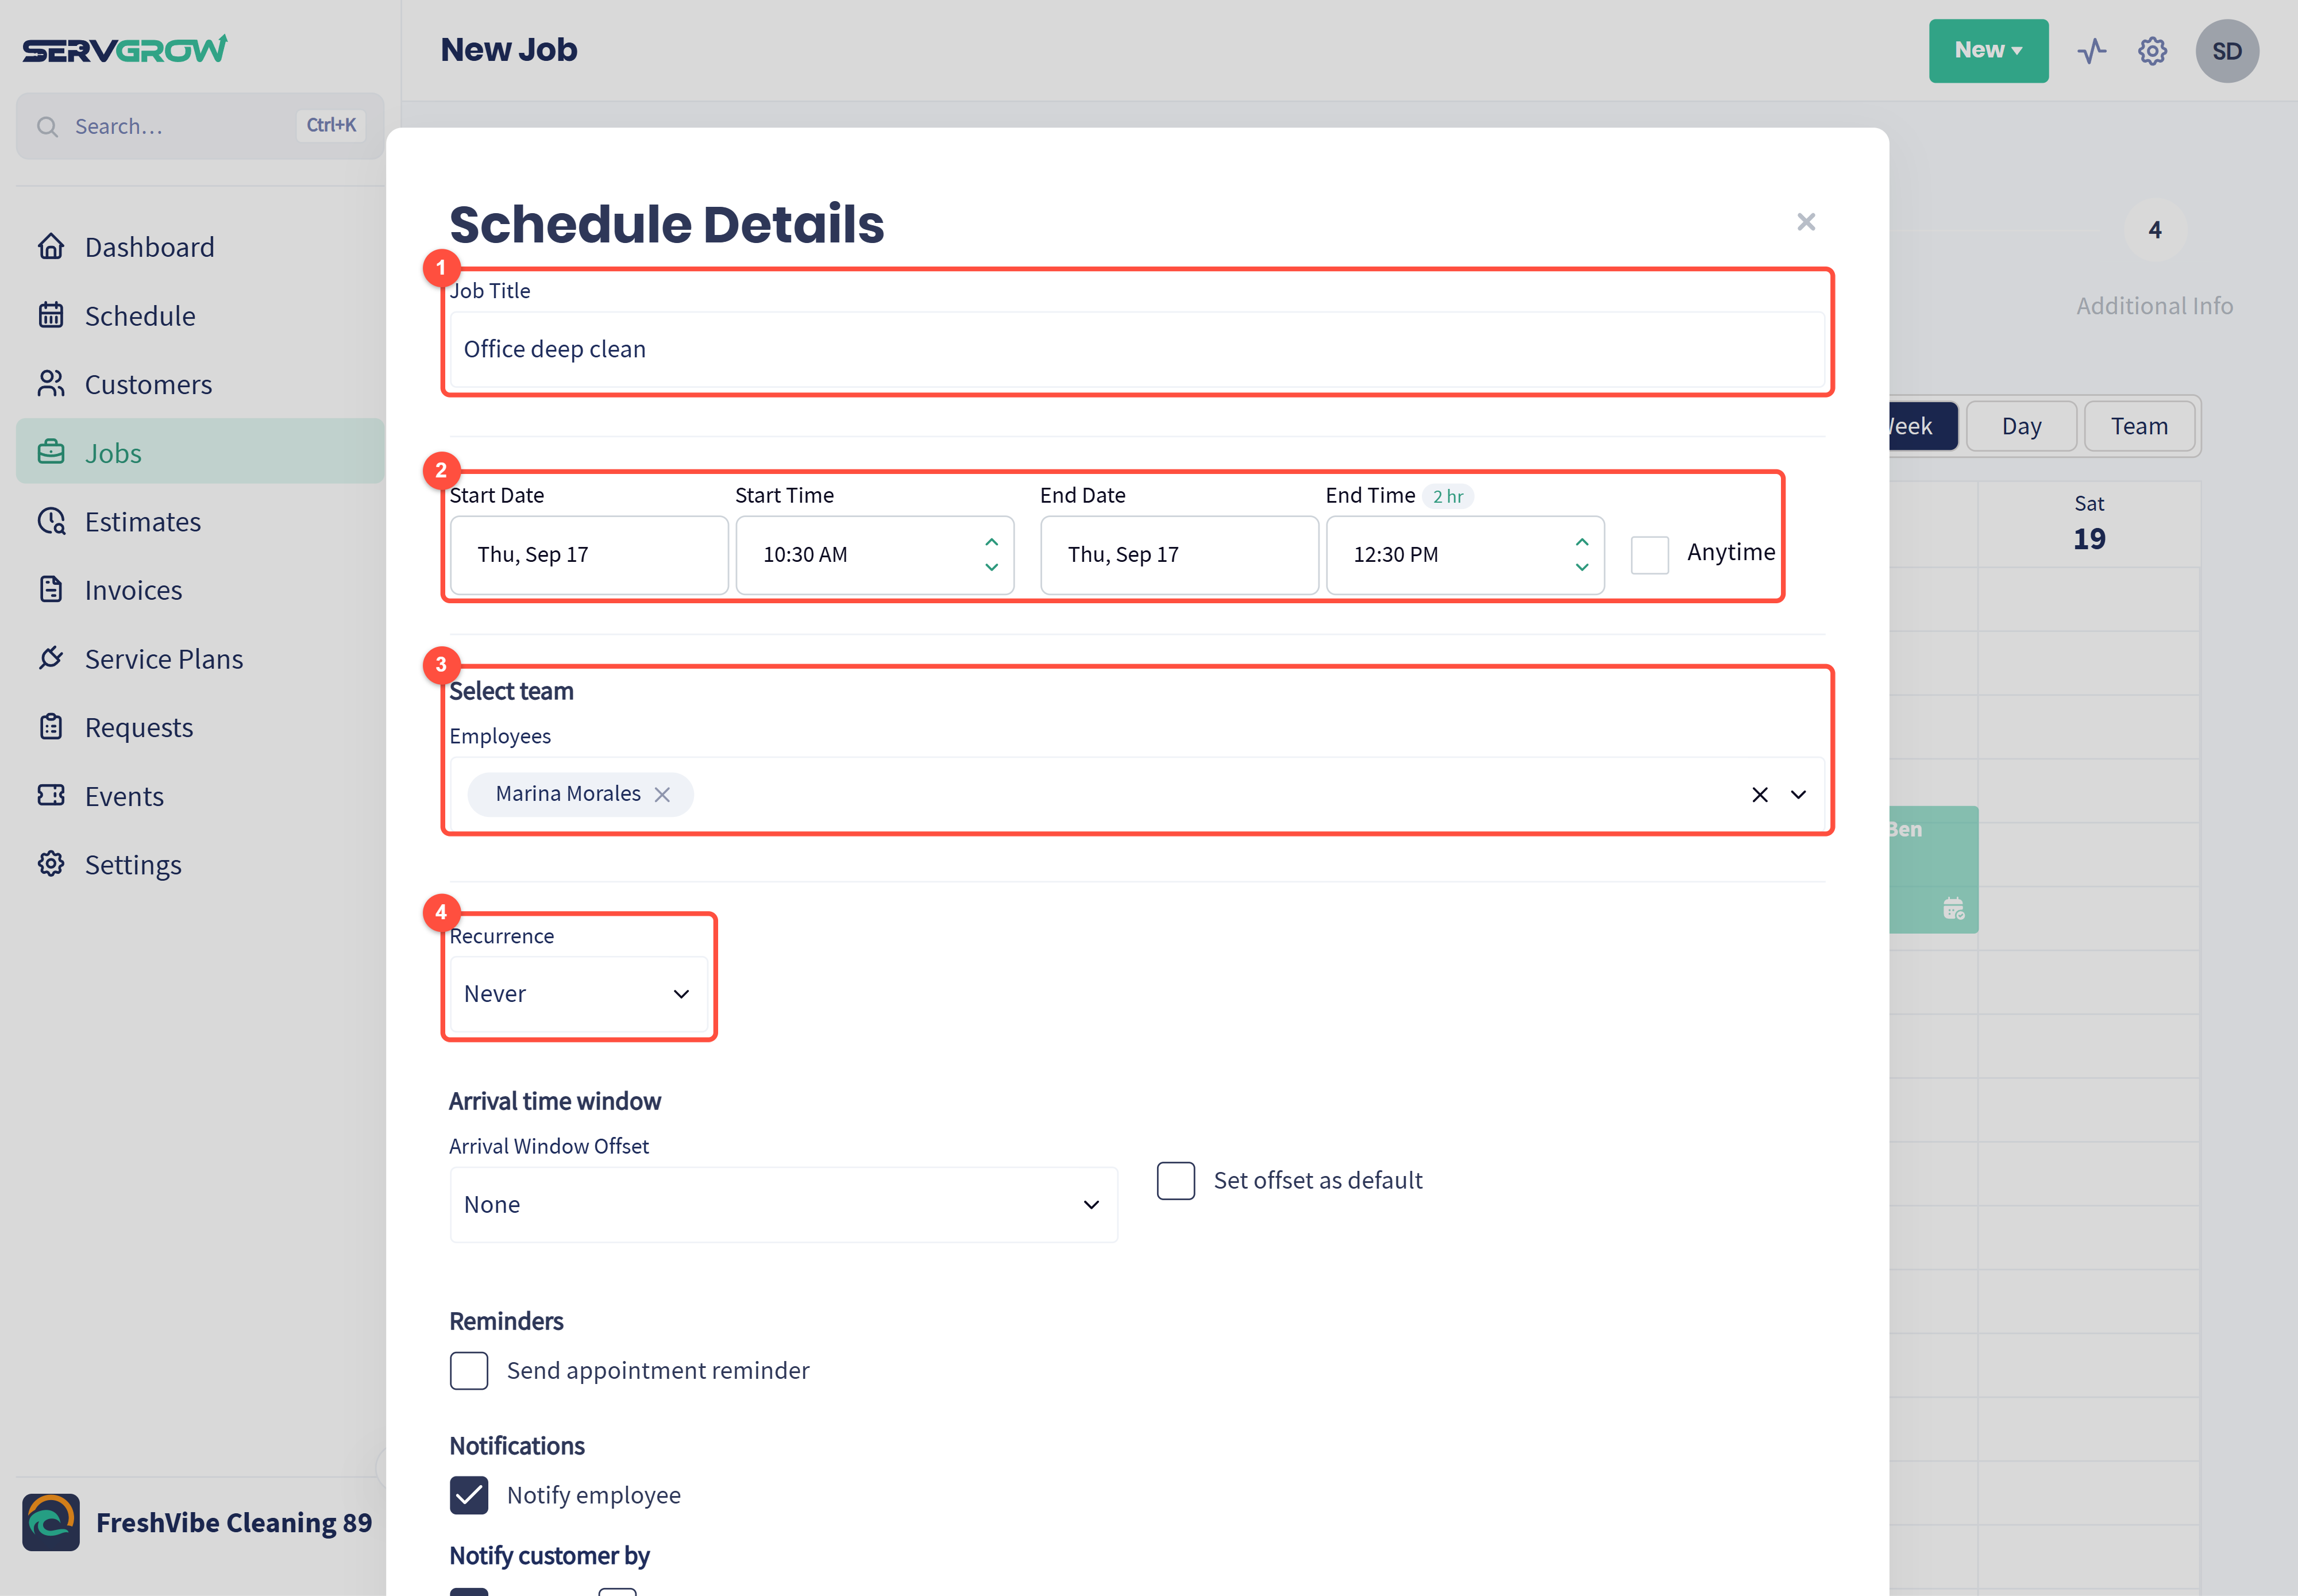
Job Title: a short name for the work, such as Office deep clean. Your team sees it on the schedule.
Start Date, Start Time, End Date and End Time: the end time starts two hours after the start, and the badge shows the length. Tick Anytime if the job has a date but no set time.
Select team: choose the employees doing the work. You can pick more than one.
Recurrence: leave it on Never for a one-off job, or repeat it daily, weekly, monthly or yearly. See How to Schedule Recurring Jobs.
Below these is the Arrival time window, which gives the customer an arrival range instead of an exact time. See How Do I Set the Arrival Window?
Jobs that run over more than one day
Work that does not finish the same day, such as a strip and wax or a big install, is booked as one job: just give it an end date on a later day.
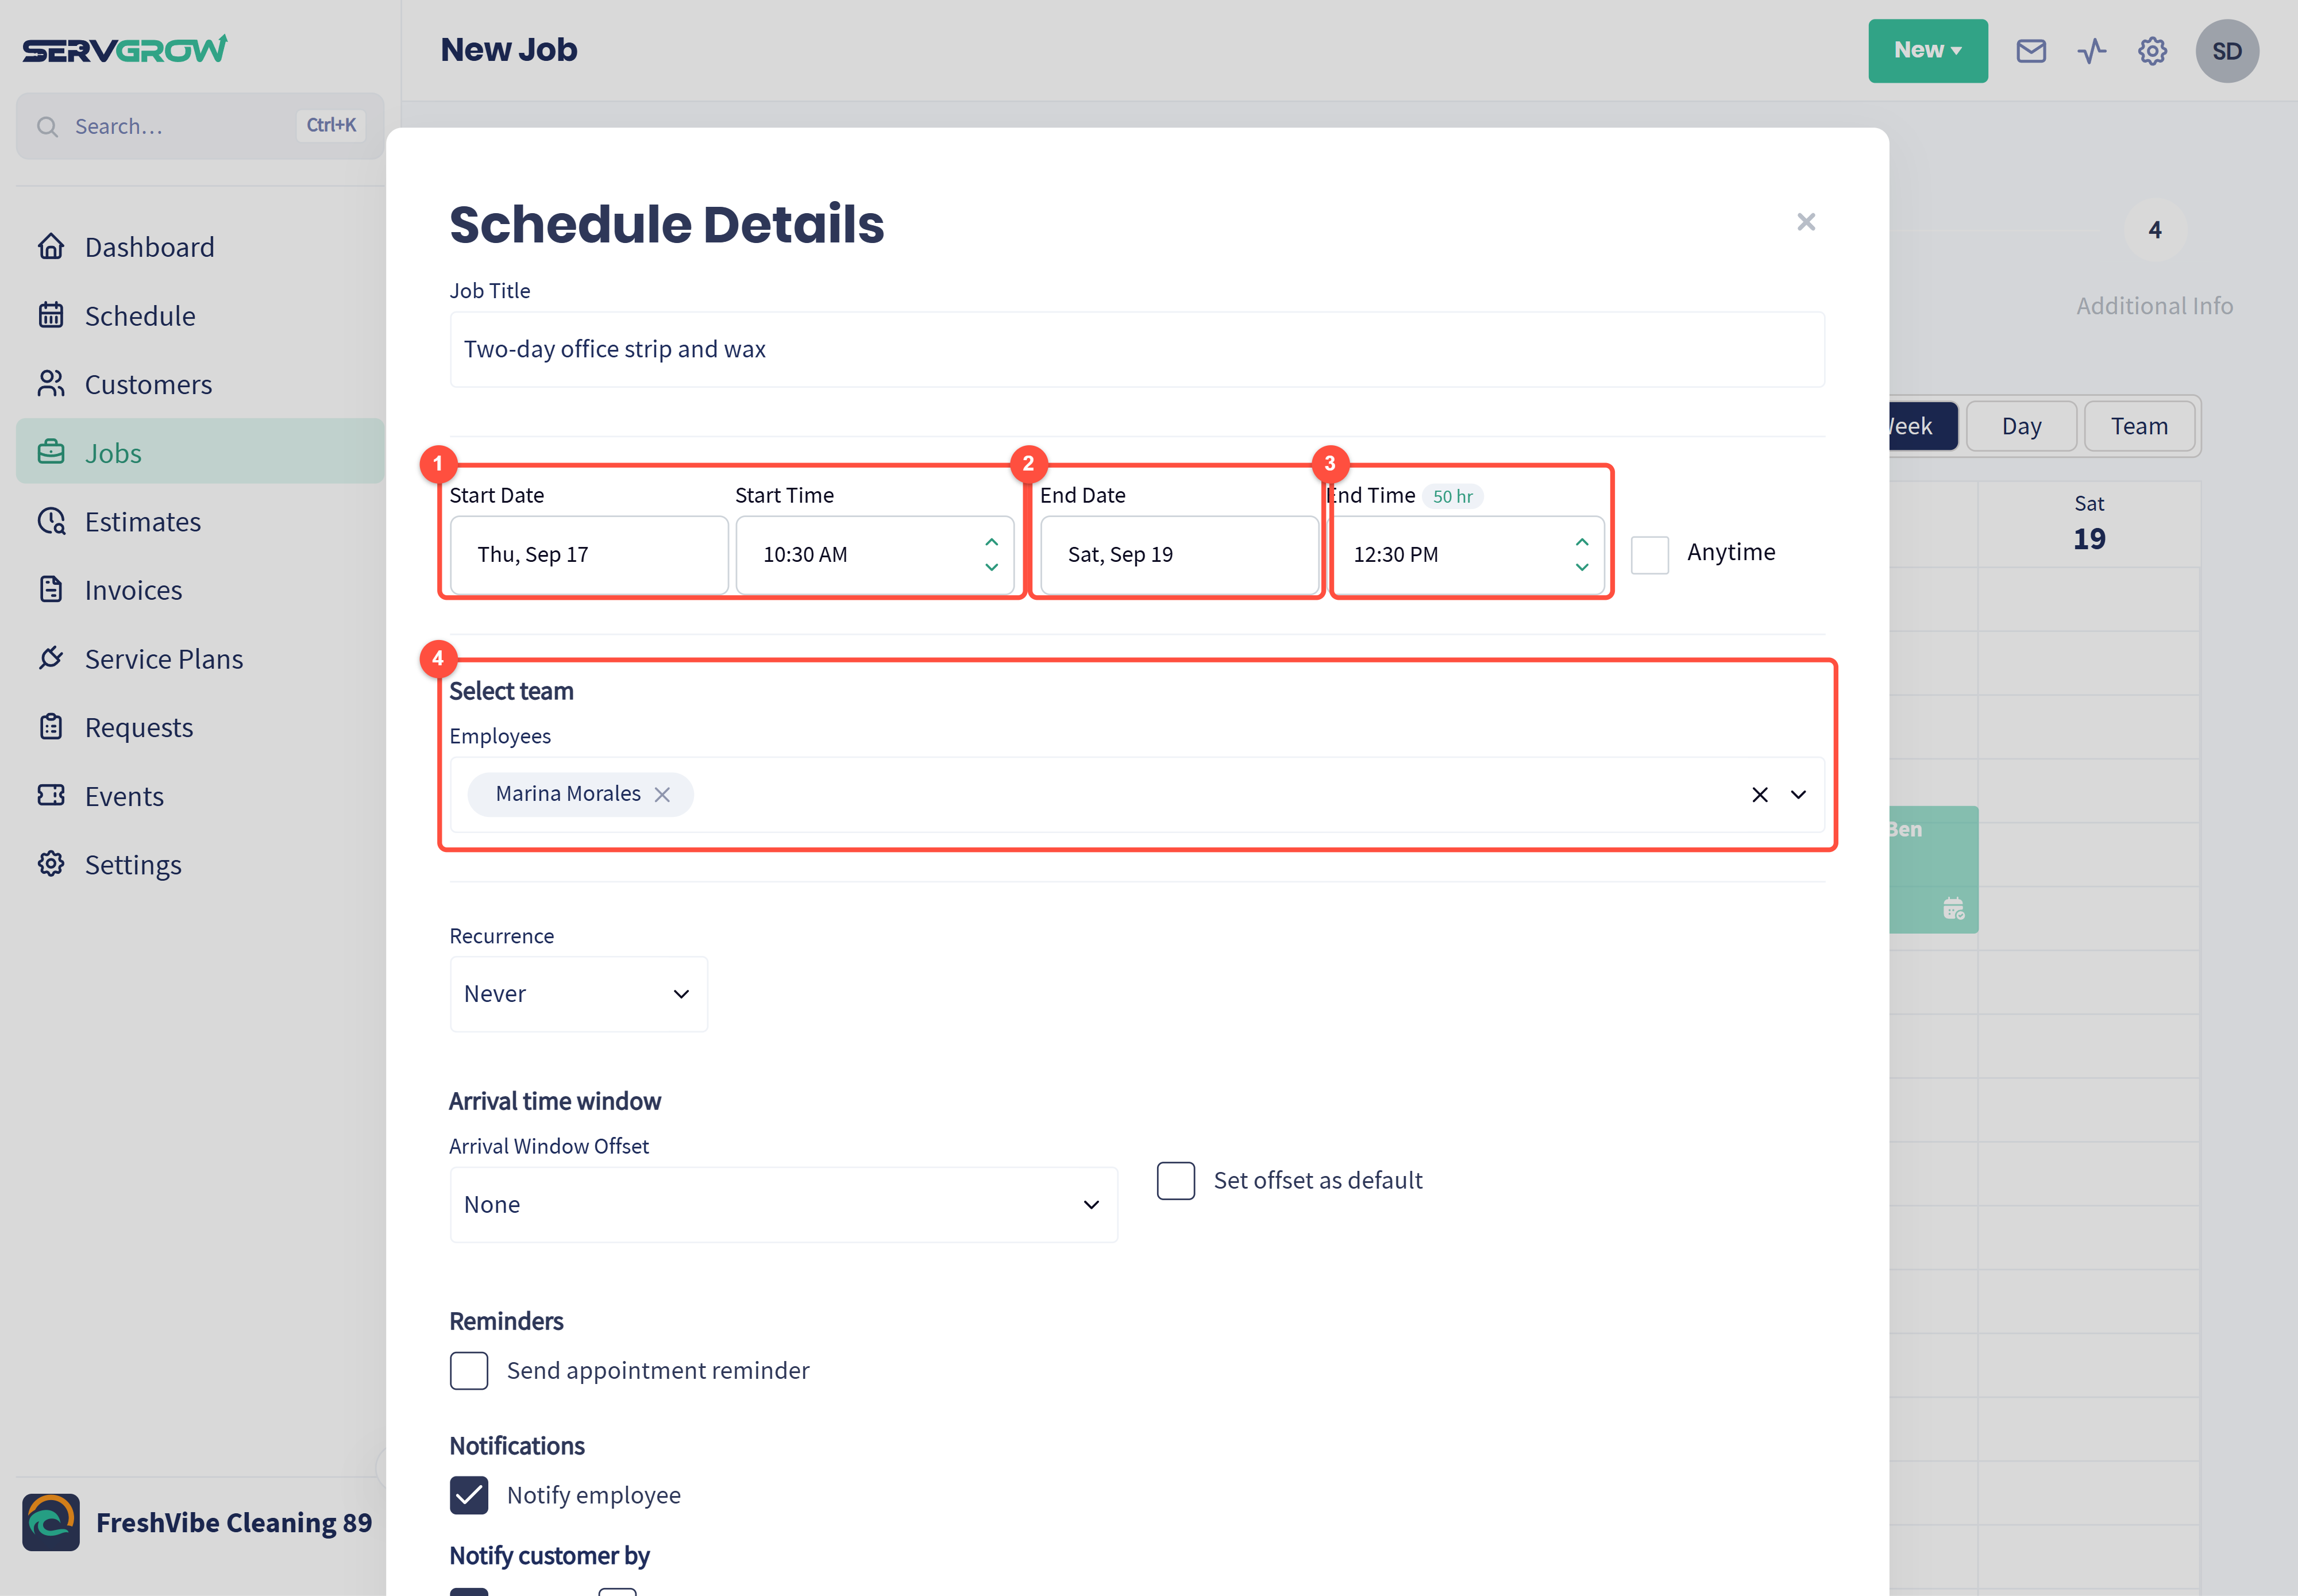
Click End Date and pick the day the work finishes.
The badge next to End Time shows how long the whole booking runs, so Thursday 10:30 AM to Saturday 12:30 PM shows as 50 hr.
The job then sits on your calendar as one bar across those days. See Multi-Day Jobs and Drive Time: Book Longer Work and Send the Closest Tech.
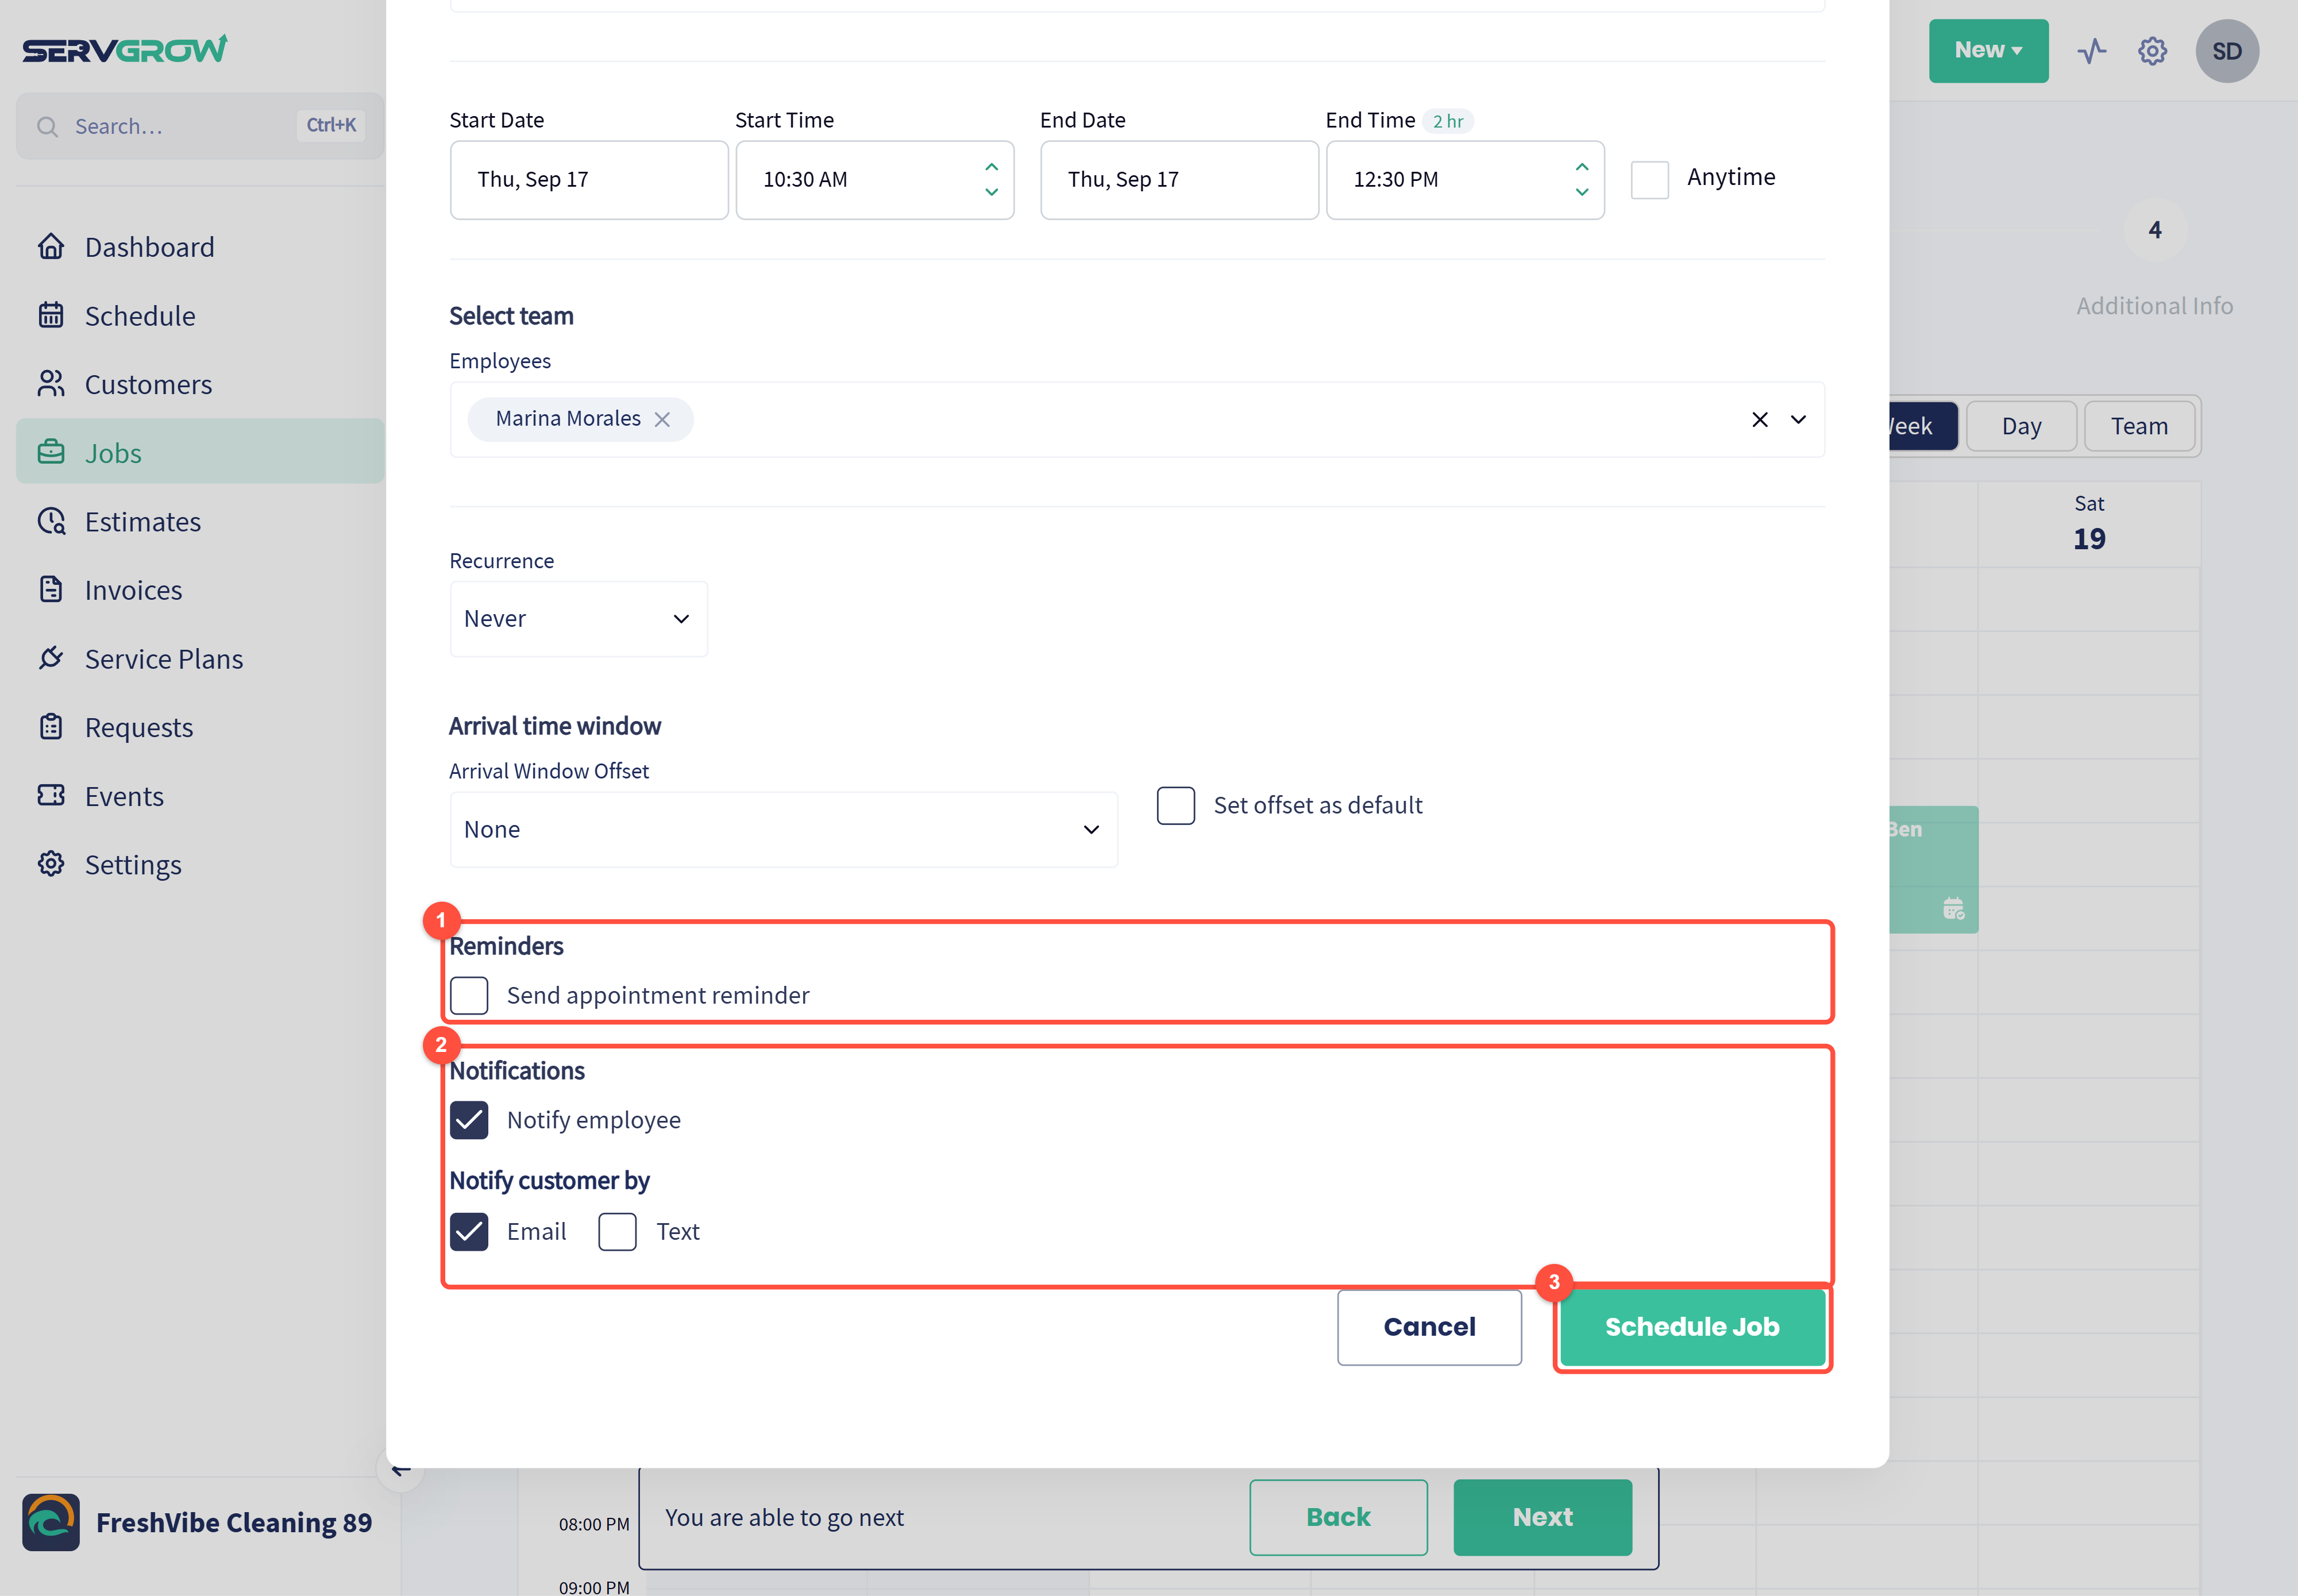
Send appointment reminder: tick it to remind the customer before the visit. Reminders cut down on no-shows and wasted trips. See Setting up Your Appointment Reminders.
Notifications: Notify employee lets the assigned team know about the job. Notify customer by sends the customer a confirmation by Email, Text or both.
Click Schedule Job.
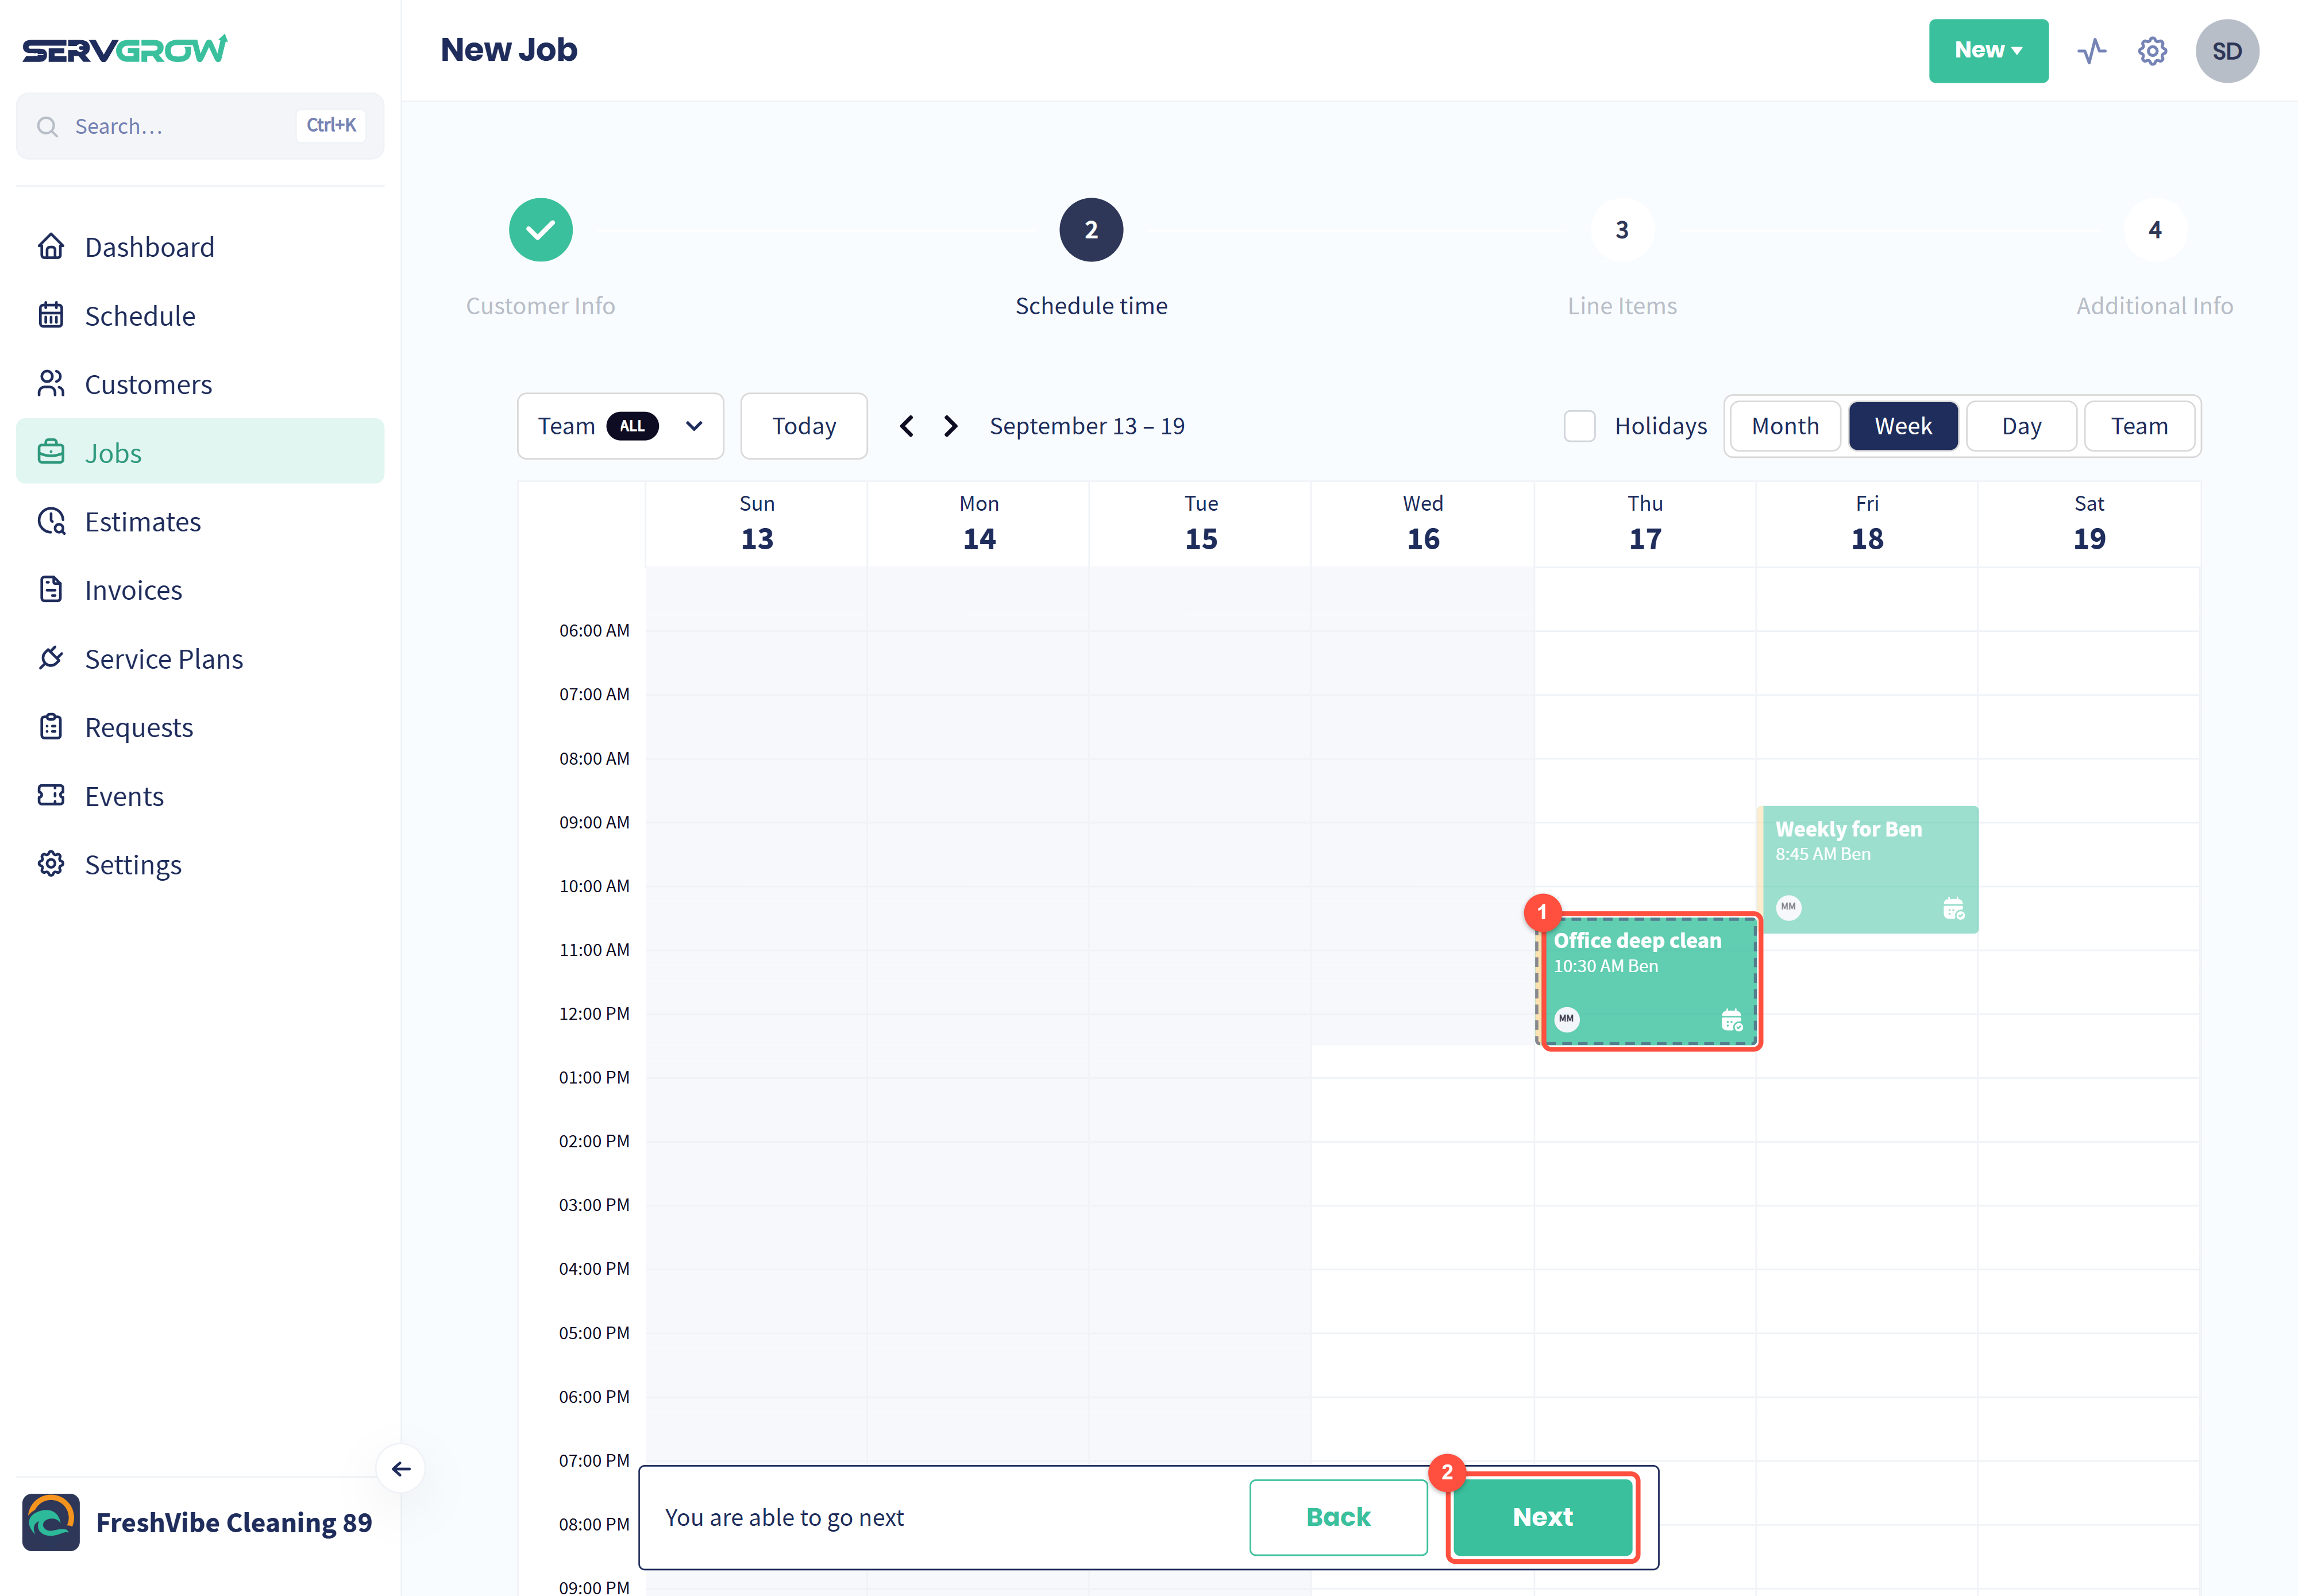
The job appears on the calendar with a dashed outline, because it is not saved until you finish the last step.
Click Next.
Step 3: Line Items
Add what you are doing for the customer and what it costs. The quickest way is from your Price Book, so every job uses the same names, descriptions and prices.
Click Add Line Item From Price Book.
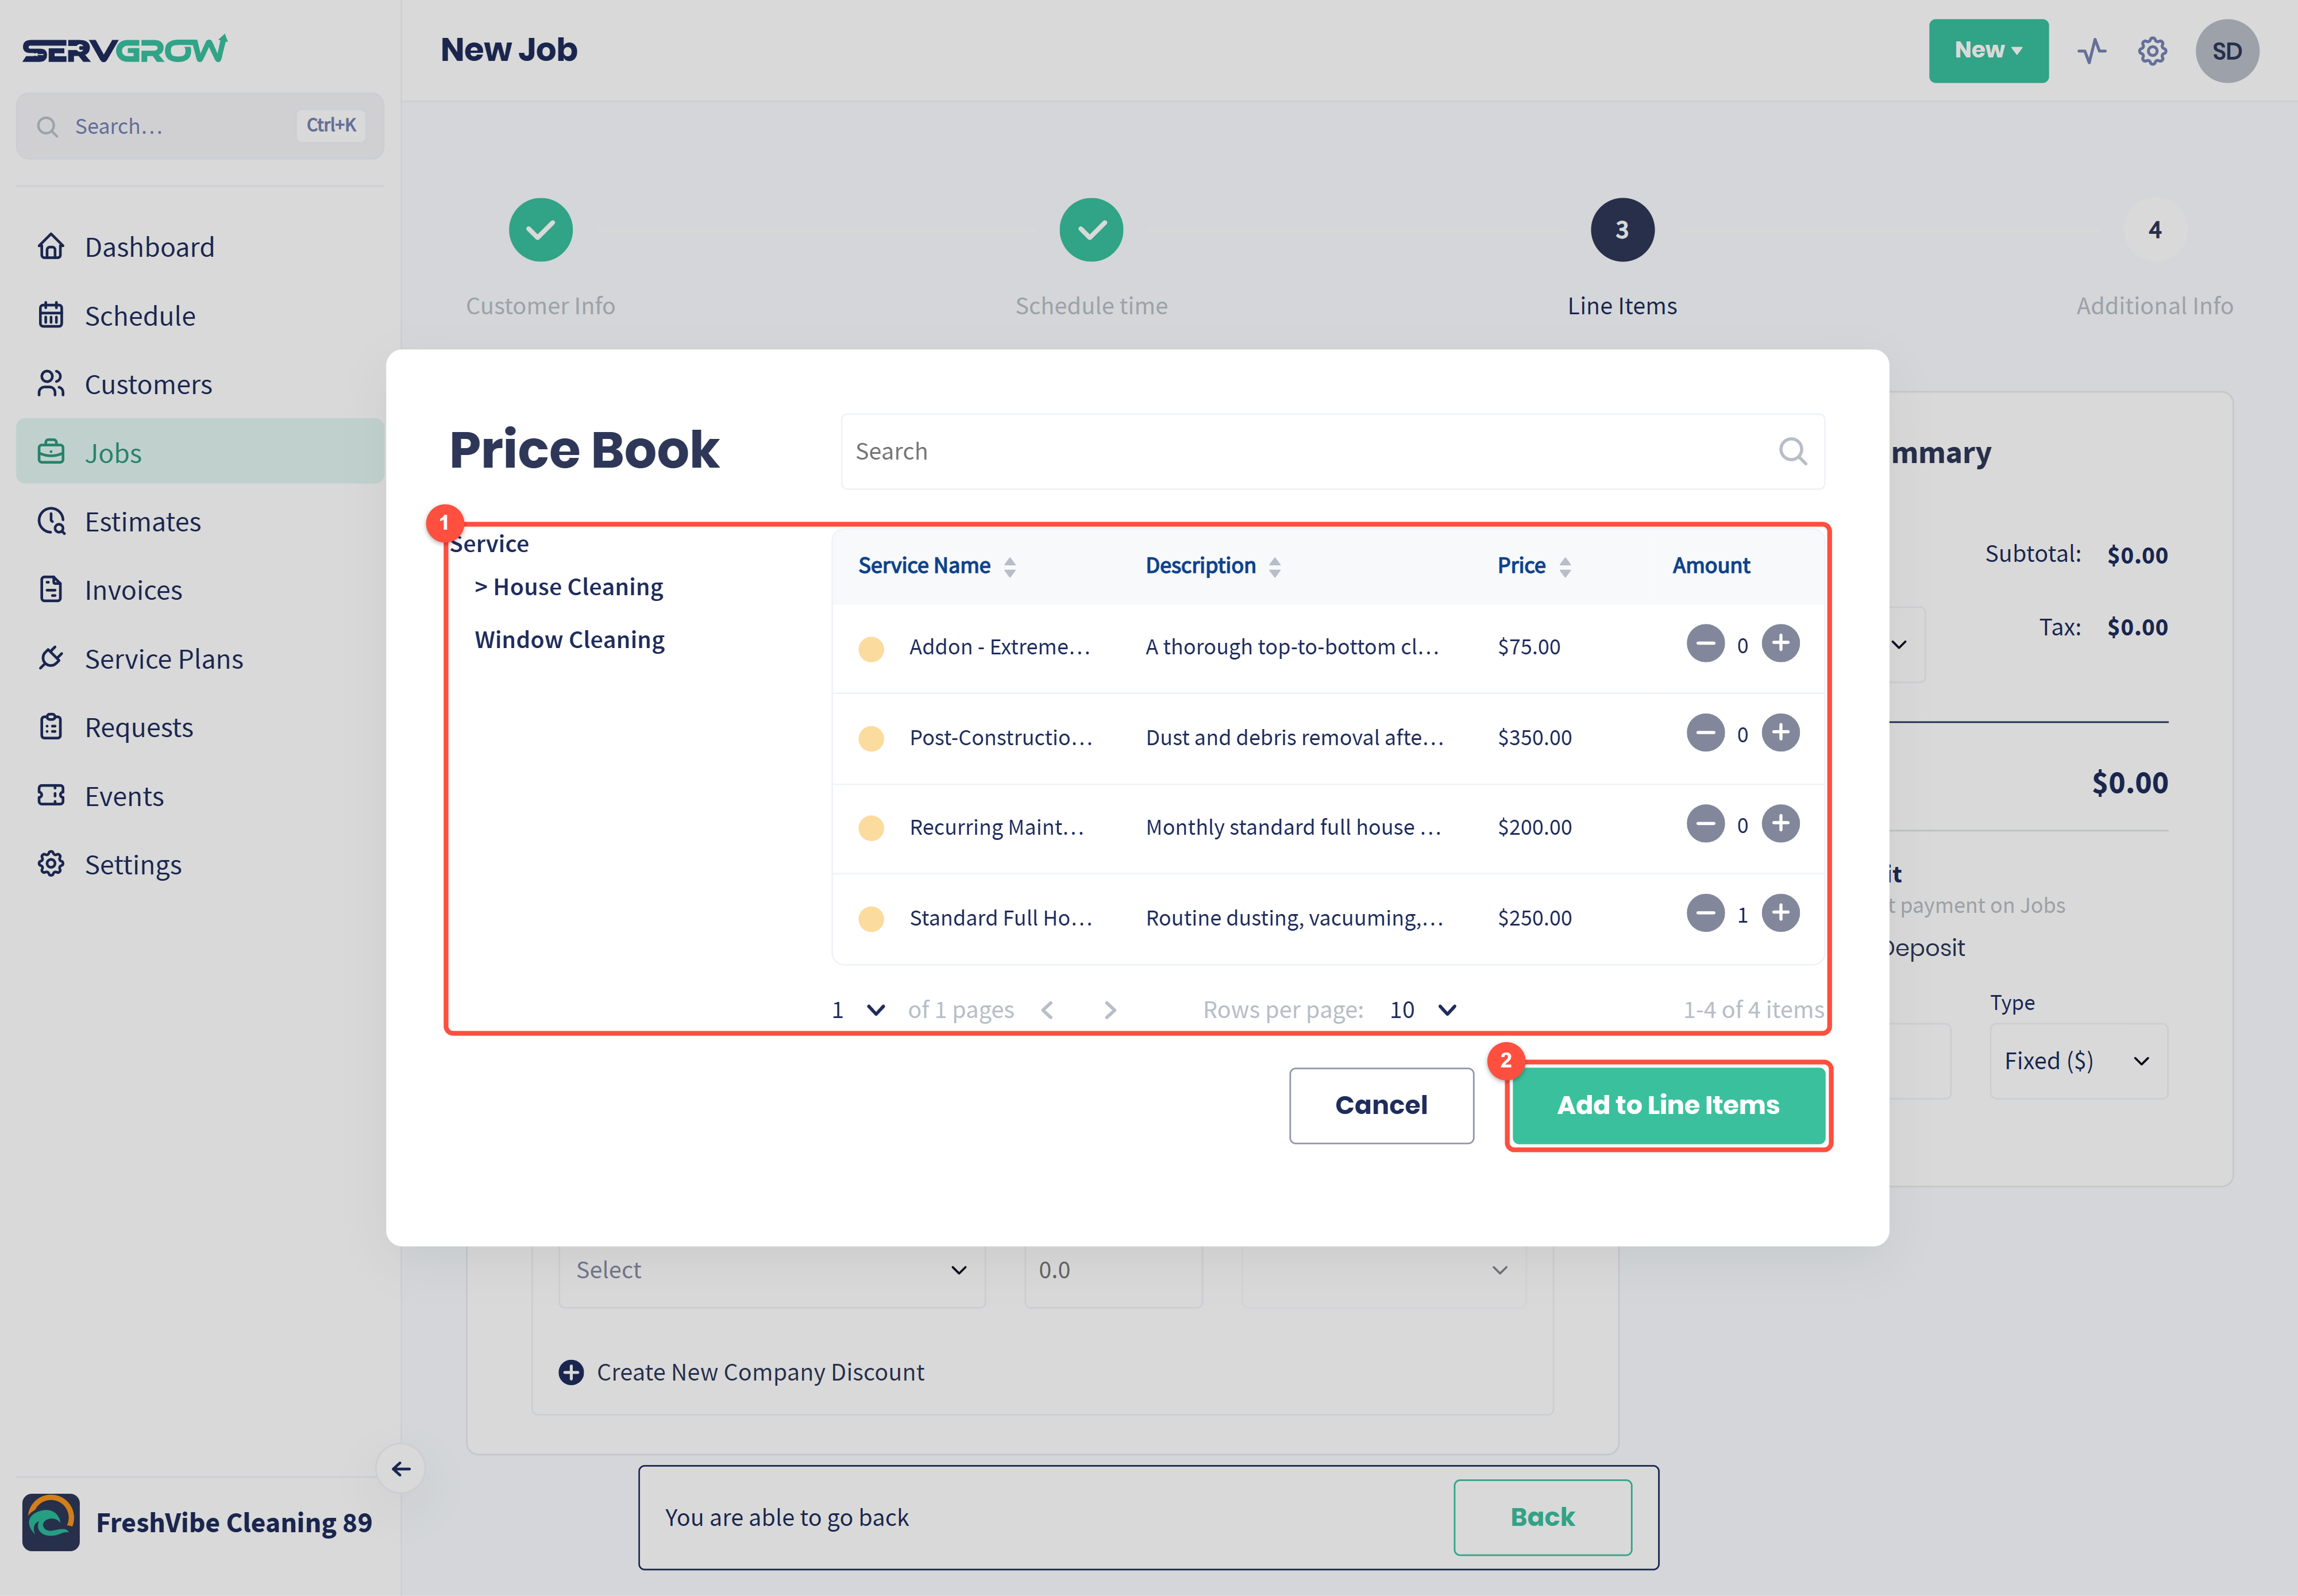
Browse by category on the left or search. Use + and - to set the quantity of each service you need.
Click Add to Line Items.
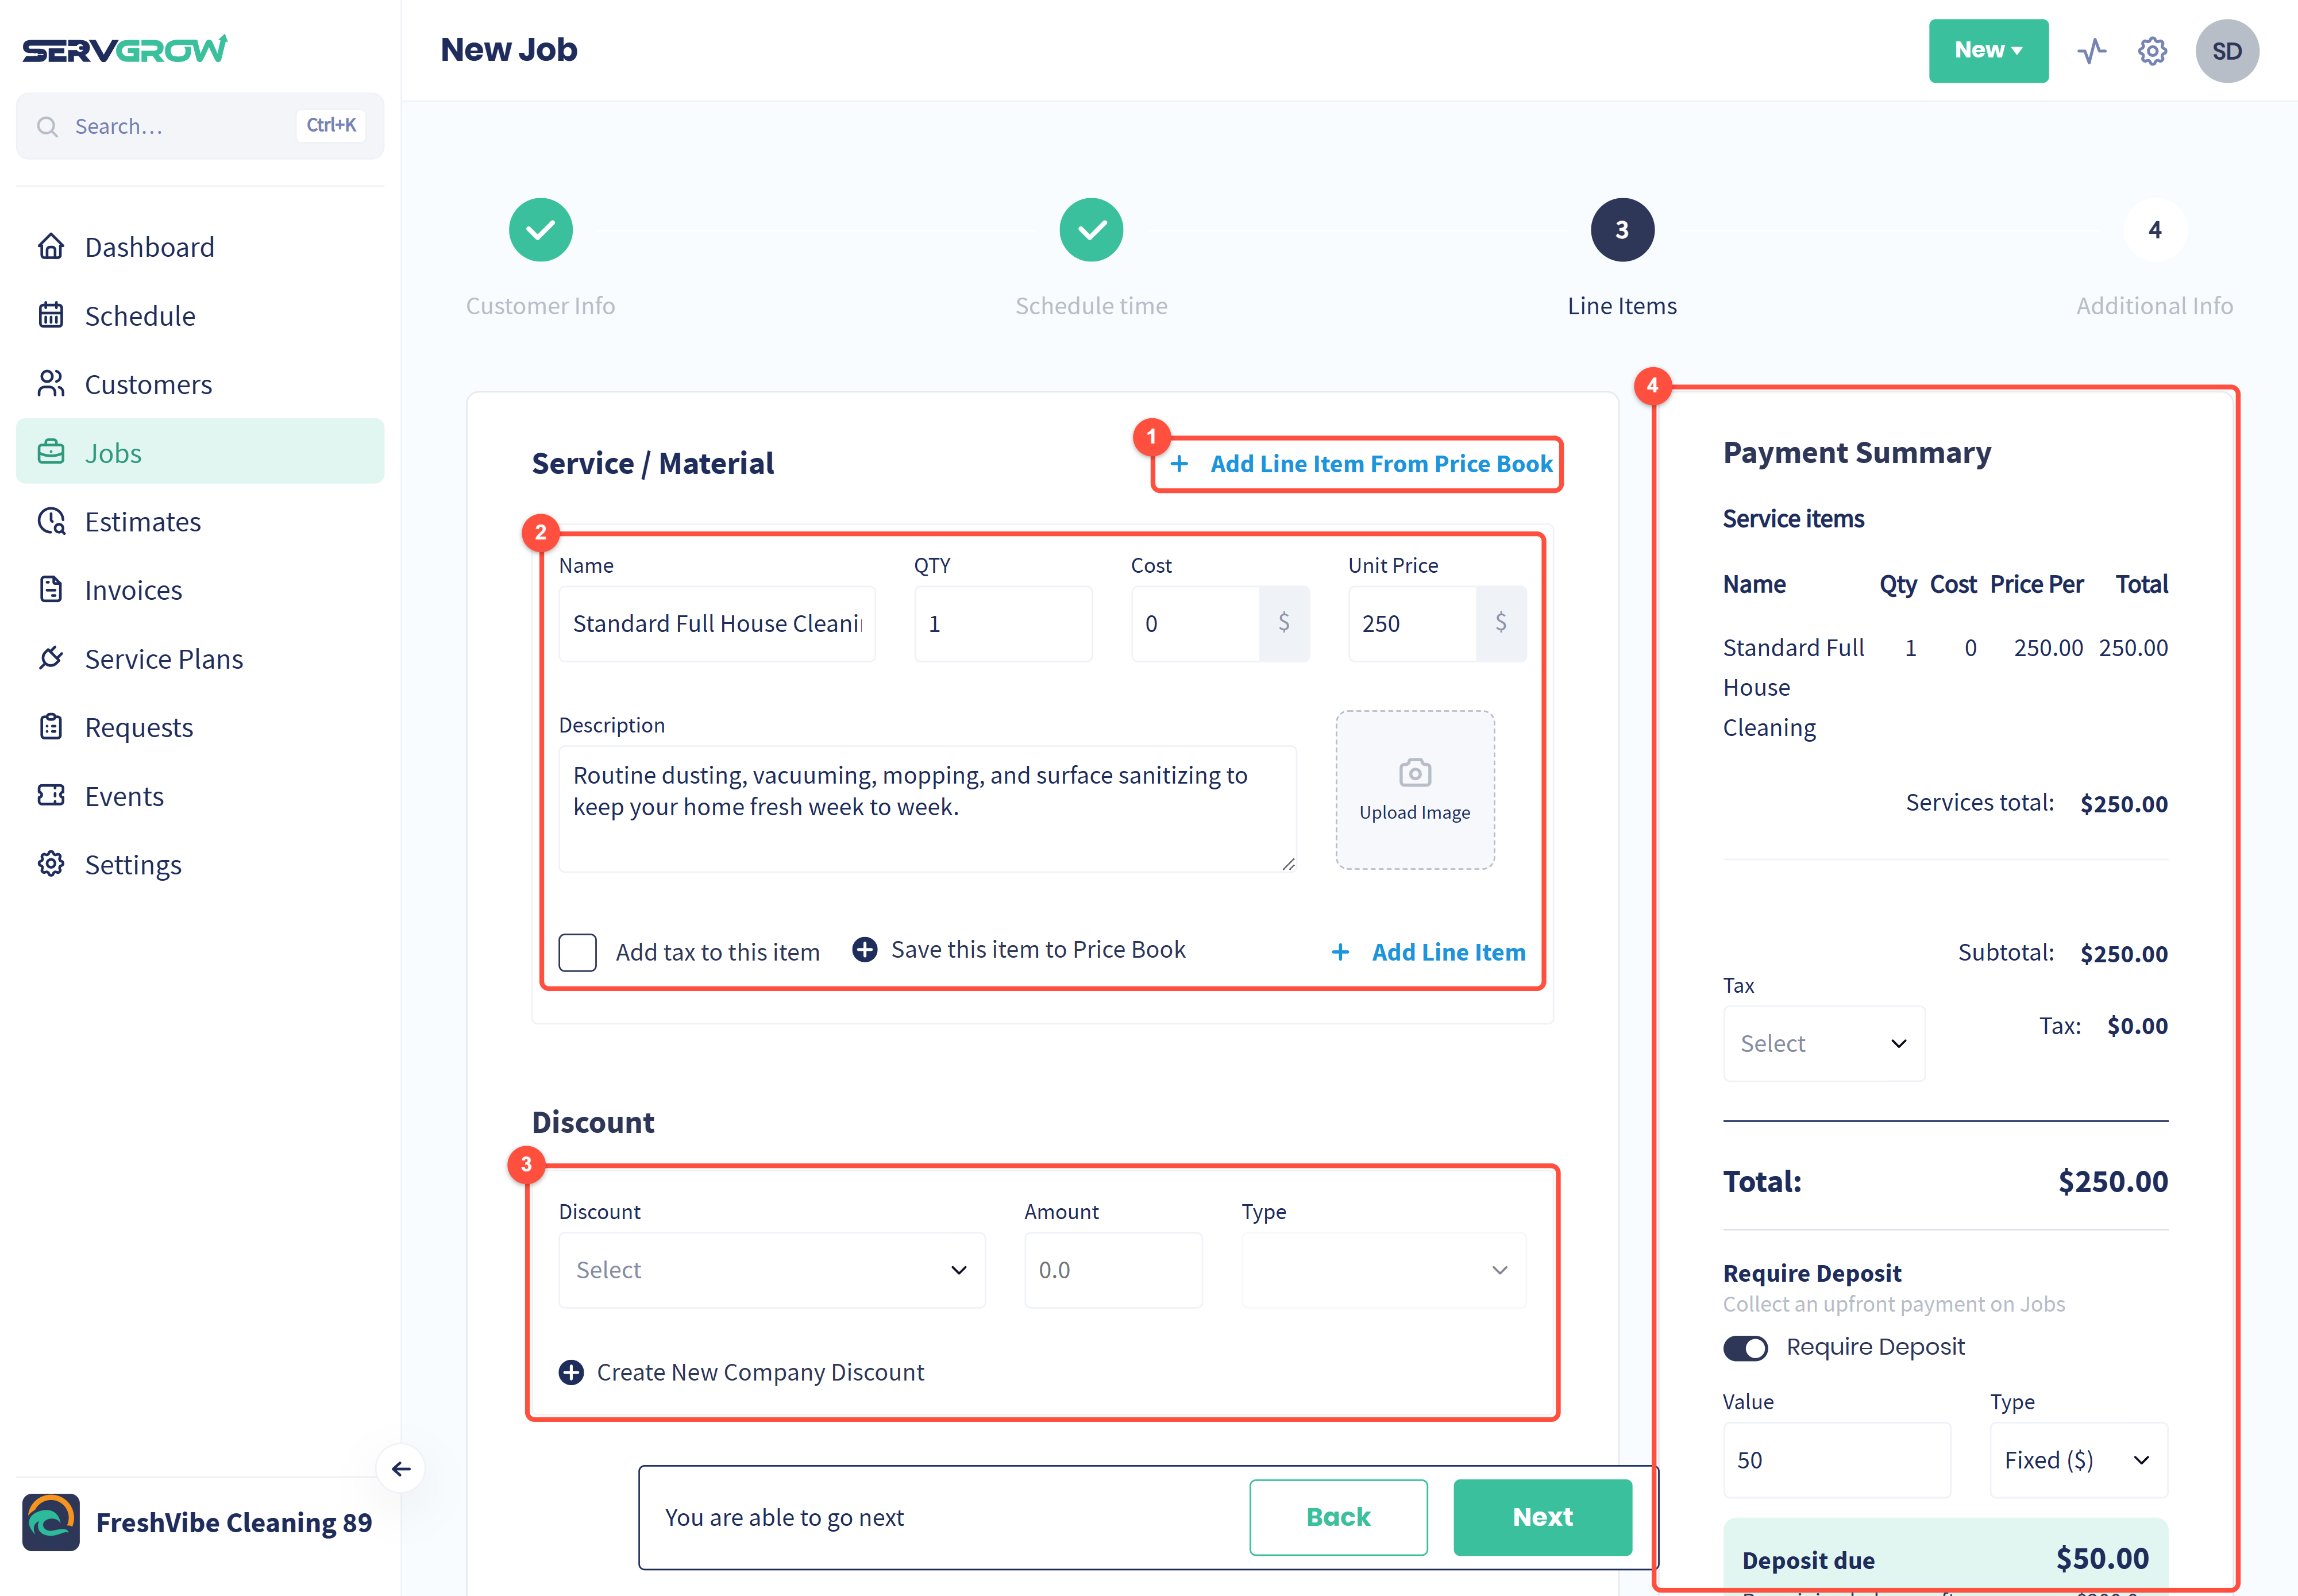
Add Line Item From Price Book: add more items at any time.
Each line has a Name, QTY, Cost (what the item costs your business) and Unit Price (what you charge), plus a Description and an optional image. Tick Add tax to this item if it is taxable. Adding something that is not in your Price Book? Type it in, and click Save this item to Price Book to reuse it next time. Add Line Item adds another blank line.
Discount: pick one of your company discounts, or click Create New Company Discount.
Payment Summary: check the items, choose the Tax rate and confirm the Total. Turn on Require Deposit to collect part of the payment up front, as a fixed amount or a percentage. The summary shows the deposit due.
Click Next.
Step 4: Additional Info
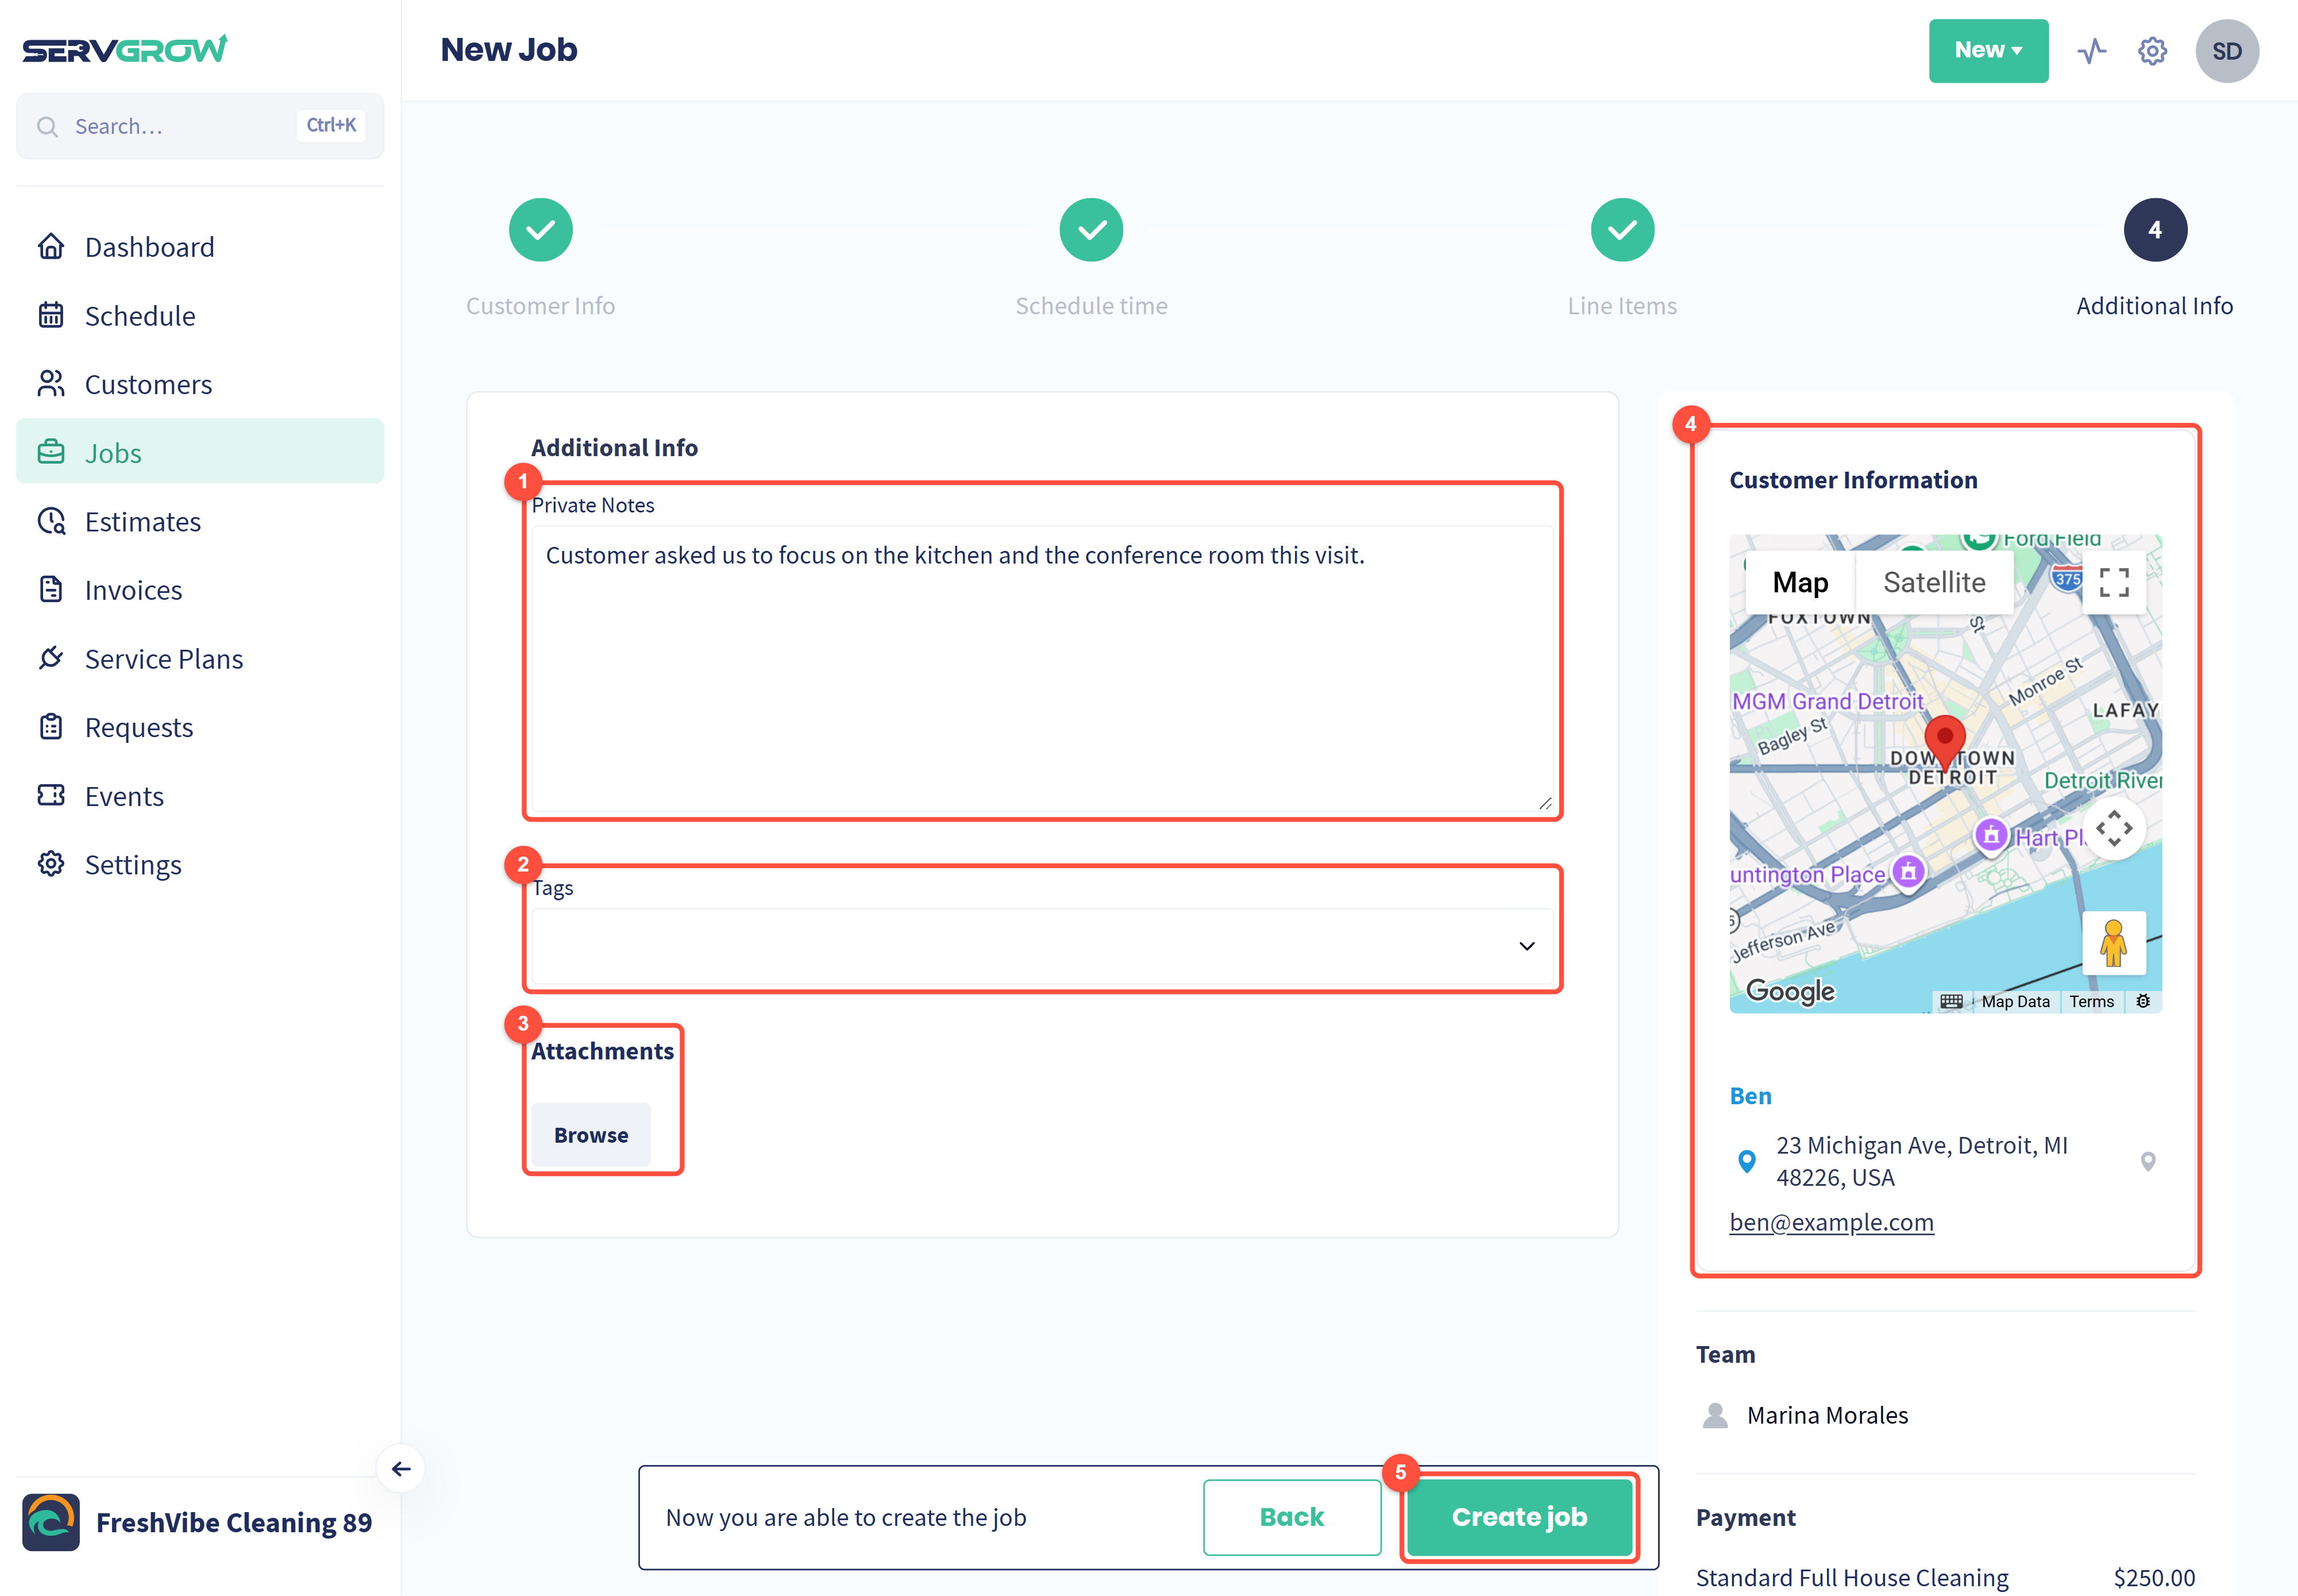
Private Notes: notes for your team about this job, such as what to focus on or how to get in. As the name says, they are private to your team.
Tags: label the job so you can find and filter it later.
Attachments: click Browse to add photos or files, such as a floor plan or photos of the problem.
Check the summary on the right: the customer, the team and the payment.
Click Create job.
The job is saved and appears on your schedule and in your Jobs list. Need to change something first? Click Back to return to an earlier step.
Anyone on your team with permission to create work can create jobs. By default that is all three roles, Field Techs included.
Tips for smoother jobs
Build your Price Book first. Jobs are faster to create and your prices stay consistent from one crew member to the next.
Always assign the team. The job shows on the right person's schedule, and your On My Way texts use their name.
Use Private Notes for access details. Gate codes, pets and parking belong with the job, not in a text message.
Related articles