
Every job, estimate, invoice and service plan in Servgrow belongs to a customer. The more you record when you add them, the less your team has to ask later: which door to use, who to ask for, where the customer heard about you, whether they want a text before each visit.
A complete customer record pays off every day. Your crew shows up knowing the gate code and where to park. Reminders and On My Way texts go out automatically. Tags let you pull up every commercial account or every customer on a route in seconds. And because you record where each customer came from, your Dashboard shows which marketing actually brings in paying work. Adding a customer takes about two minutes.
Where to start
Go to Customers in the left menu.
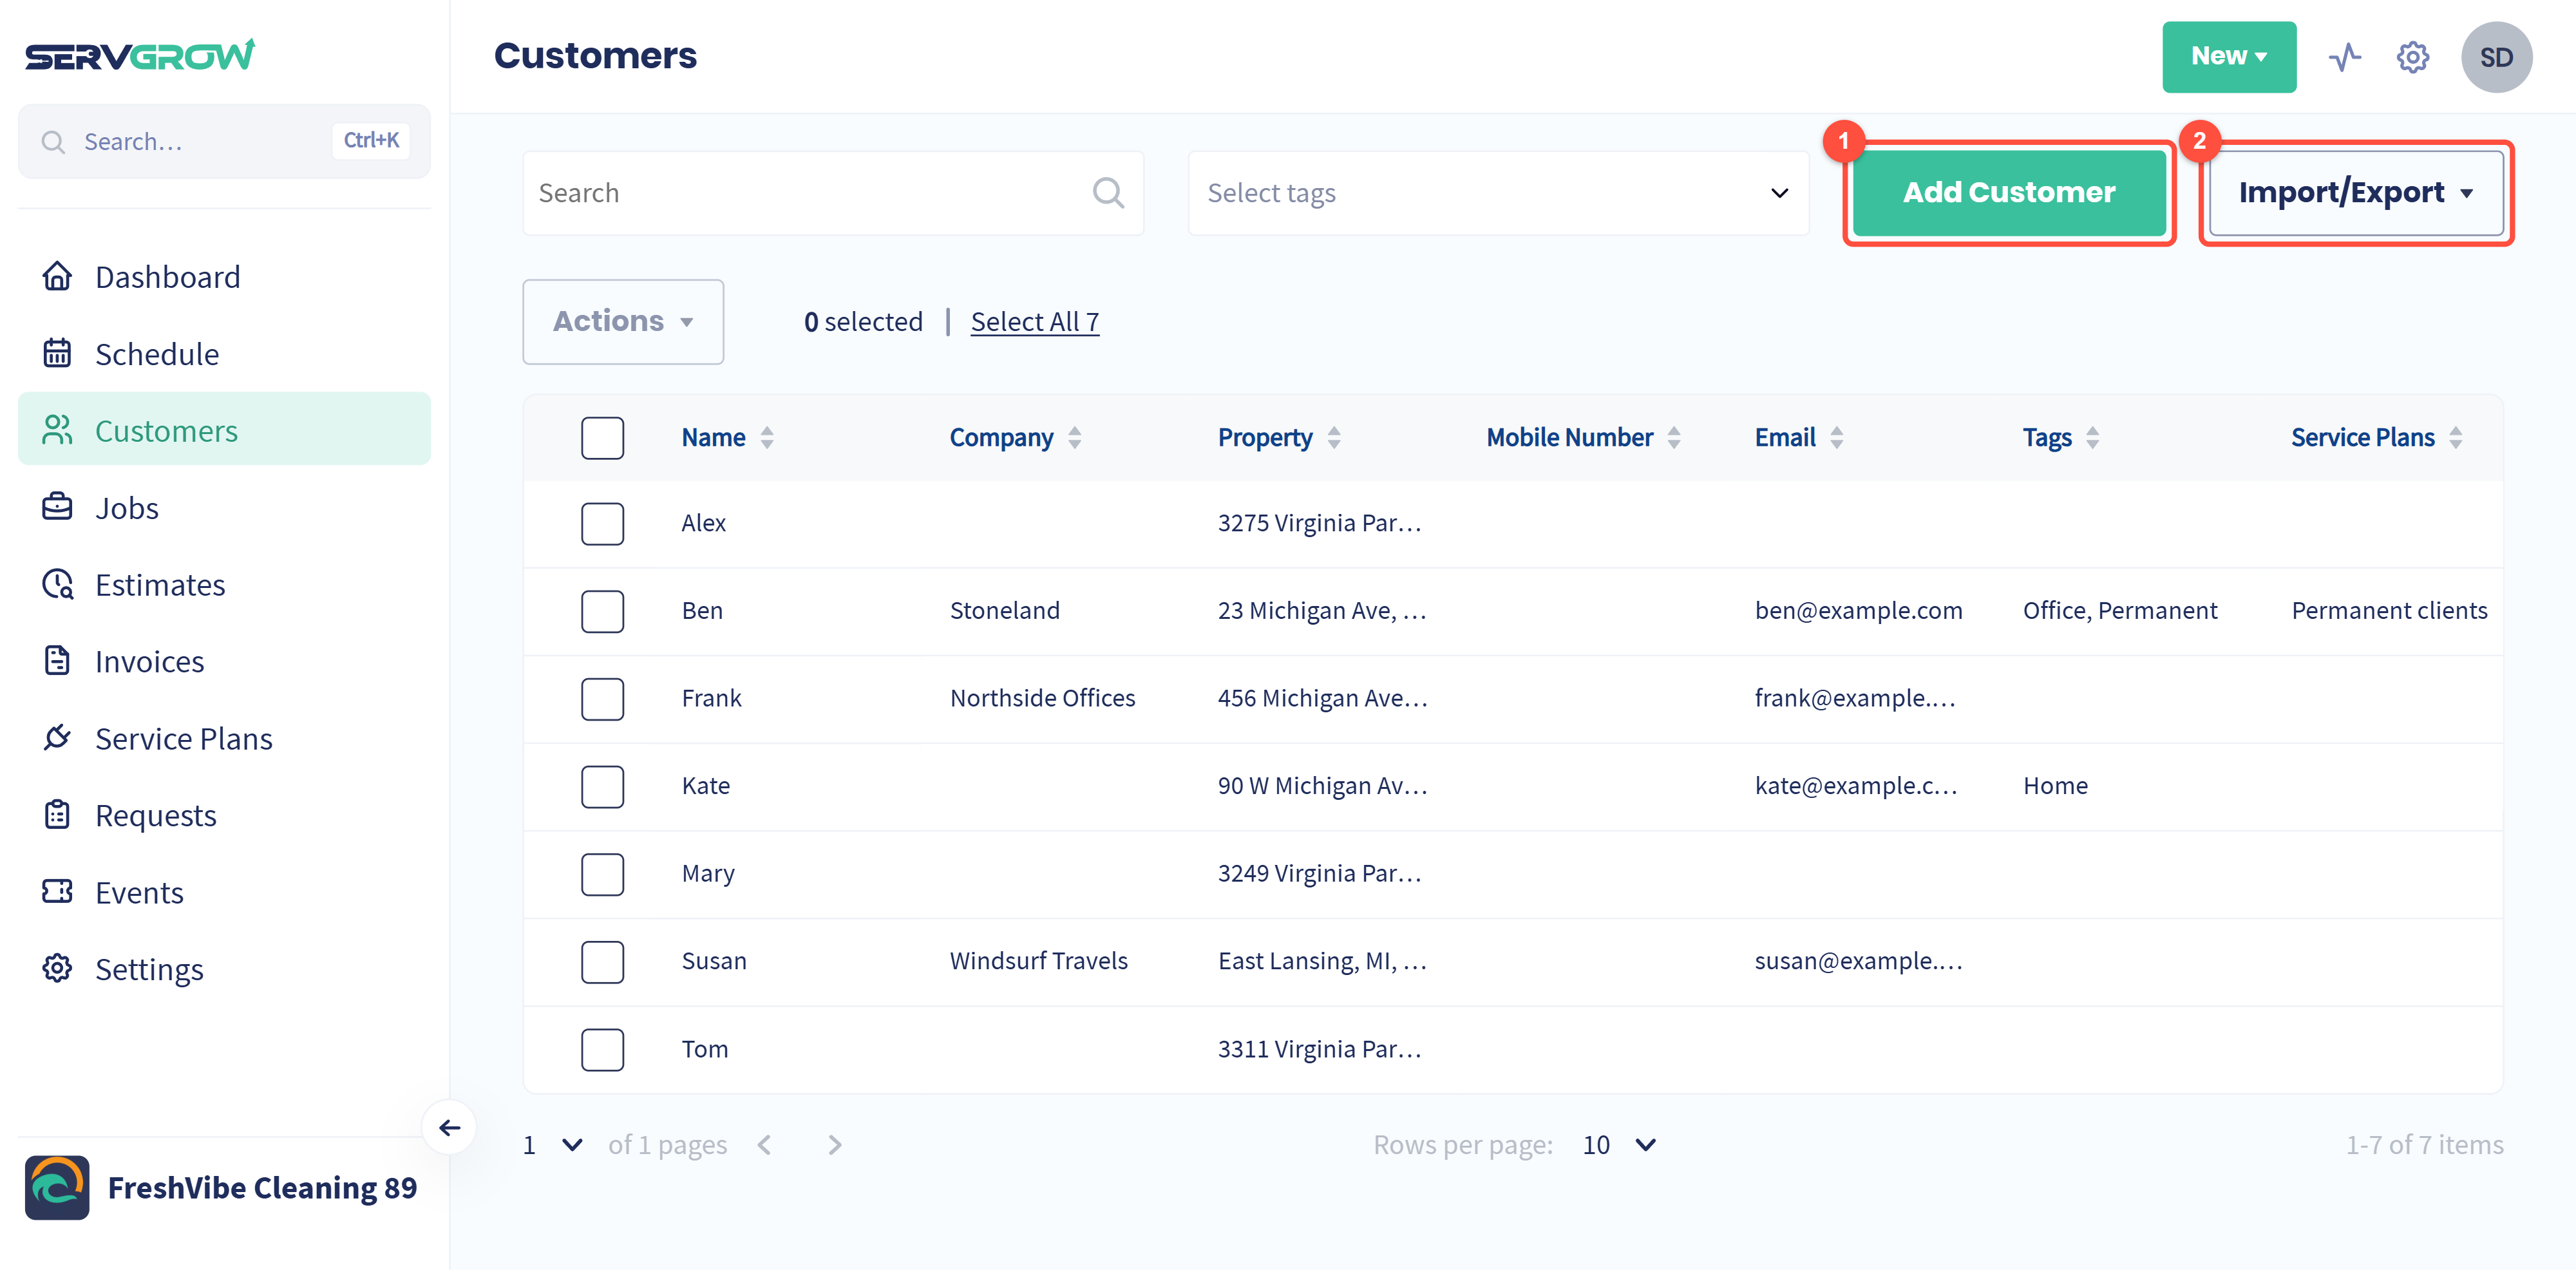
Click Add Customer to add one customer.
Have a whole list to bring in? Use Import/Export instead. See How to Import or Export a Customer List.
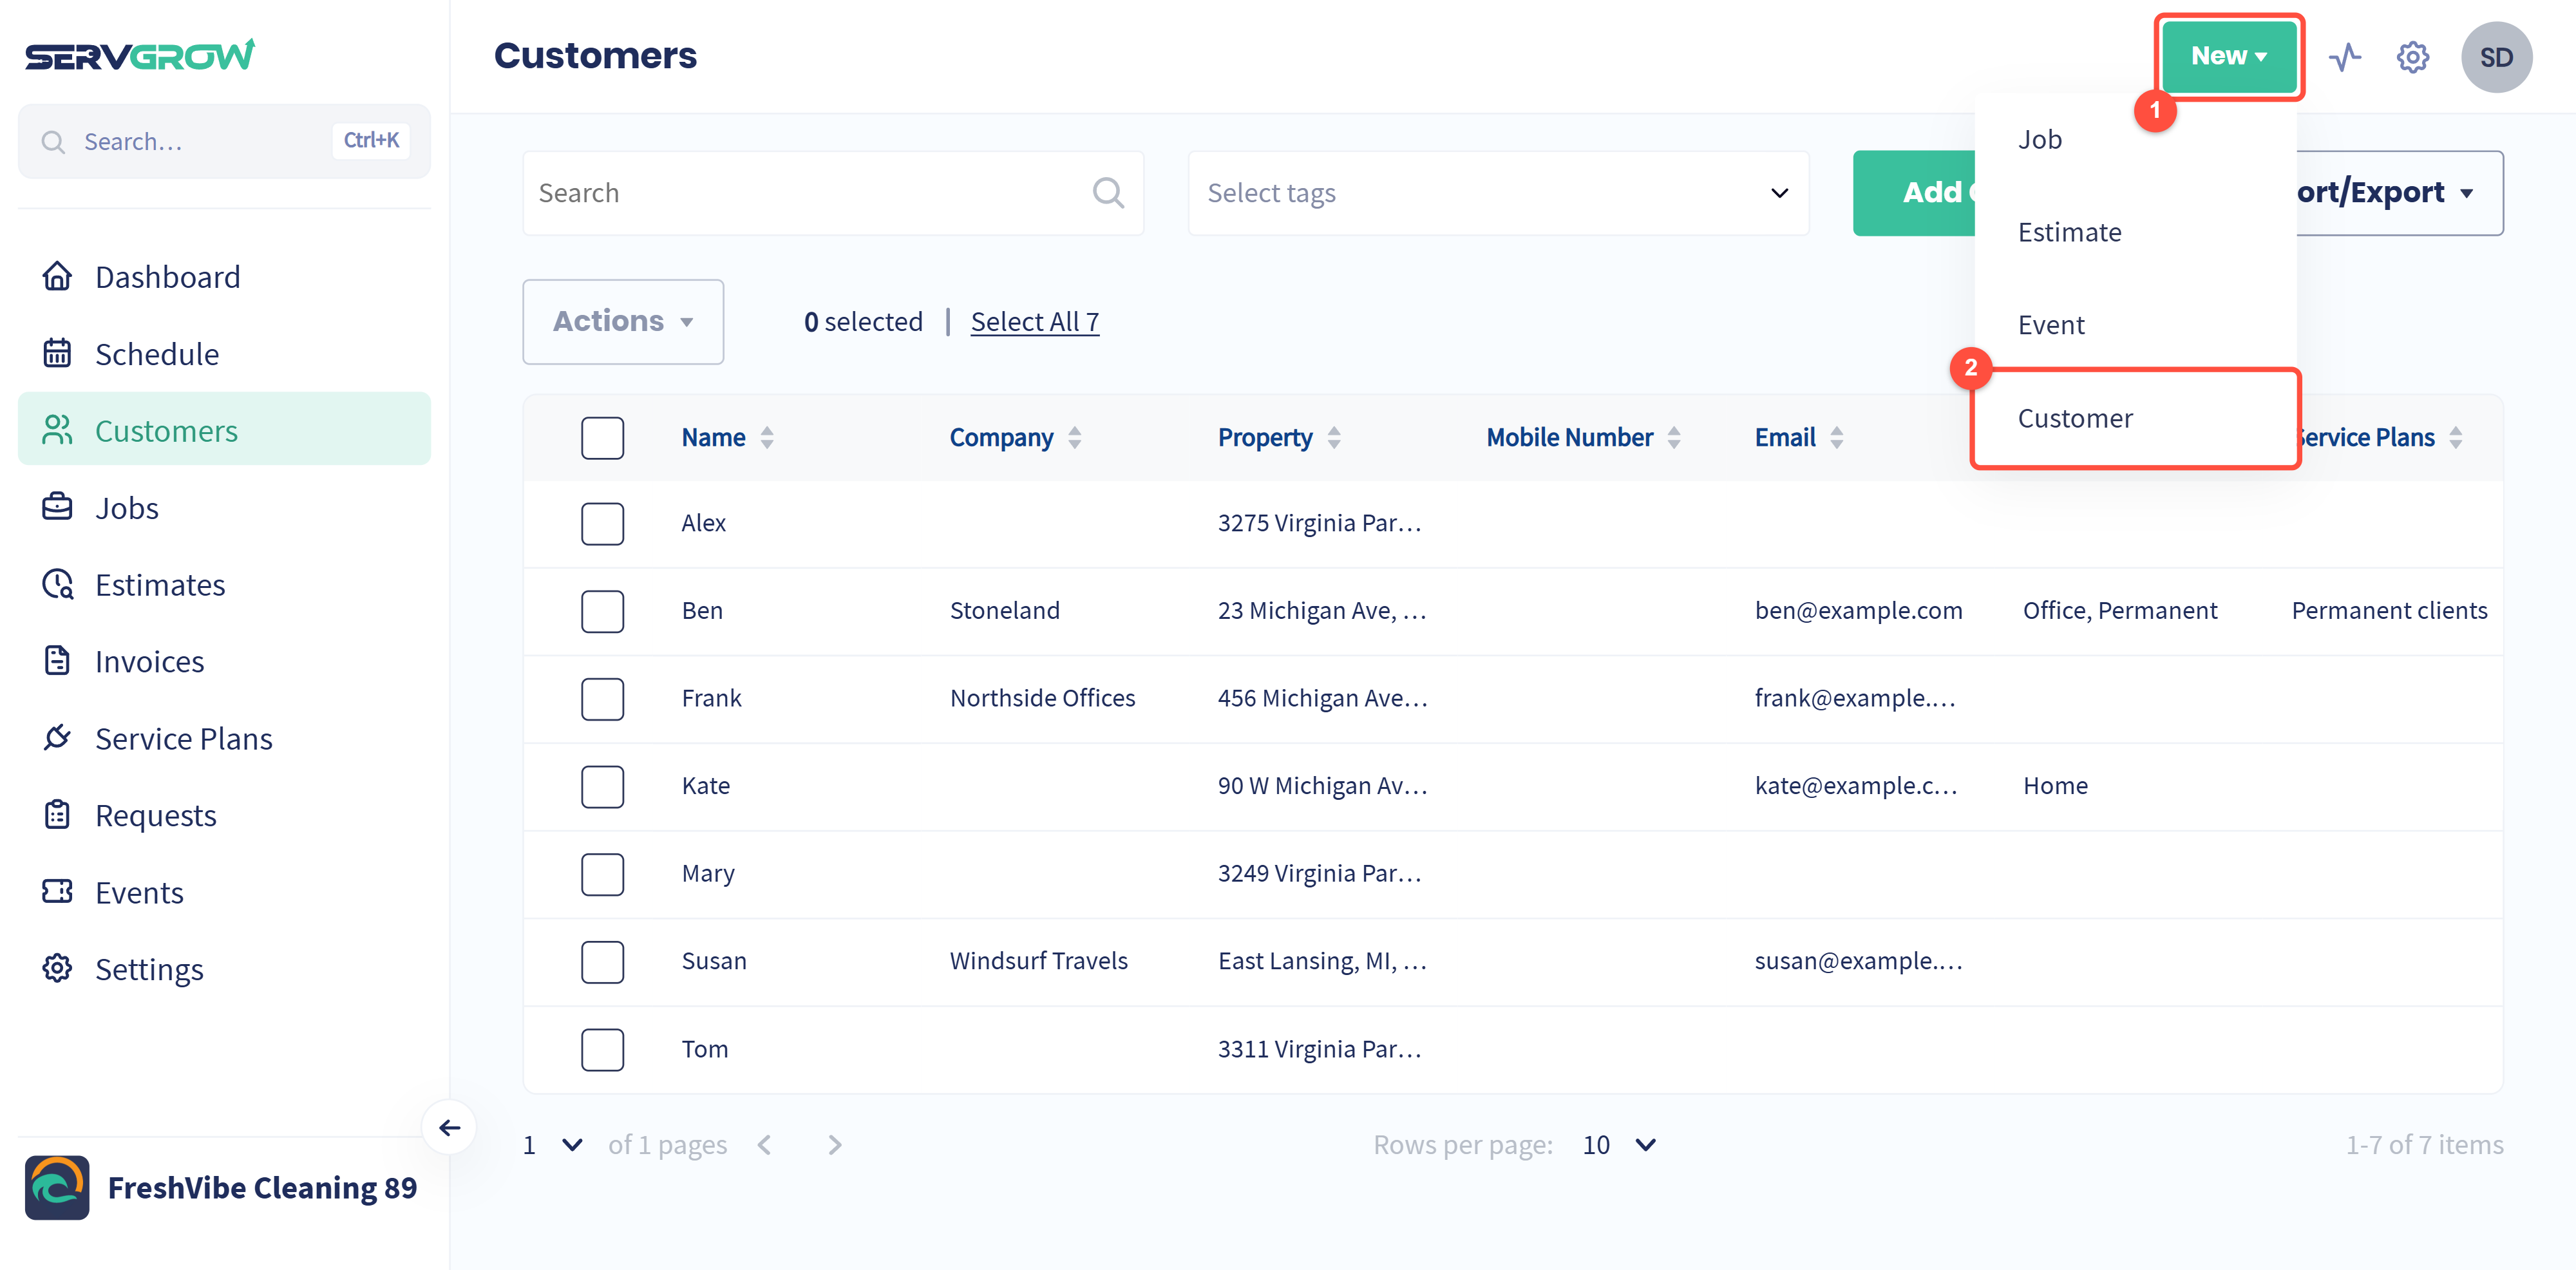
You can also add a customer from any page. Click New at the top of the screen, then Customer.
Company Admins and Office Staff can add customers. Field Techs cannot by default.
Adding a customer takes three short steps: Contact Info, Property Info and Notes.
Step 1: Contact Info
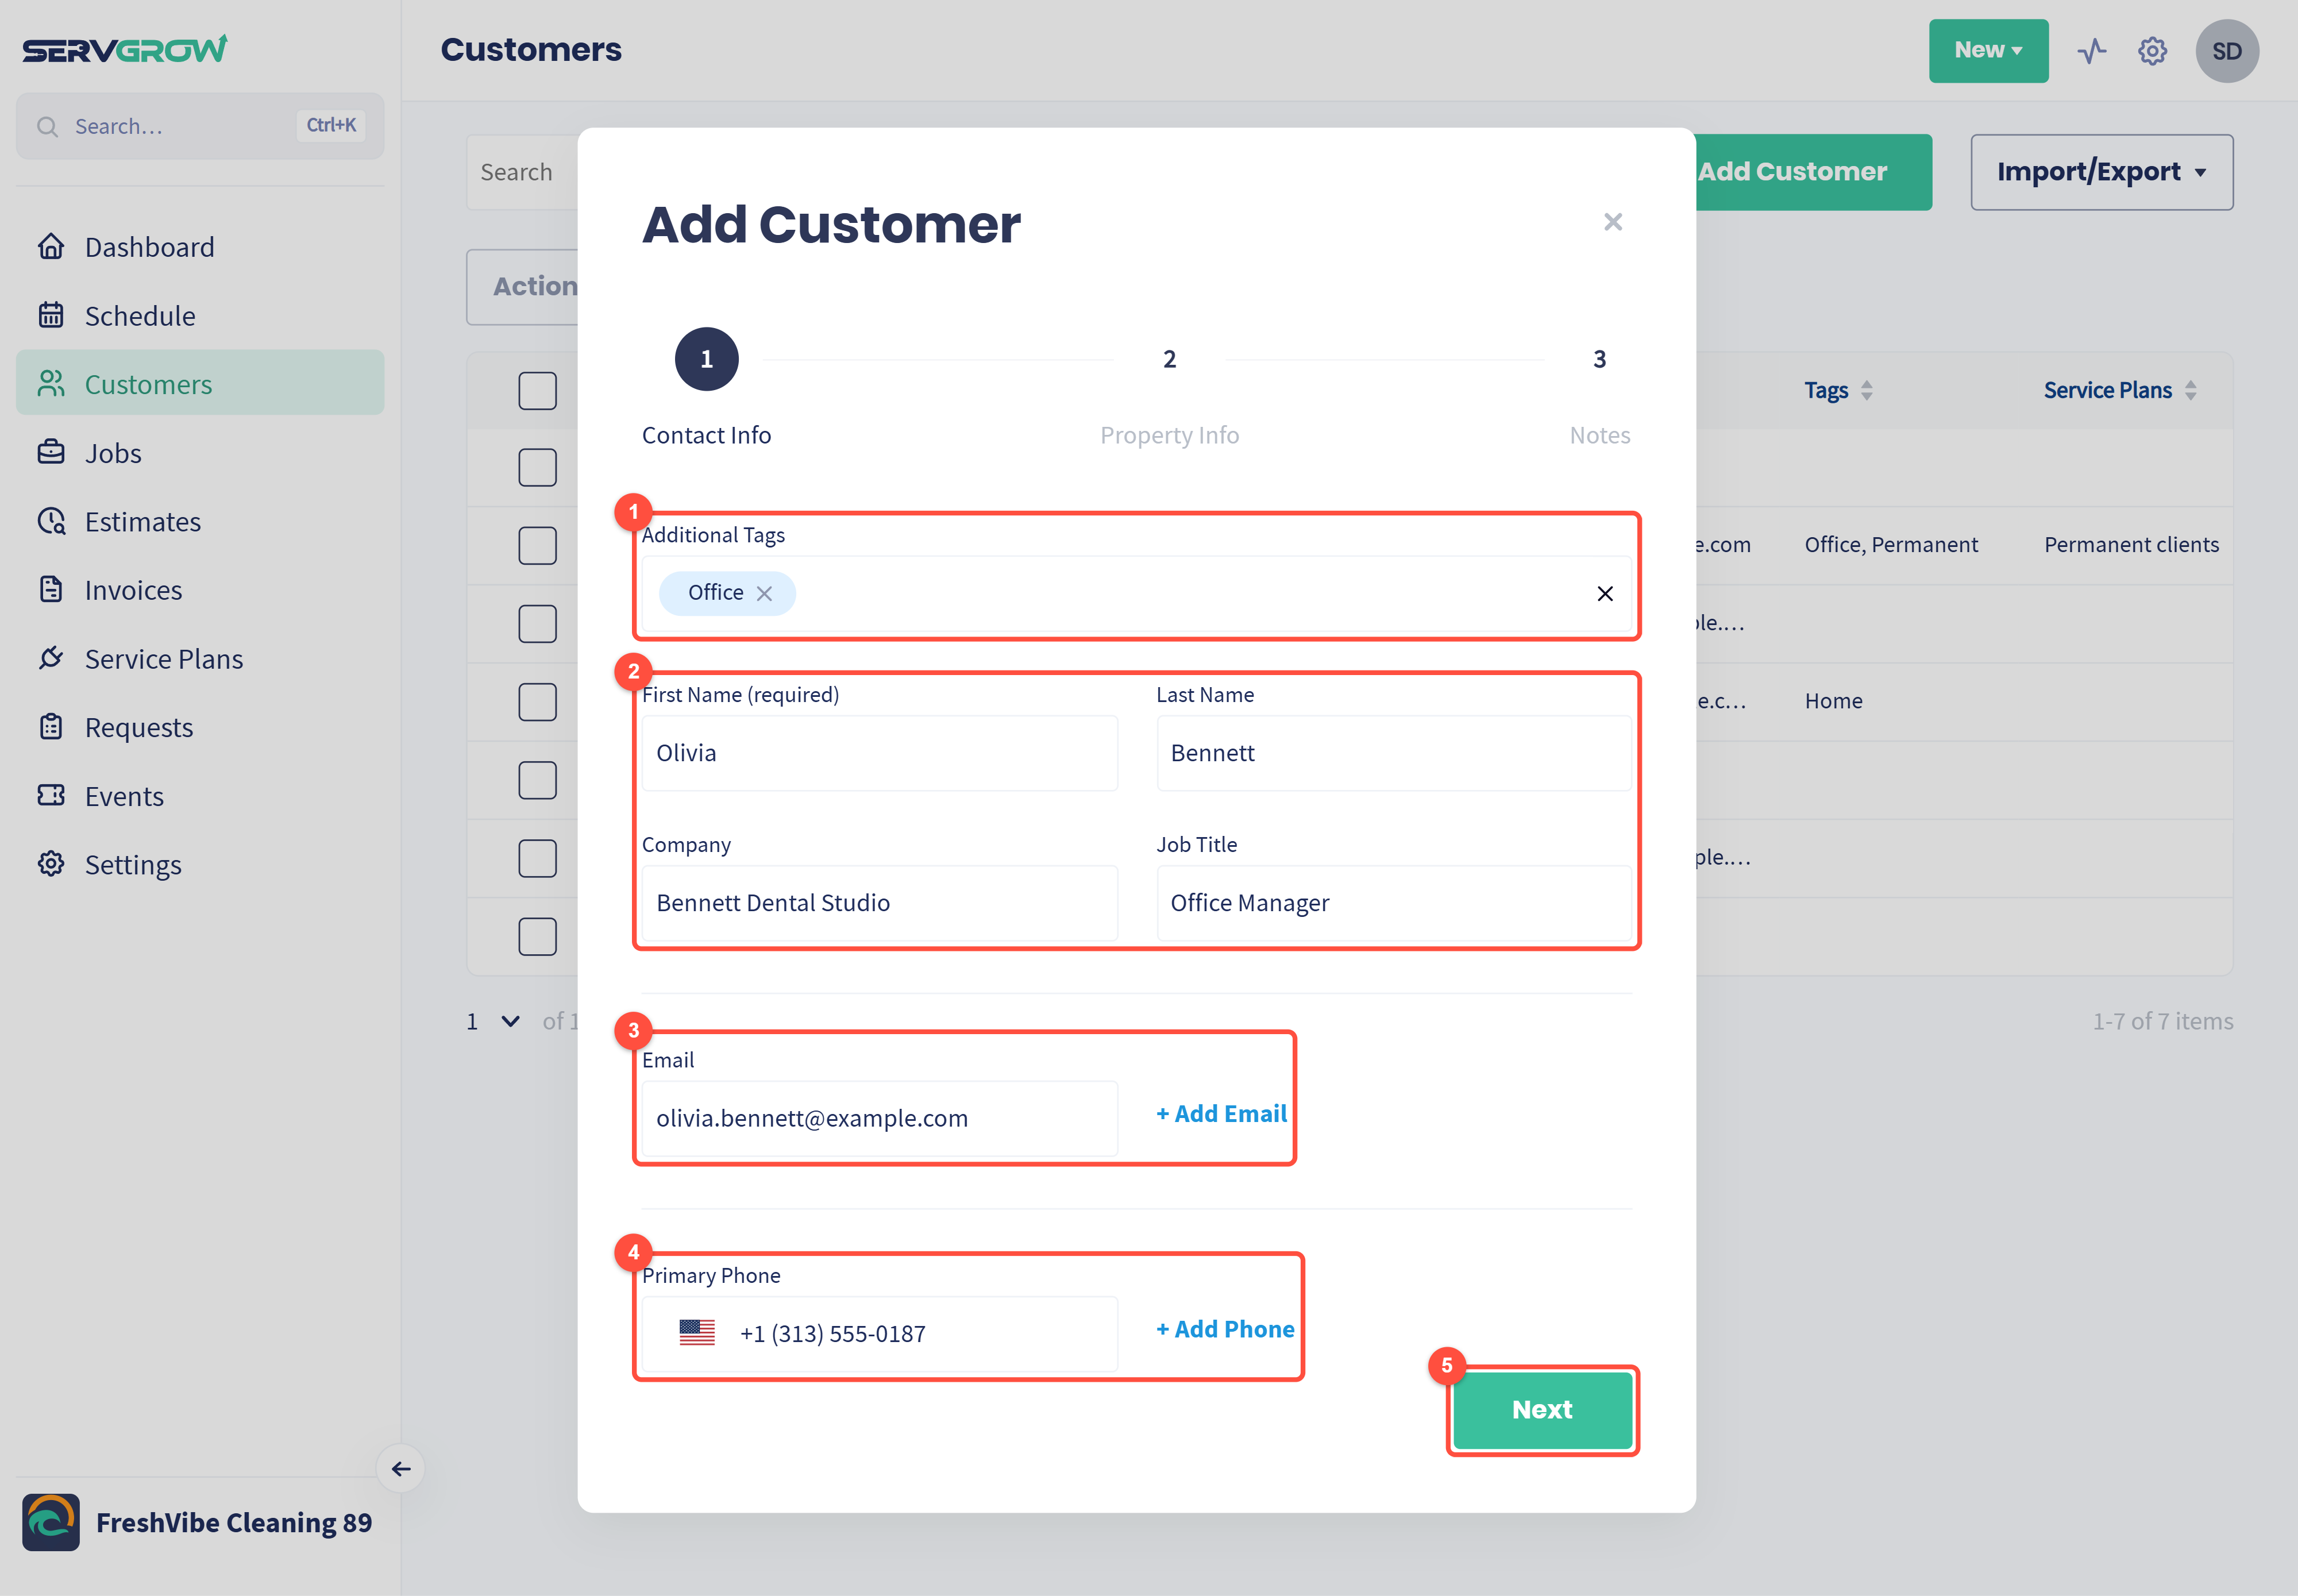
Additional Tags: group the customer so you can find them fast, for example Office, Home or a route name. Pick an existing tag or type a new one to create it. You can filter your Customers list by tag later.
First Name is the only required field. Add a Last Name, and for business customers the Company and the contact's Job Title.
Email: click + Add Email to add a second address.
Primary Phone: click + Add Phone to add a second number.
Click Next.
No more duplicates. Servgrow checks the email and phone number as you type. If another customer already has them, you will see a message such as "Email already taken by" followed by that customer's name, so you can use the existing record instead.
If your account has Residential and Commercial customer tags, this step also offers Add customer type tag, so you can mark the customer as one or the other.
Step 2: Property Info
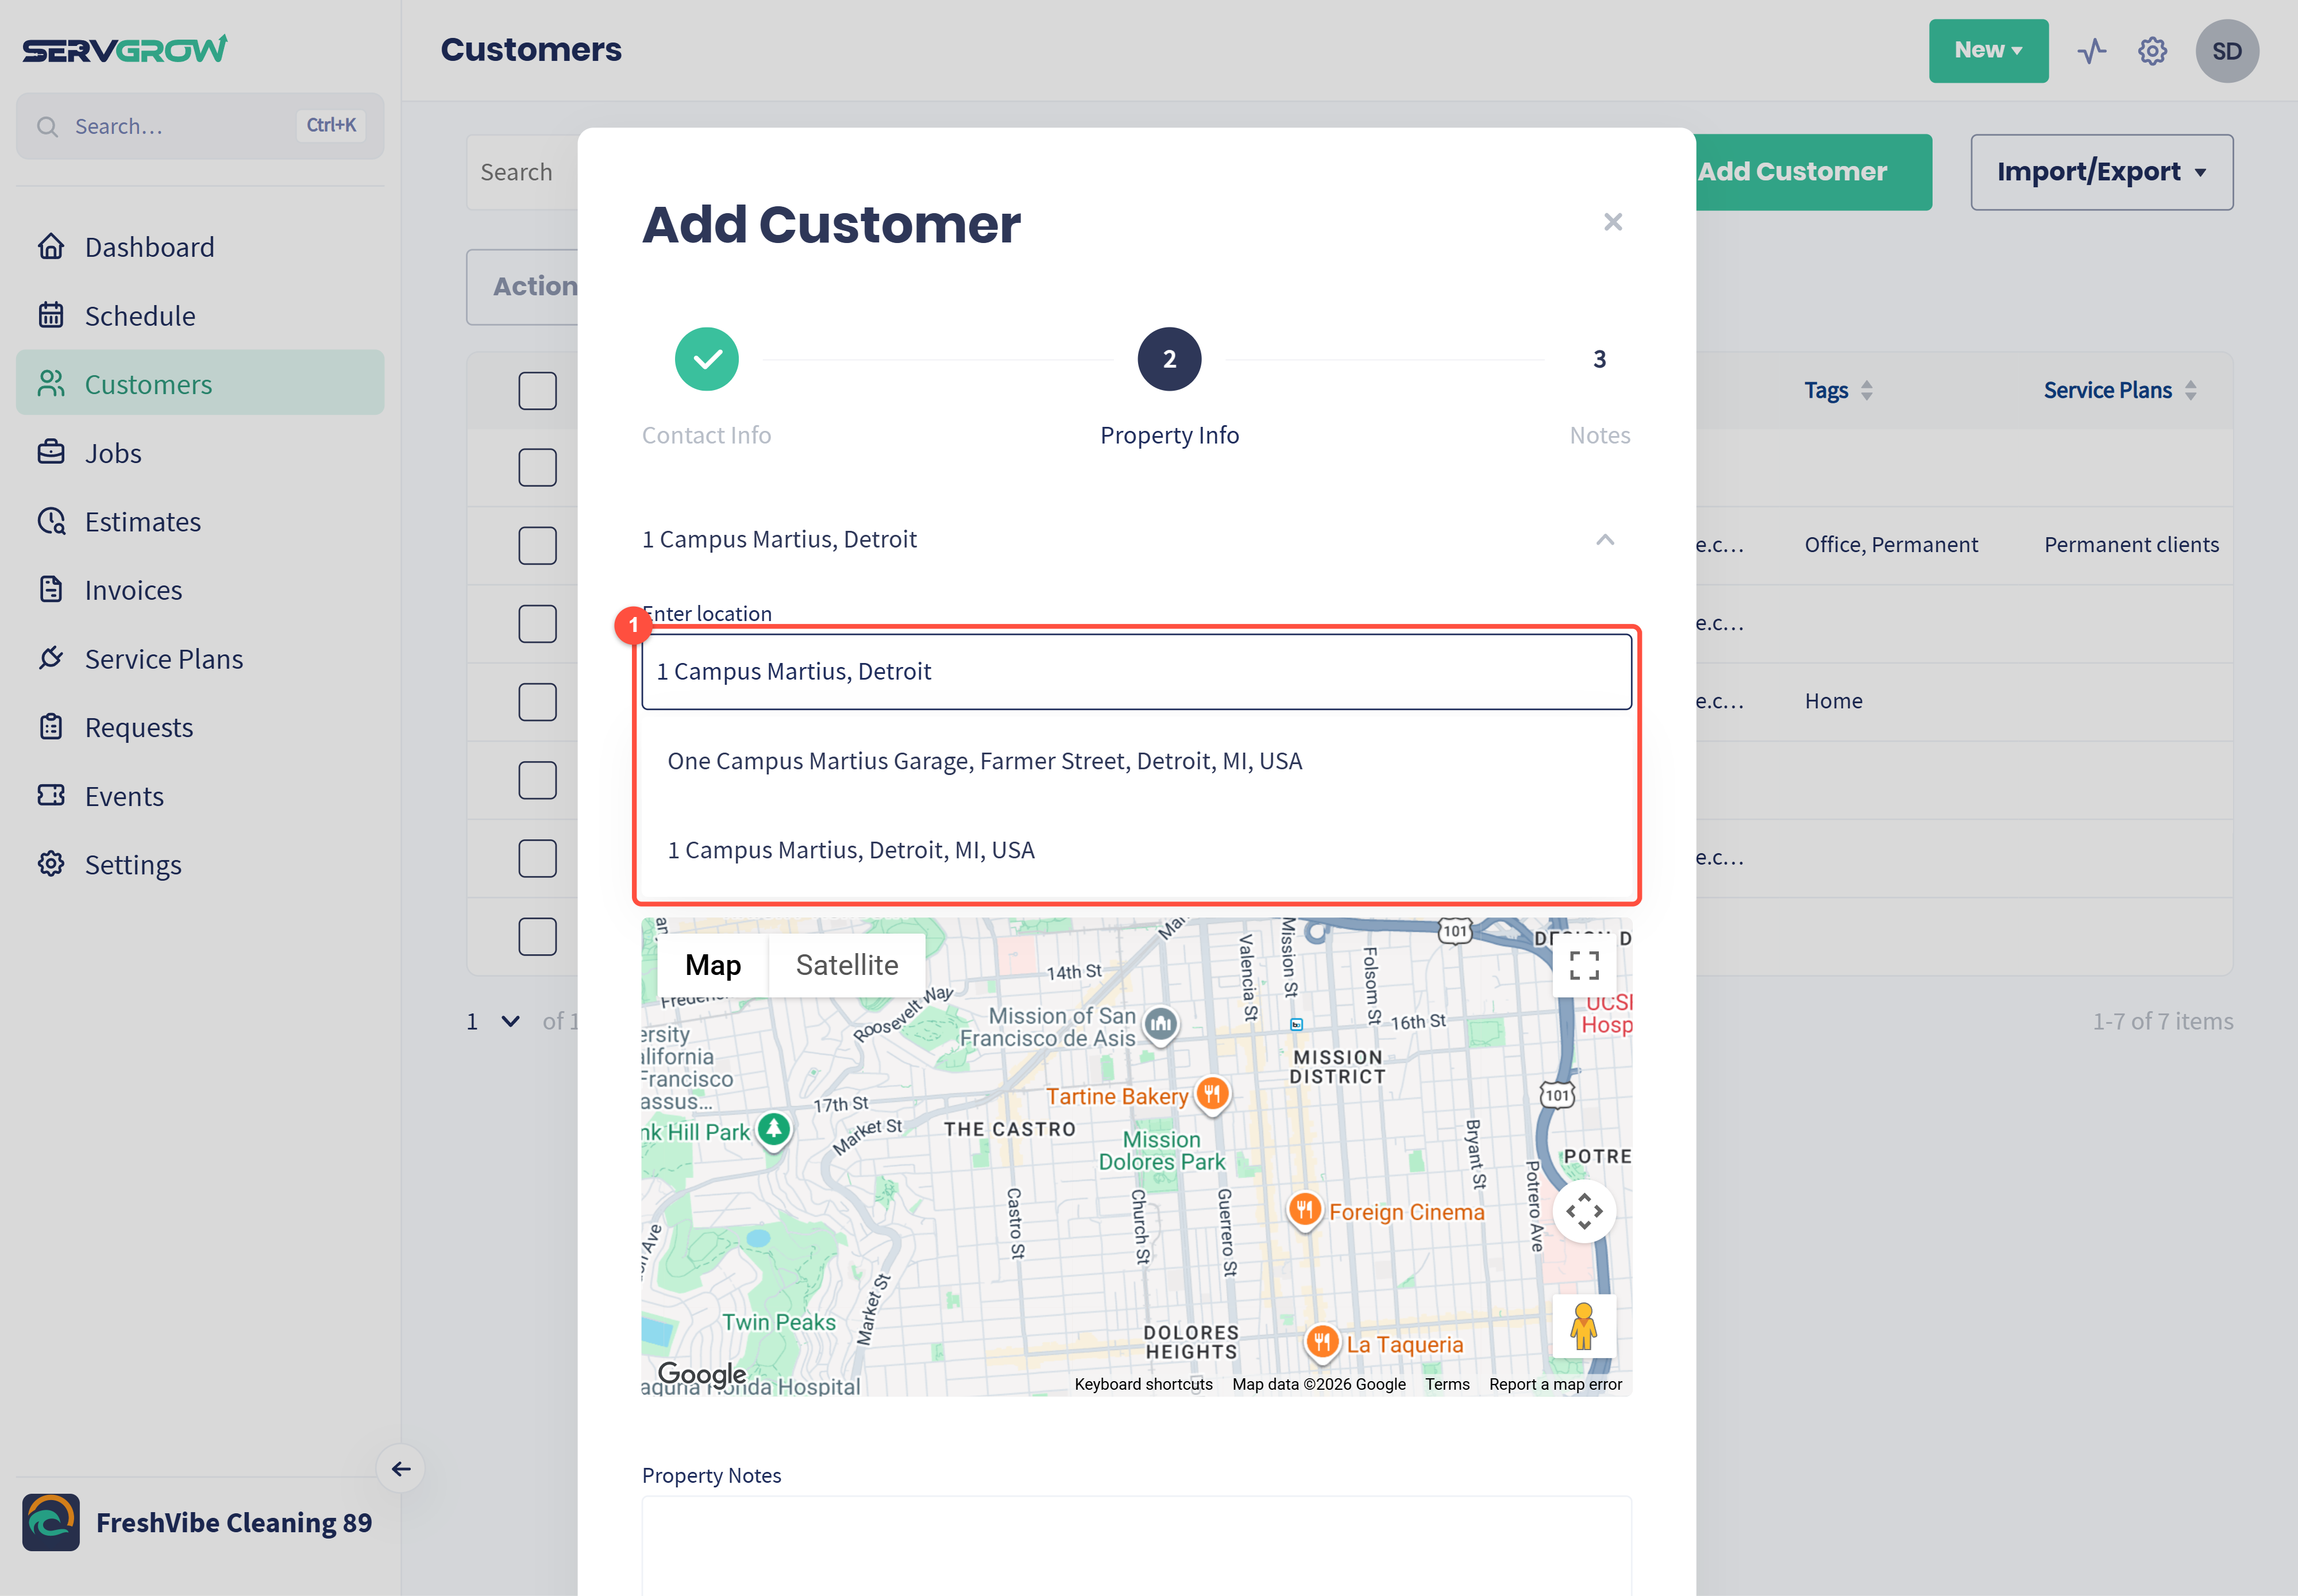
Start typing the service address in Enter location and pick the right match from the list. The map drops a pin on the property.
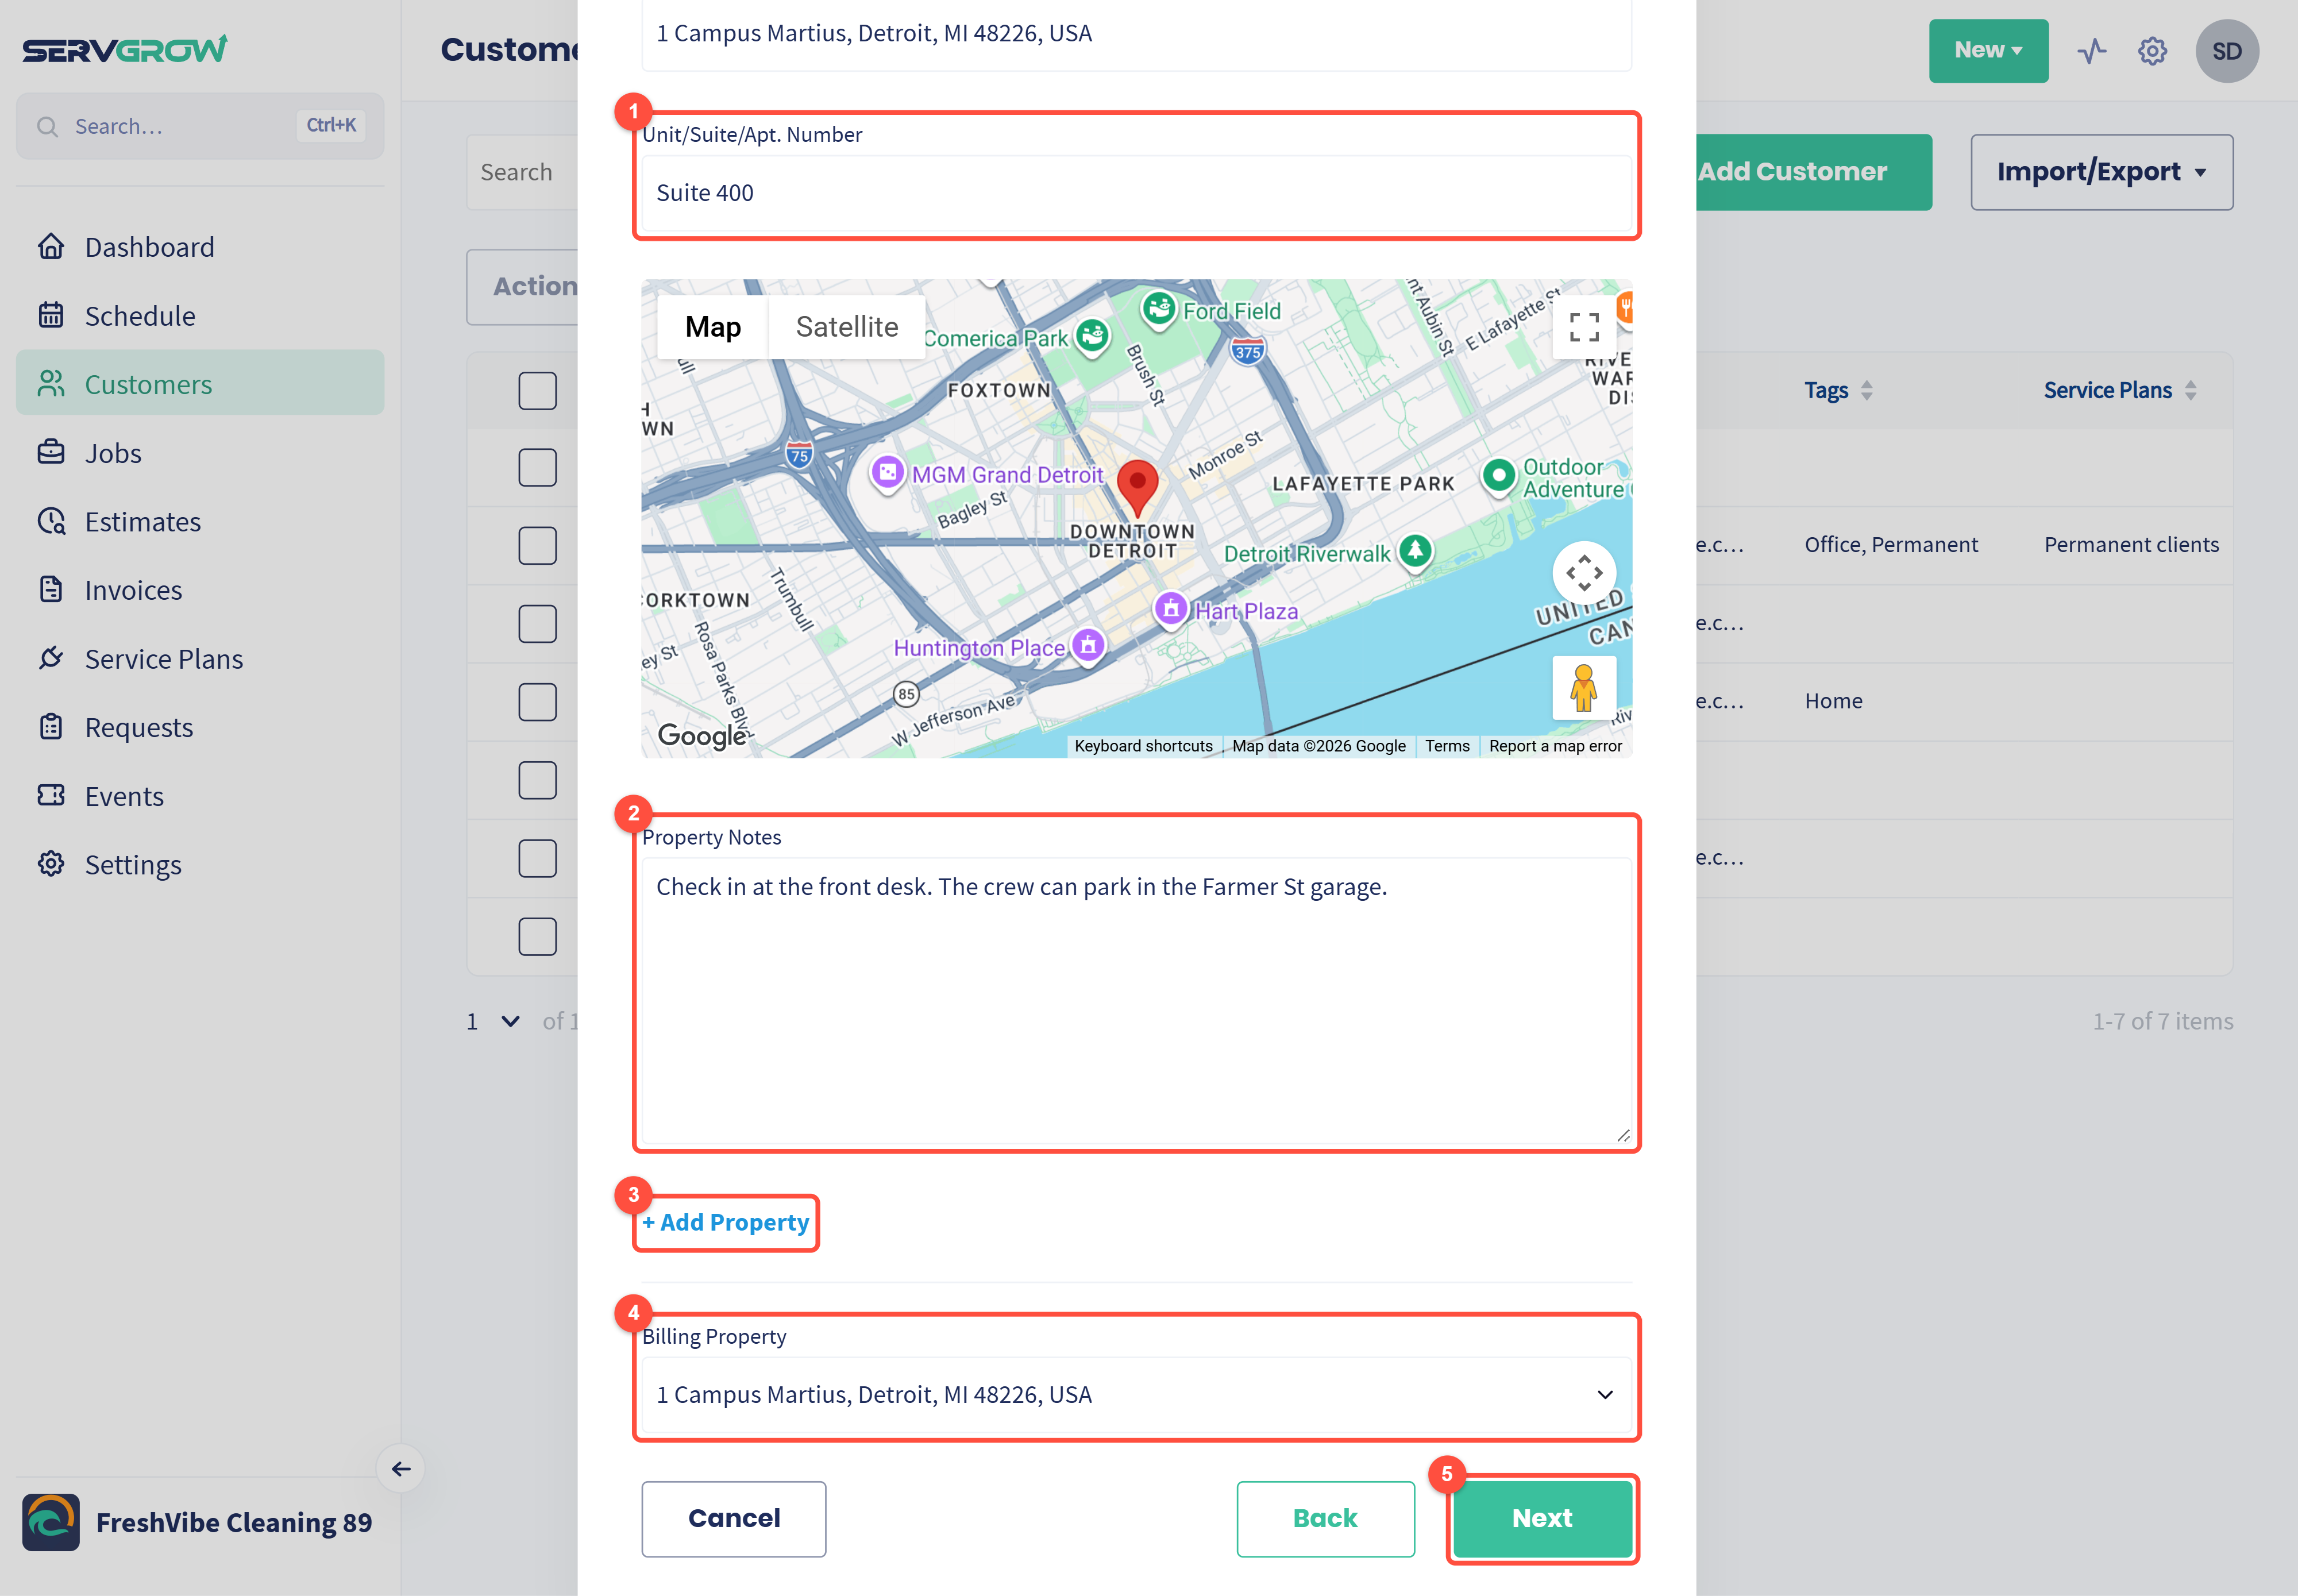
Unit/Suite/Apt. Number: up to 10 characters, such as Suite 400.
Property Notes: anything someone visiting needs to know, such as gate codes, pets, parking or where to check in.
+ Add Property: add another location for customers with more than one, such as landlords, property managers or businesses with several sites.
Billing Property: choose which property is used as the billing address.
Click Next.
Step 3: Notes
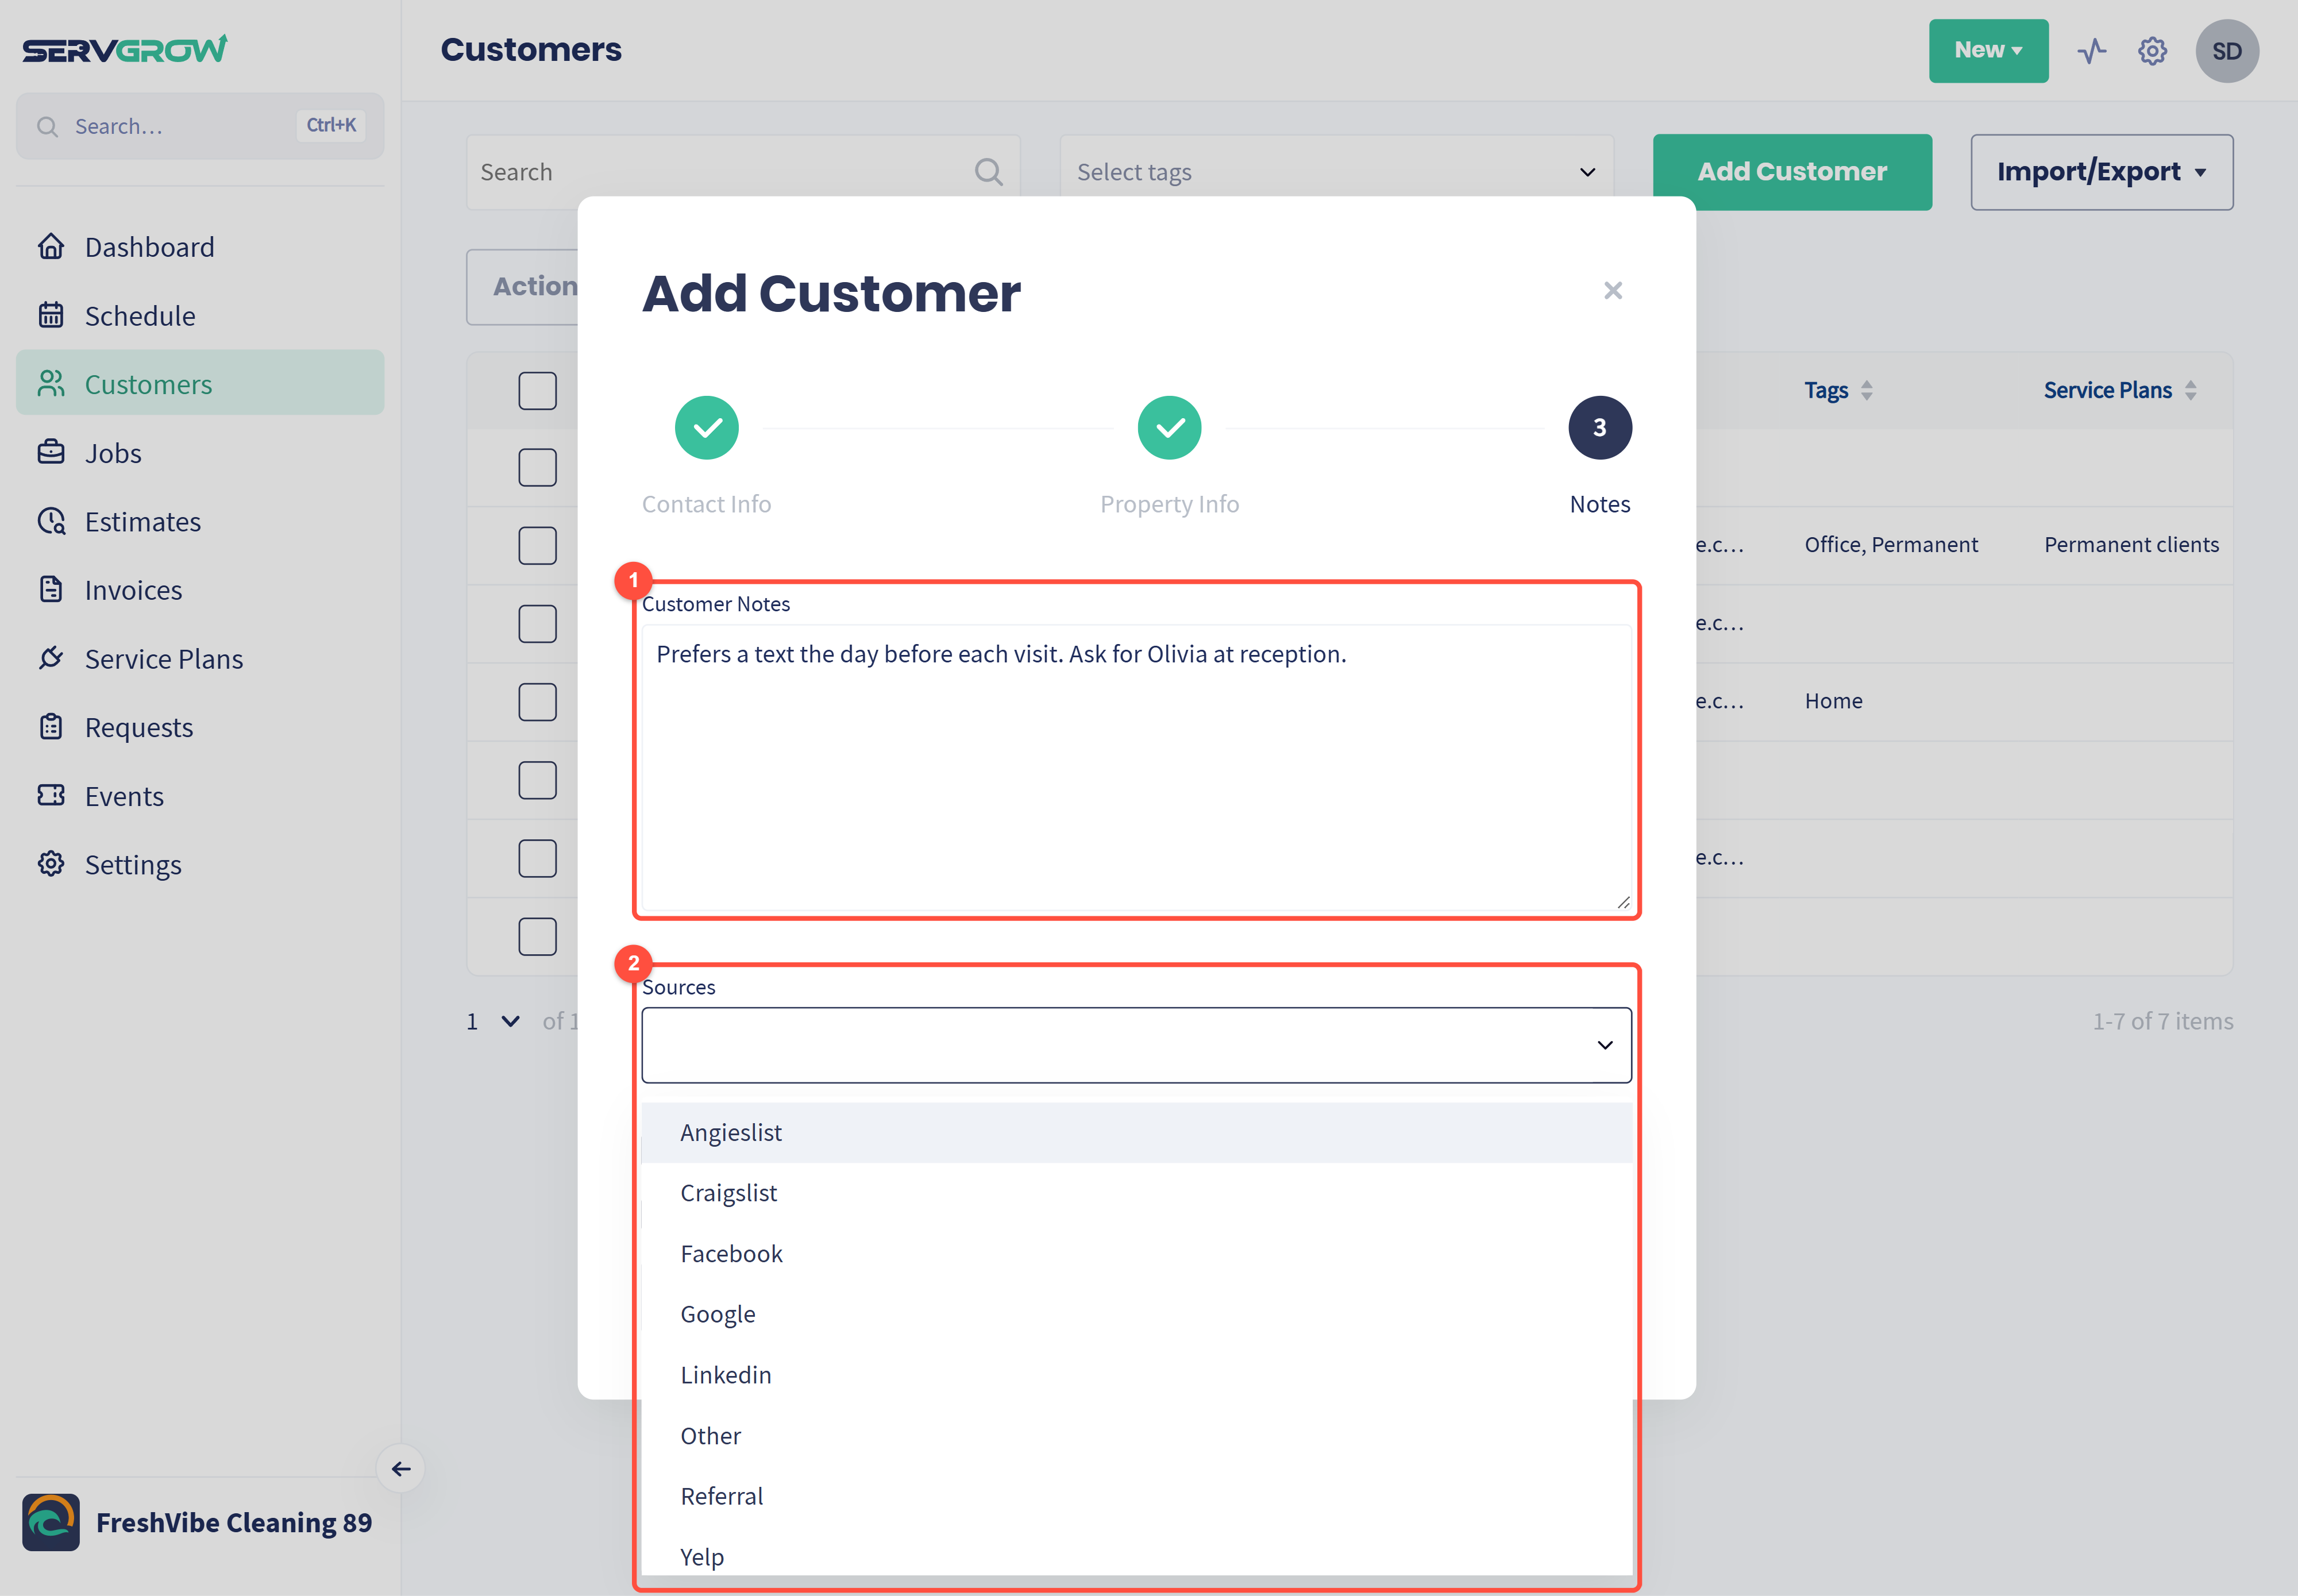
Customer Notes: preferences and details your team should know, such as the best time to call or who to ask for.
Sources: where this customer found you, such as Google, Facebook or a referral. You can pick more than one. The list comes from the lead sources under Settings, Company Profile, Sources.
Always fill in the source. It is what powers the Jobs by source chart on your Dashboard, which shows which marketing brings you paying customers. Skip it and you are guessing where your advertising money should go.
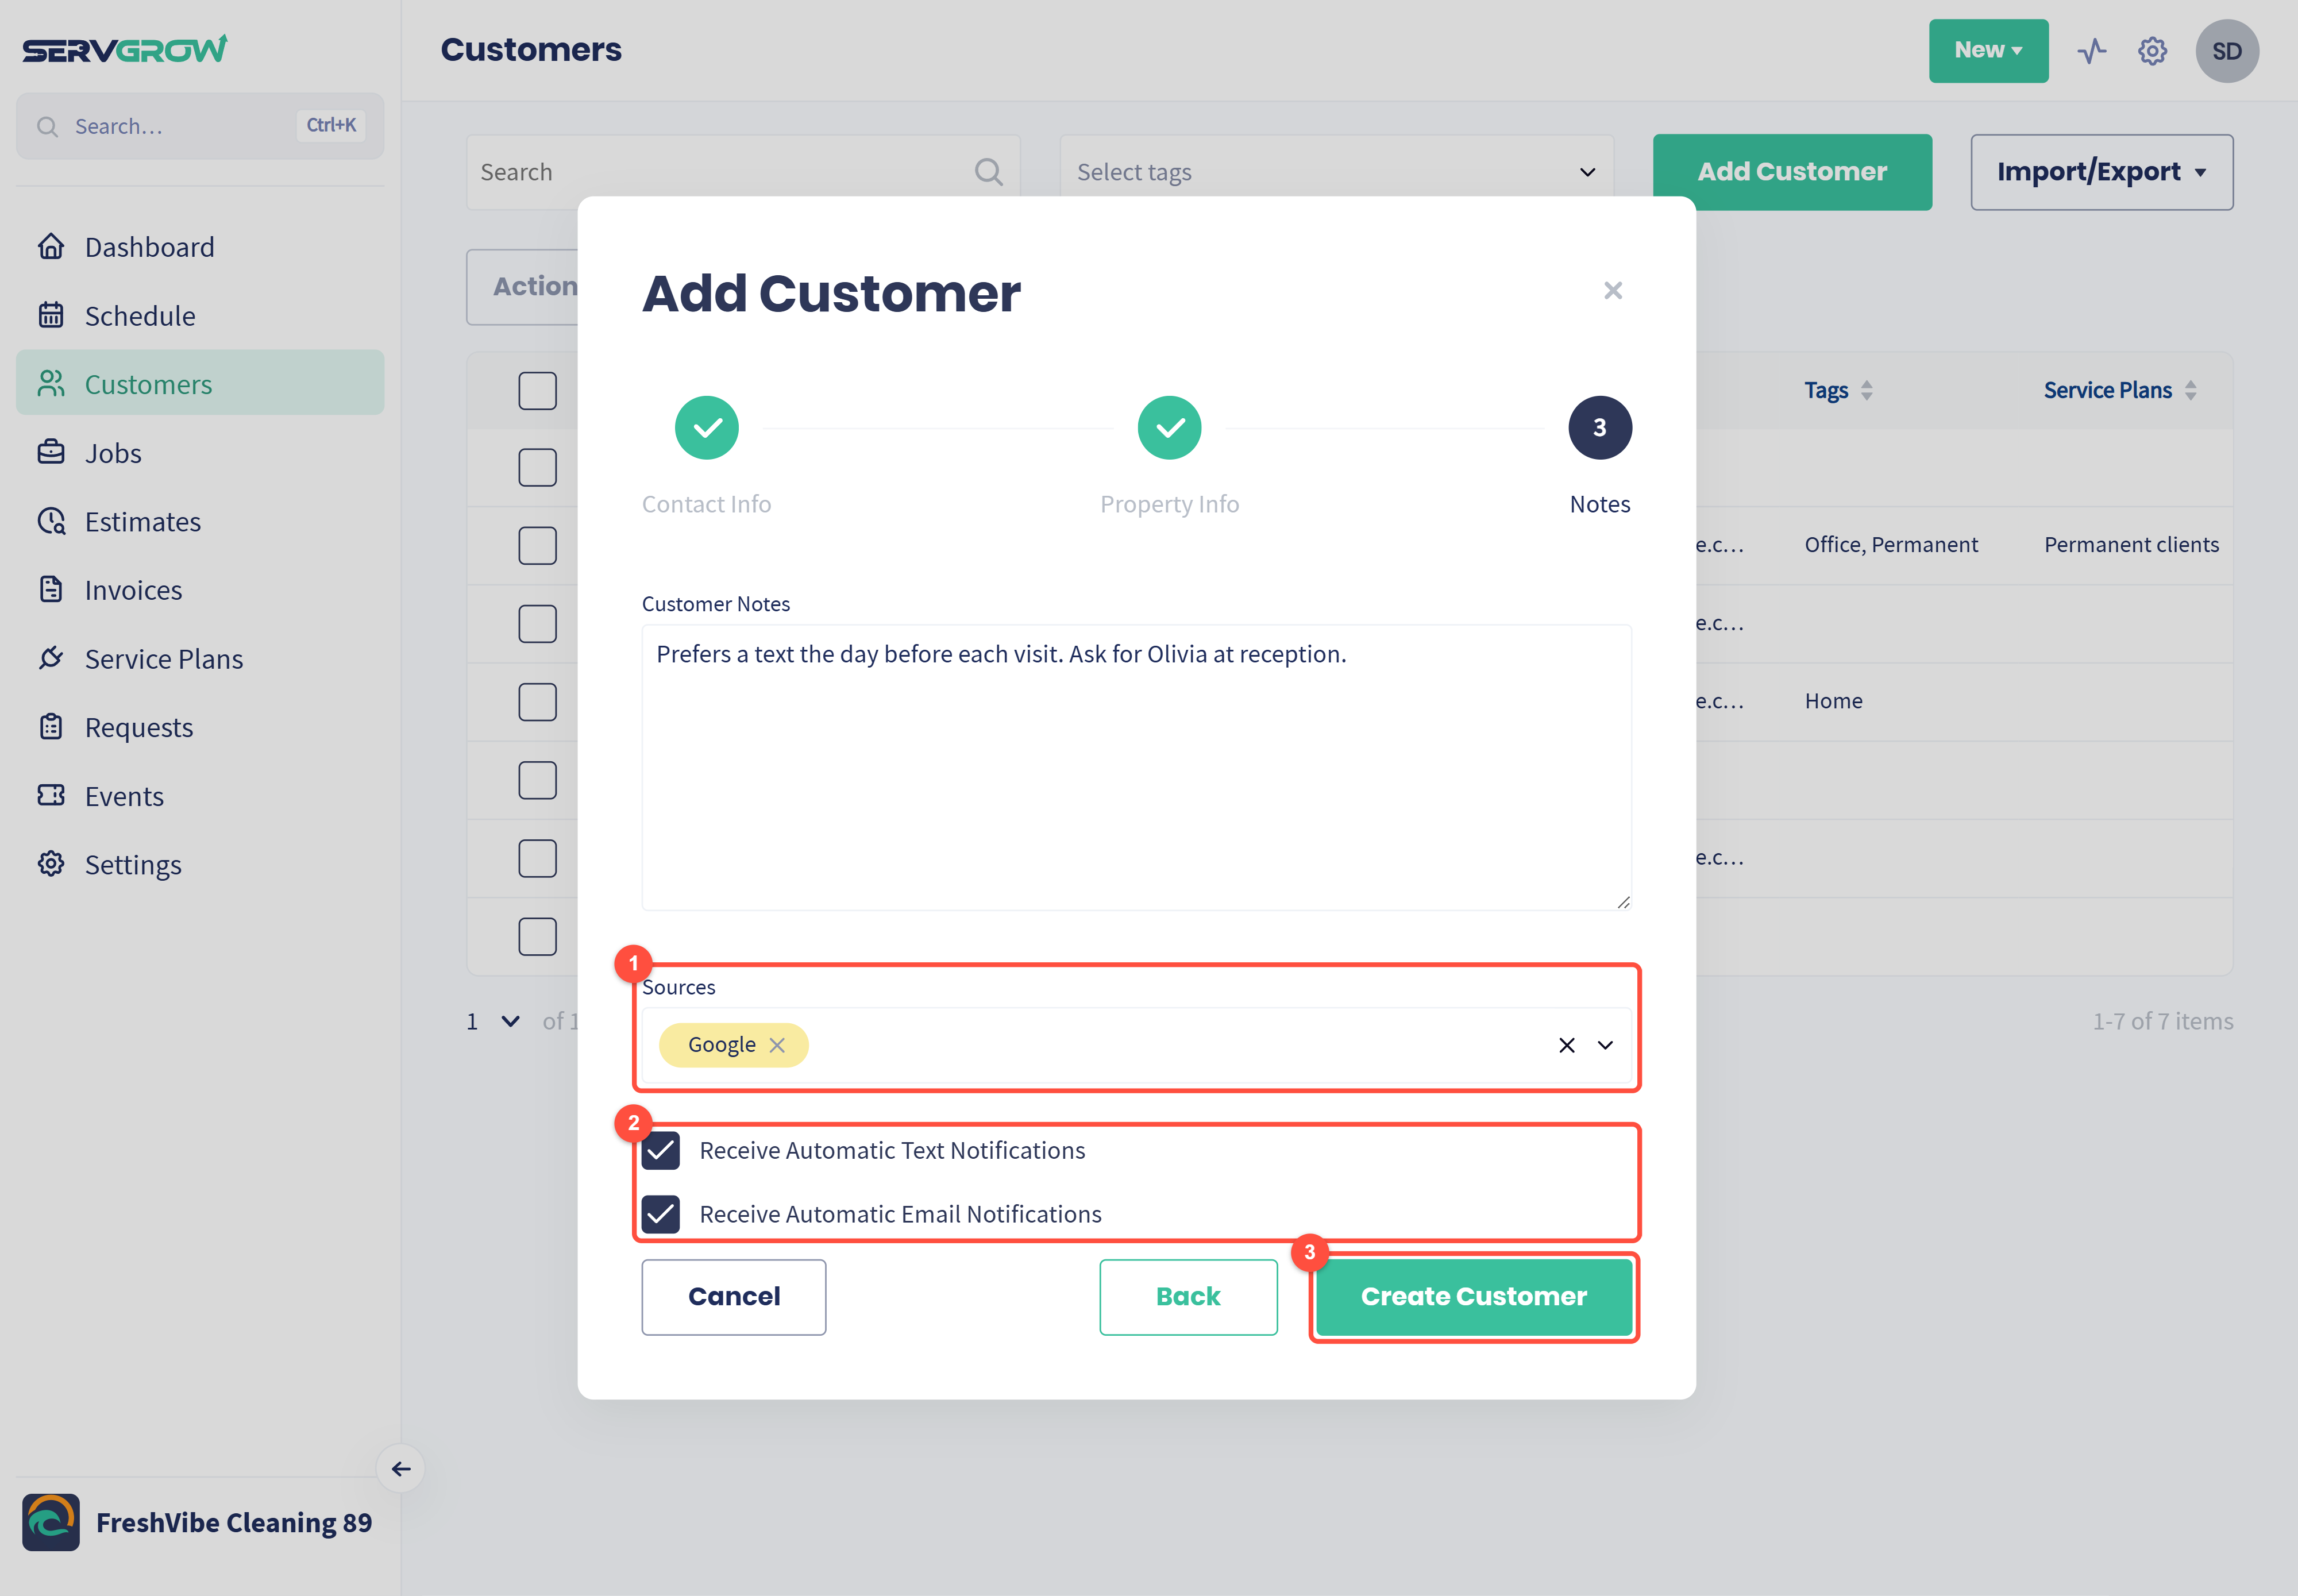
The sources you picked appear in the field.
Receive Automatic Text Notifications and Receive Automatic Email Notifications are on by default, so the customer gets your automatic messages, such as appointment reminders and On My Way texts. Untick one if the customer asks not to receive them.
Click Create Customer.
Servgrow confirms with "Customer was created successfully!" and the new customer appears in your Customers list, ready for estimates, jobs and invoices. Need to change something first? Click Back to return to an earlier step before you create the customer.
Good habits for a clean customer list
Search before you add. Returning customers often call from a new number. A quick search keeps their history in one place.
Put access details in Property Notes, not in your head. Anyone on your team can then handle the visit.
Agree on a small set of tags. A few consistent tags beat dozens of one-off ones when you filter a list or plan a campaign.
Related articles