
When a customer calls about a visit, a quote or a bill, the answer should be one click away, not spread across your calendar, your inbox and a spreadsheet. And every time you learn something about them, like how they like to be contacted, it should be saved where the whole team will see it next time.
Every customer in Servgrow has their own page. It holds their contact details and properties, every job and estimate you have done for them, their invoices and payments, and their service plans. From the same page you can book new work, record a payment and invite them to your Customer Portal, so you spend less time searching and more time on the work itself.
Open a customer's page
Click Customers in the left menu, then click the customer's name.
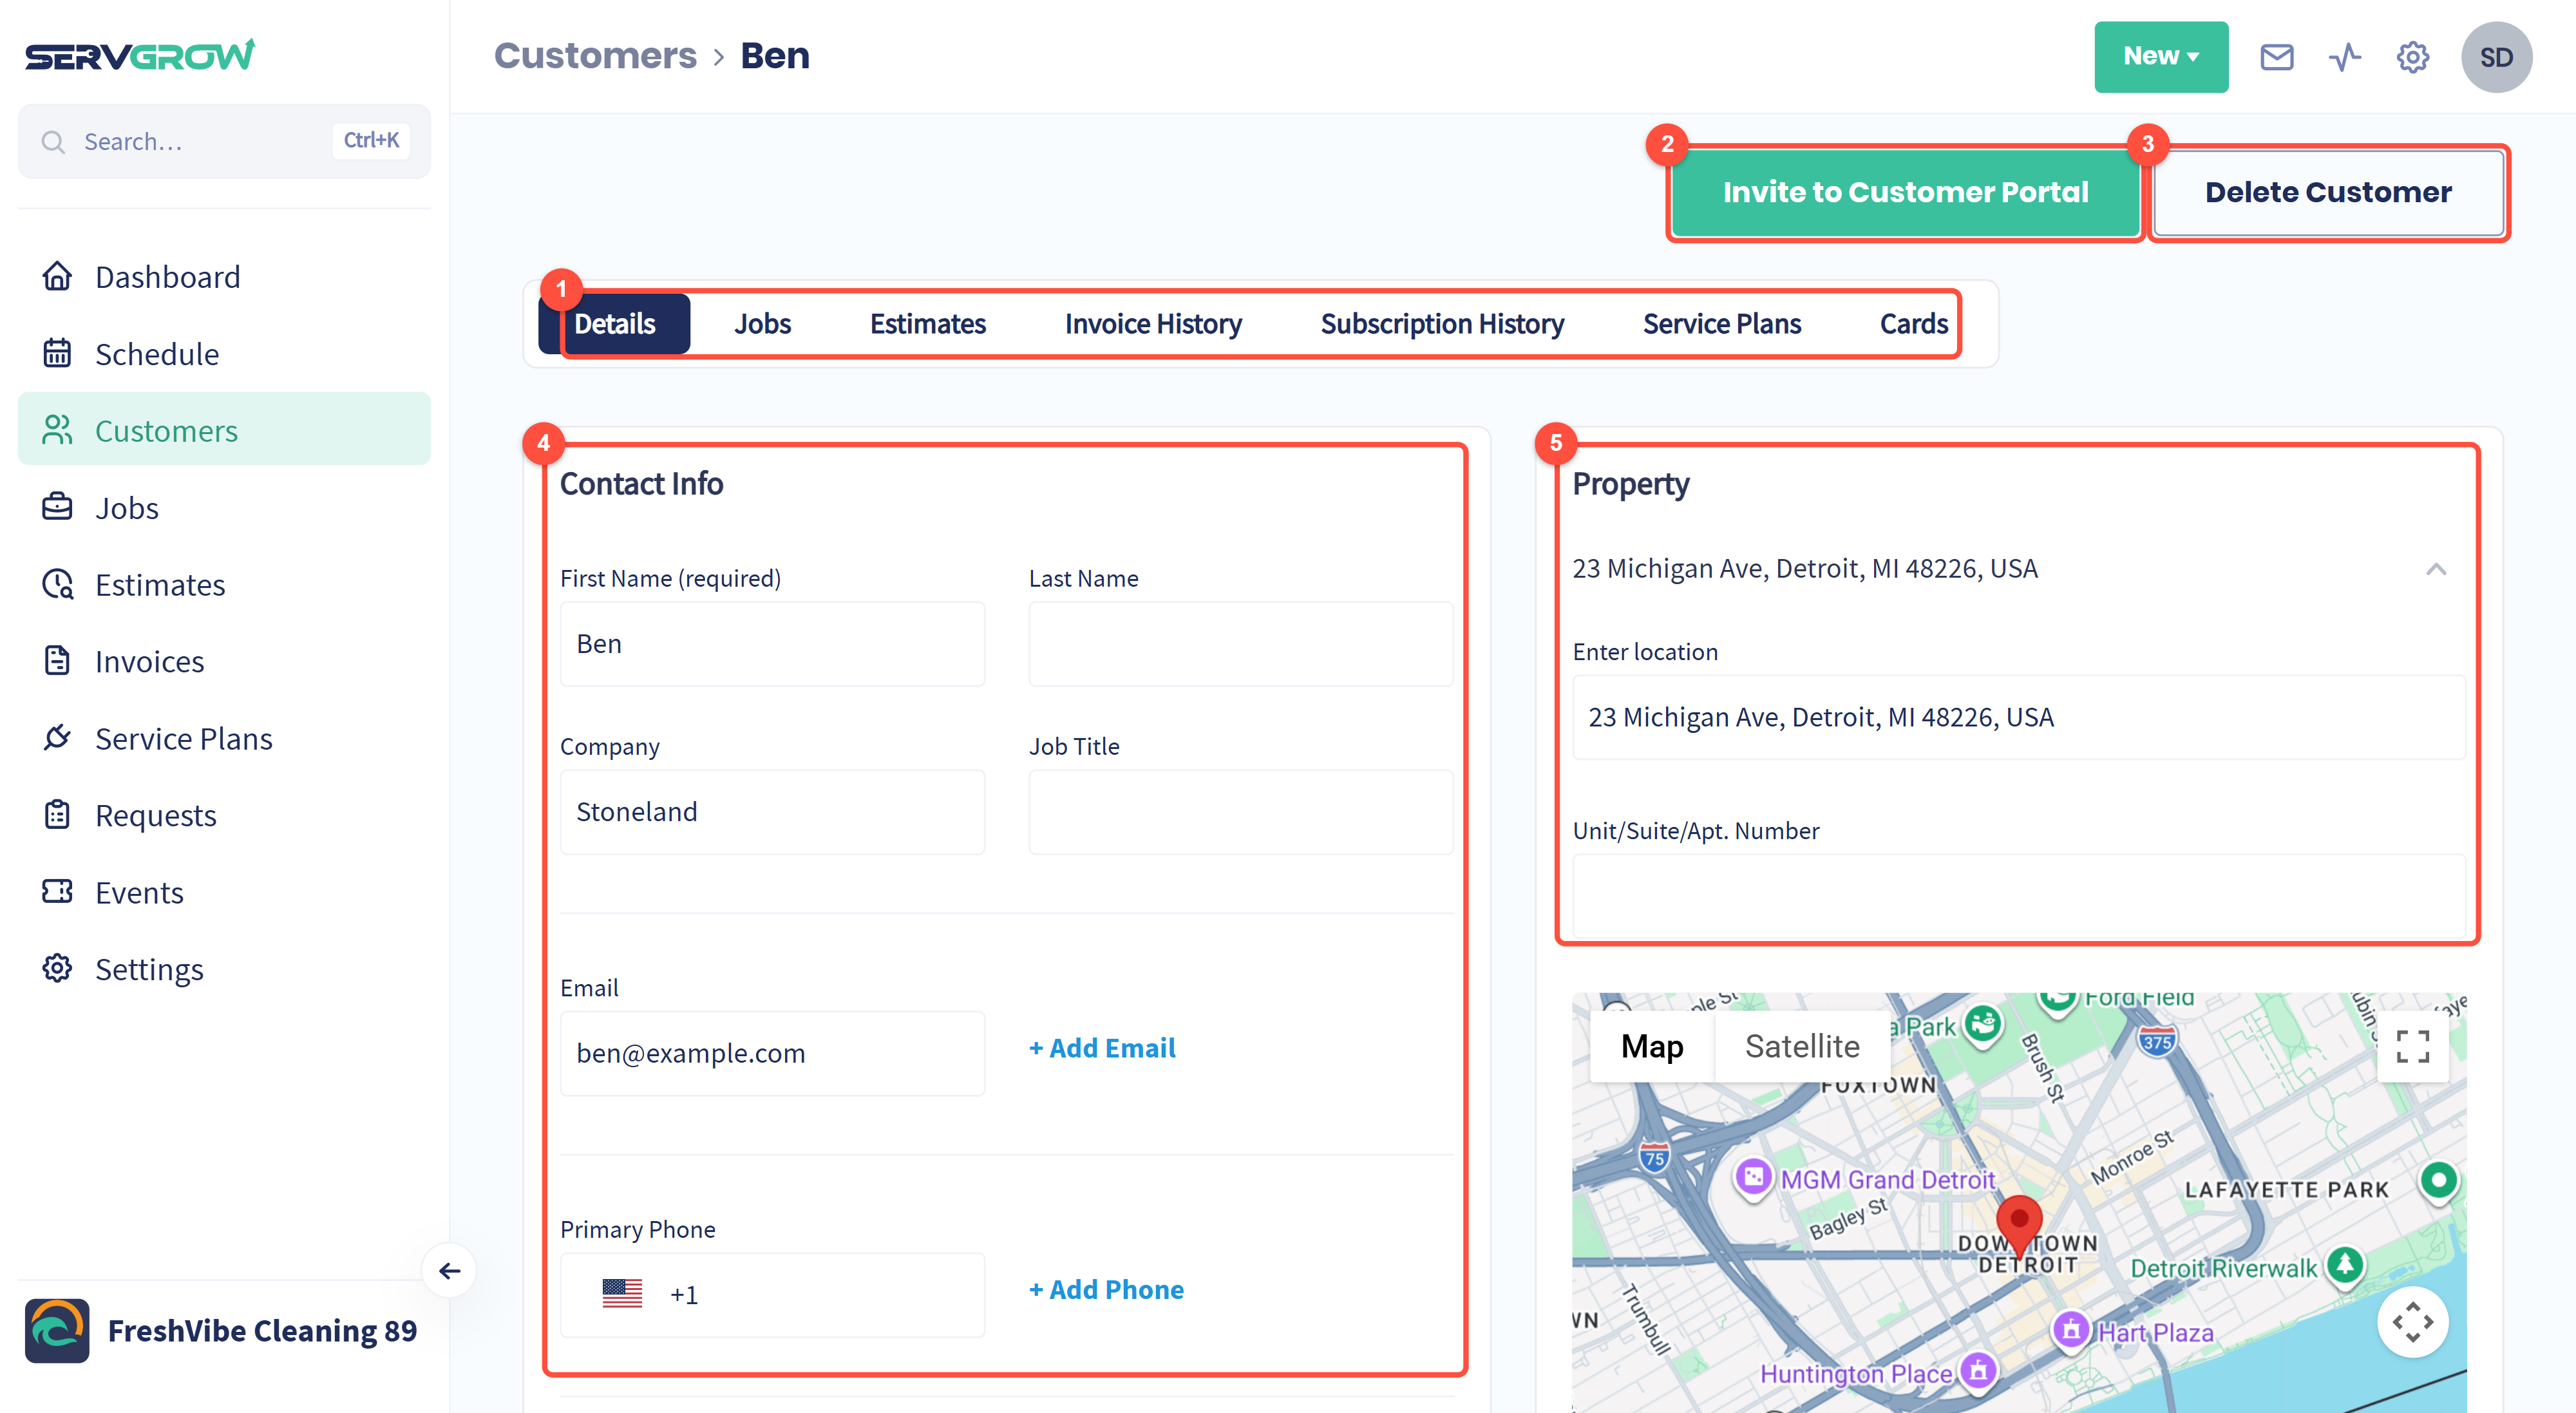
The tabs: Details, Jobs, Estimates, Invoice History, Subscription History, Service Plans and Cards. Each one is covered below.
Invite to Customer Portal: email the customer a link to their own portal.
Delete Customer: remove the customer for good (see the end of this article).
Contact Info: name, company, job title, email and phone. Use + Add Email and + Add Phone when a customer has more than one.
Property: the service address, with a map so you can check the pin is in the right place. Add a unit or suite number if the building has several.
Keep the details up to date
Scroll down the Details tab for everything else you know about the customer.

Customer Notes: preferences your team should know, such as the best time to call or who to ask for.
Sources and Tags: where the customer found you, and the tags you use to group customers.
Receive Automatic Text Notifications and Receive Automatic Email Notifications: untick one to stop that kind of automatic message, such as reminders and On My Way texts, for this customer.
Attachments: click Browse to add documents, such as a signed contract or a floor plan.
Property Notes: what anyone visiting needs to know, such as gate codes, pets or parking.
+ Add Property: add another address for a customer with more than one location. Billing Property is the address used for billing.
As soon as you change anything, a bar appears at the bottom. Click Update to save, or Reset to undo your changes.
Jobs
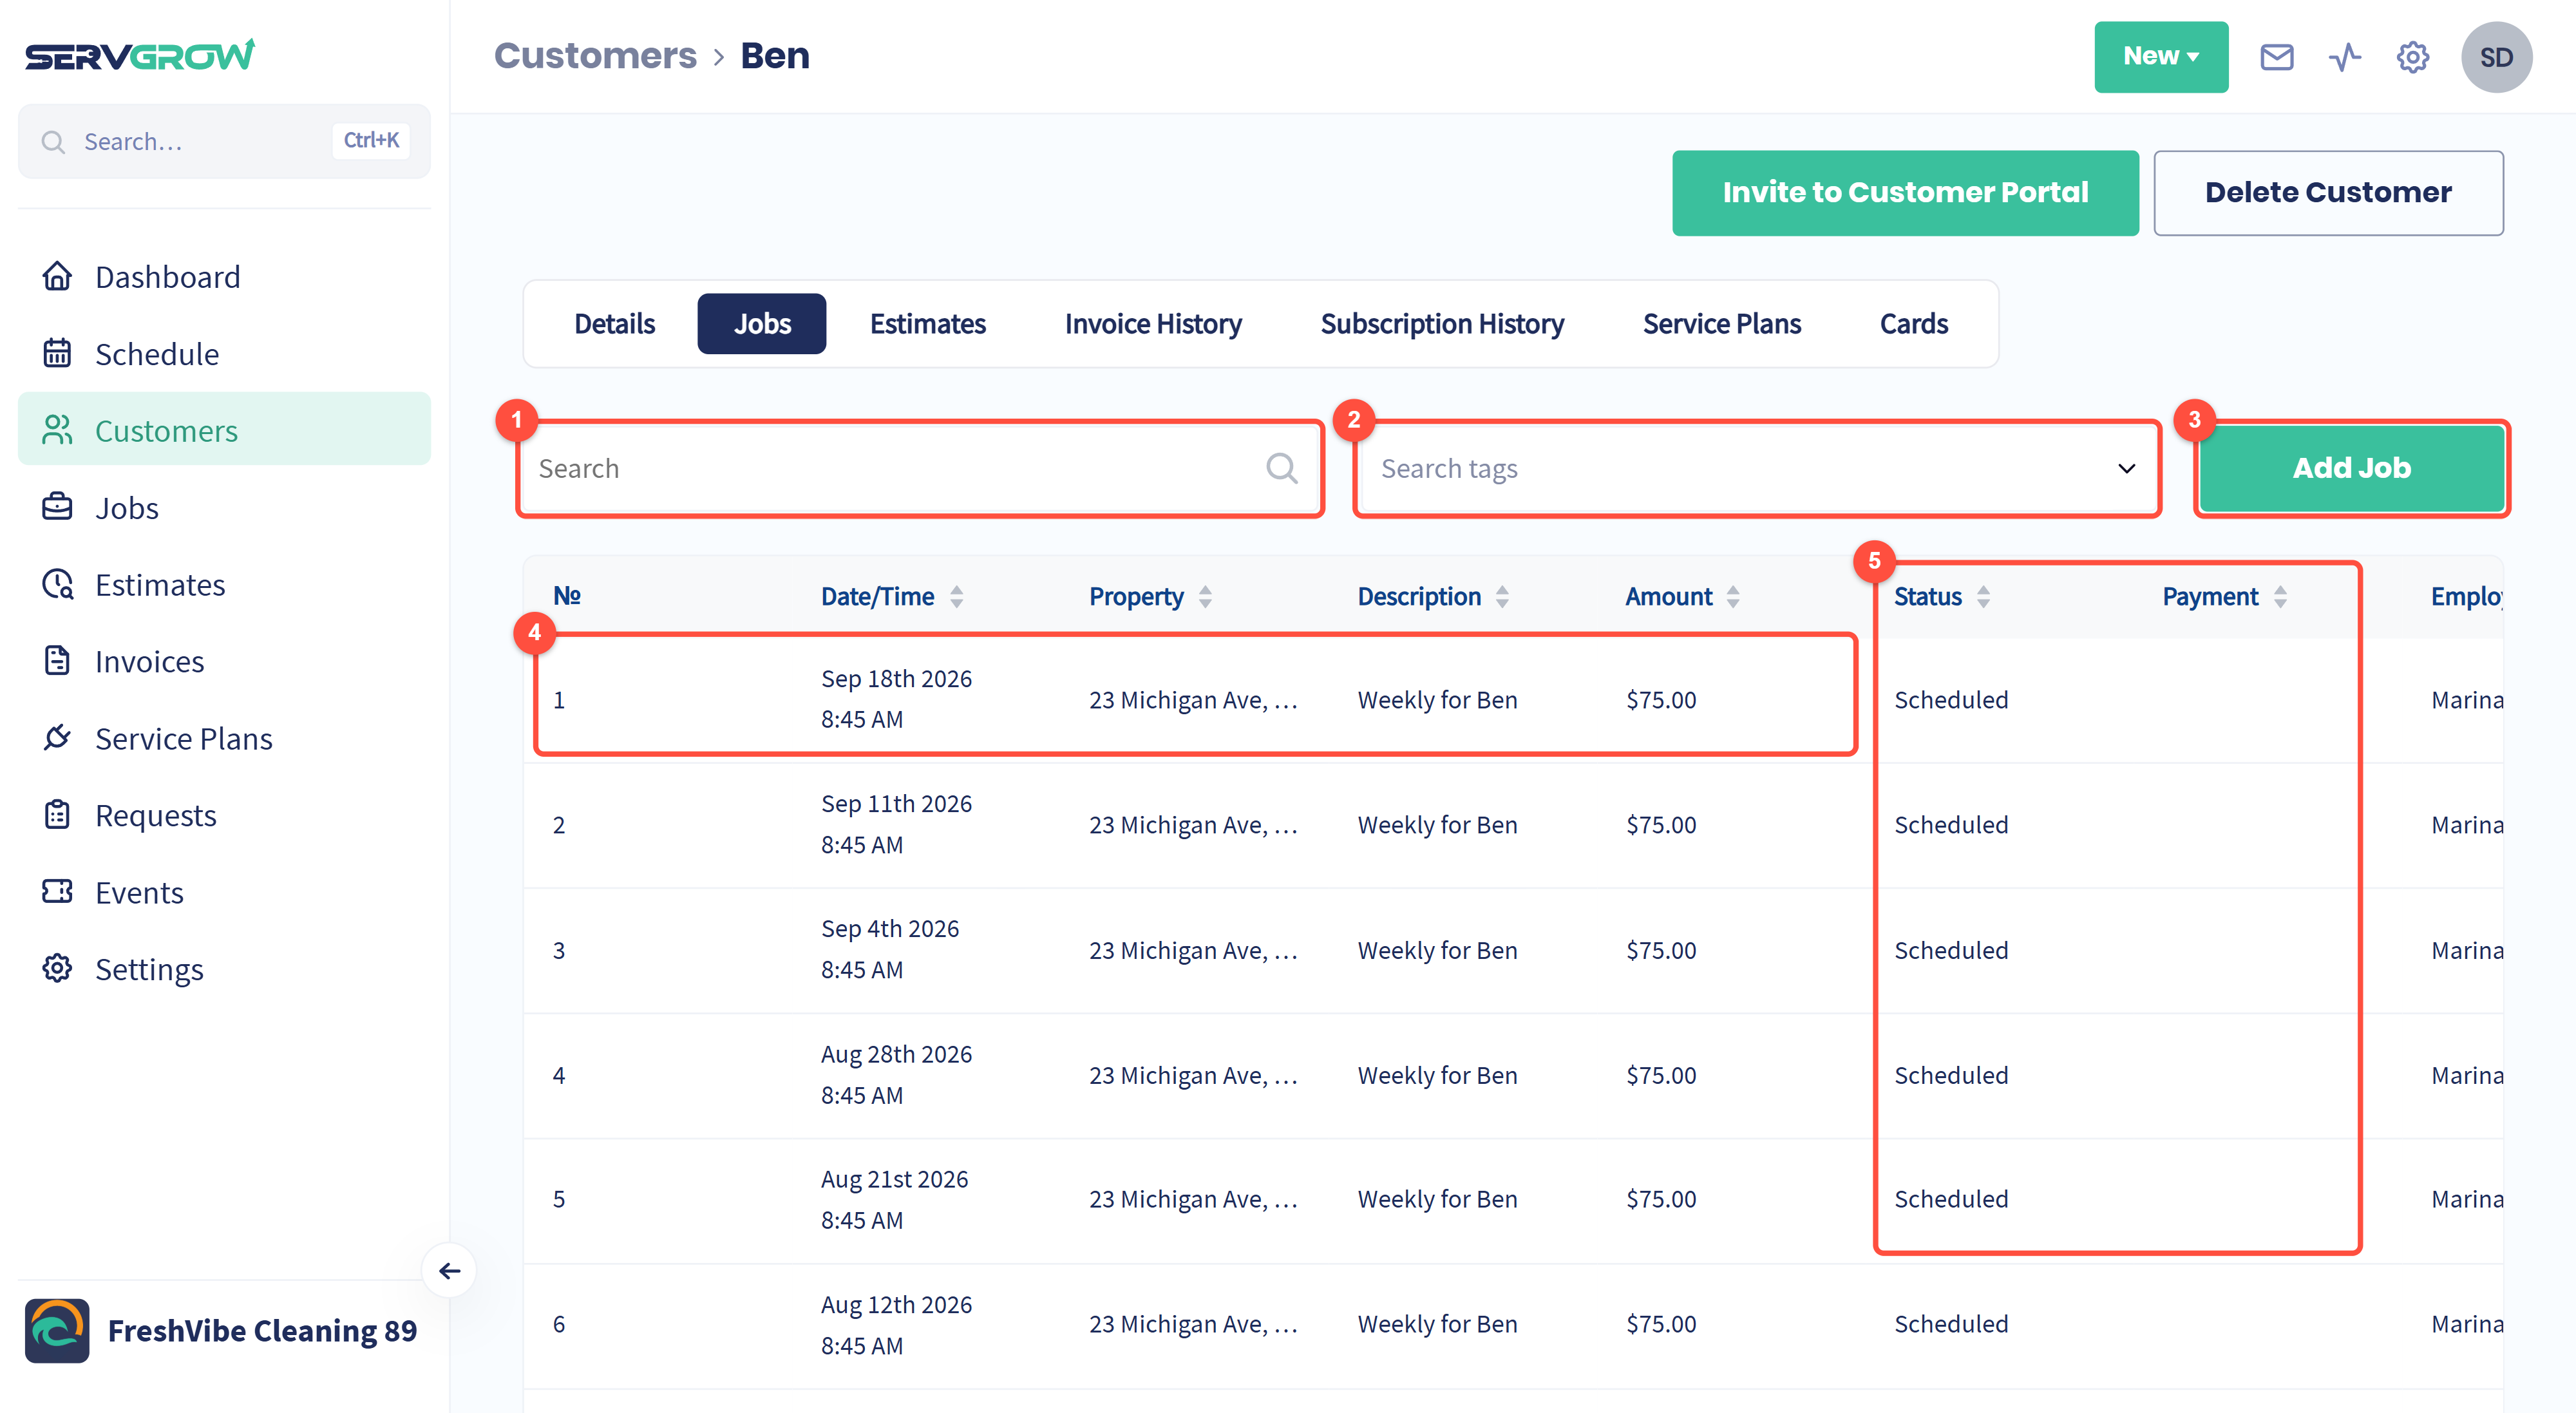
Search this customer's jobs.
Search tags: show only jobs with the tags you pick.
Add Job: start a new job with this customer already filled in.
Each row shows the date and time, property, description and amount. Click a job to open it.
Status shows where the work is, such as Scheduled or Started, and Payment shows whether it has been paid for. Scroll sideways to see who is assigned.
Estimates
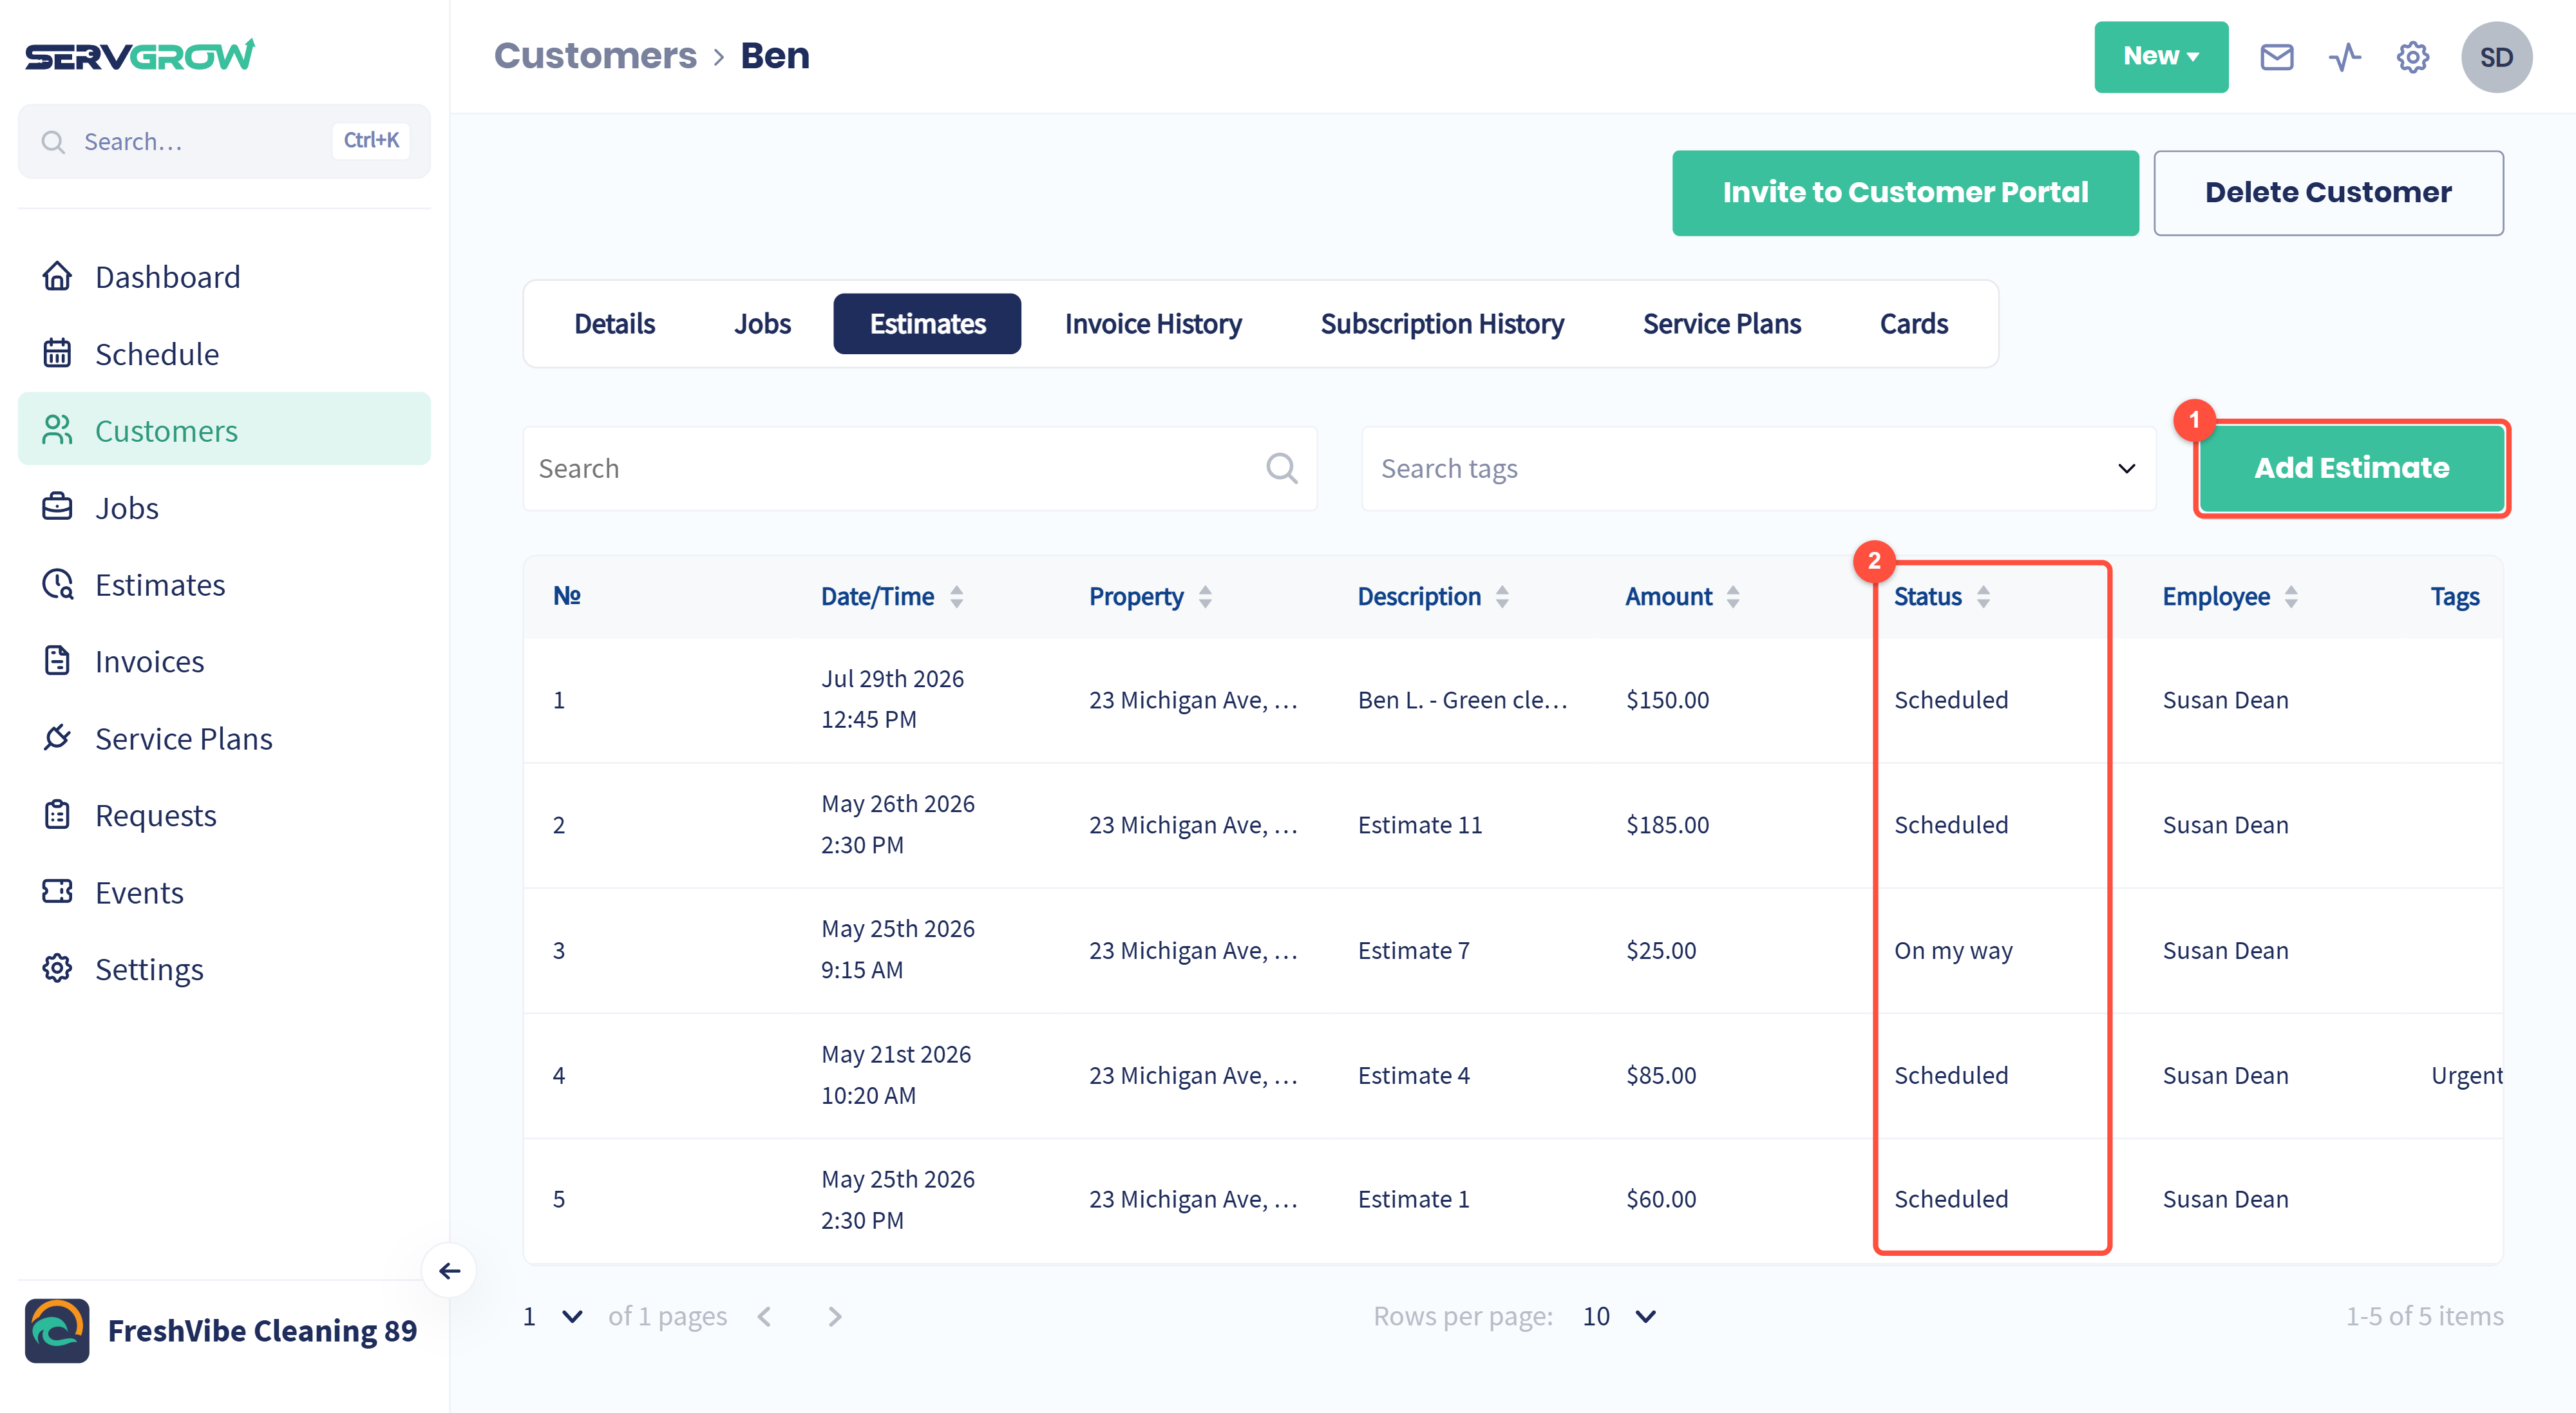
Add Estimate: start a new estimate with this customer already filled in.
Status: where each estimate is, such as Scheduled or On my way. Click an estimate to open it. Search and the tag filter work the same way as on the Jobs tab.
Invoice History
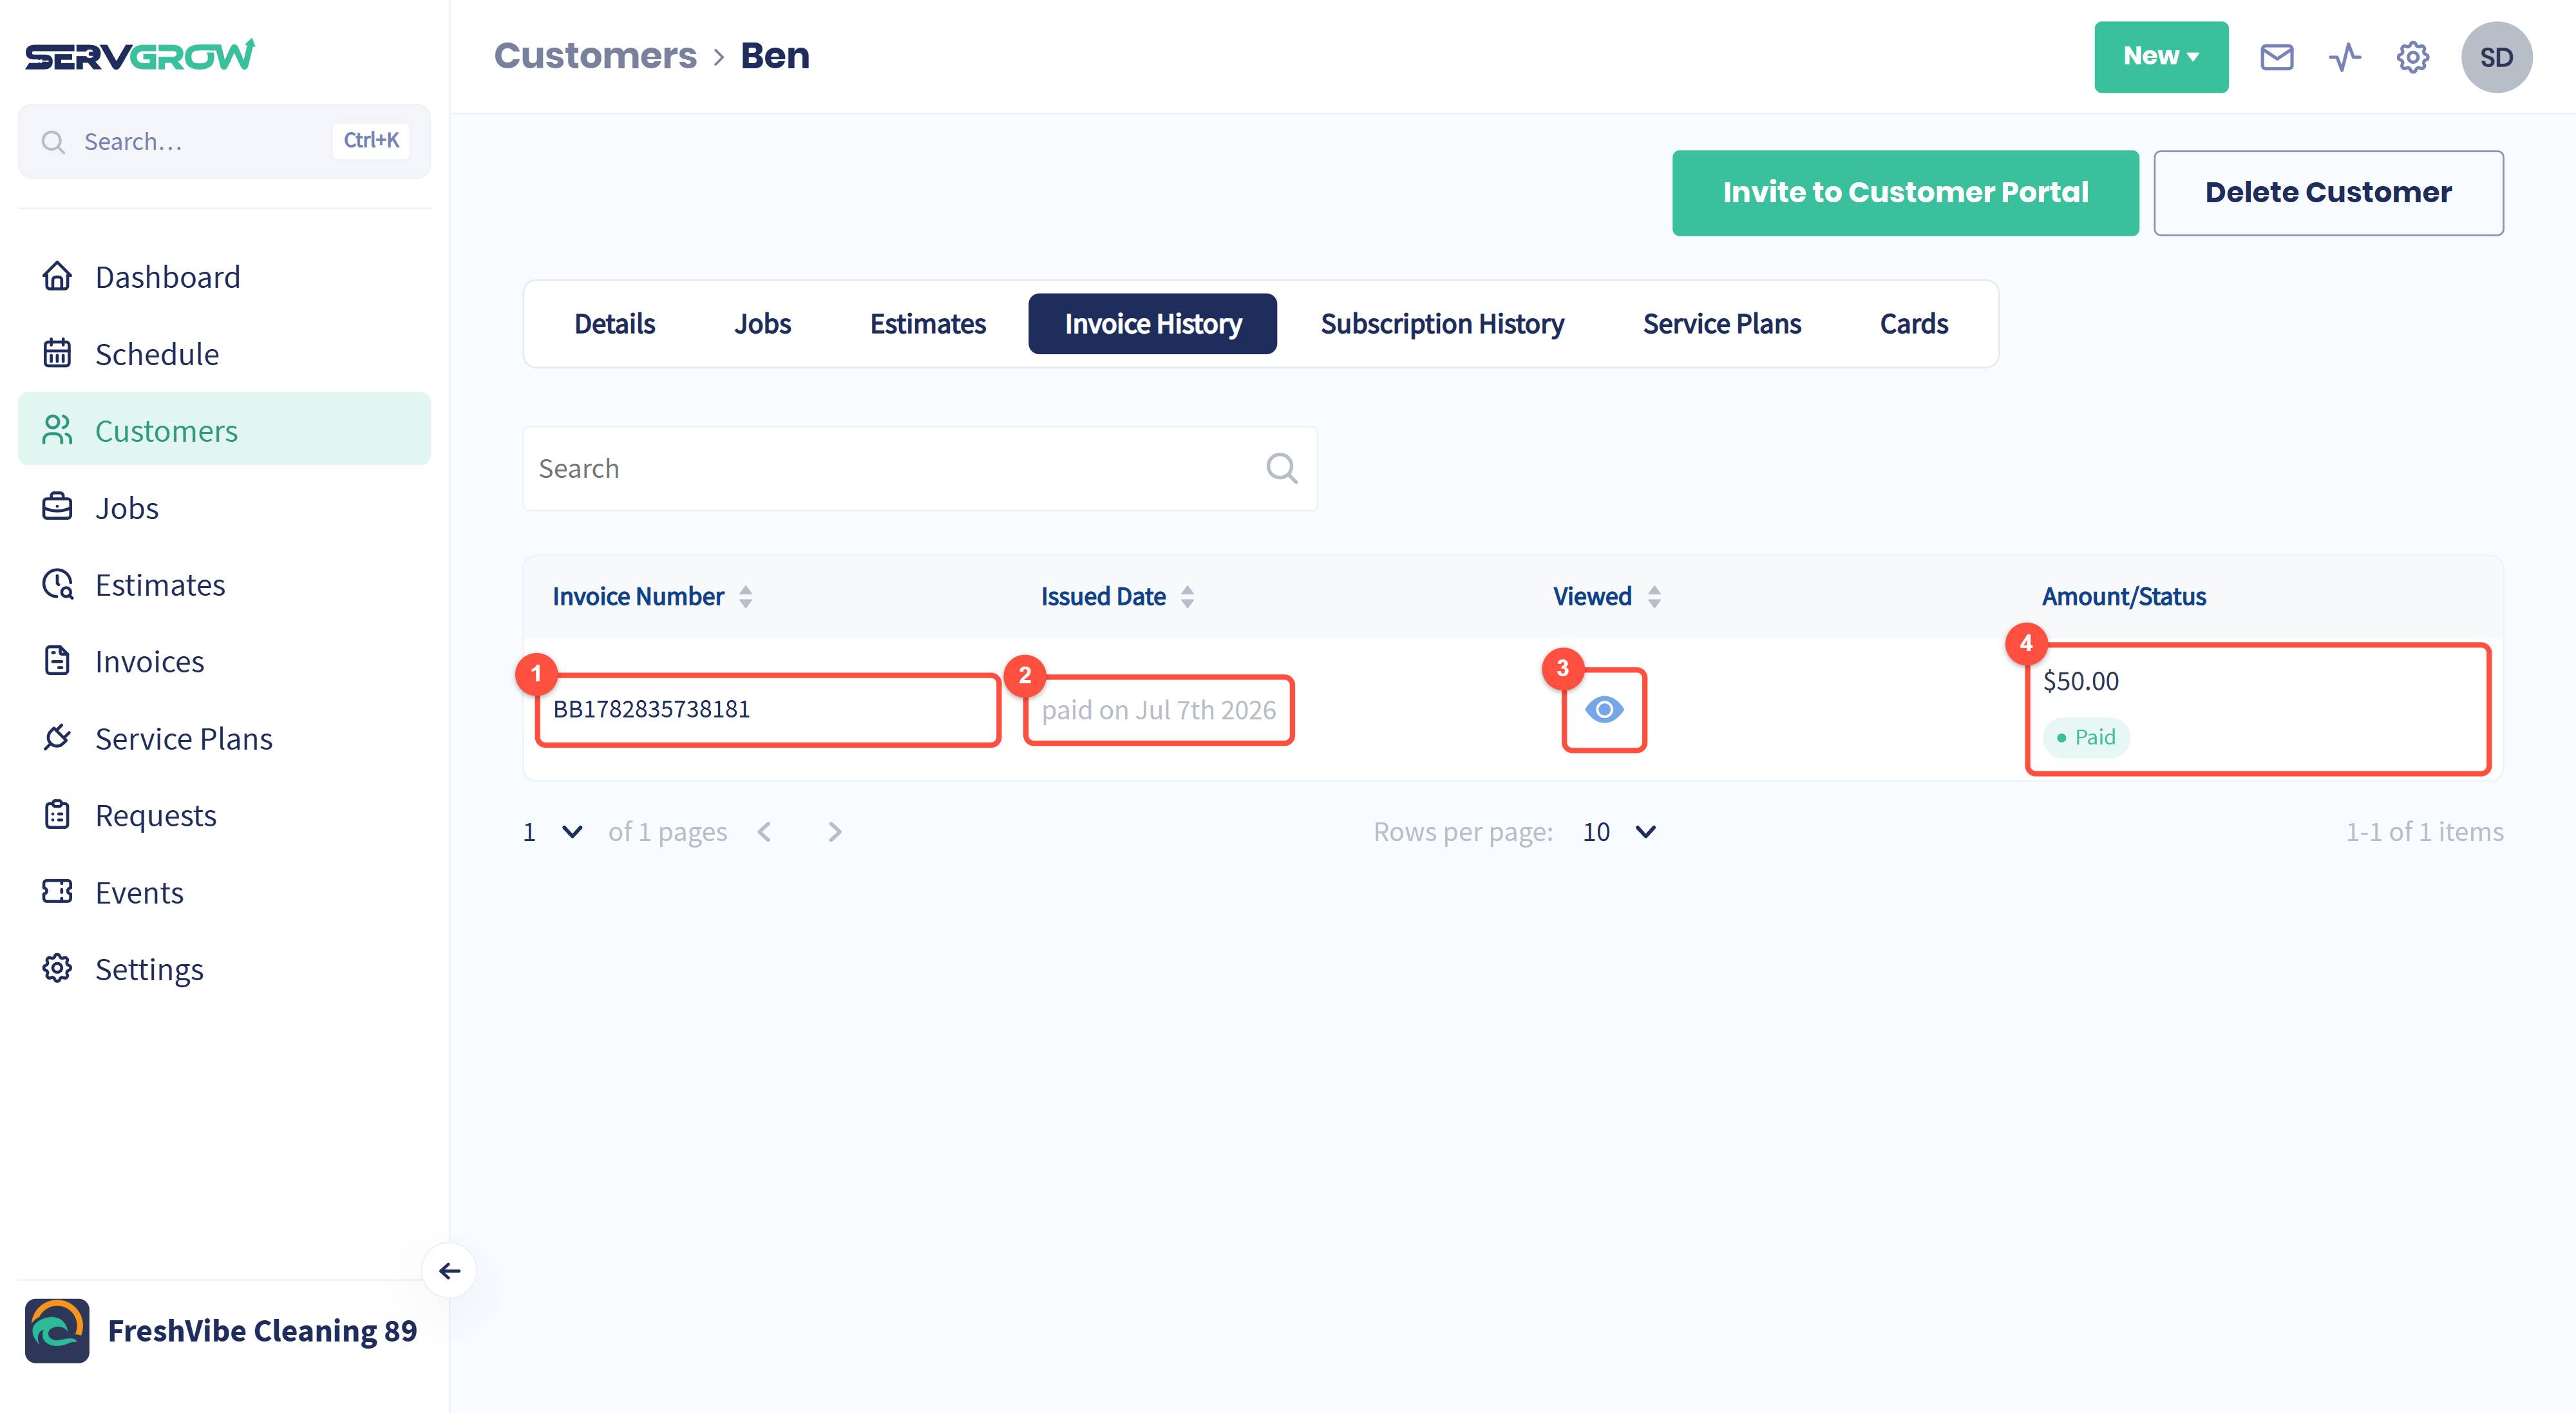
The invoice number. Click it to open the invoice.
When it was issued or paid.
Viewed: shows whether the customer has opened the invoice.
The amount and its status, such as Paid.
Subscription History and manual payments
If the customer is on a service plan, each bill for the plan is listed on Subscription History.
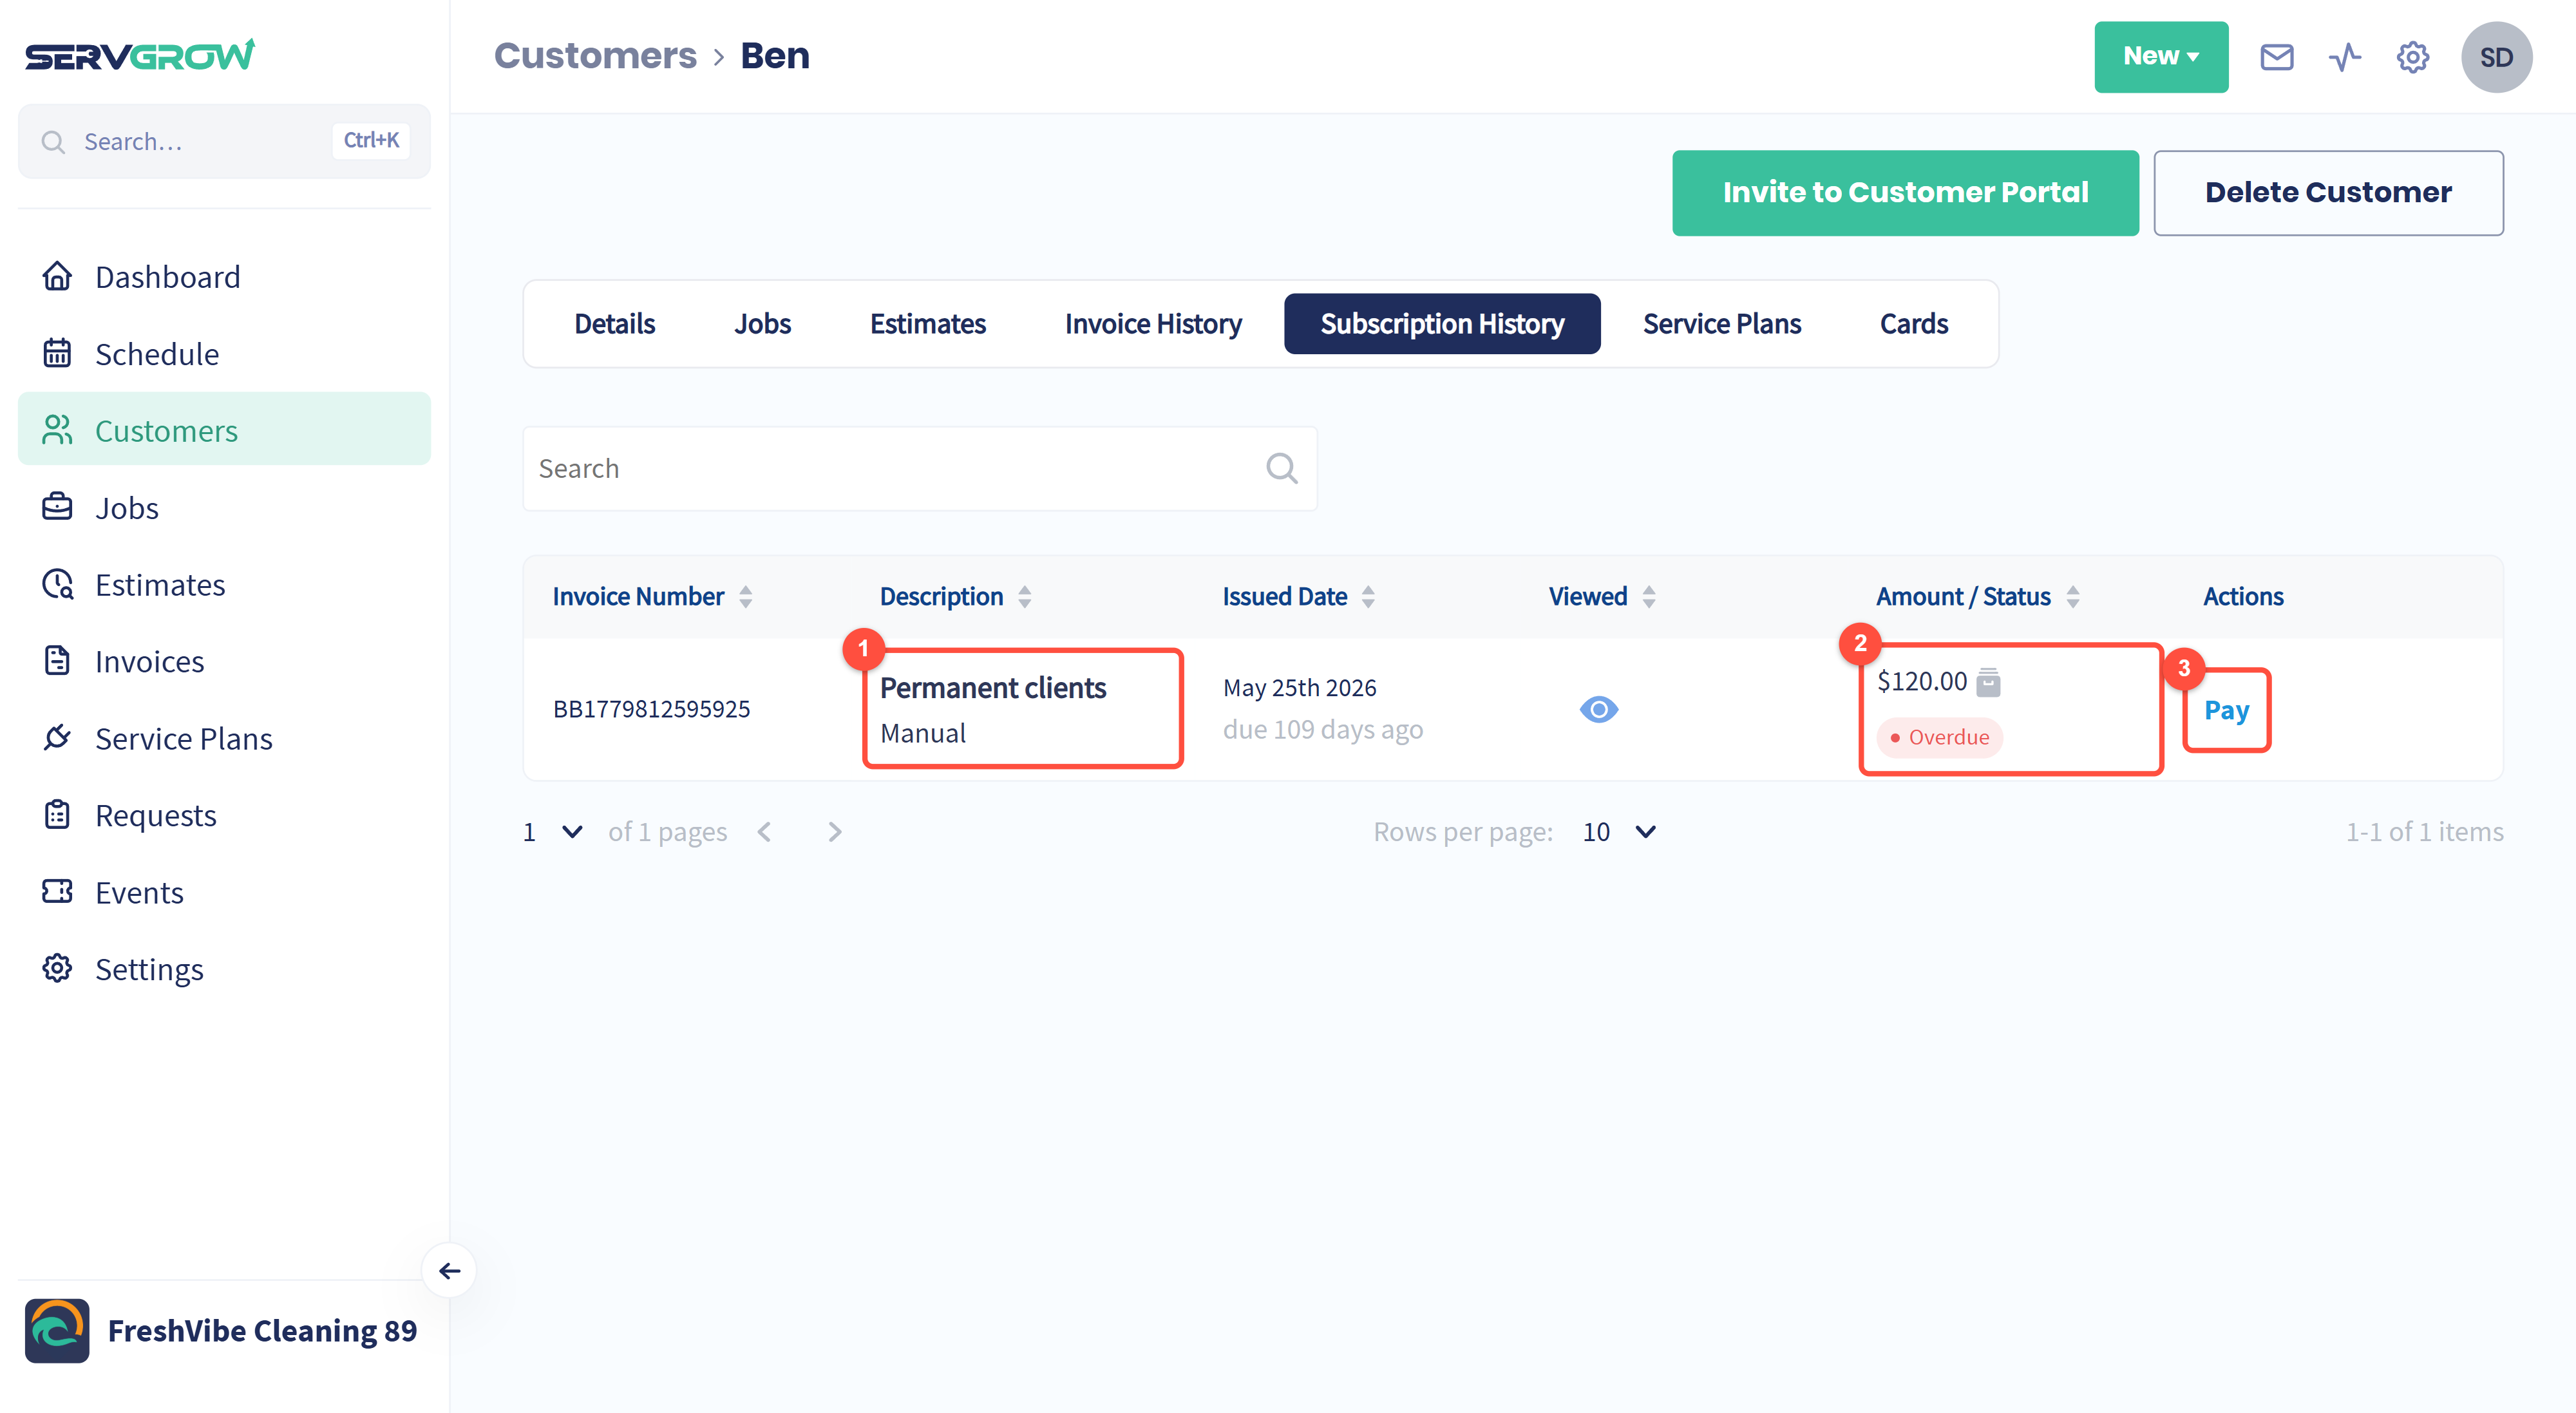
The plan and how it is billed: Manual or automatic.
The amount and its status, such as Overdue.
Pay: record a payment the customer made another way, such as cash or a check.
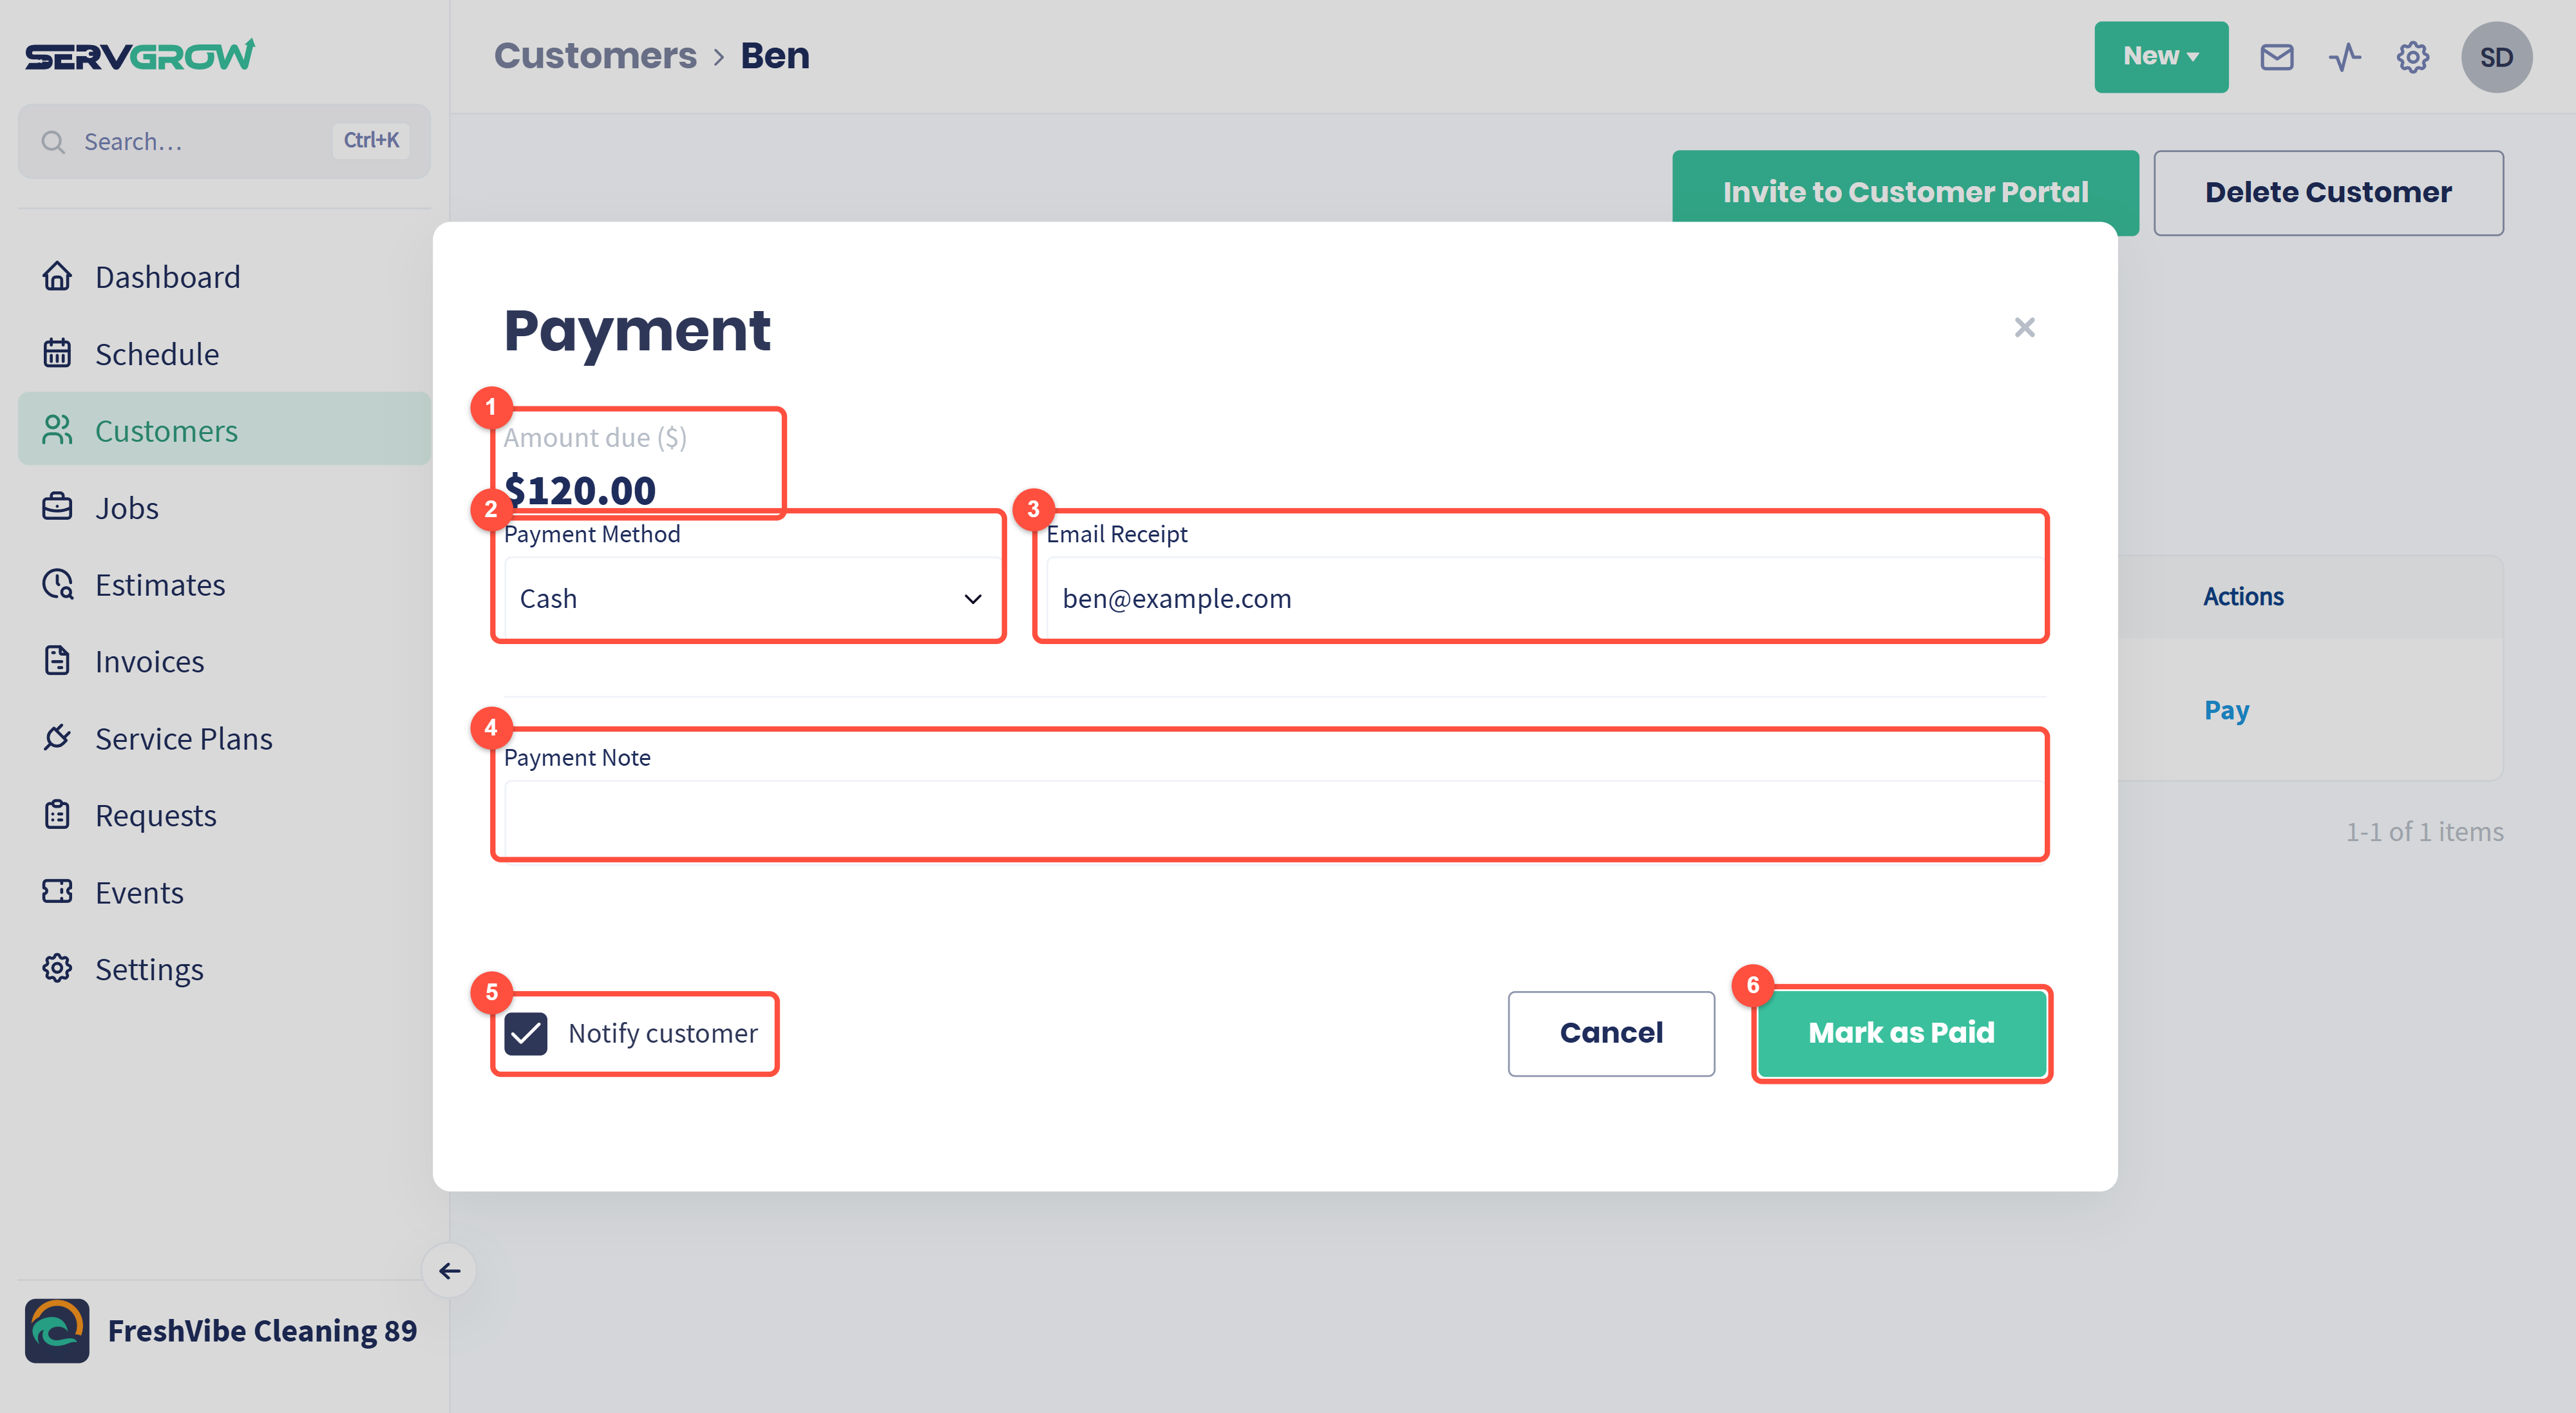
Amount due for this bill.
Payment Method: Cash, Check, Card or Other.
Email Receipt: the address the receipt goes to.
Payment Note: anything to remember, such as a check number.
Notify customer: leave it ticked to let the customer know the payment was recorded.
Click Mark as Paid.
Service Plans
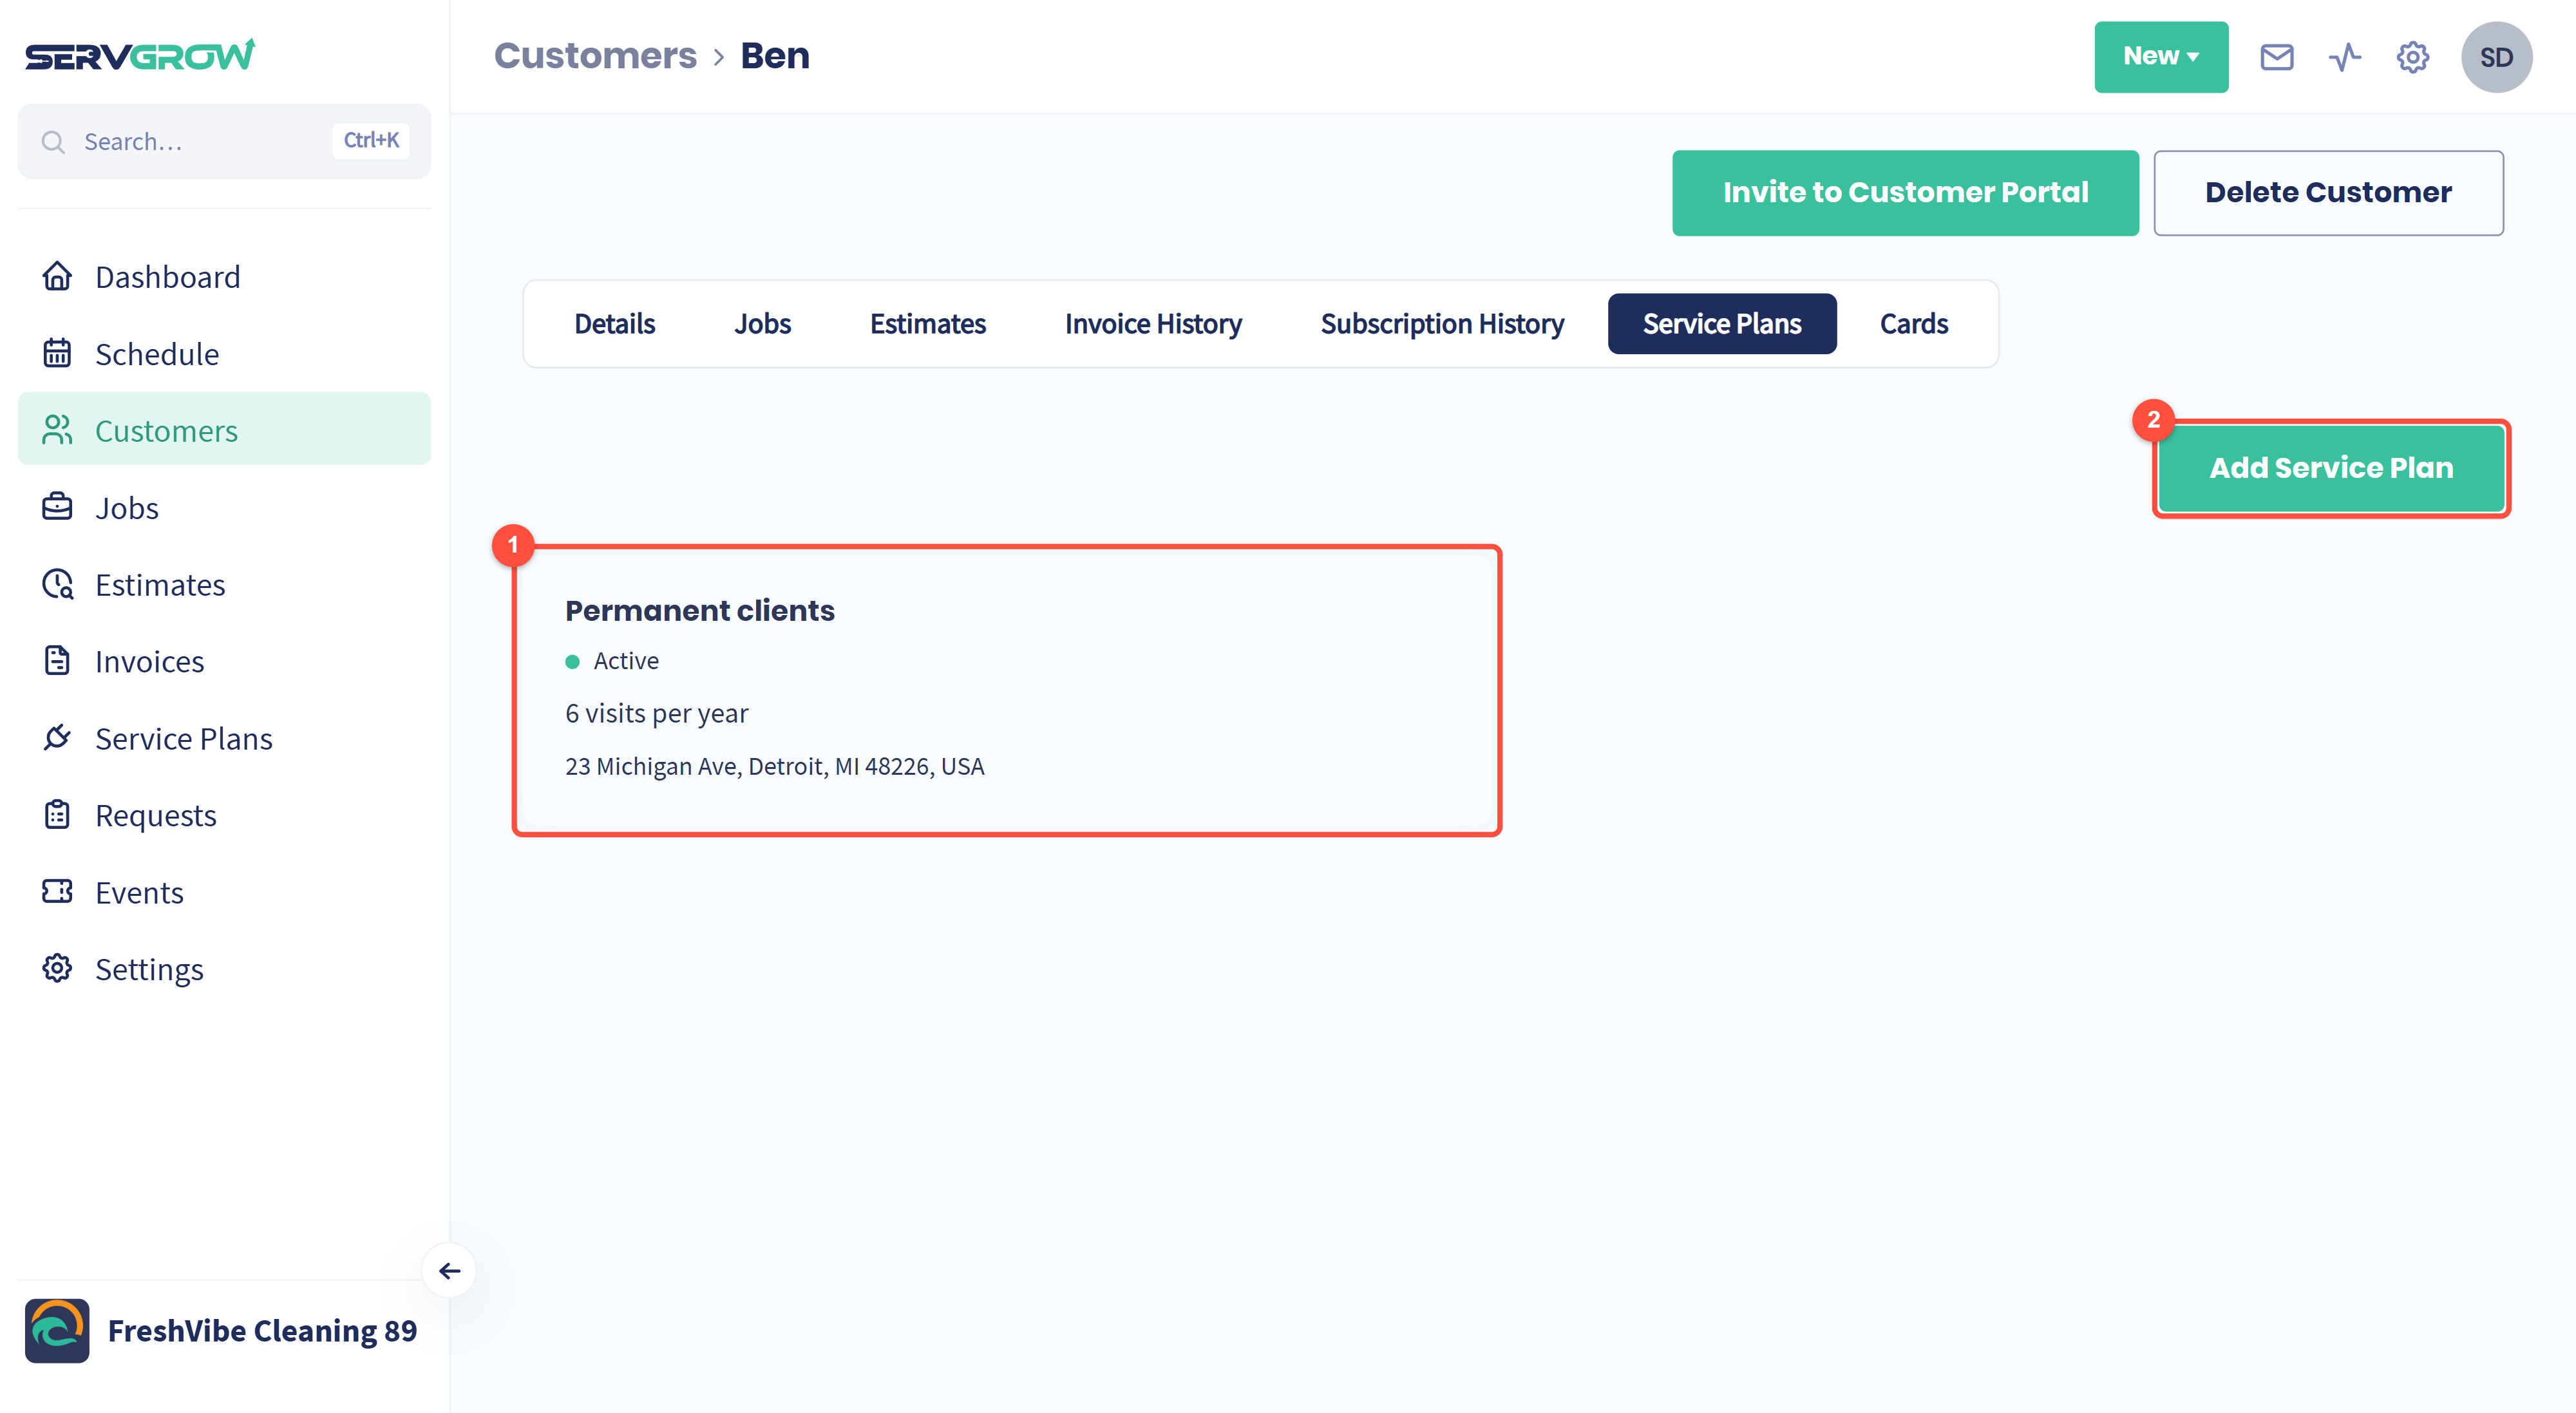
Each plan the customer is on, with its status, how many visits a year it includes and the property it covers. Click a plan to open it.
Add Service Plan: sign this customer up to one of your plans.
Cards
The Cards tab lists the cards the customer has saved for payments. Click Add Card to save a new one while the customer is on the phone with you.
Invite the customer to your Customer Portal
The Customer Portal gives customers their own place to find the information about their services with you, instead of calling you for it. Click Invite to Customer Portal at the top of the page.
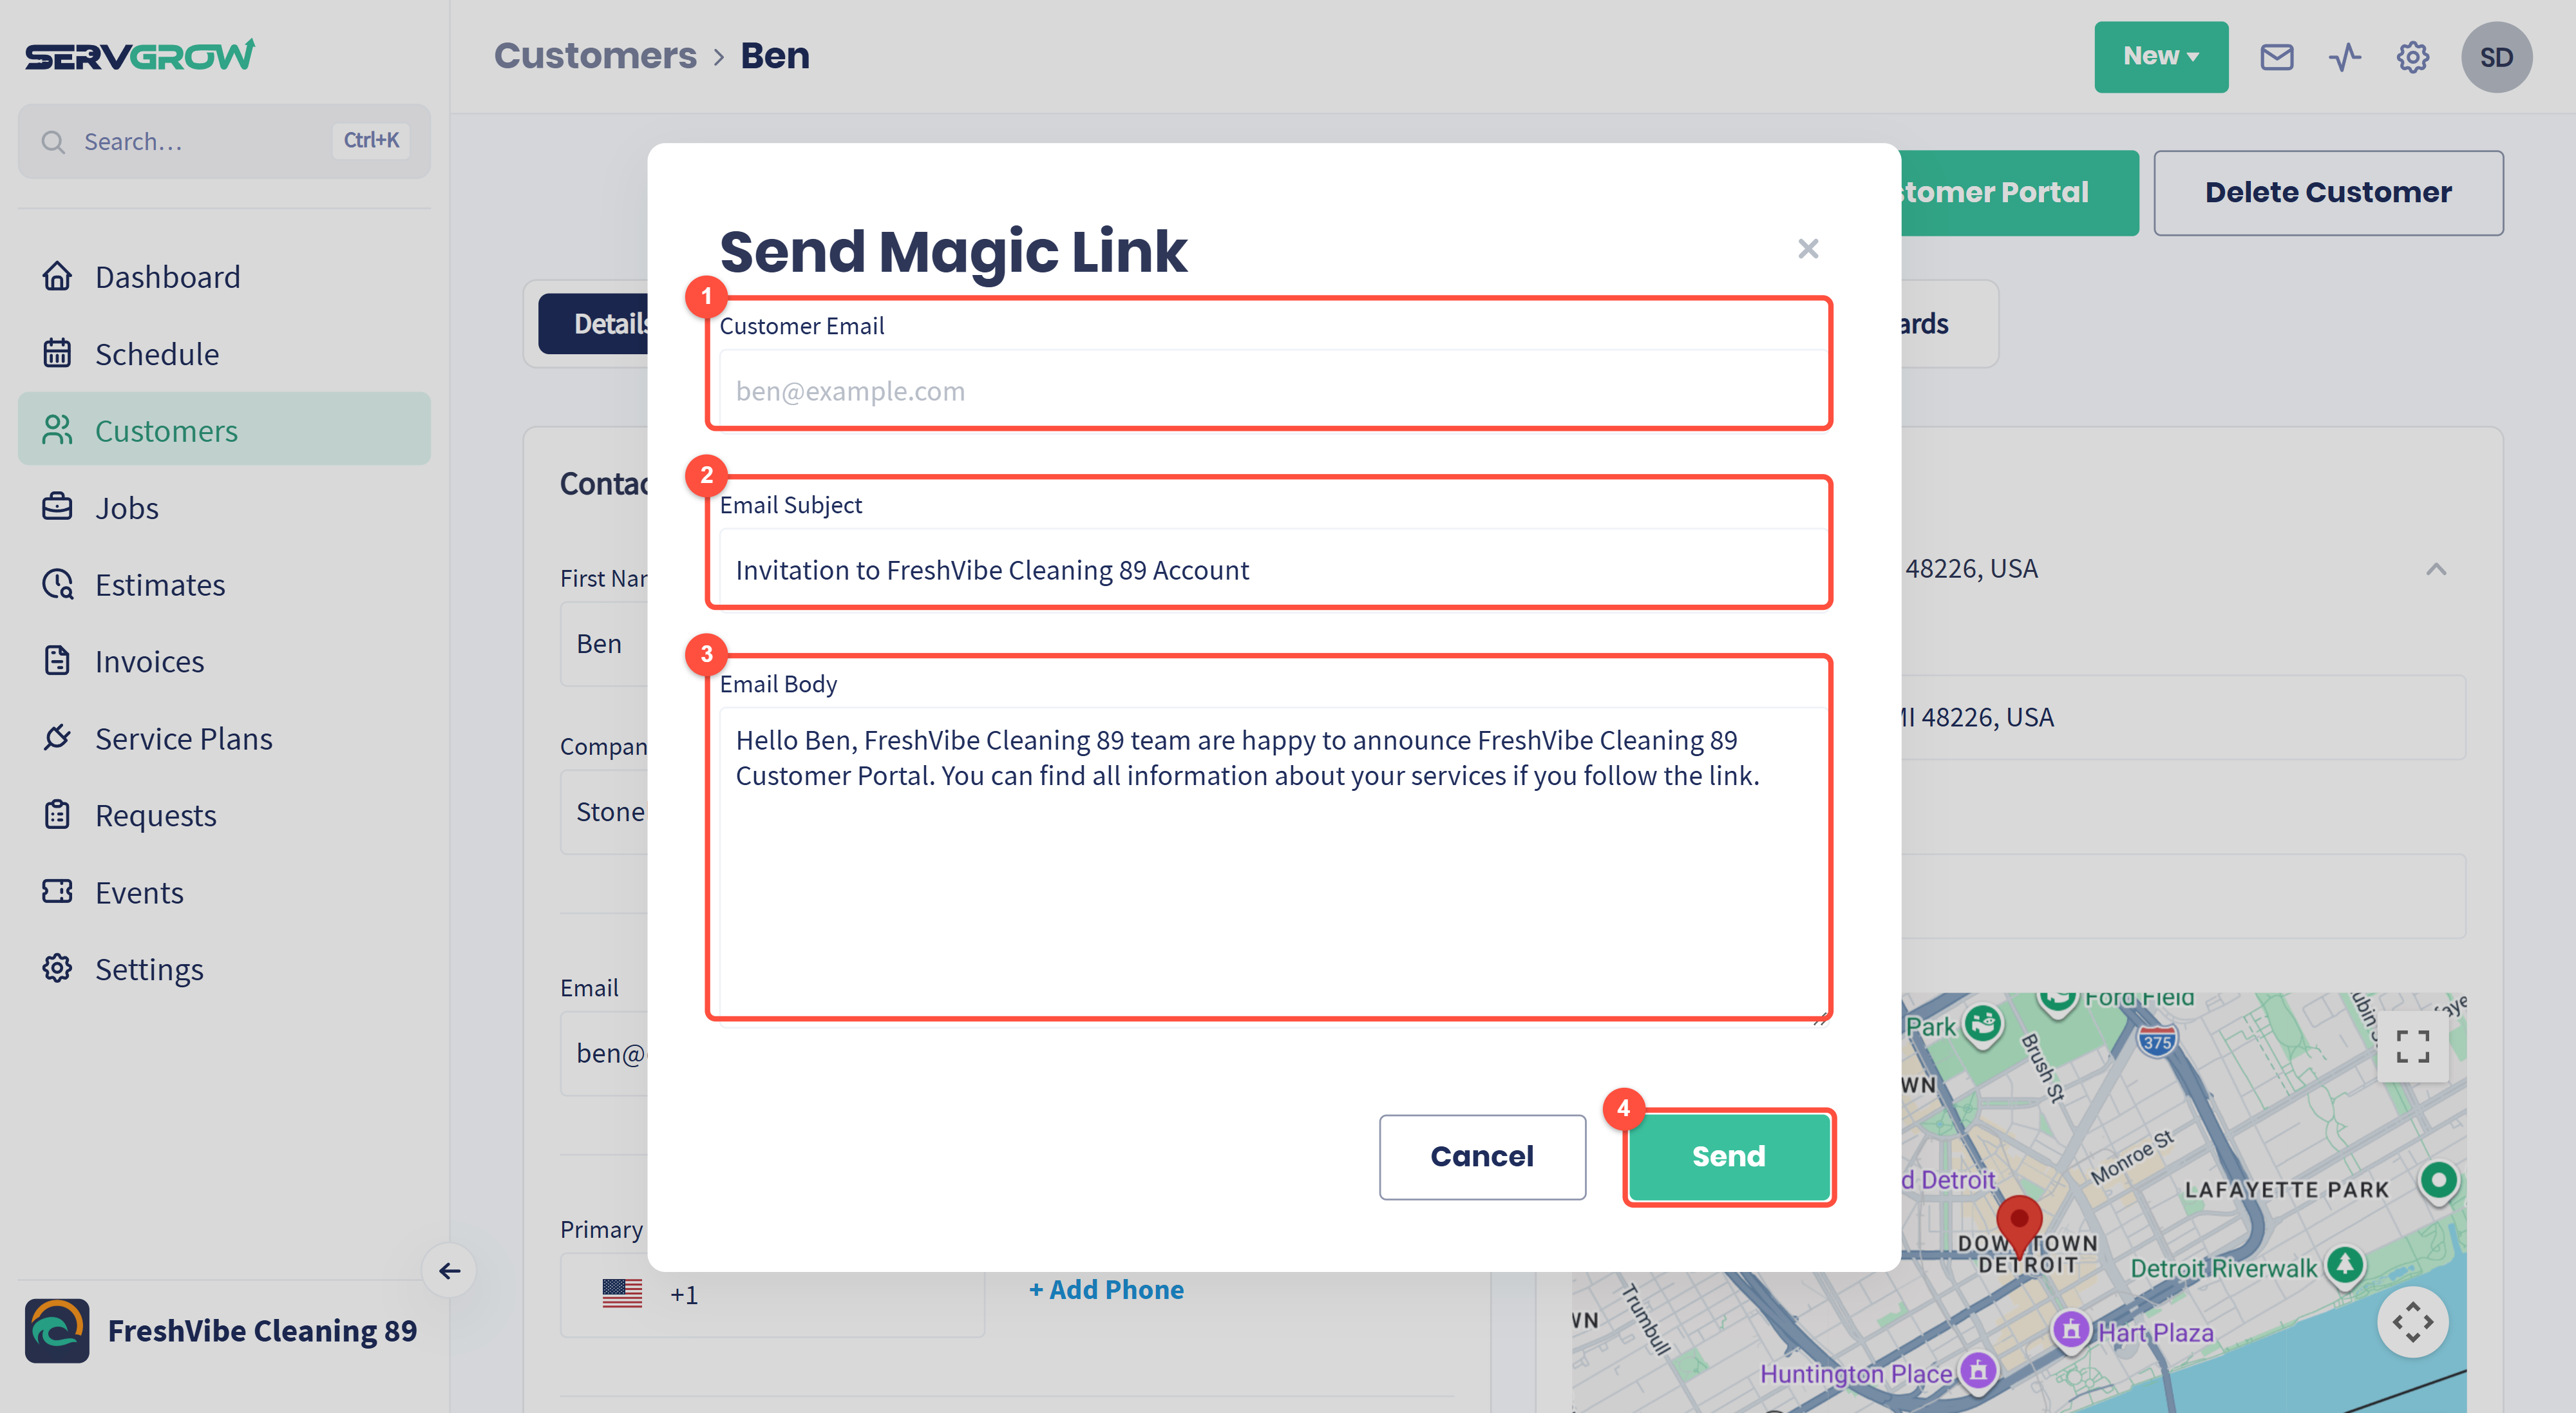
Customer Email: the invite goes to the email on the customer's record.
Email Subject: change it if you like.
Email Body: the message above the link. Edit it to sound like you.
Click Send. The customer gets a link that signs them straight in.
Delete a customer
Click Delete Customer and confirm. This cannot be undone, so export your customer list first if you might need the record later.
Tips
Write it down once. Anything you learn on a call goes into Customer Notes or Property Notes, so the next person who talks to or visits the customer already knows.
Check before you call. A quick look at Invoice History and Subscription History tells you if anything is overdue before you pick up the phone.
Invite every regular customer to the portal. Fewer "when are you coming?" and "can you resend my invoice?" calls.
Related articles