
When a customer calls, you should have their details up before they finish saying their name. And when you want to reach a group, like every office client or everyone on one street, you should not have to click through customers one at a time.
The Customers page is your whole customer list in one place. Search by name, company or street, narrow the list by tag, and tick as many customers as you like to tag or tidy them in one go. Clean, well-tagged records are what make targeted campaigns, accurate reports and fast scheduling possible.
The Customers page at a glance
Click Customers in the left menu.
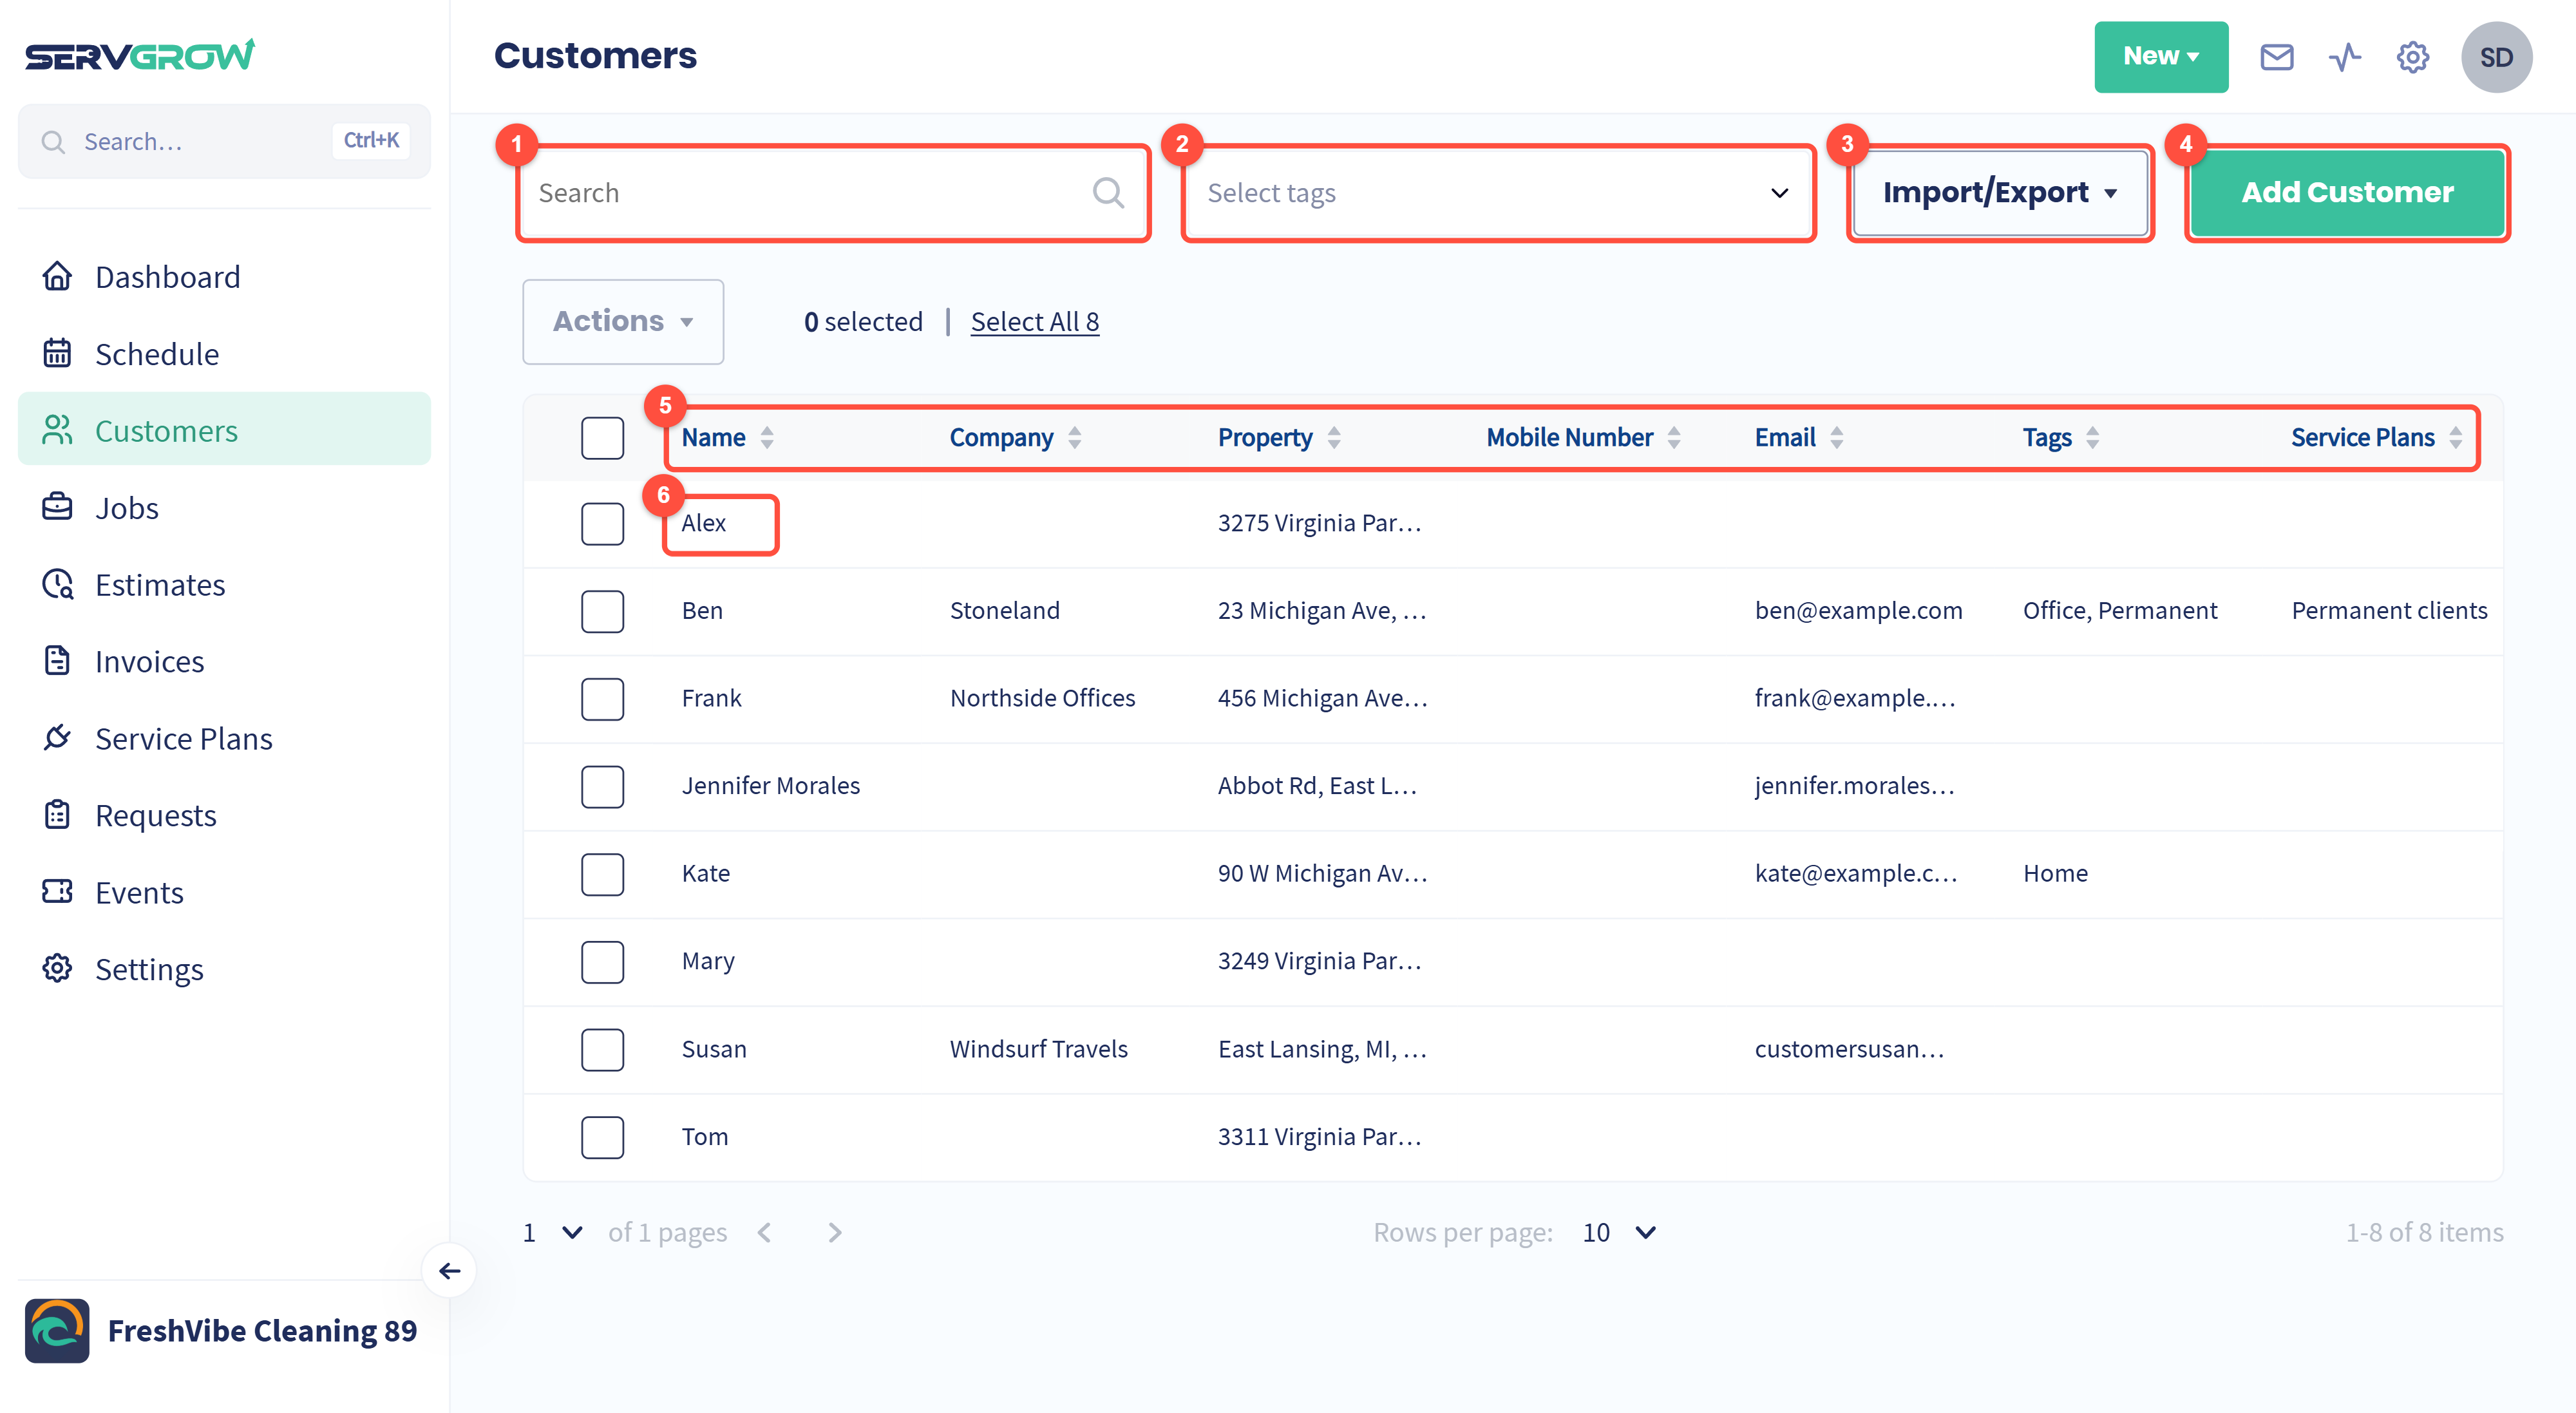
Search: type part of a name, company or address.
Select tags: show only customers with the tags you pick.
Import/Export: bring in a spreadsheet of customers, or download your list to a CSV file.
Add Customer: create a new customer record.
The column headings: click Name, Company, Property, Email or any other heading with arrows to sort by it. Click again to reverse the order. On a smaller screen, scroll the table sideways to see the Notes column.
Click a customer's name to open their customer page, with all of their details, jobs, estimates, invoices and service plans.
Use Rows per page under the list to show more customers at once, and the page arrows to move through a long list.
Find a customer by street, company or name
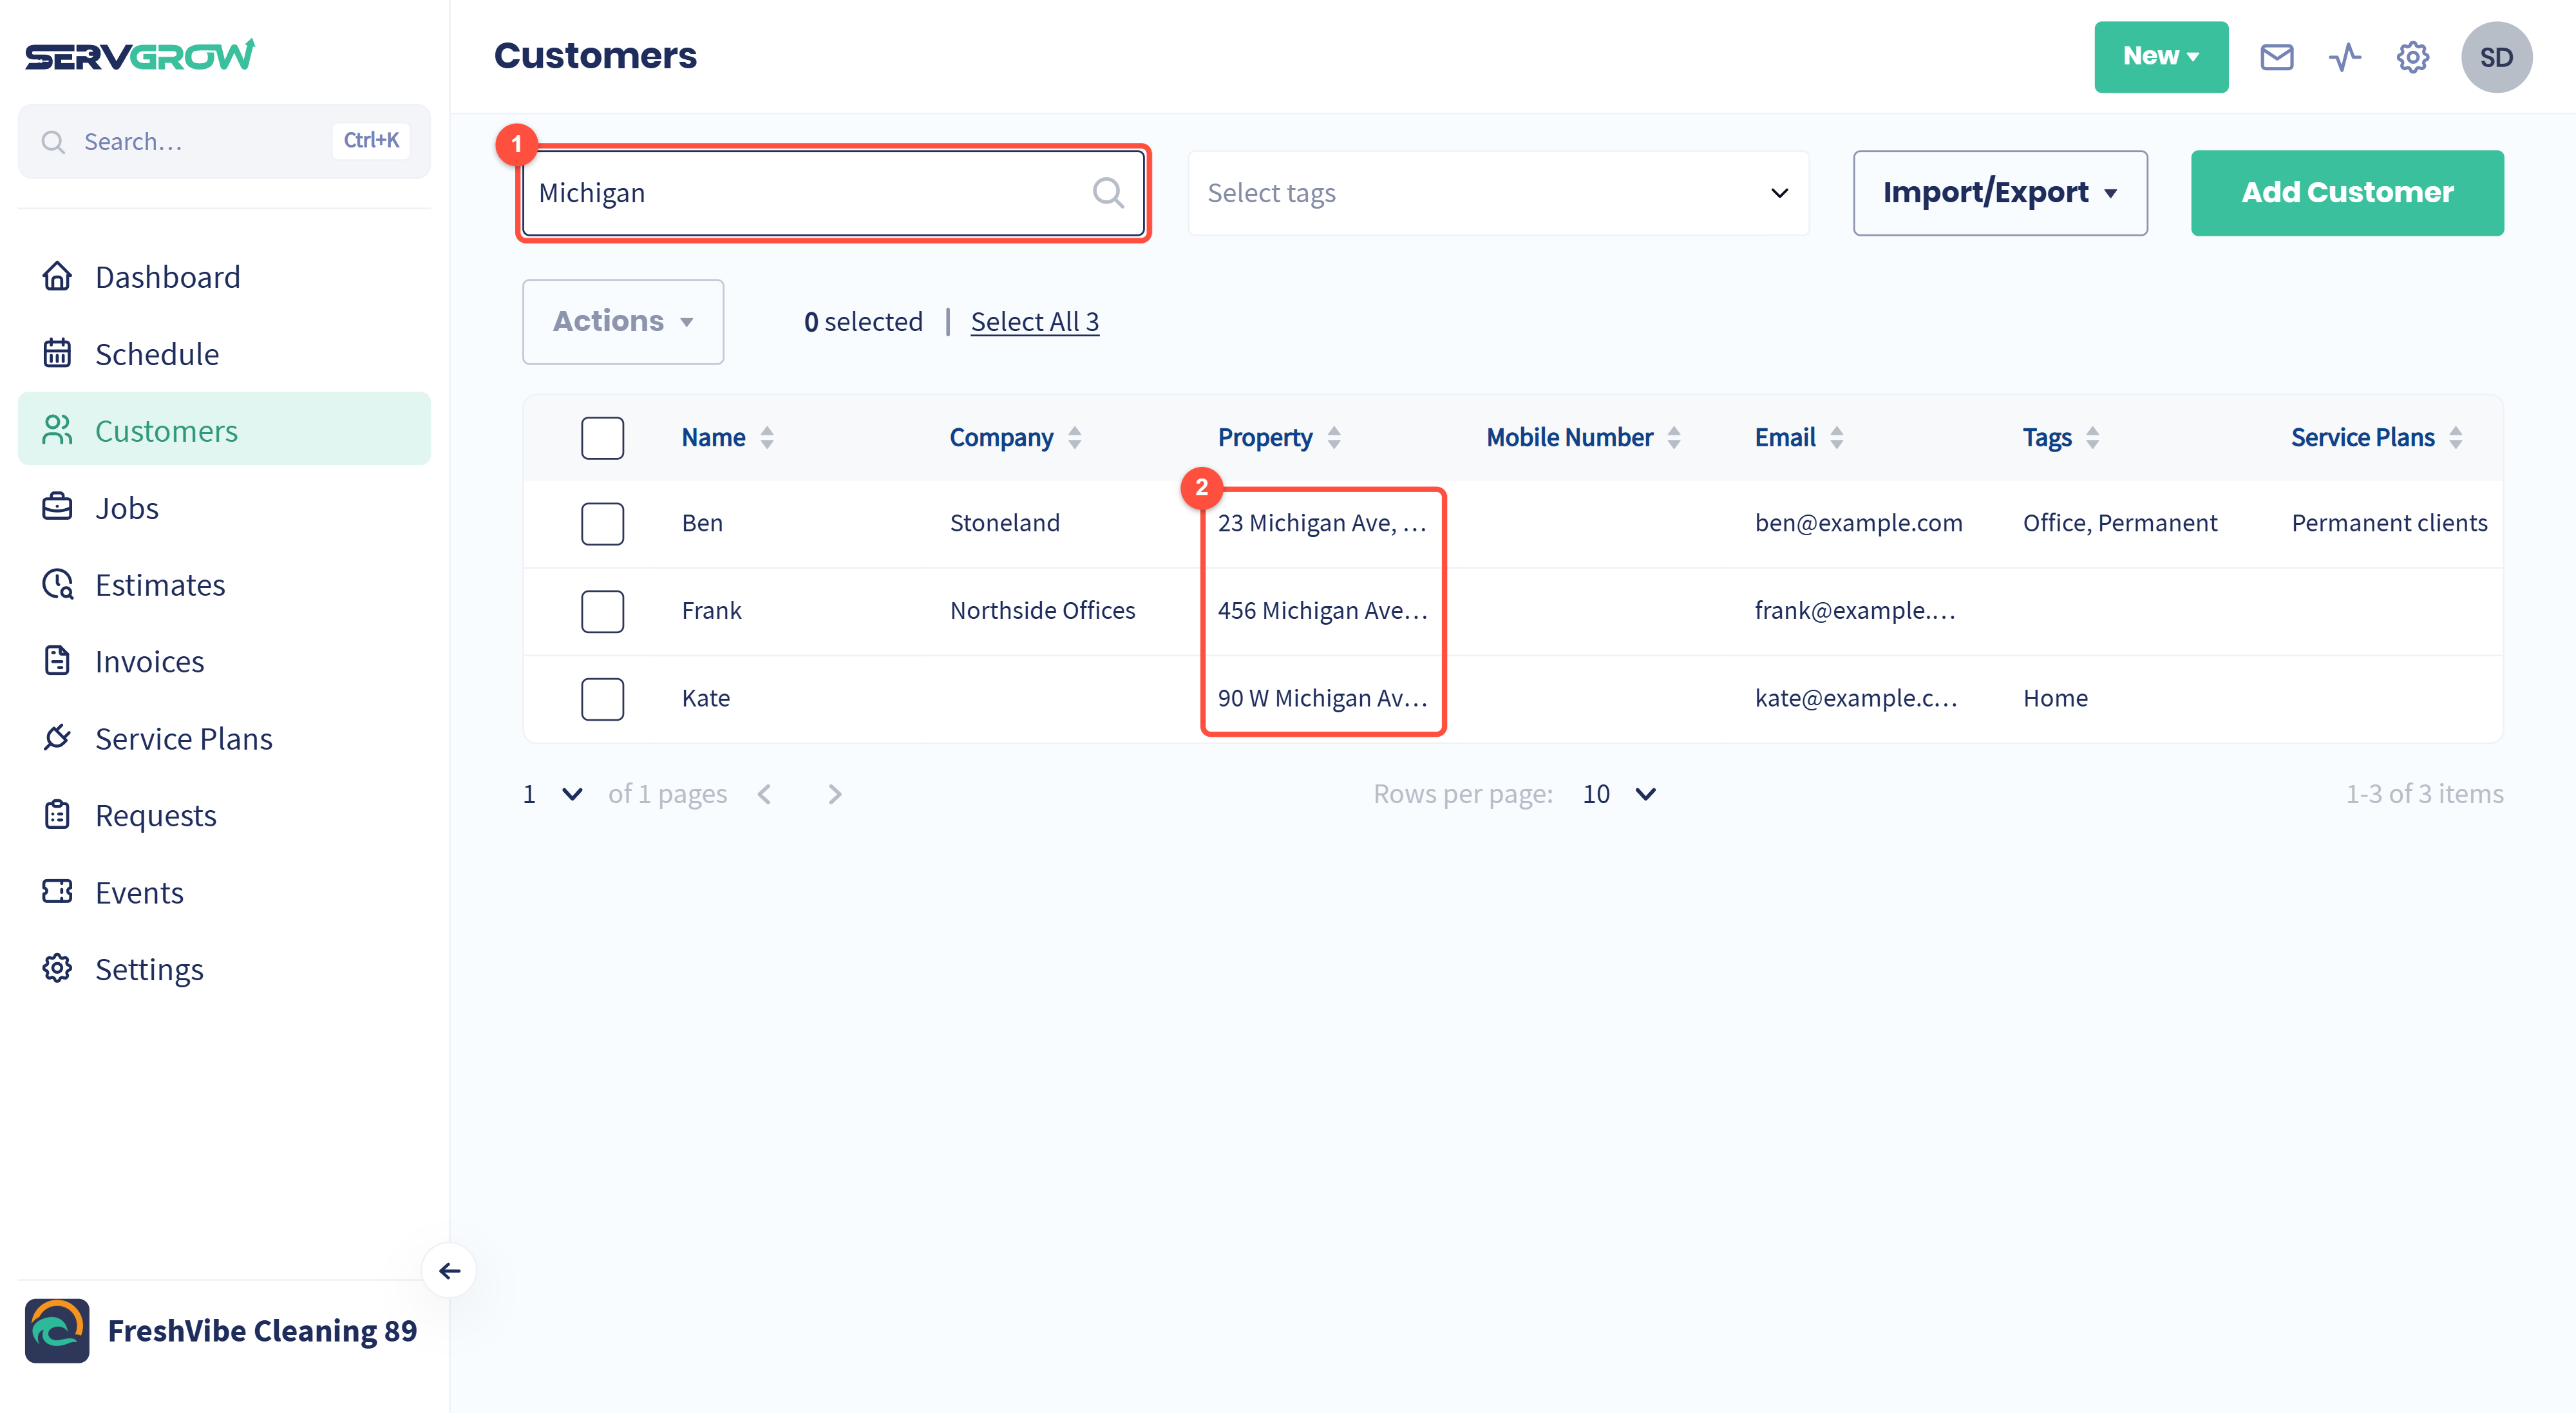
Type in Search. The list narrows as you type.
Search checks addresses as well as names, so typing a street name finds everyone on it. Handy when a caller only gives you their street, or when you want to fill a gap in a crew's day with nearby customers.
Filter by tag

Click Select tags and pick one or more tags. Click the x in the box to clear the filter.
The Tags column shows every tag each customer has.
The Select All count changes to match, so you can act on exactly the customers you filtered to.
You can use search and the tag filter together, for example every Office customer in Detroit.
Update many customers at once
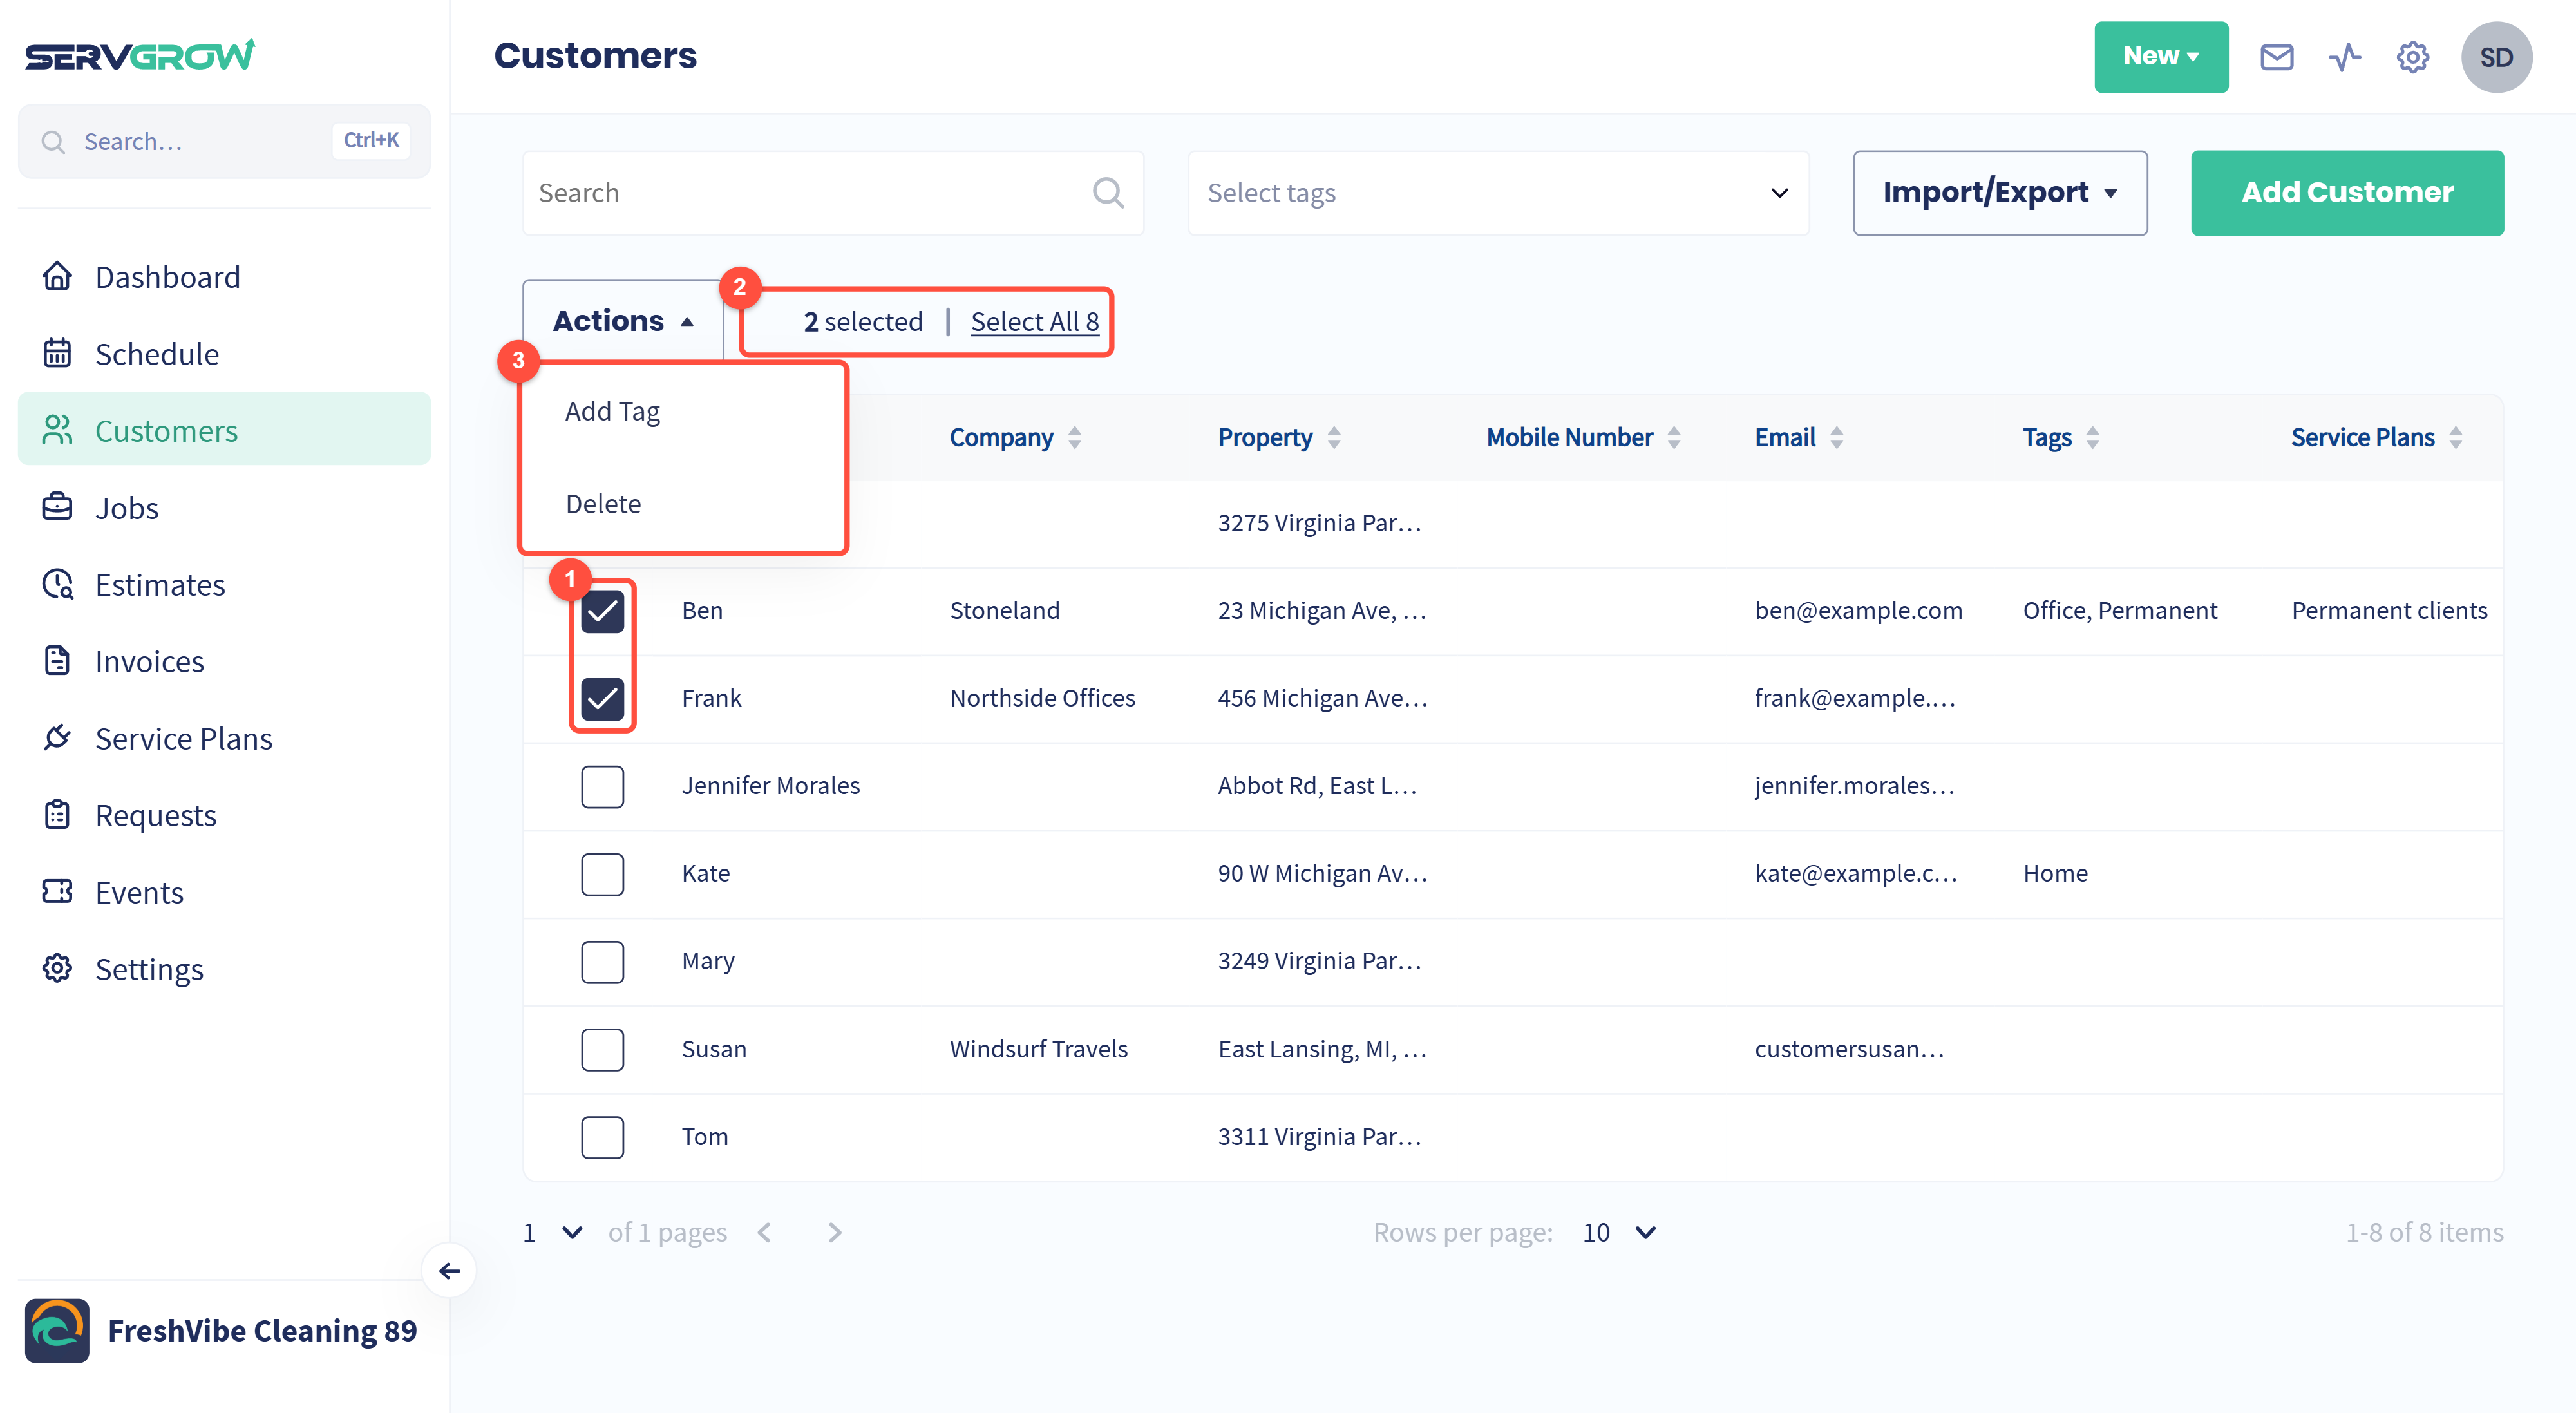
Tick the box next to each customer you want to change.
The count shows how many you have picked. Click Select All to pick every customer that matches your current search and tag filter, across all pages.
Click Actions, then choose Add Tag or Delete.
Add a tag to every selected customer
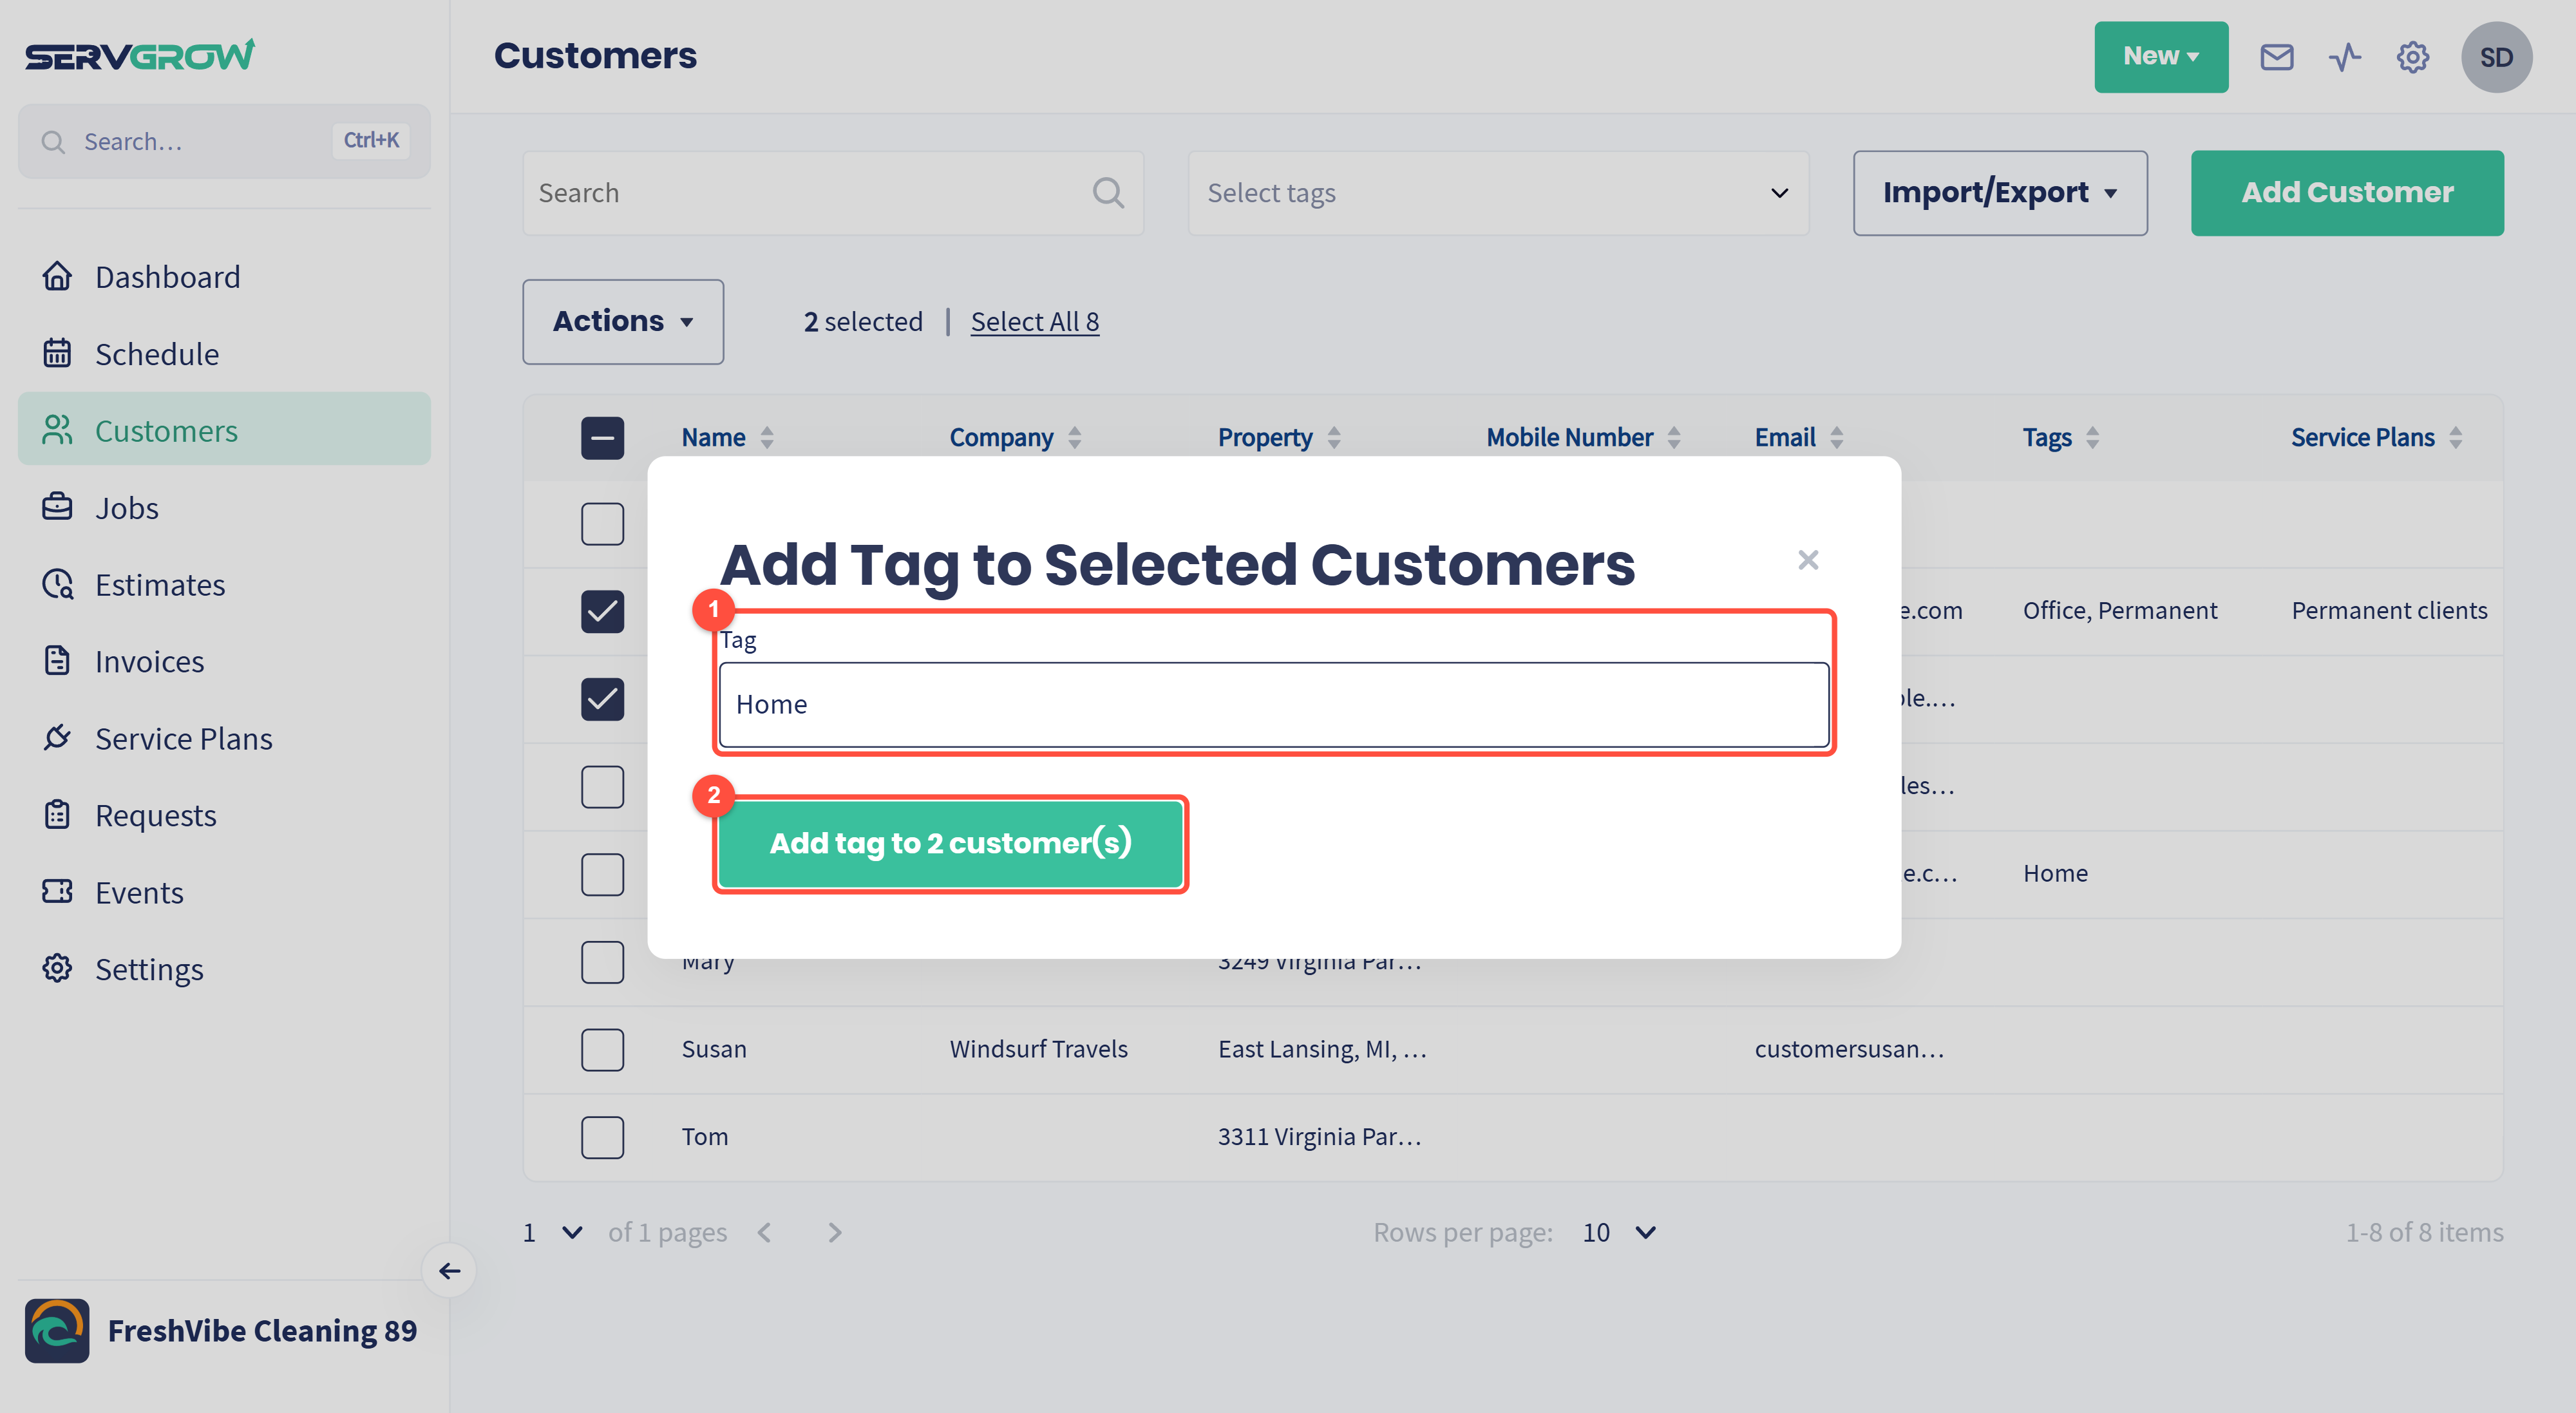
In Tag, pick one of your existing tags, or type a new name and choose Create to make a new tag. A new tag is saved to your tag list straight away.
Click Add tag to 2 customer(s). The number matches how many customers you selected. Their existing tags stay, and the new one is added.
Delete customers
Choose Actions, then Delete, and confirm. Deleted customers are gone for good and cannot be brought back, so export your list first if you might need the records later.
Do not see the tick boxes or the Actions button? Your role does not allow editing customers. Ask the account owner to change your permissions.
Tips
Tag as you go. A tag for the type of customer (Home, Office) and one for the service they buy makes the filter far more useful later.
Tag in bulk after a campaign. Search or filter to the customers you reached, Select All, and add a tag like "Spring promo" so you can follow up with the same group.
Export before a big clean-up. Download your list from Import/Export before you delete anything.
Related articles