
Every "when are you coming?", "can you resend that invoice?" and "did my payment go through?" call takes time out of your day. Customers would rather look it up themselves, whenever suits them.
The Customer Portal gives every customer their own space with your business, in your colors and with your logo. They see their upcoming and past appointments, approve estimates, pay invoices and book new work on their own, around the clock. You answer fewer calls, get estimates approved and invoices paid sooner, and look like the professional outfit you are.
What your customers can do in the portal
Appointments: see upcoming and past jobs, estimates and visits, with the date, address, the team coming and the total.
Estimates: review an estimate, choose any optional items, then approve it, decline it or request changes. If you ask for a deposit, they can pay it online.
Invoices: see what is due and what is paid, pay online with an optional tip, and download invoices and receipts.
Service Plans: see their plan, visits, billing period, upcoming payments and payment history.
Profile: keep their contact details and properties up to date and save a card for payments.
Company: find your contact details and hours, and send you a message.
Book Online: request new work using your Online Booking form.
Online payments in the portal use Servgrow Payments, so set that up first if you want customers to pay there.
Set up your portal
Click the gear icon, then Customer Portal.
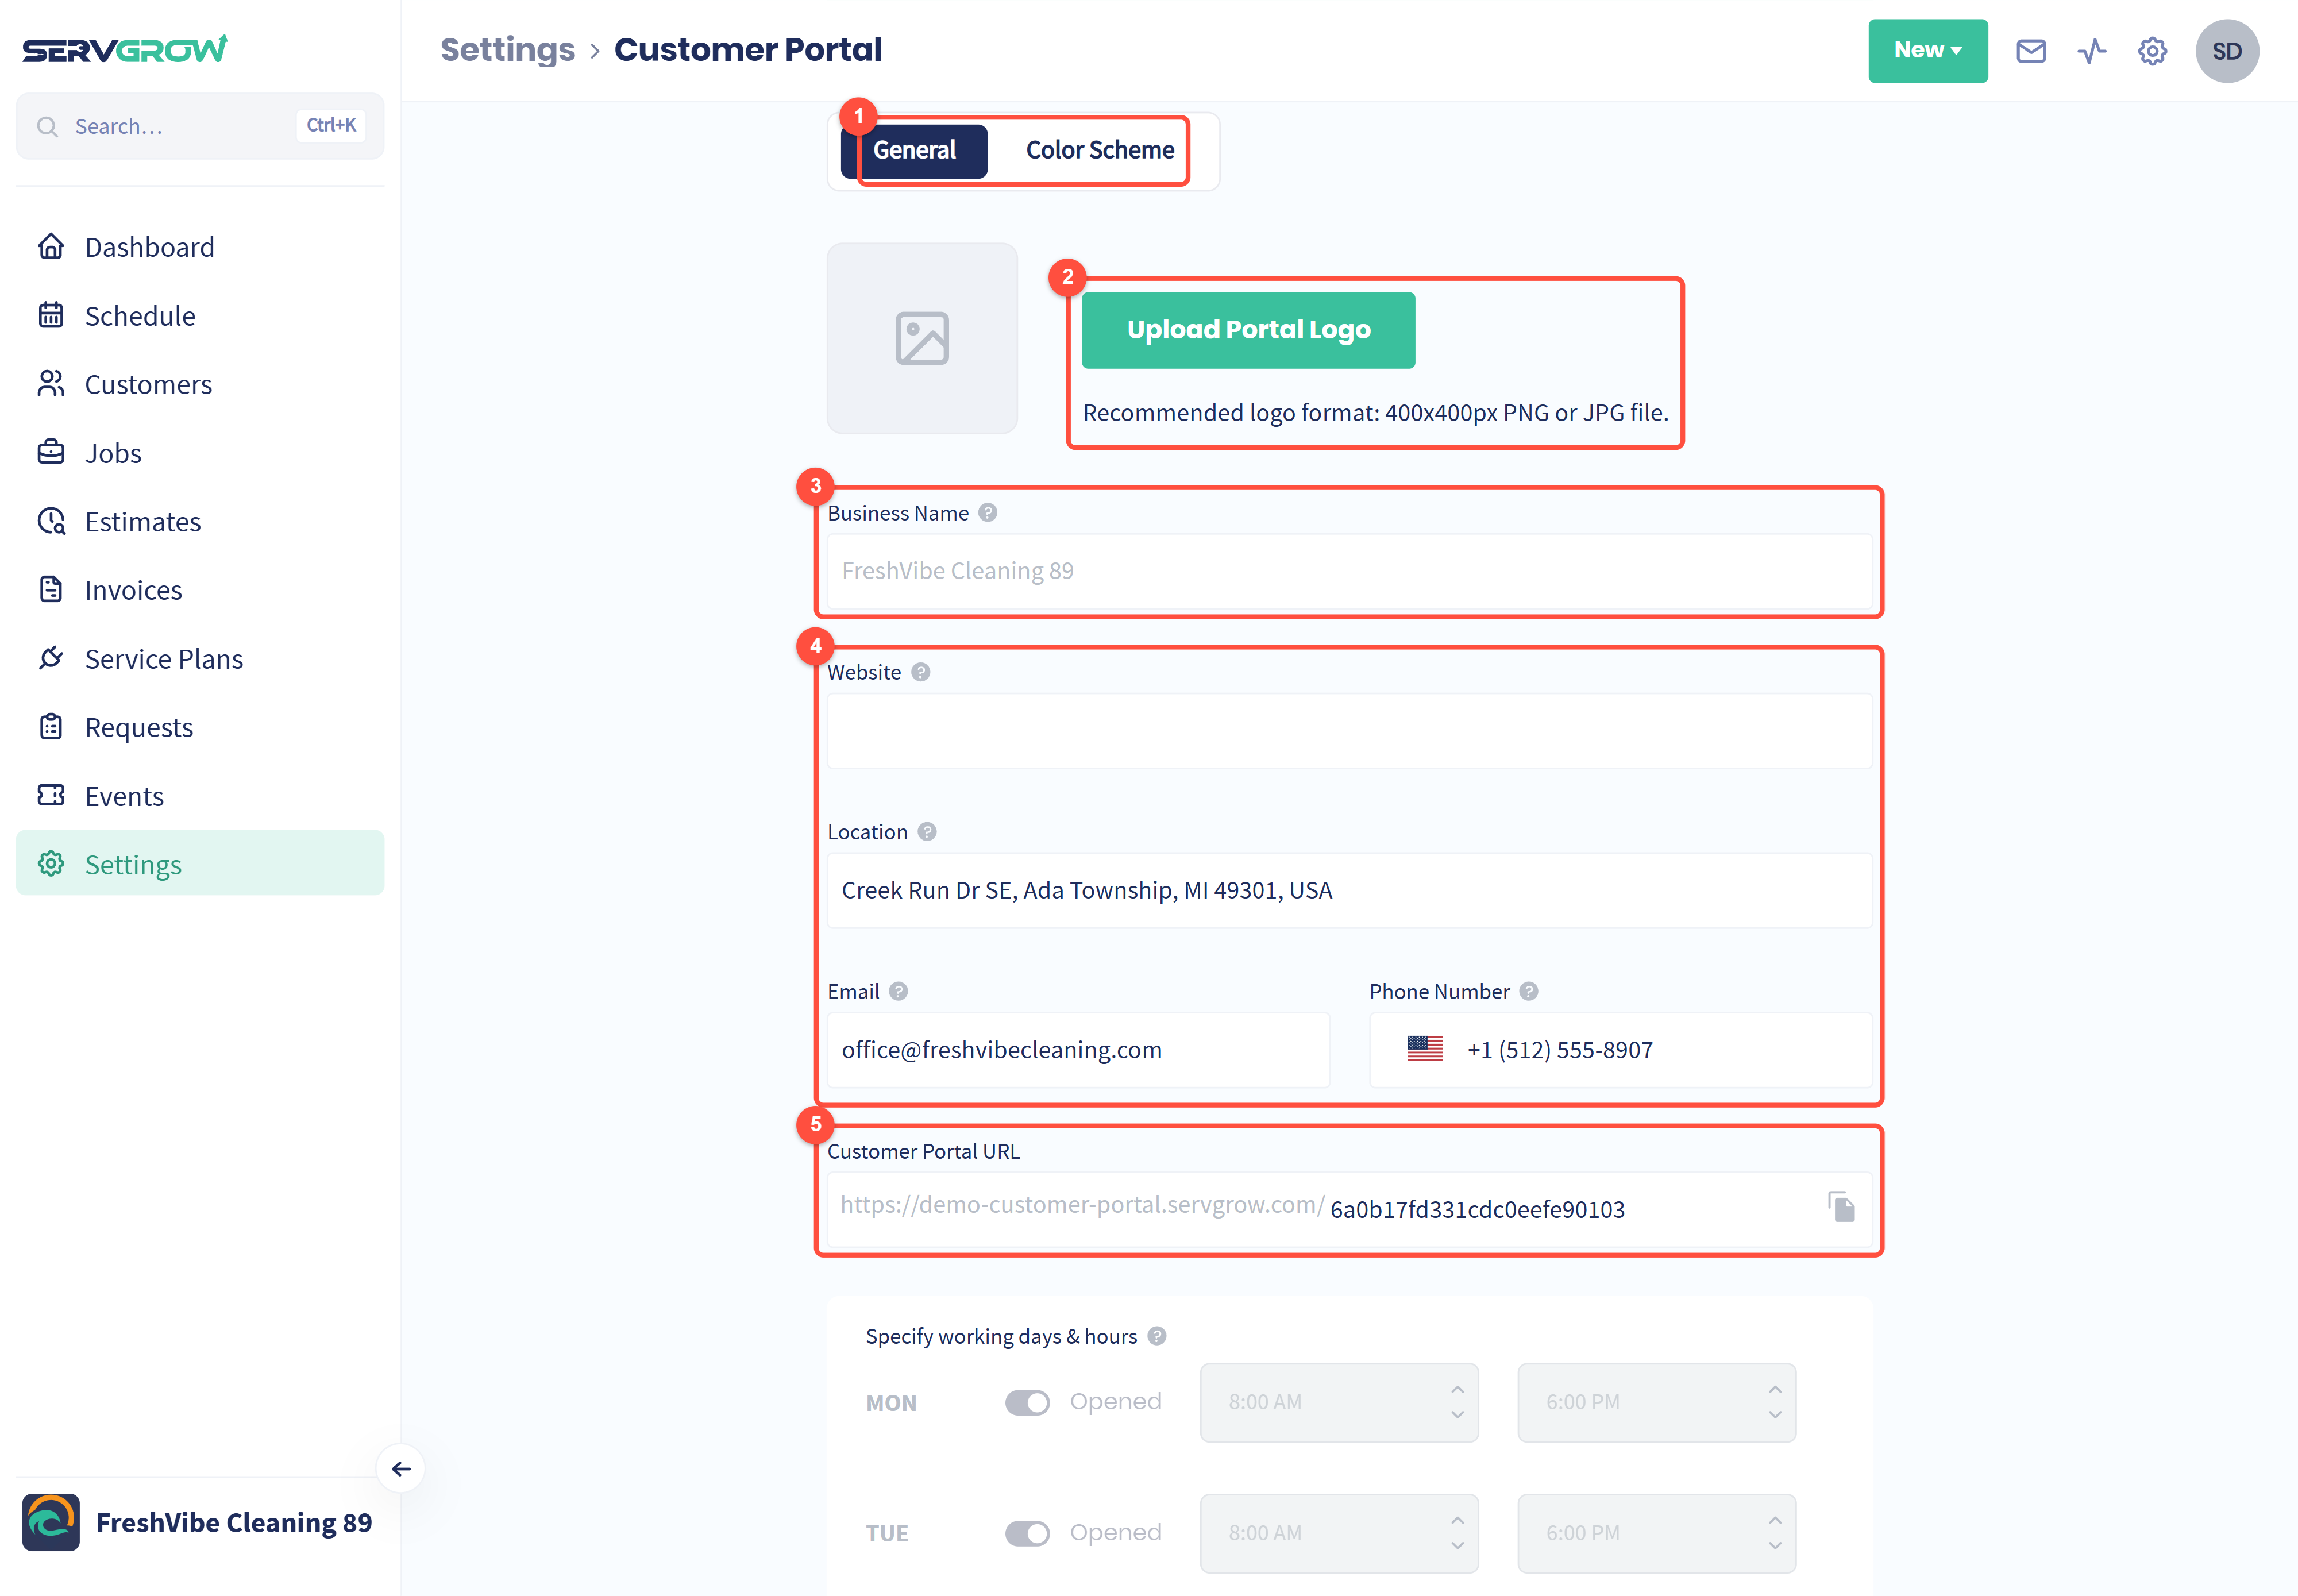
General holds your business details. Color Scheme sets the look (see below).
Upload Portal Logo: the logo customers see. Use a 400 x 400 pixel PNG or JPG.
Business Name comes from your Company Profile. Change it there.
Website, Location, Email and Phone Number: what customers see in the portal. The email and phone are the support contact they will use. Changing them here does not change your main business details.
Customer Portal URL: your portal's web address. Click the copy icon to copy it. You can change the end of the address once, to something easy like your business name, using letters, numbers and hyphens (not at the start or end). After that it is locked, so choose carefully; contact support if you ever need it changed.
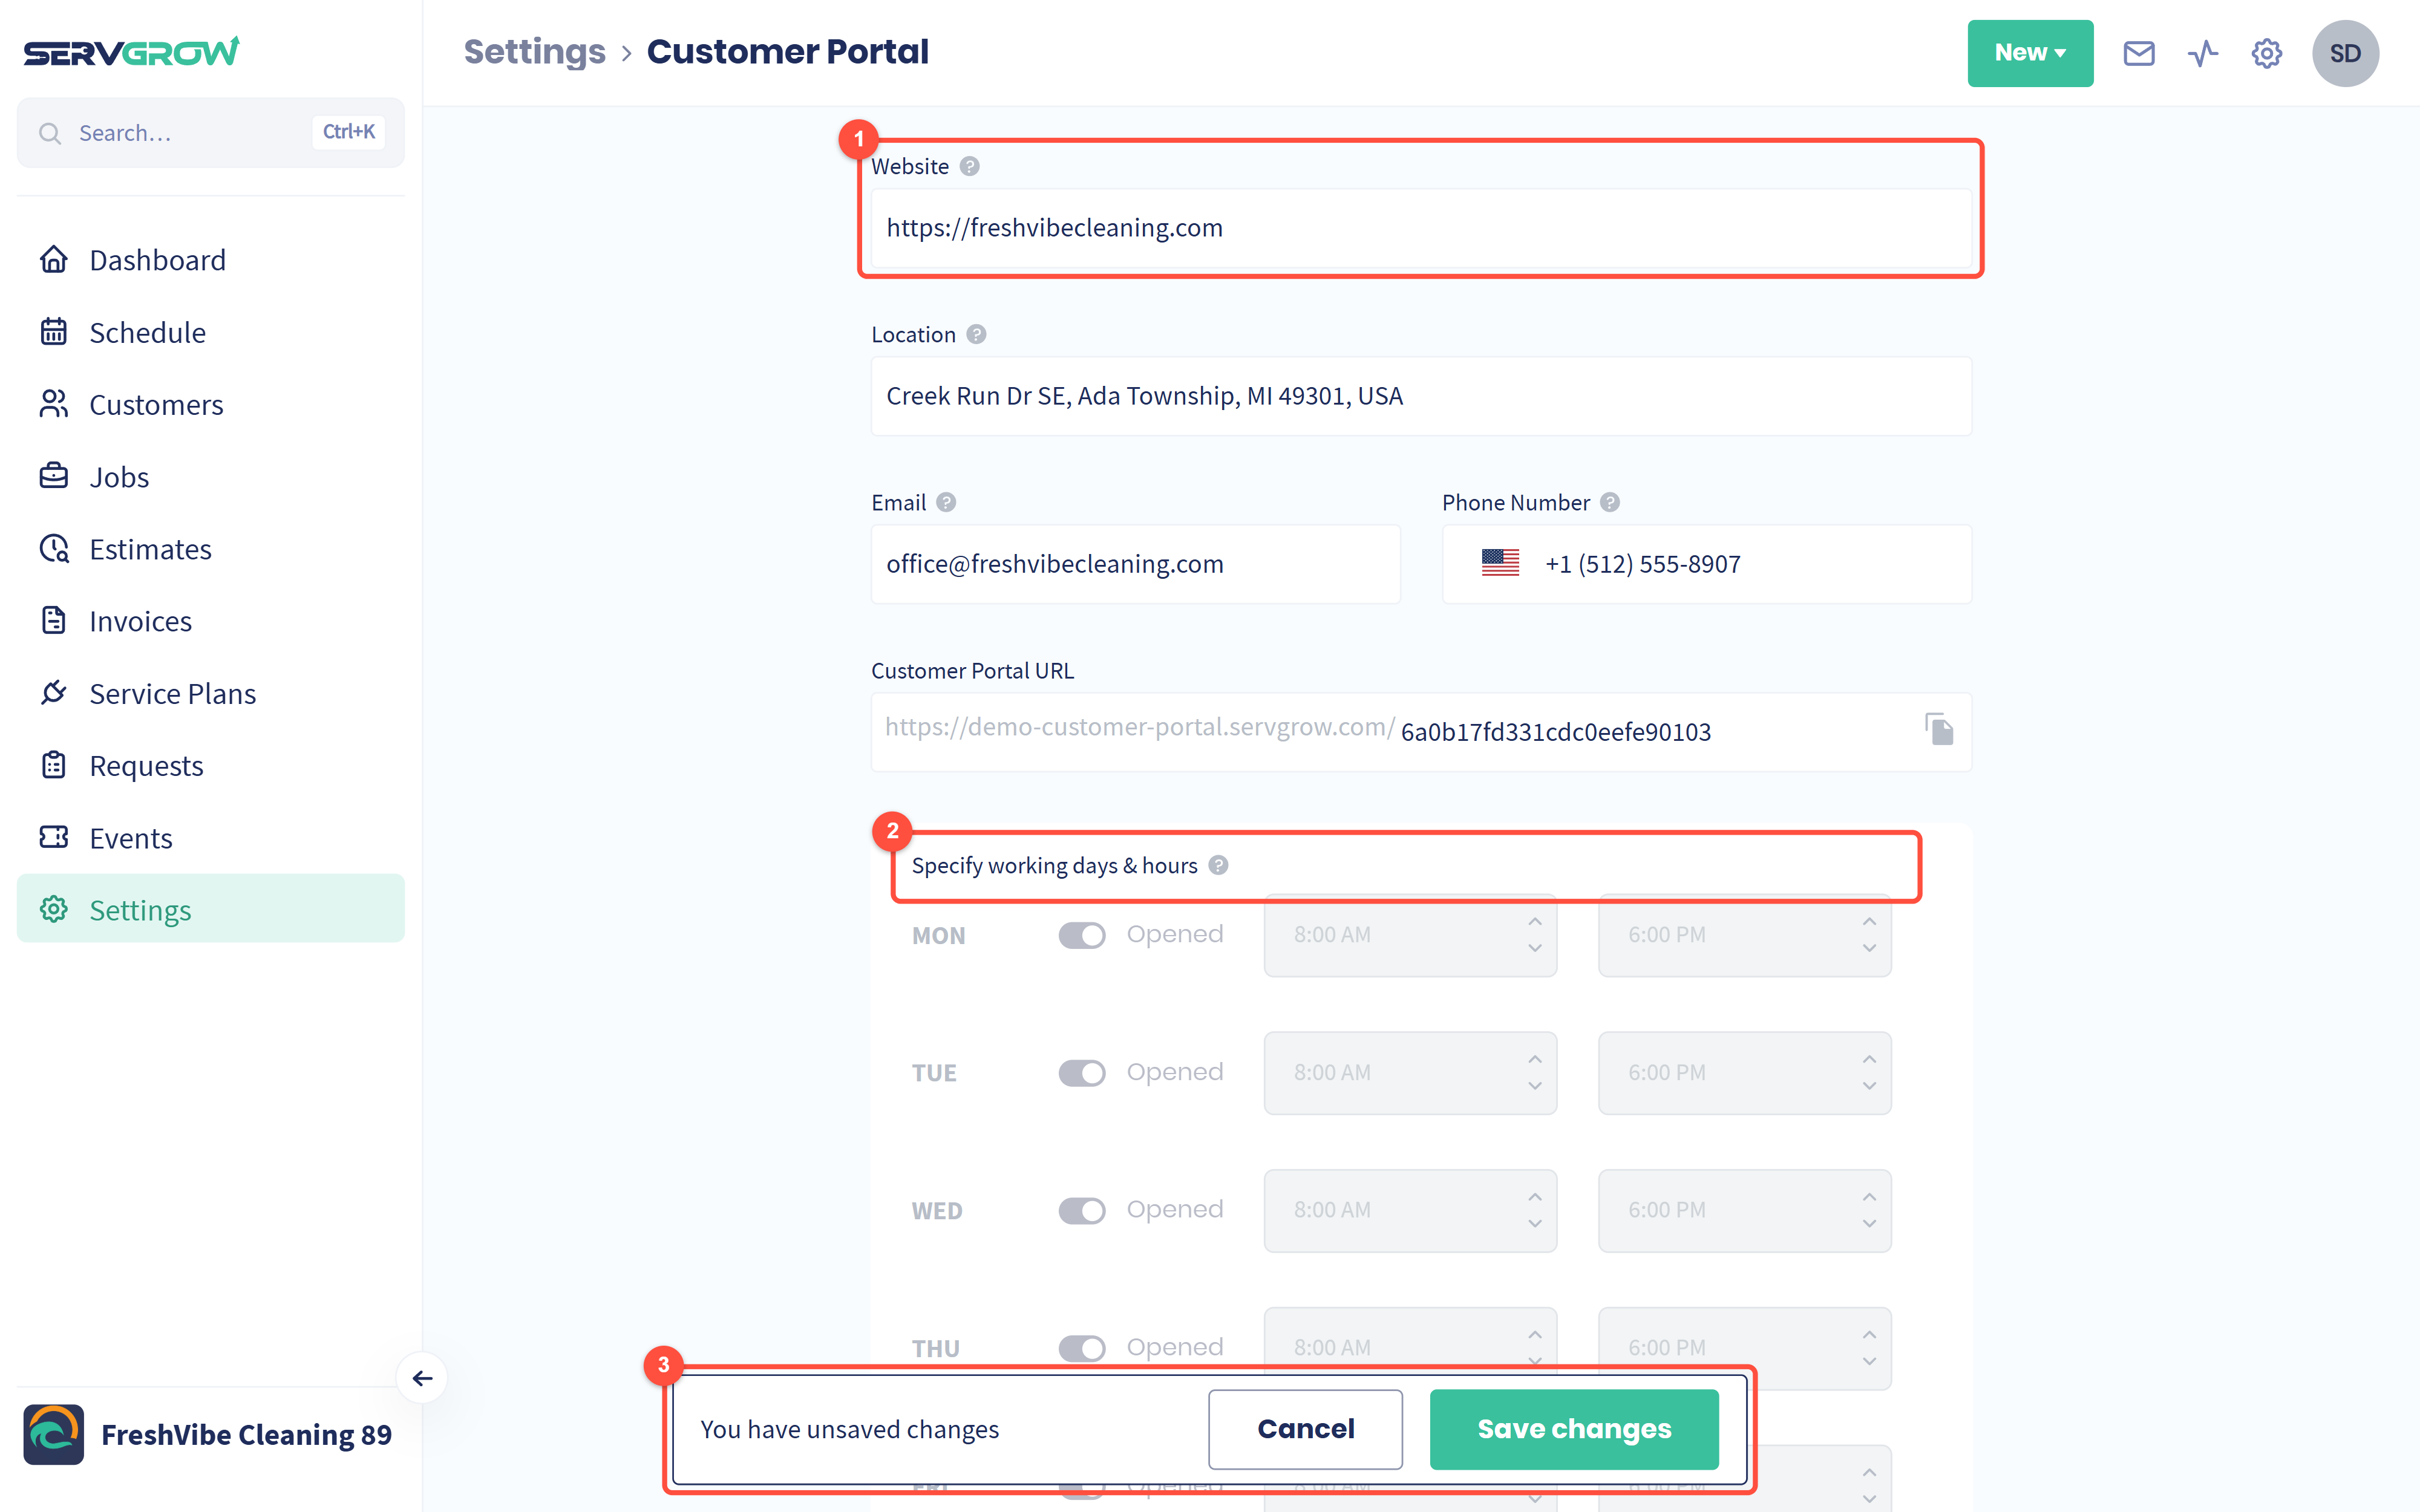
Change any field you need.
Specify working days & hours shows the hours from your Company Profile. Update them there.
Click Save changes, or Cancel to undo.
Match the portal to your brand
Click the Color Scheme tab.
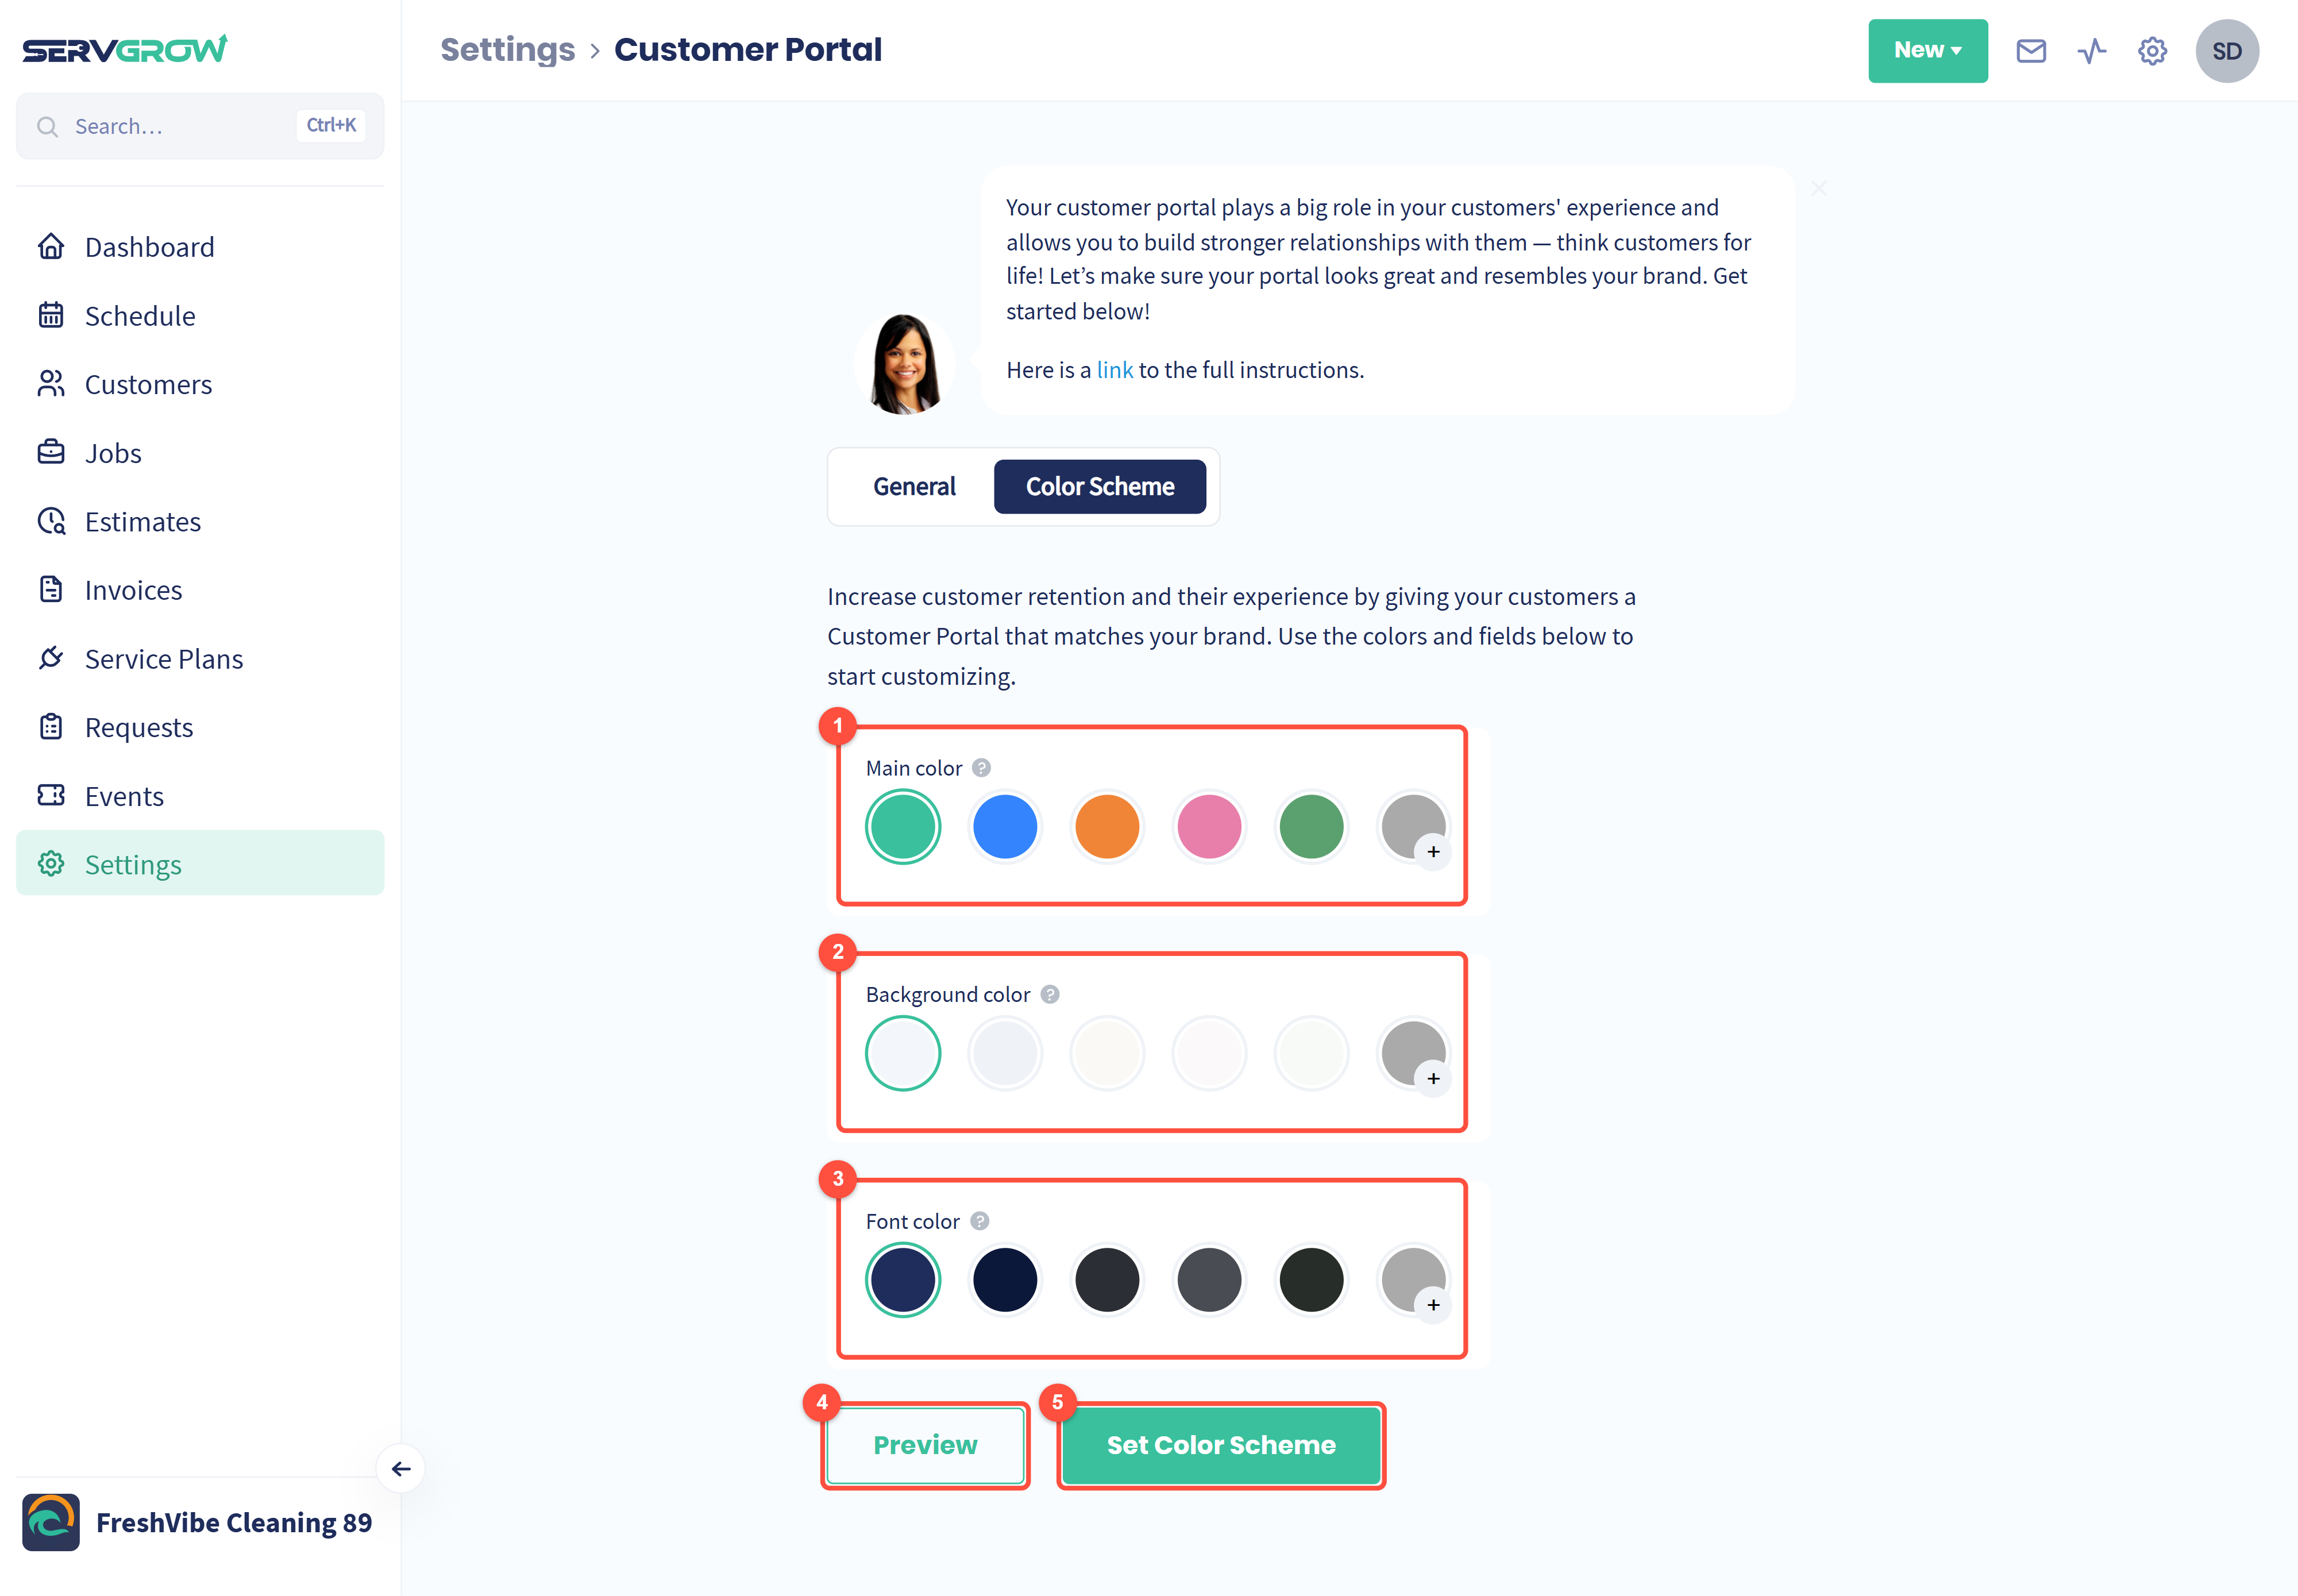
Main color: the menu buttons, main elements and buttons.
Background color: the menu background, inactive tabs and the emails customers get from the portal.
Font color: the main text, active tabs and service buttons. On each row, click a swatch or click the last circle with the + to pick any color, such as your exact brand color.
Preview: opens the portal in a new tab with your colors and a sample customer, so you can check the look before you save.
Click Set Color Scheme to save.
What your customers see
This is the Preview, showing sample appointments for a sample customer.
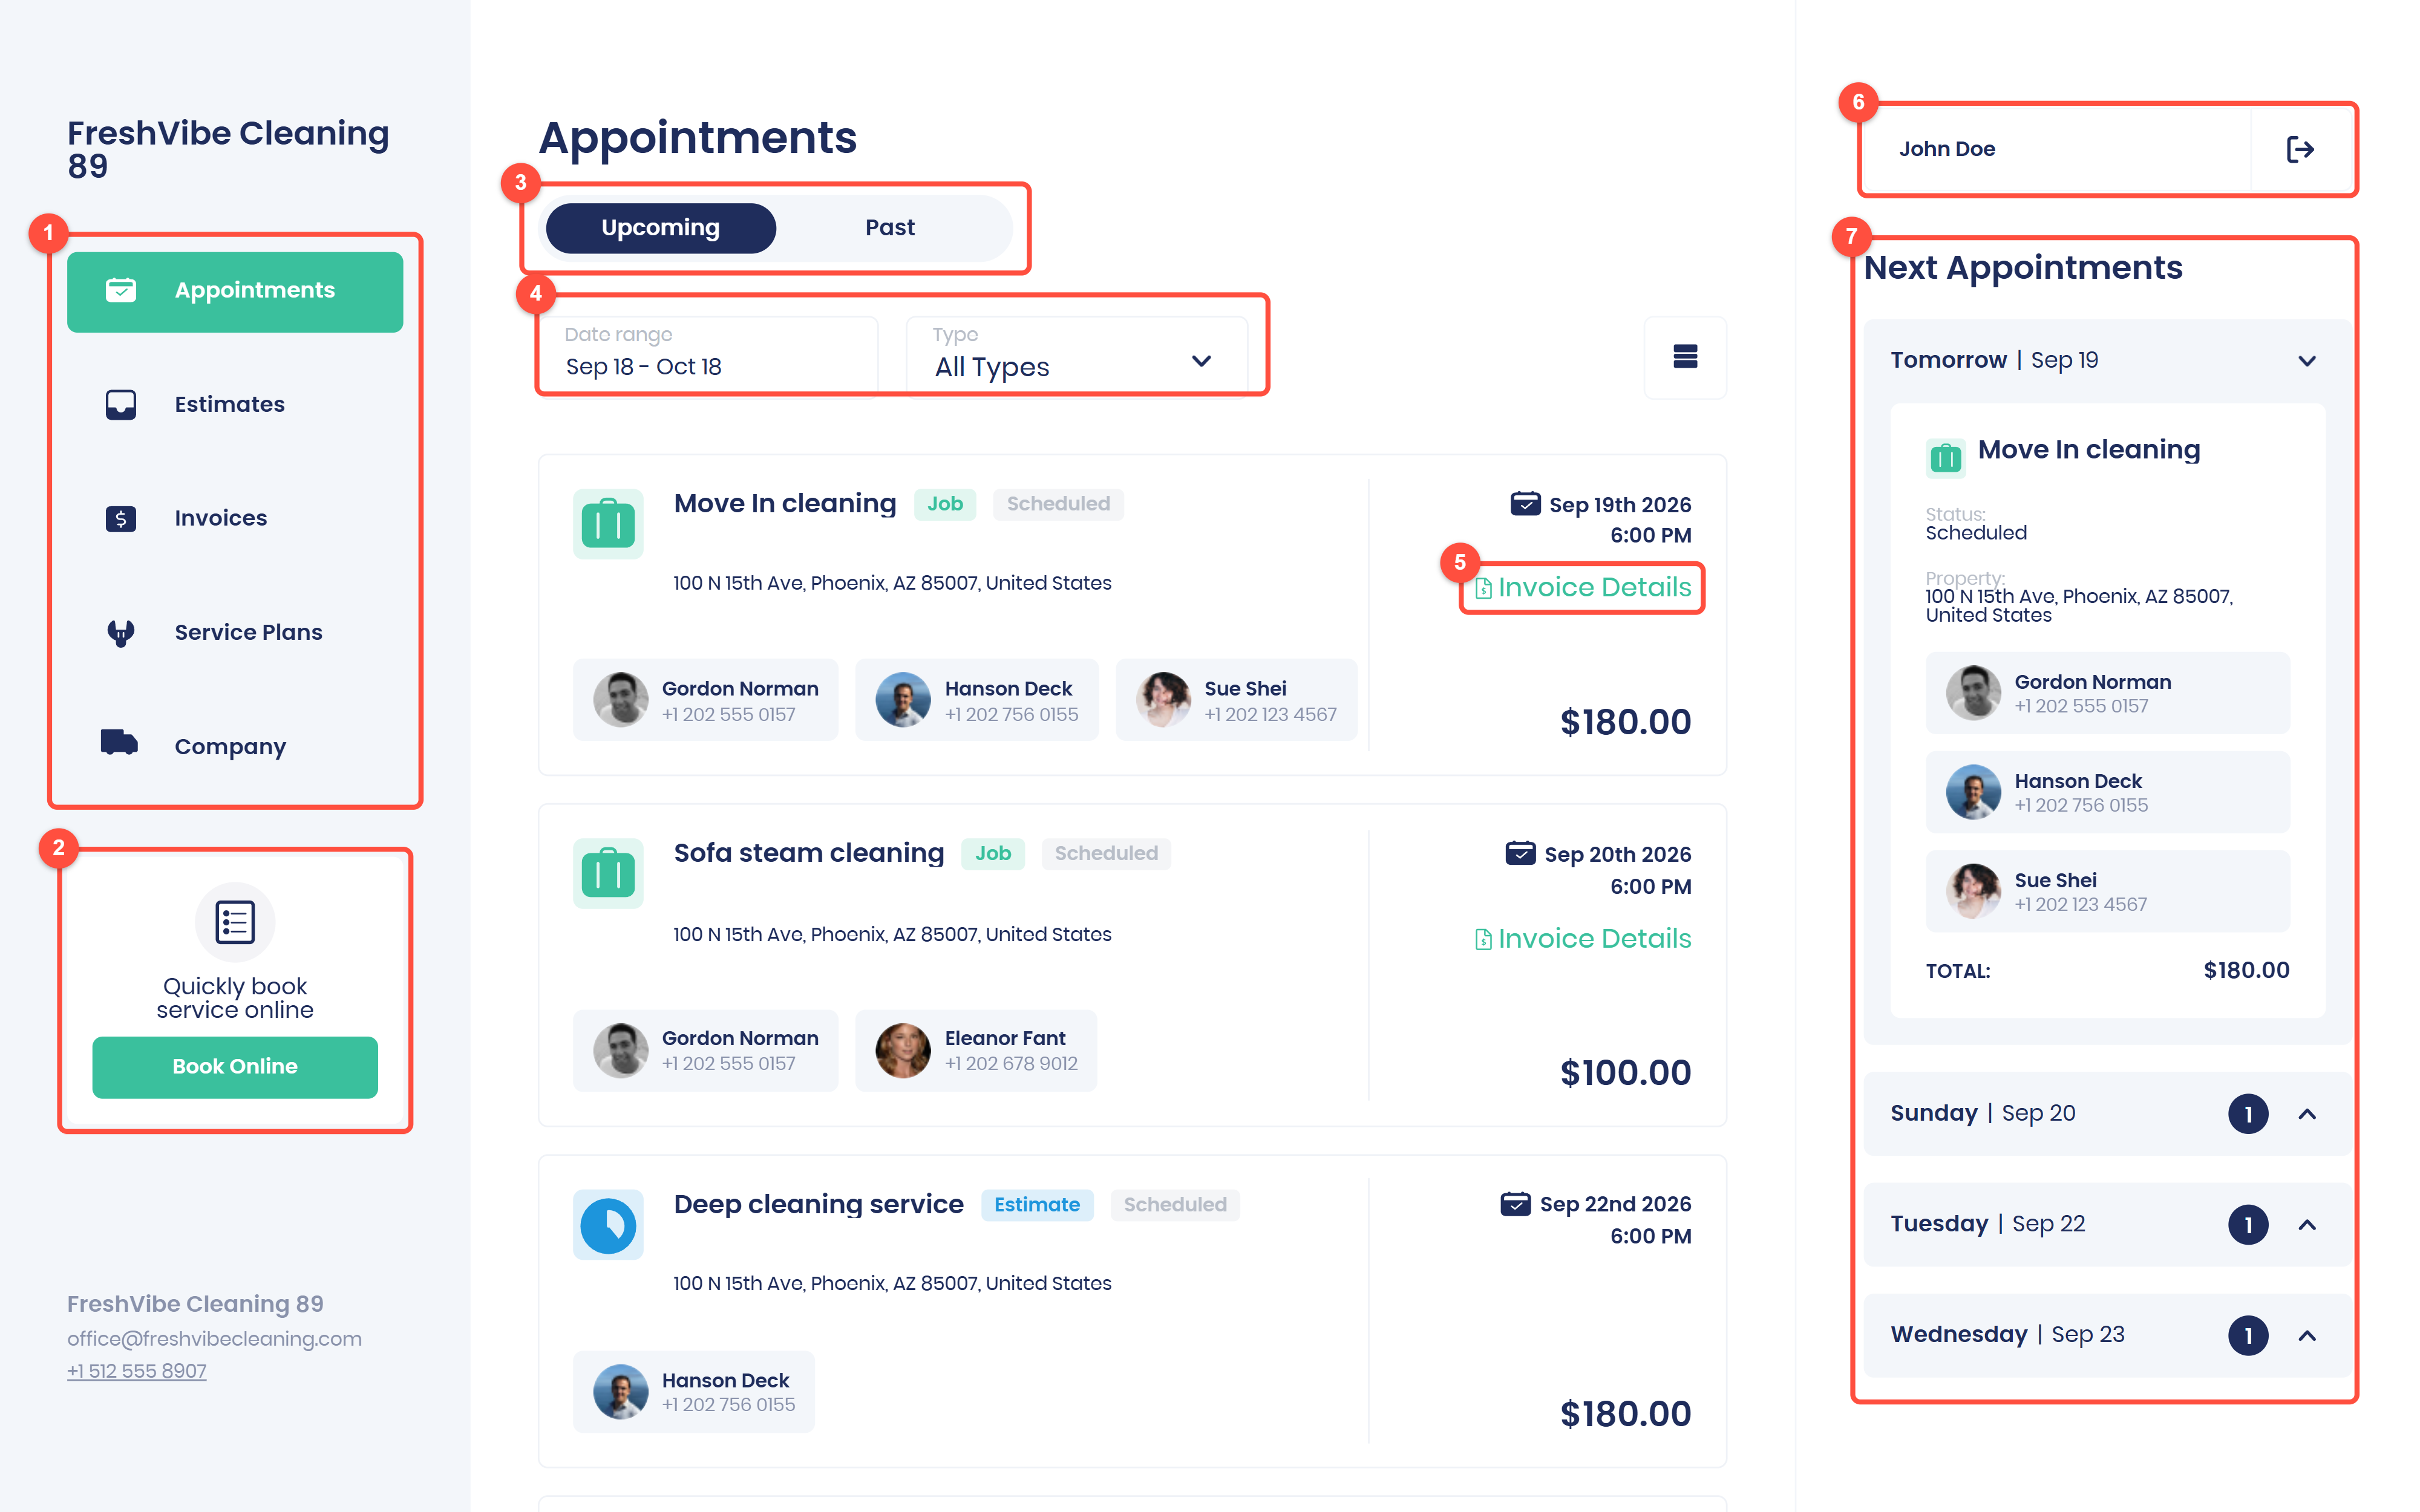
The menu: Appointments, Estimates, Invoices, Service Plans and Company.
Book Online: request new work.
Upcoming and Past appointments.
Filter by date range and by type (jobs, estimates or visits).
Invoice Details: open the invoice for that job.
The customer's name opens their profile. The icon next to it signs them out.
Next Appointments: the coming days at a glance, with who is coming.
Get customers into the portal
Customers sign in with a secure link sent to their email, so there is no password to remember. There are two ways to get them in.
Invite a customer
Open the customer from Customers and click Invite to Customer Portal.
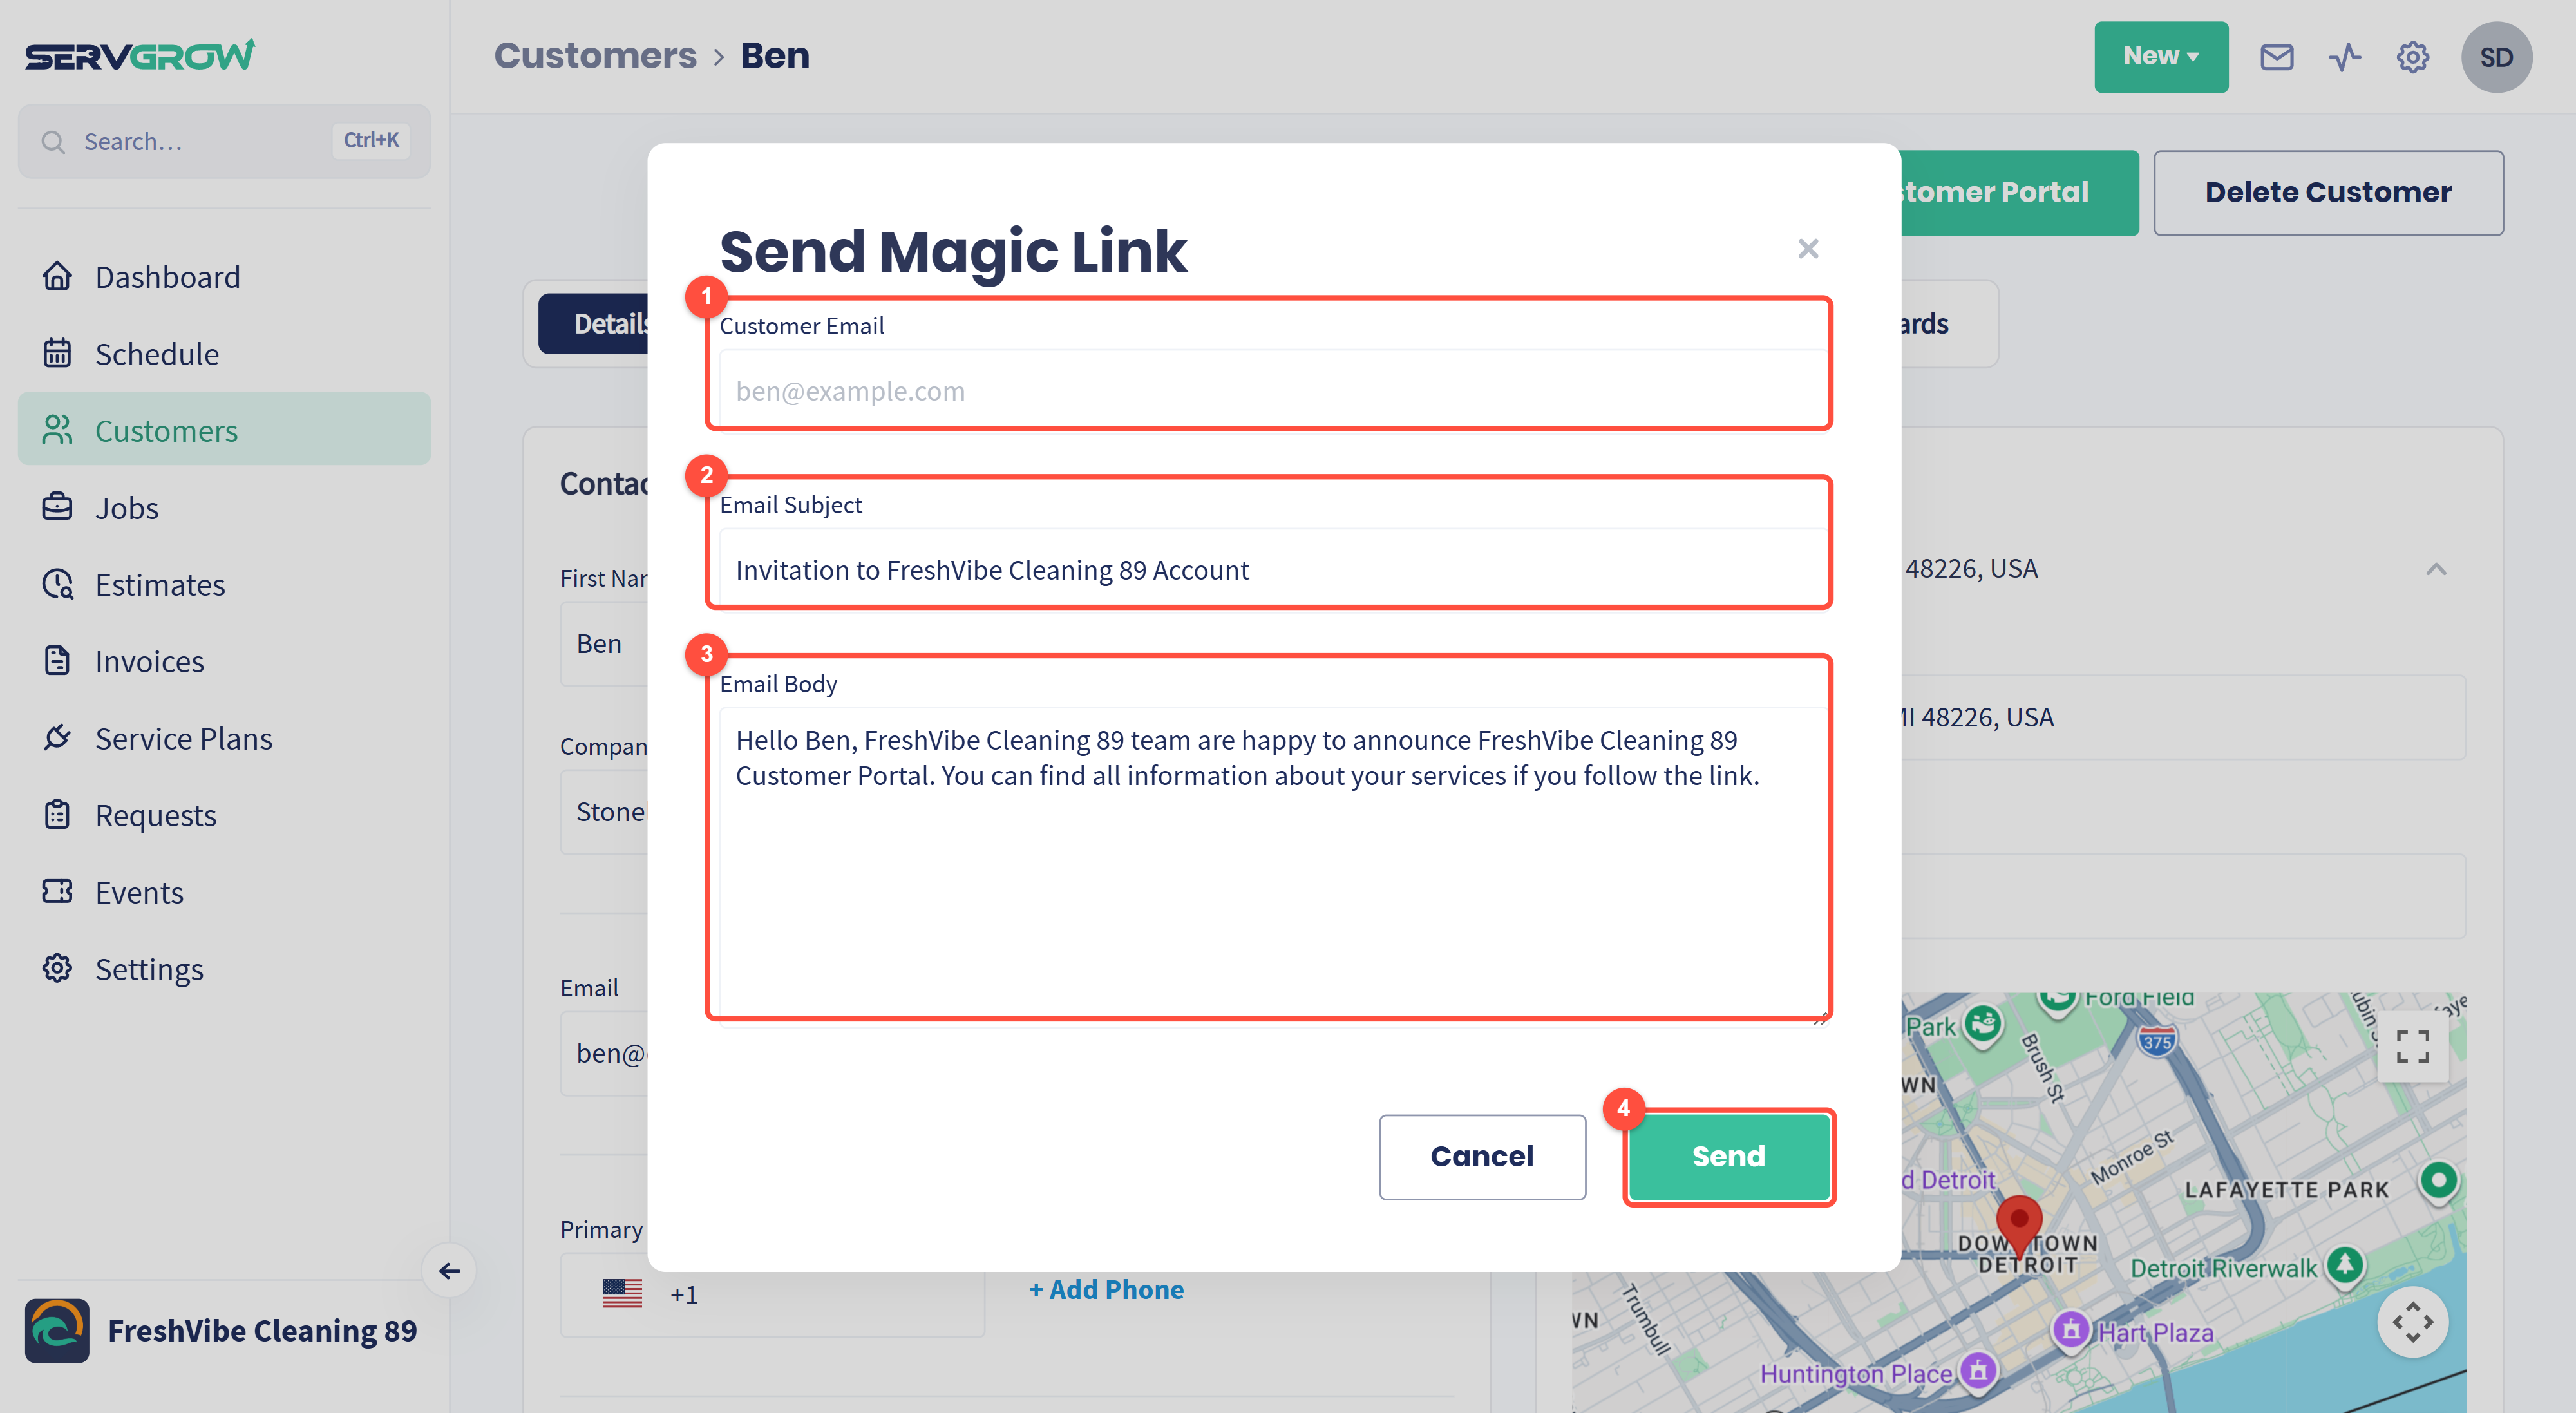
The invite goes to the email on the customer's record.
Change the Email Subject if you like.
Edit the Email Body so it sounds like you.
Click Send. The customer clicks the link in the email and is signed straight in.
Share your portal link
Copy your Customer Portal URL from the General tab and put it on your website, in your email signature or in a text. Customers who open it see this page:
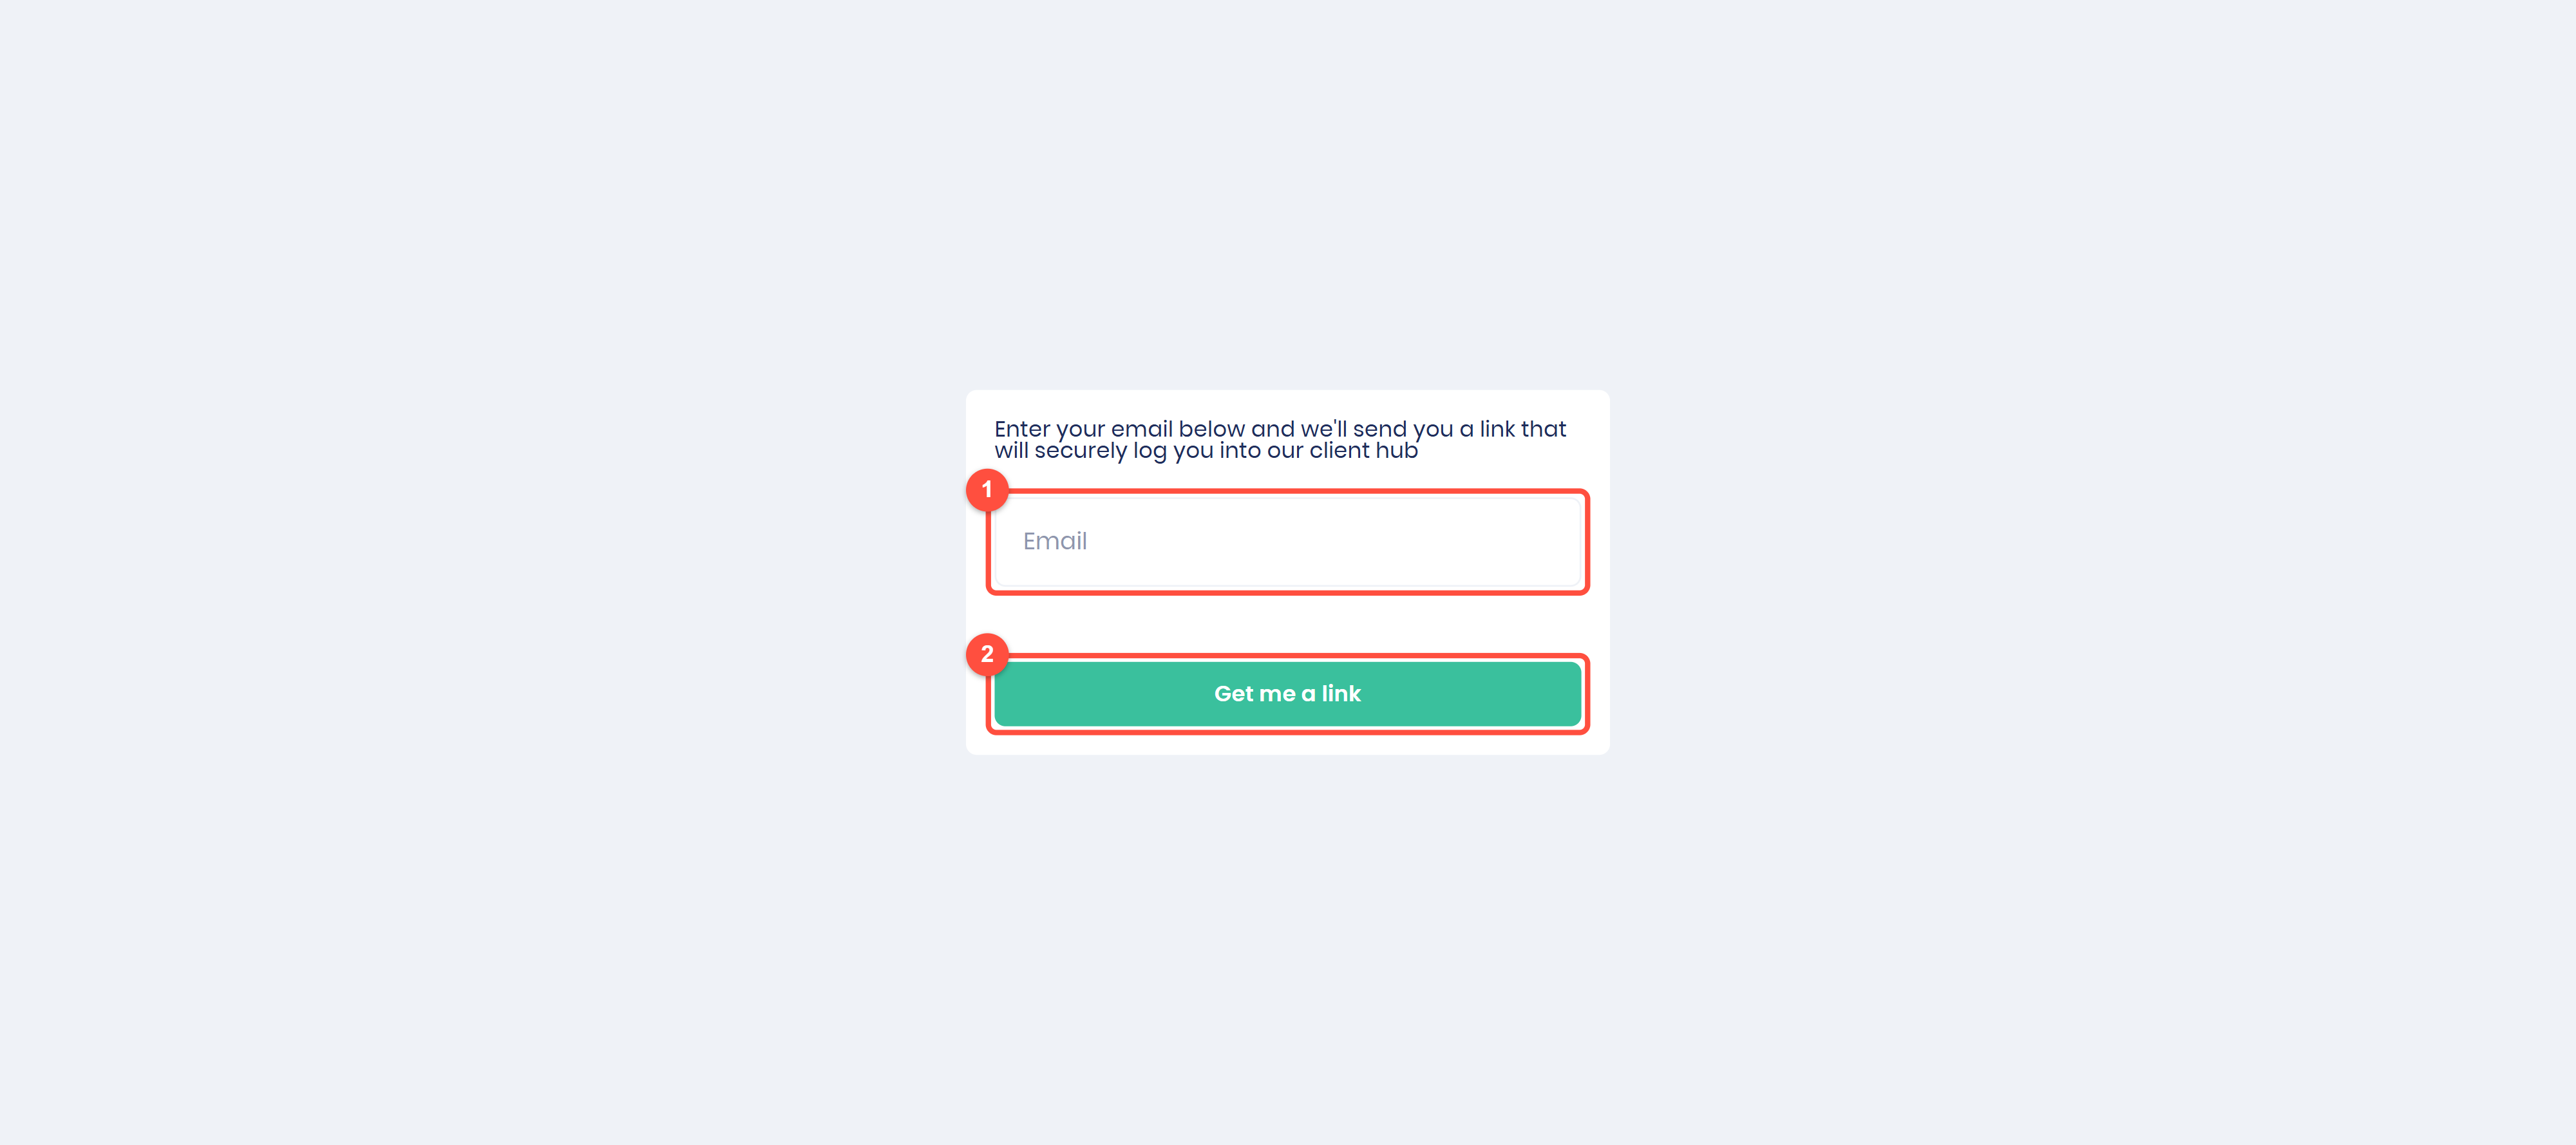
They type the email address you have for them.
They click Get me a link, then open the link in their email to sign in.
The email has to match the one on their customer record, so keep customer emails up to date.
Tips
Add a "Customer login" button to your website that links to your portal URL.
Invite customers when you send their first estimate, so they can approve it and pay any deposit in the portal.
Use your brand colors and logo. A portal that looks like your business builds trust, and the background color carries into the portal emails too.
Related articles