
Traffic, a job that runs long, a customer who wants to chat: in the field, exact times slip. An arrival window gives your team breathing room and sets honest expectations, so customers are waiting for "between 10 and 11" rather than watching the clock at 10:01. Fewer "where are you?" calls, fewer frustrated customers, and techs who are not rushing between jobs.
How the window works
The window starts at the job's start time and runs for the length you choose. A job starting at 10:00 AM with a +1 hr window is a 10:00 to 11:00 arrival. The job itself still starts at 10:00 on your schedule.
Set the window on a job
You can set it while creating a job or estimate (in the scheduling step, under Arrival time window), in the details of Quick Schedule, or later on an existing job: open the job and click the pencil next to its title to open Update Details.
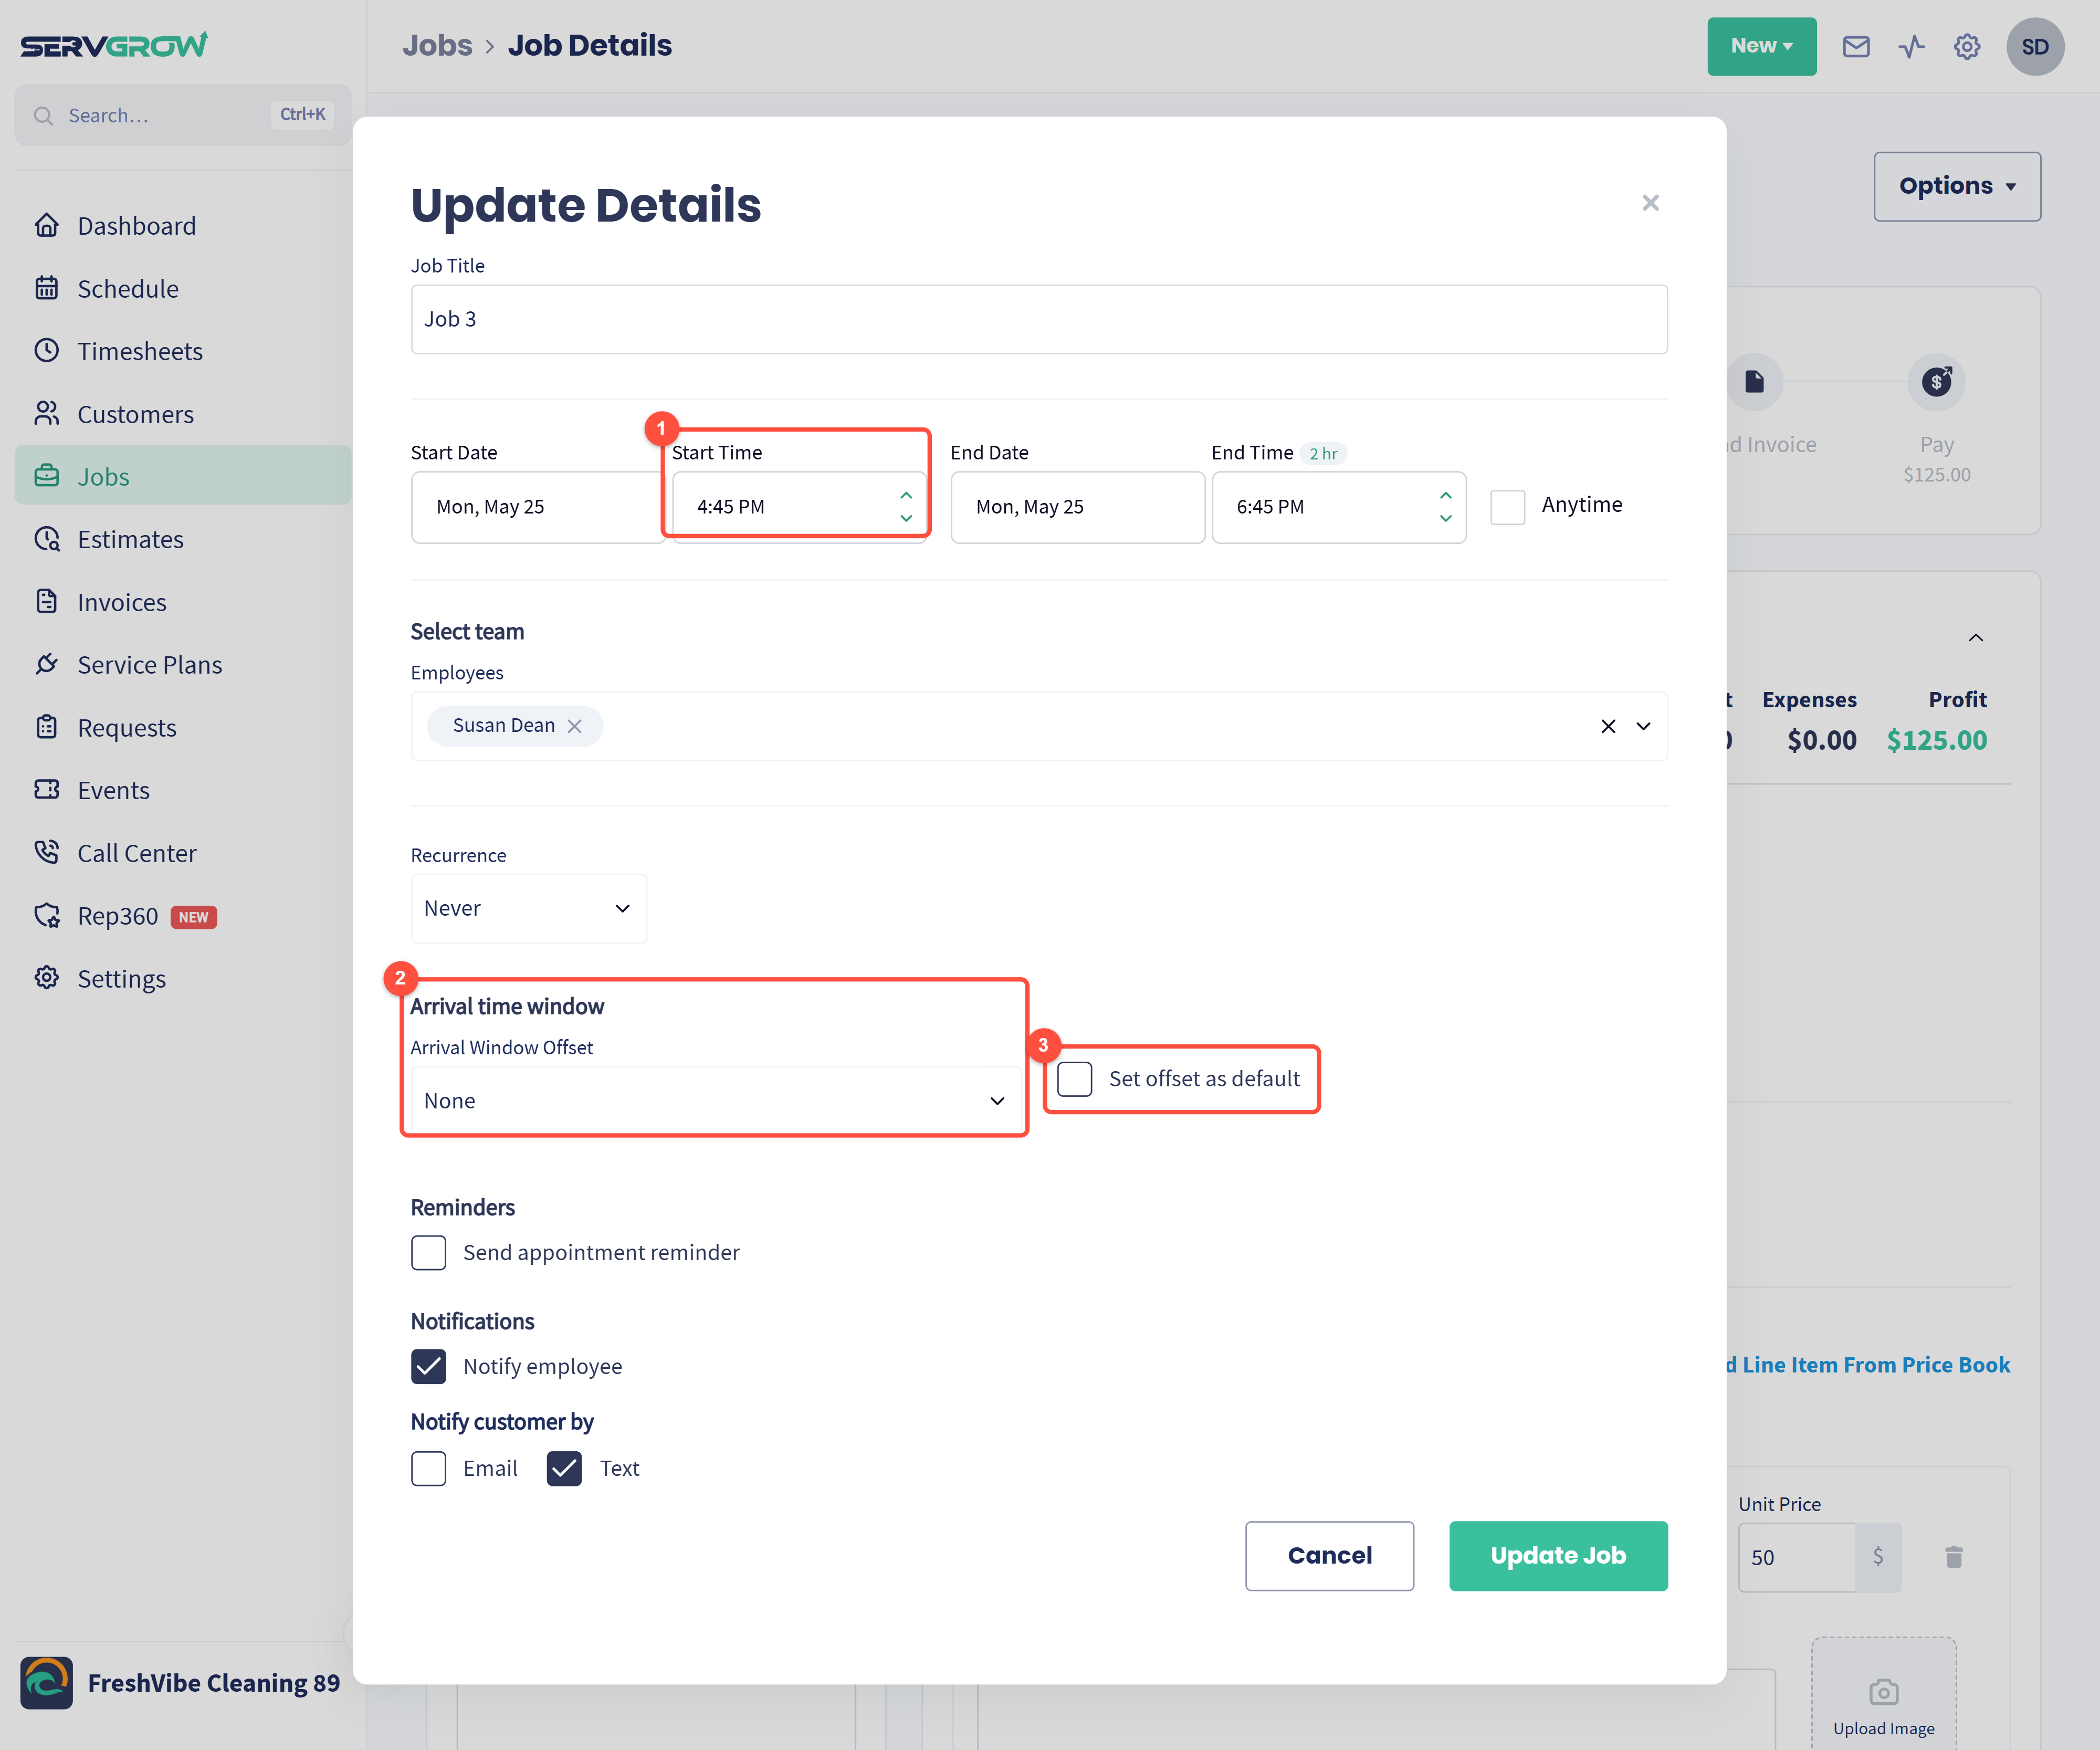
Start Time: the beginning of the window.
Arrival time window: choose how long the window is in Arrival Window Offset.
Set offset as default: tick it to use the same window on future jobs, so you set it once instead of on every booking.
Click Update Job (or carry on creating the job) to save.
Choose the length
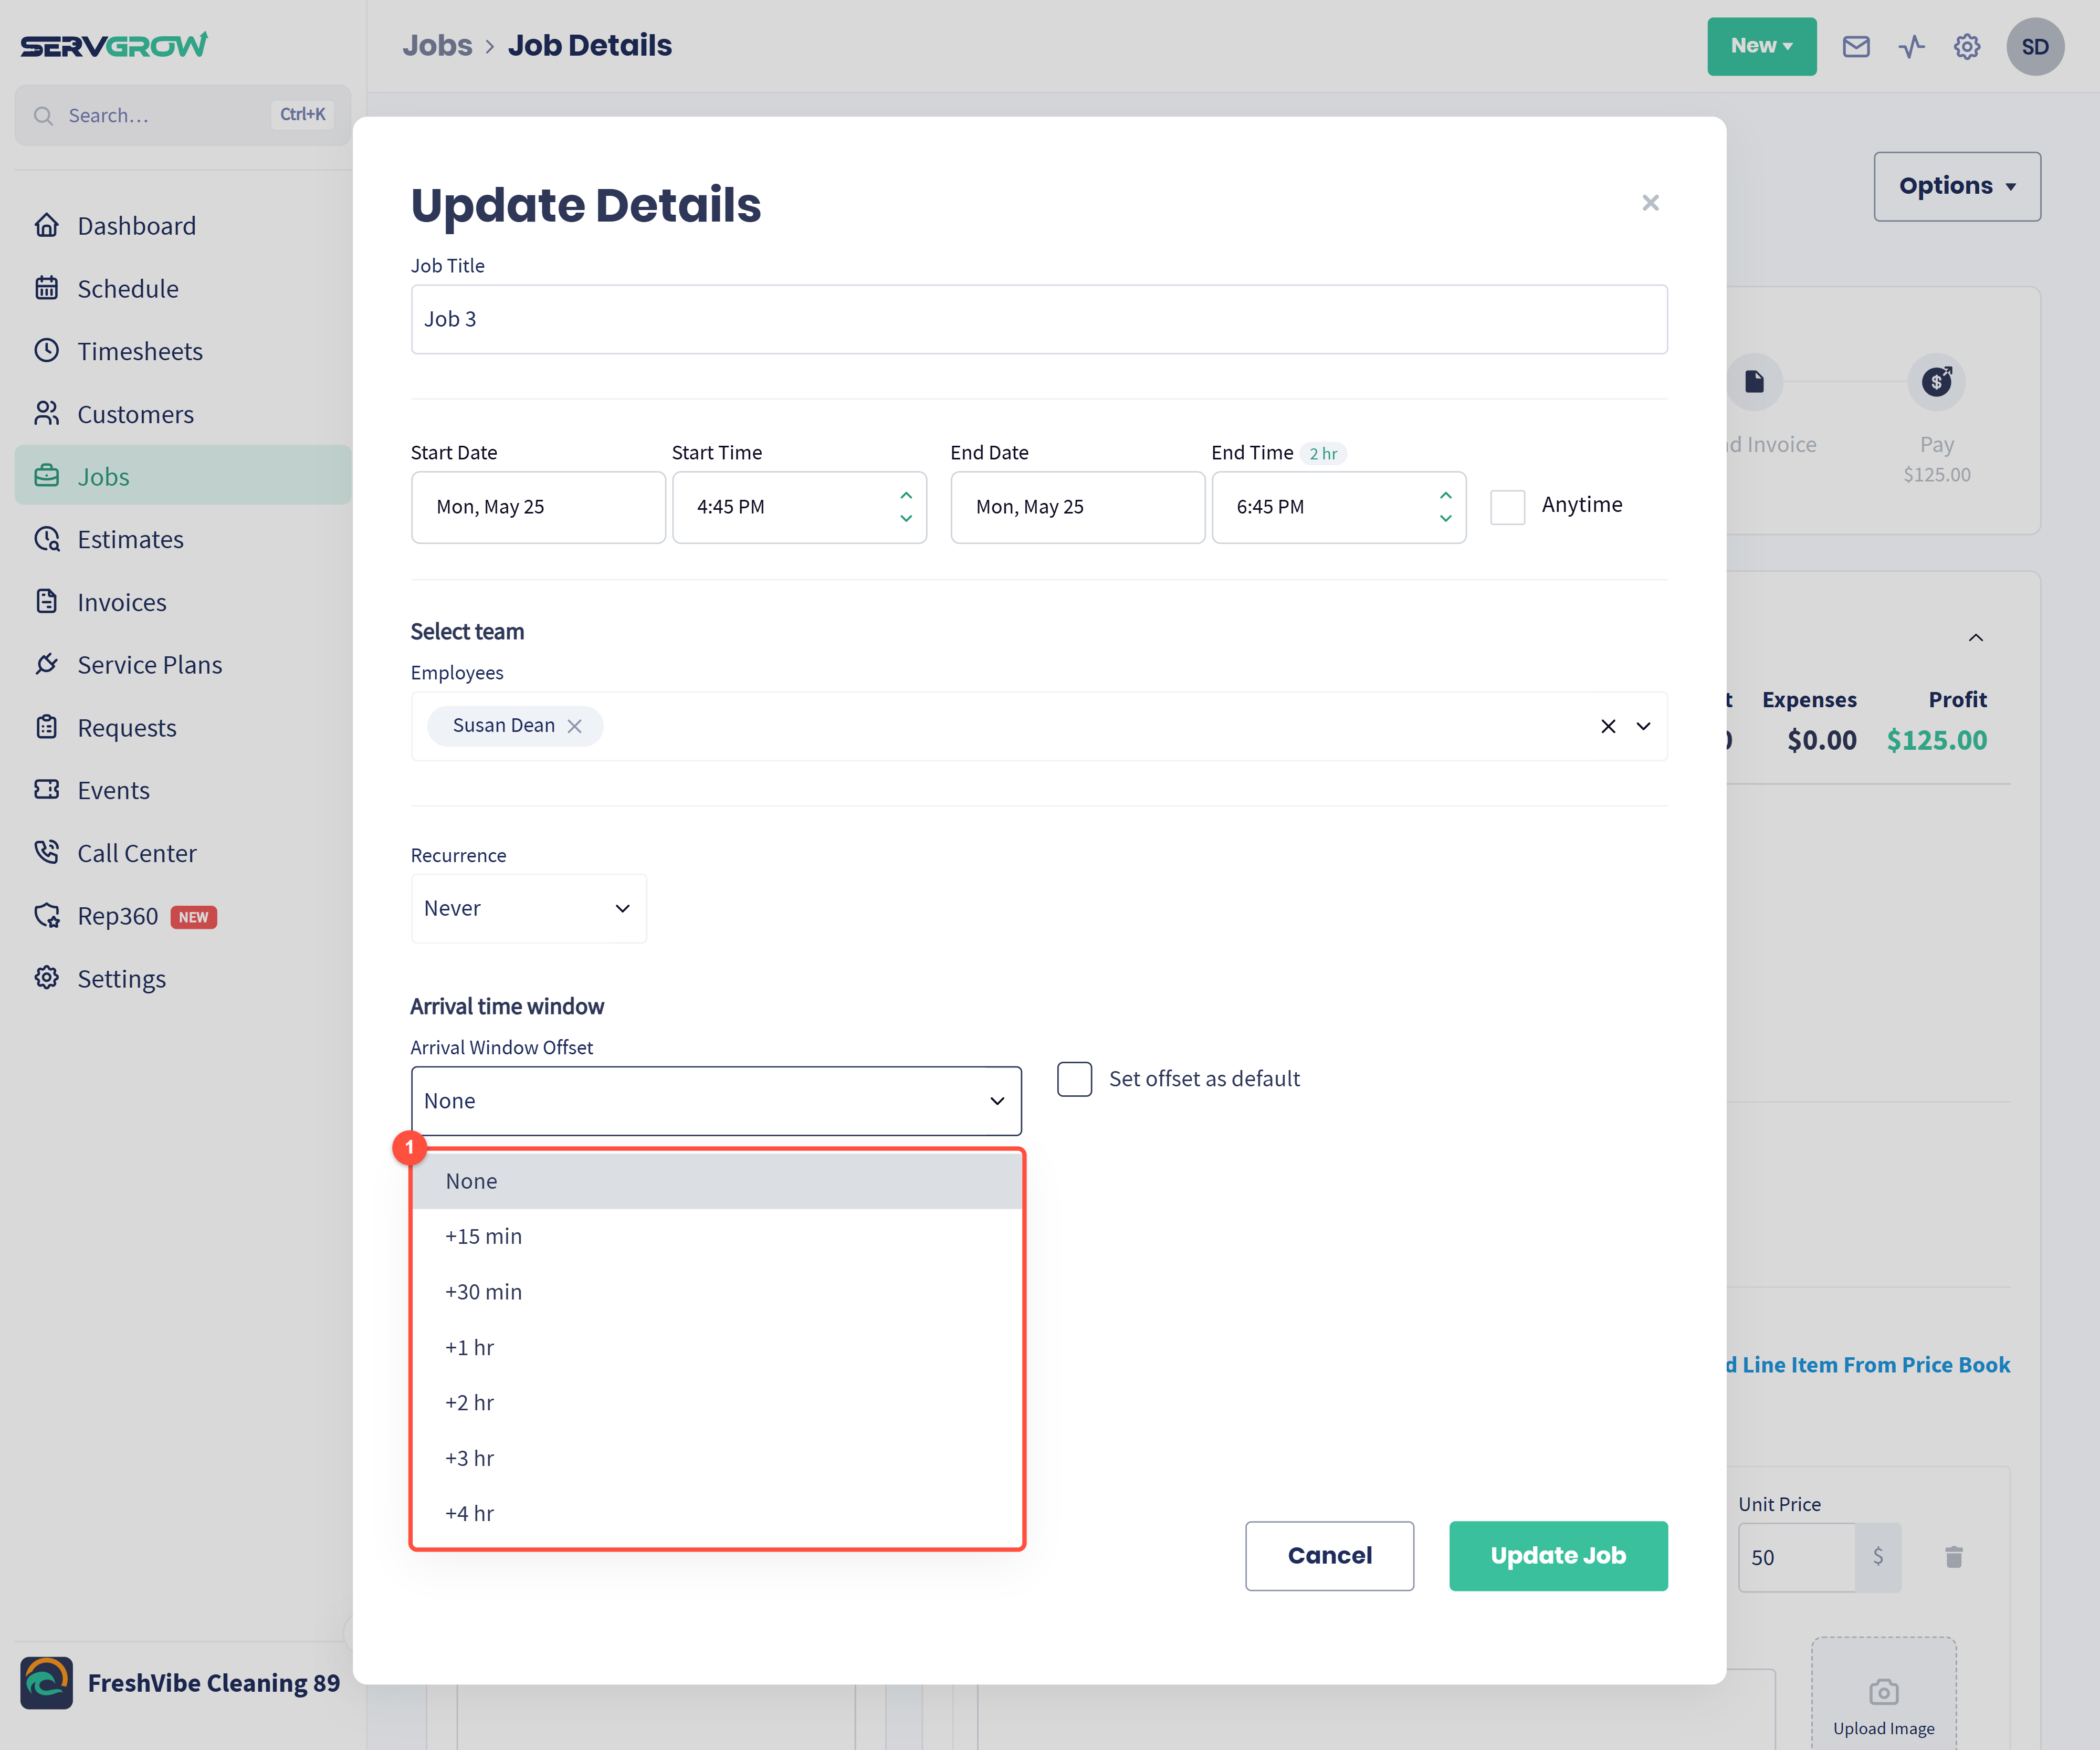
Pick None for an exact time, or a window of +15 min, +30 min, +1 hr, +2 hr, +3 hr or +4 hr.
Which window to use
+30 min to +1 hr suits most routes: enough slack for traffic without leaving the customer waiting all morning.
+2 hr to +4 hr works for long or unpredictable days, such as the second or third stop after a big job.
None is right for the first job of the day, or for appointments that really are at a fixed time, such as a meeting with a property manager.
Tips
Pair it with On My Way texts. The window sets the expectation; the On My Way text tells the customer you are actually on the road.
Set a default that matches how your team really runs, then change it only for exceptions.
Online booking uses its own windows. Customers who book online choose a part of the day (such as Morning or Afternoon), set up in Online Booking.
Related articles