
The work is done, but you are not paid yet. Every day an invoice sits unsent is another day the customer forgets how happy they were with the job, and another day your cash is tied up. Invoices written up at the end of the week from memory also miss things, and those missed items come straight out of your profit.
In Servgrow, the invoice is already built by the time the work is finished. The job holds the services, prices and customer details, so finishing the job, sending the invoice and recording the payment take a few clicks, often before your crew has left the driveway. Customers get the invoice by text or email while the job is still fresh, and your Invoices page shows at a glance who has paid and who still owes you.
Where to find it
Go to Jobs in the left menu and click the job you finished. You can also click the job on your Schedule.
The job progress bar
Across the top of every job is a progress bar: Schedule, OMW, Start, Finish, Send Invoice and Pay. Each step fills in as it is done, so anyone on your team can see exactly where the job stands. Clicked a step by mistake? Click UNDO above it.
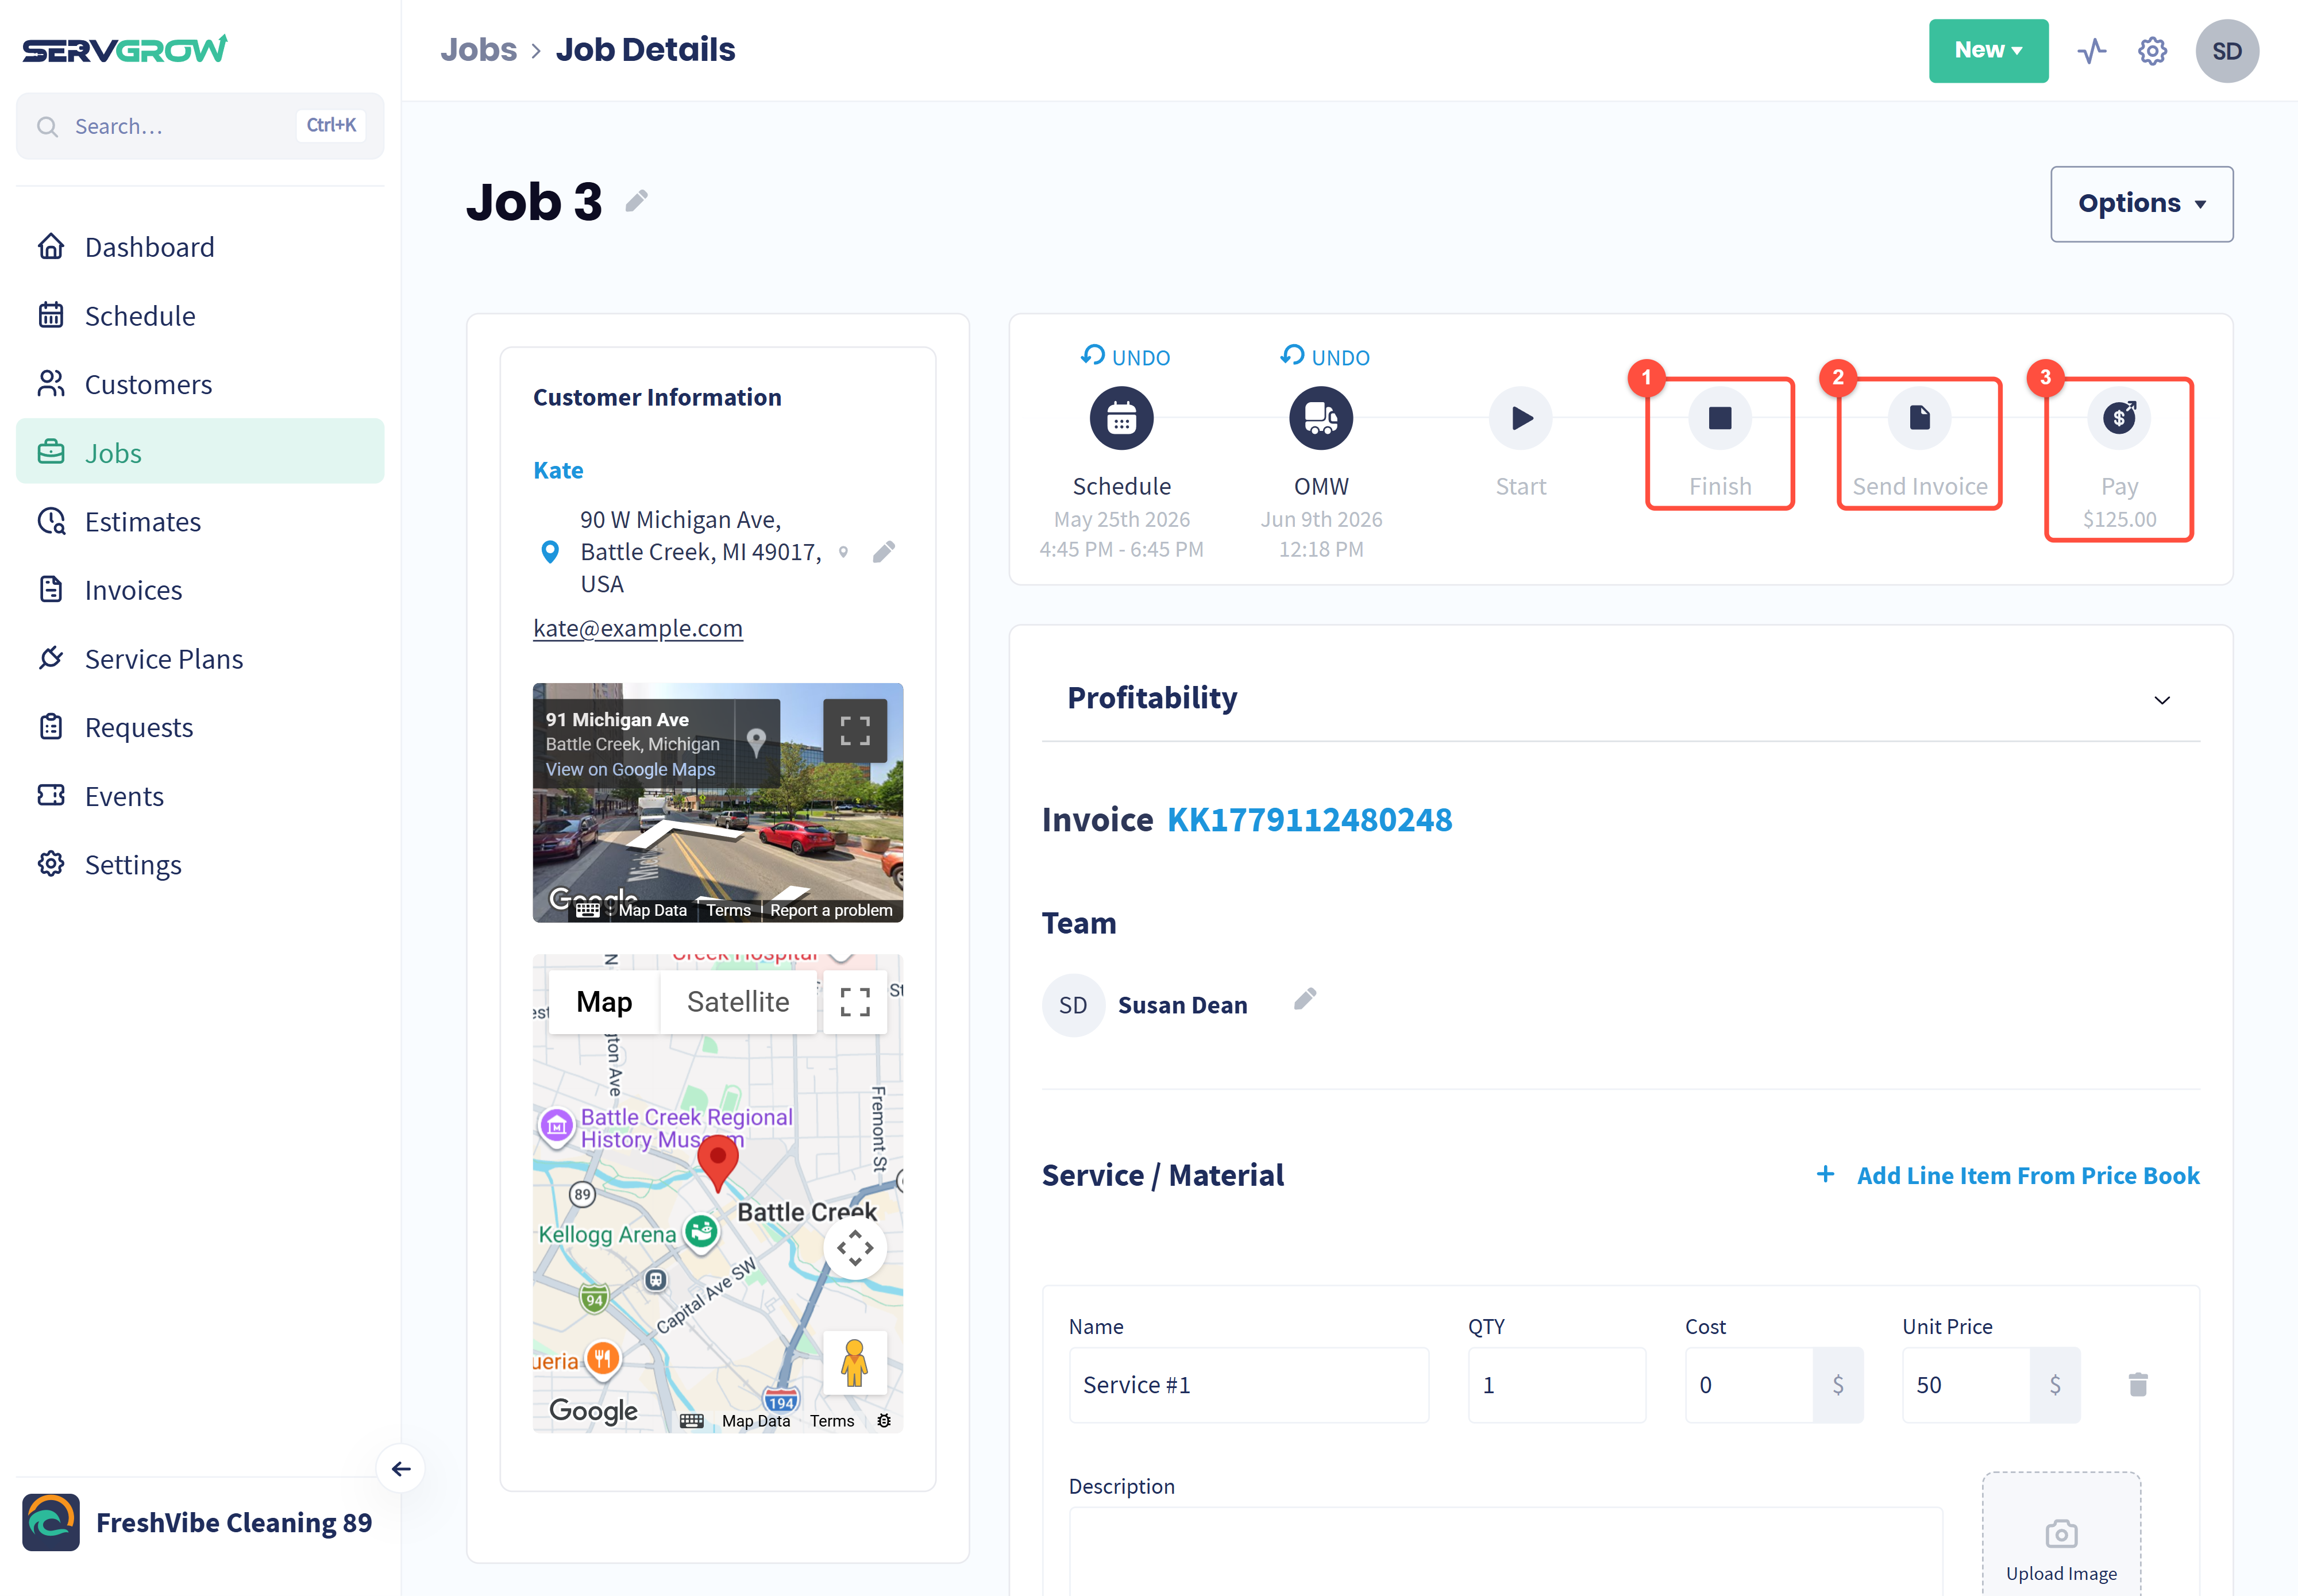
Finish: mark the work as done.
Send Invoice: send the invoice to the customer.
Pay: record the payment. The amount due shows underneath.
Every job already has its own invoice number, shown under Profitability on the job page.
Step 1: Finish the job
Click Finish.
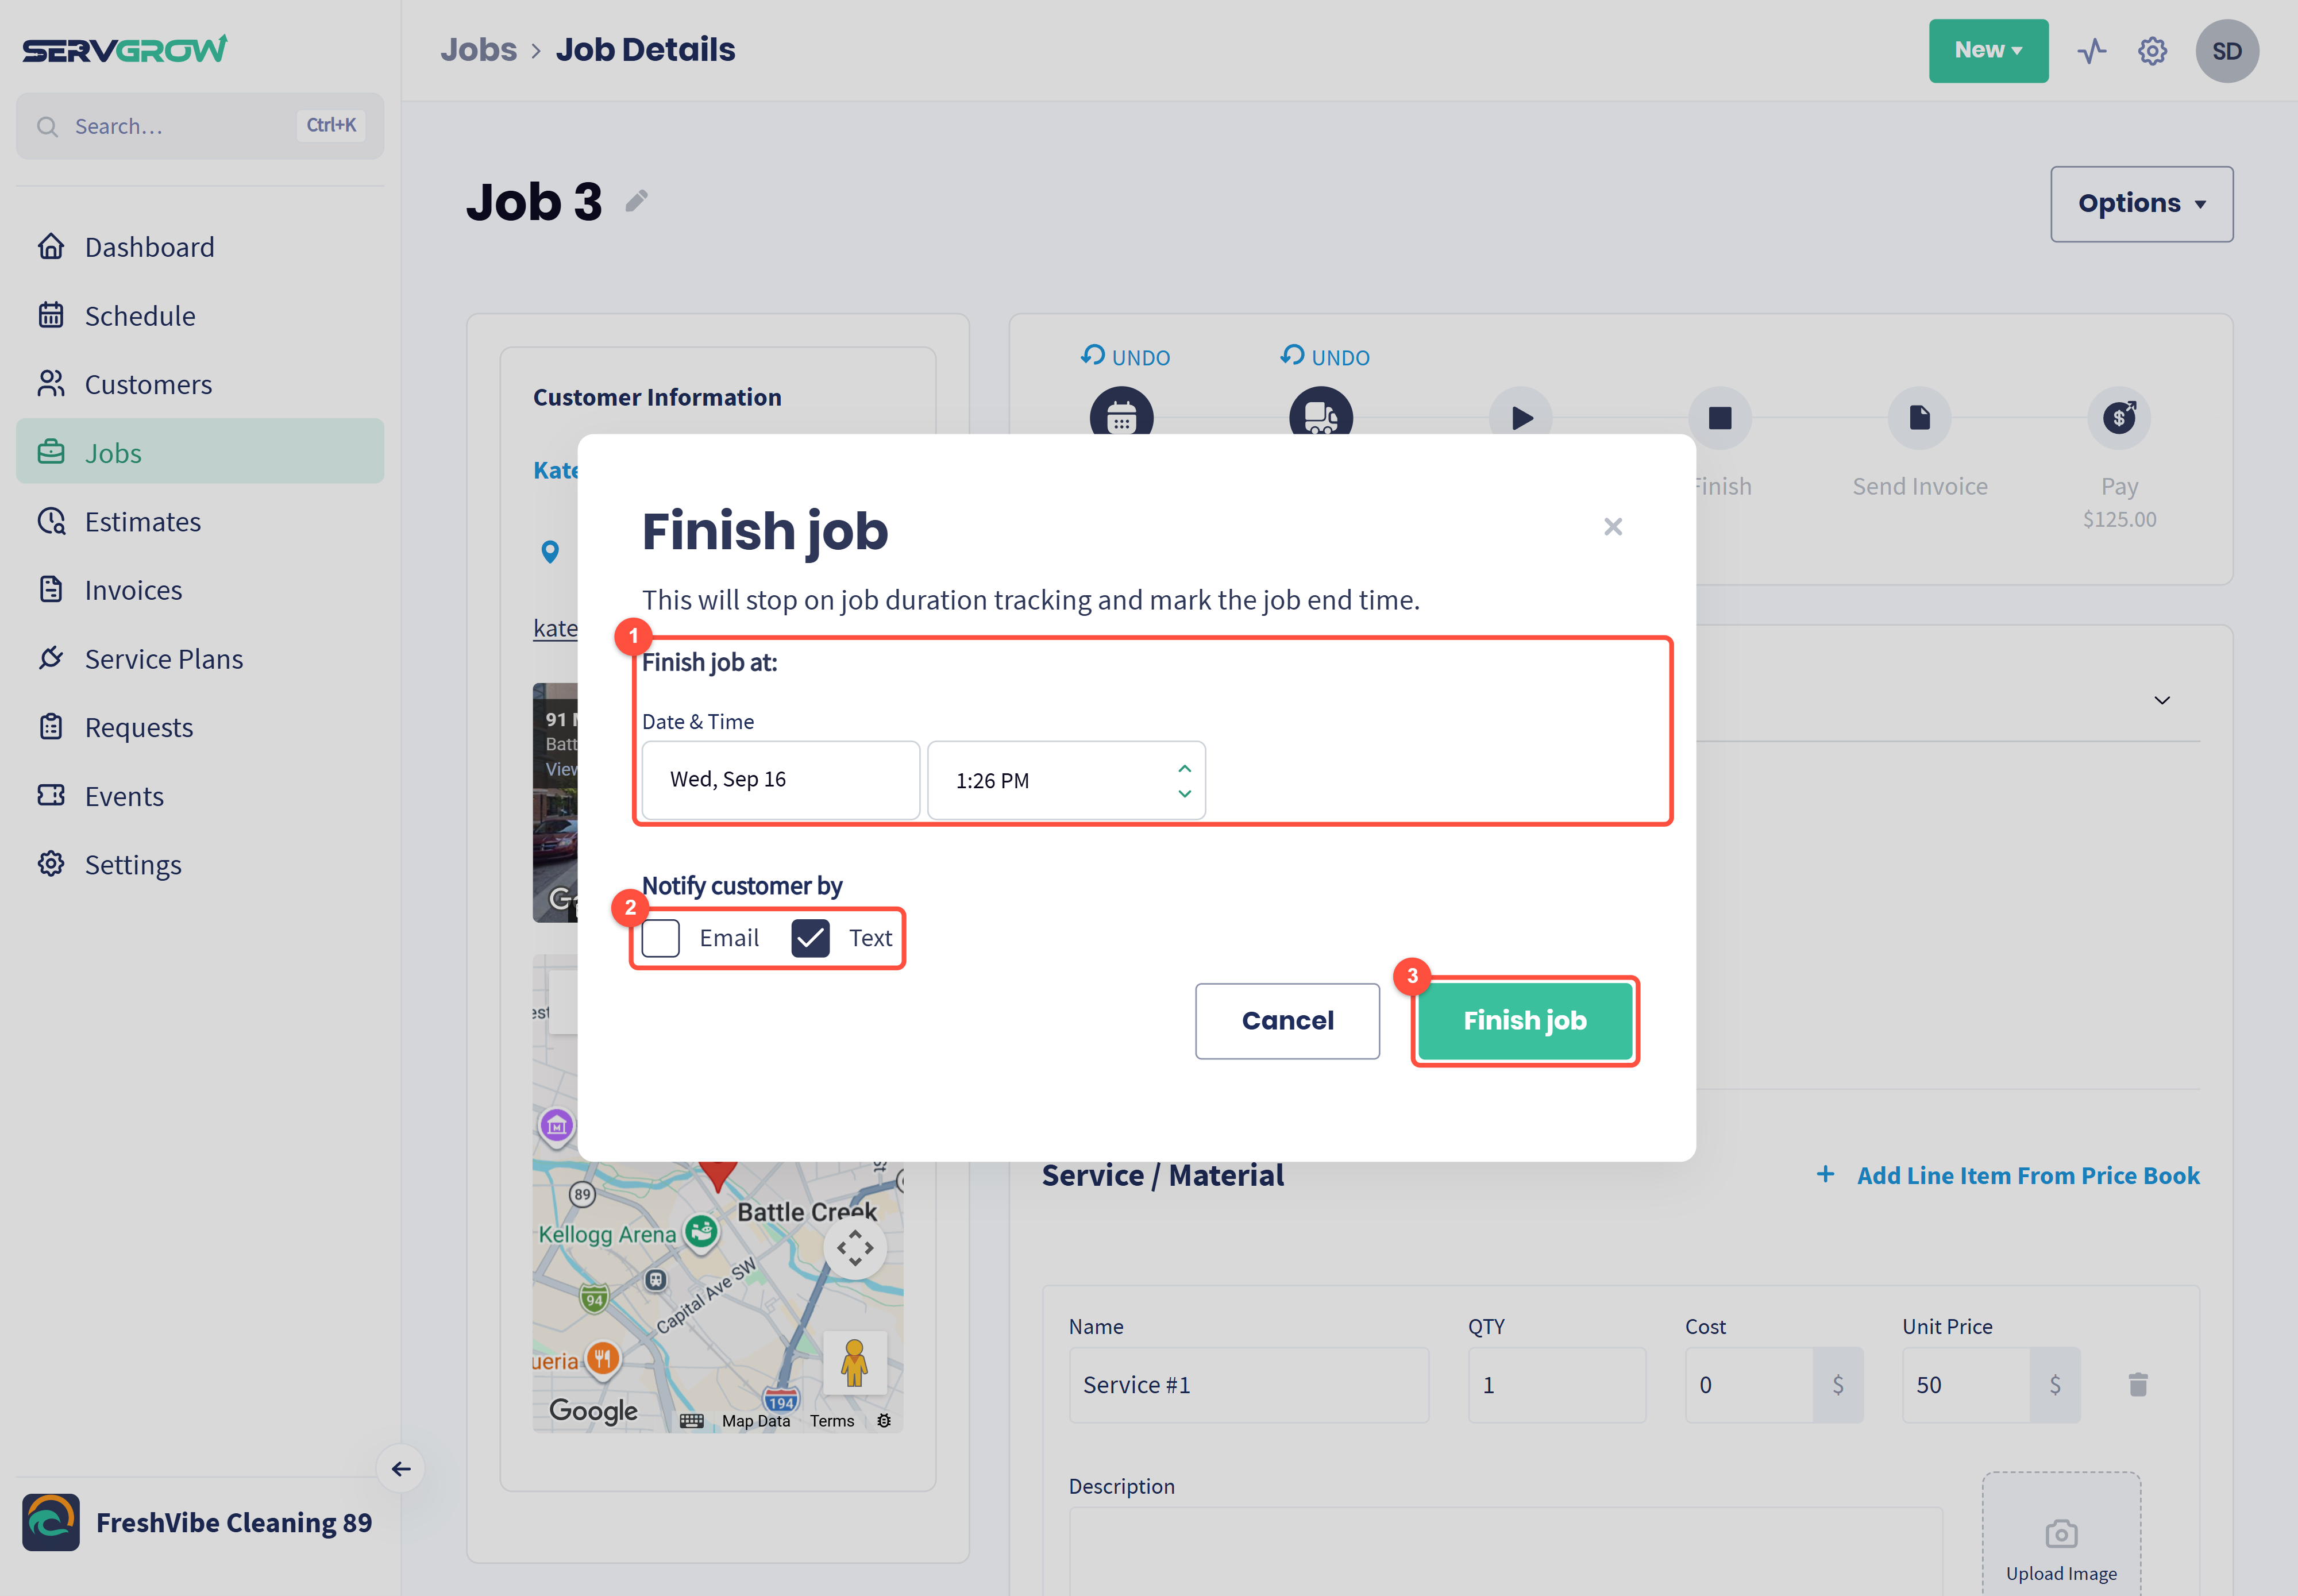
Finish job at: the date and time the work ended. It starts at the current time, and finishing stops the job's time tracking.
Notify customer by: tick Email, Text or both to let the customer know the work is complete.
Click Finish job.
Step 2: Check the invoice before you send it
The invoice uses the line items on the job. Scroll down the job page to make sure everything you did is there.
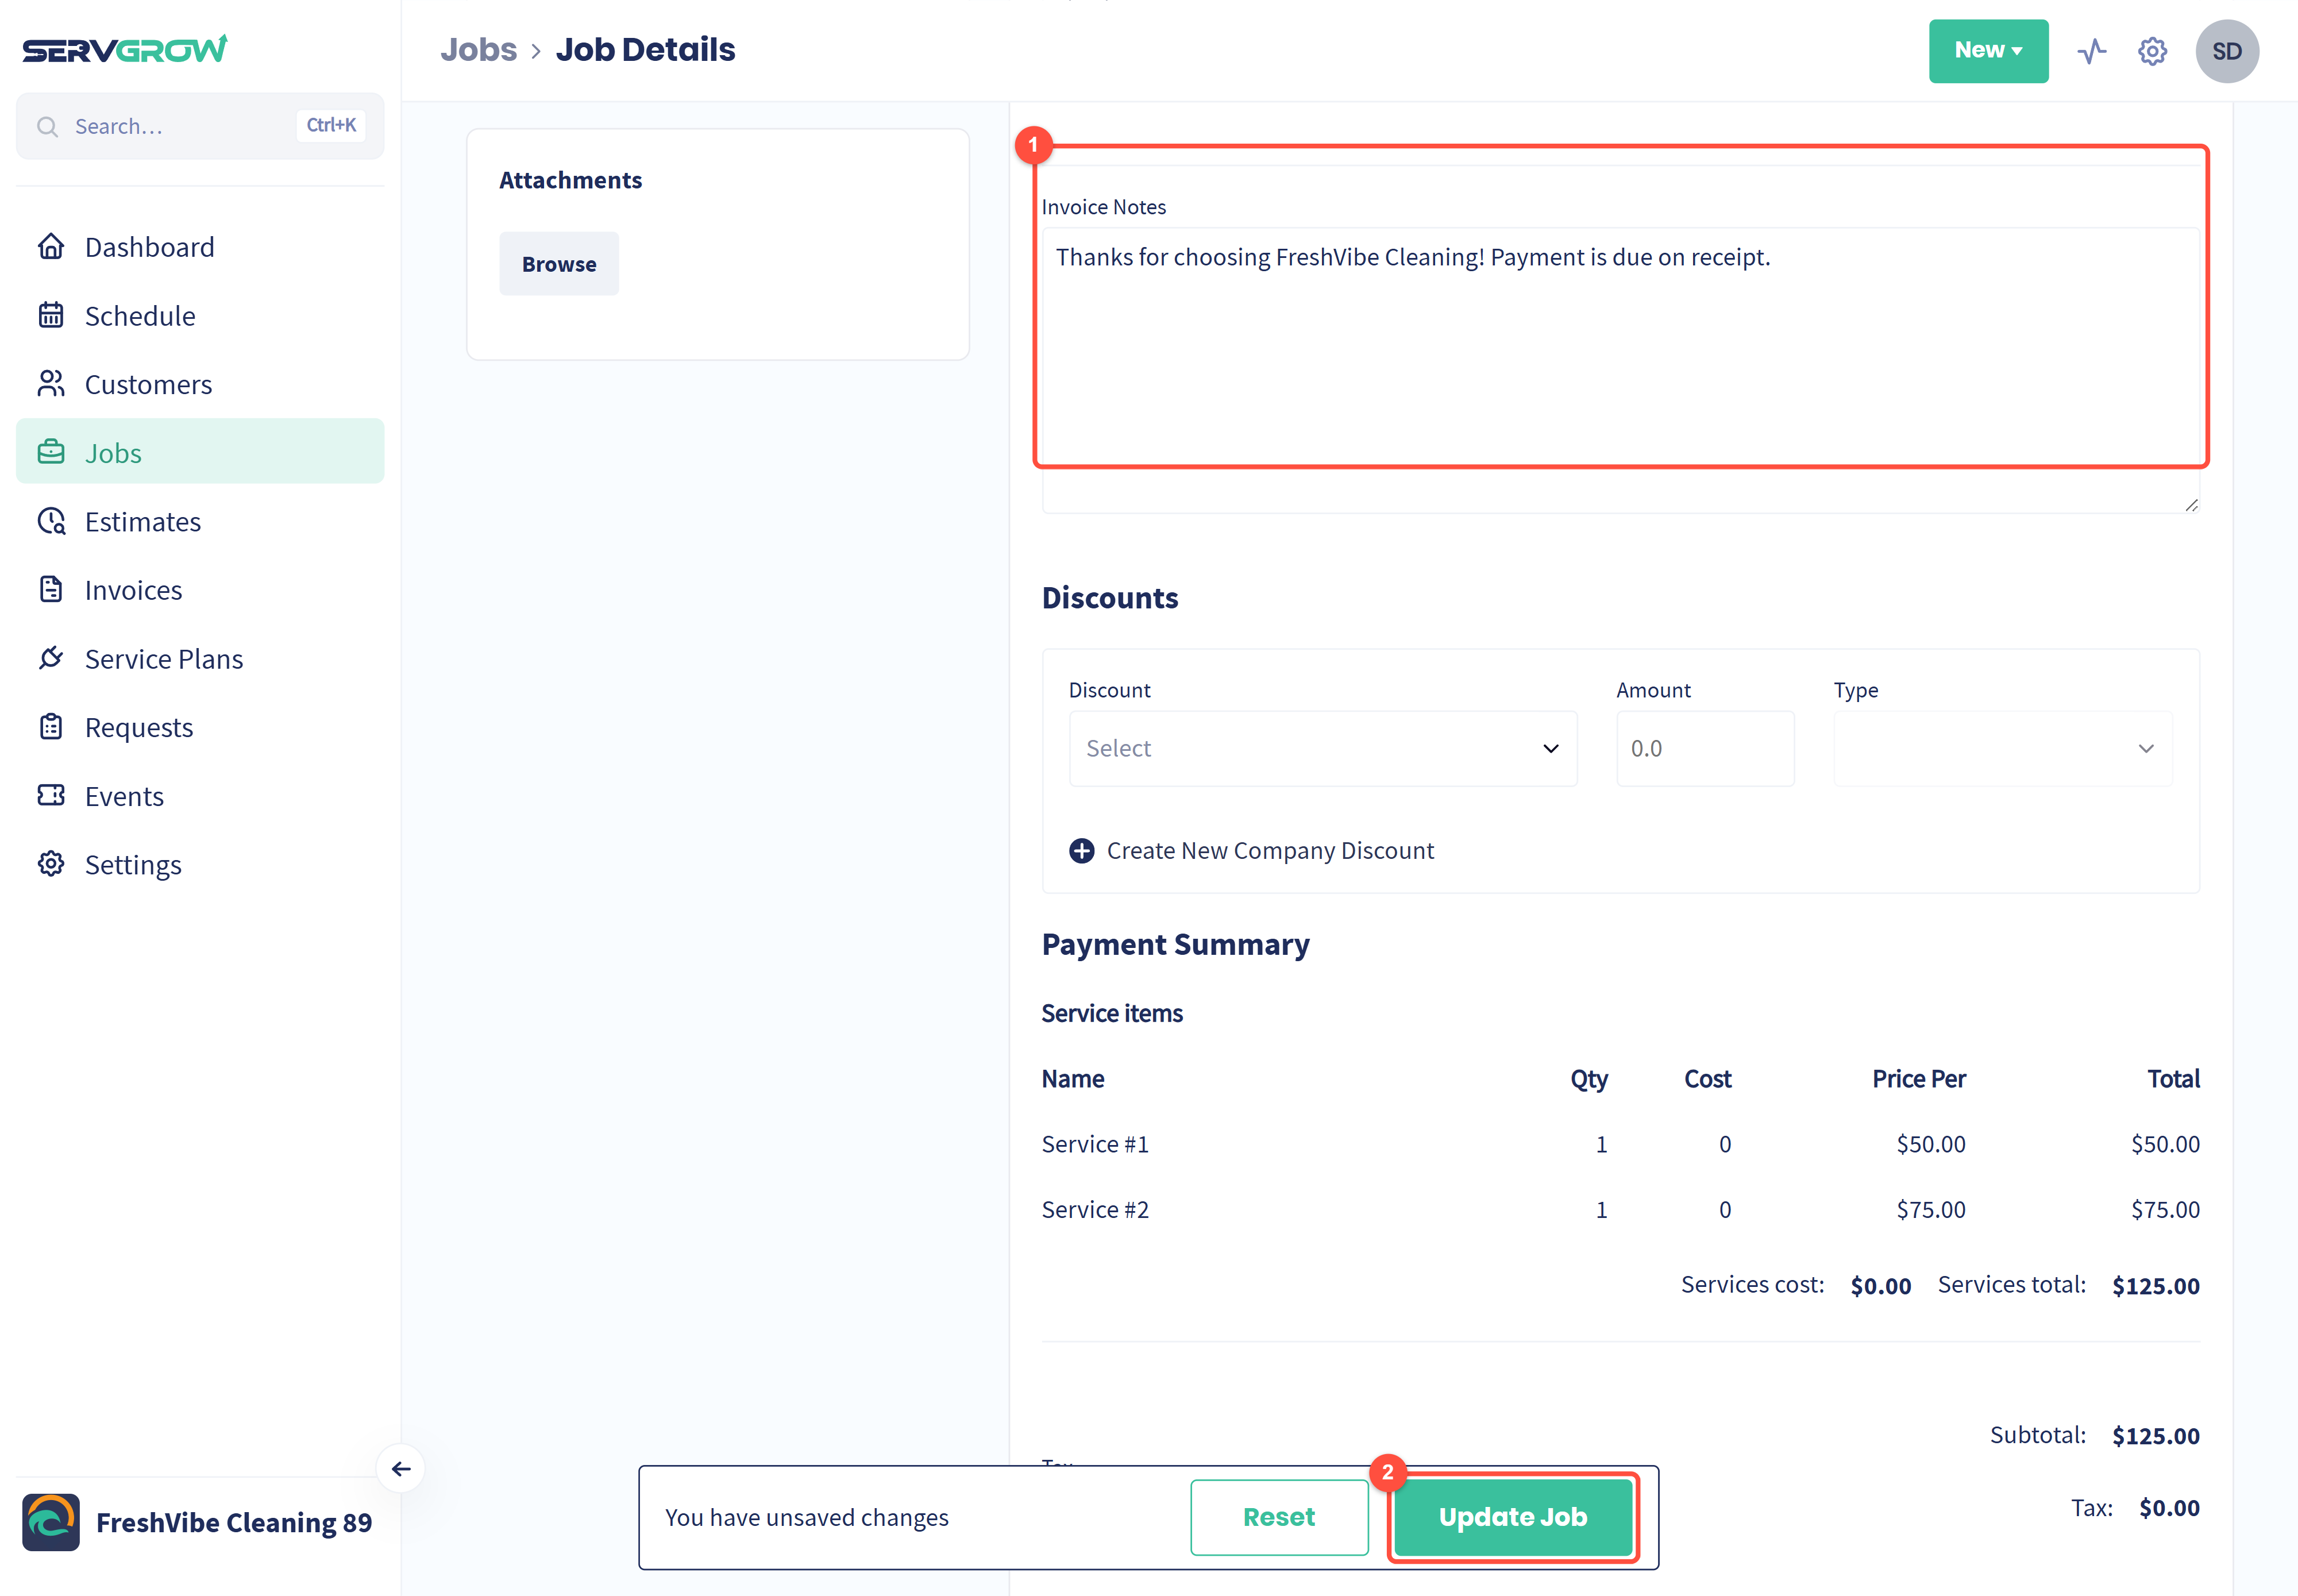
Add or change services and materials if the job grew, apply a discount, and check the tax. Use Invoice Notes for a message that appears on the invoice, such as a thank you or your payment terms.
Click Update Job to save your changes before you send.
Your invoice numbering, due terms and card surcharge are set under Settings, Invoice settings.
Step 3: Send the invoice
Click Send Invoice in the progress bar.
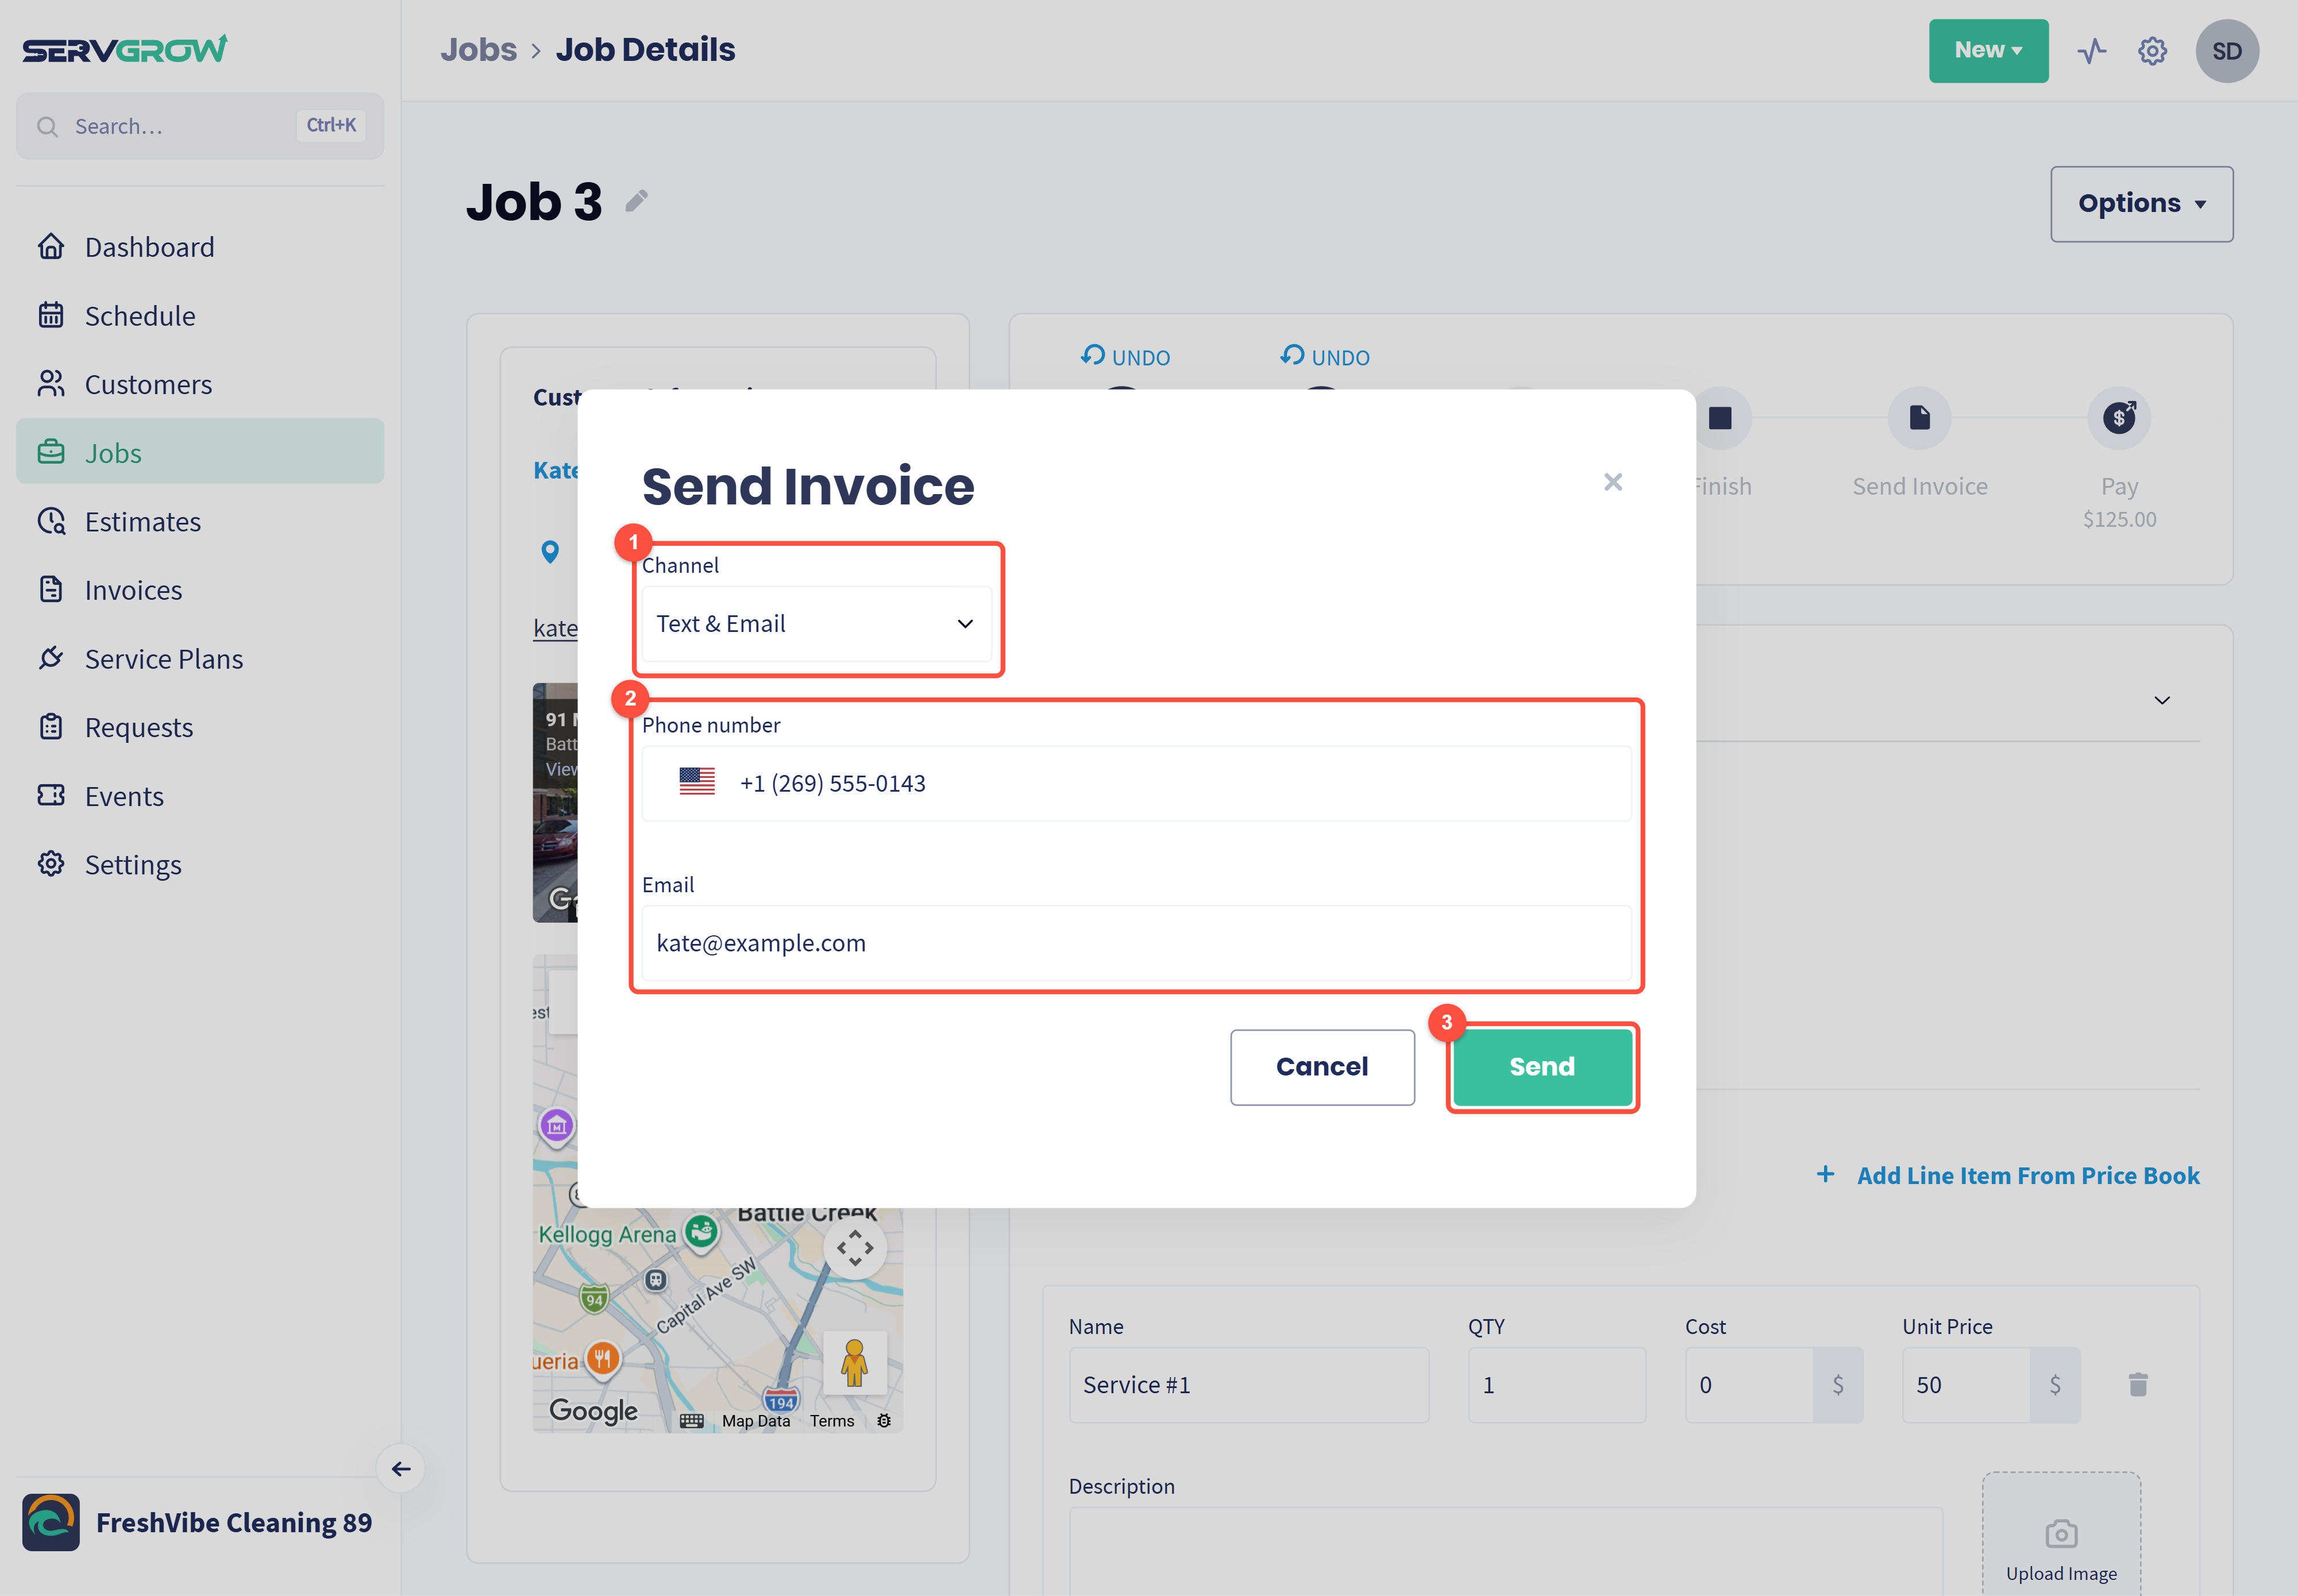
Channel: choose Text, Email or Text & Email. A text is read within minutes, so it usually gets you paid fastest.
Check the Phone number and Email. They come from the customer's record, and you can change them here.
Click Send.
Step 4: Record the payment
When the customer pays you in person, click Pay in the progress bar.
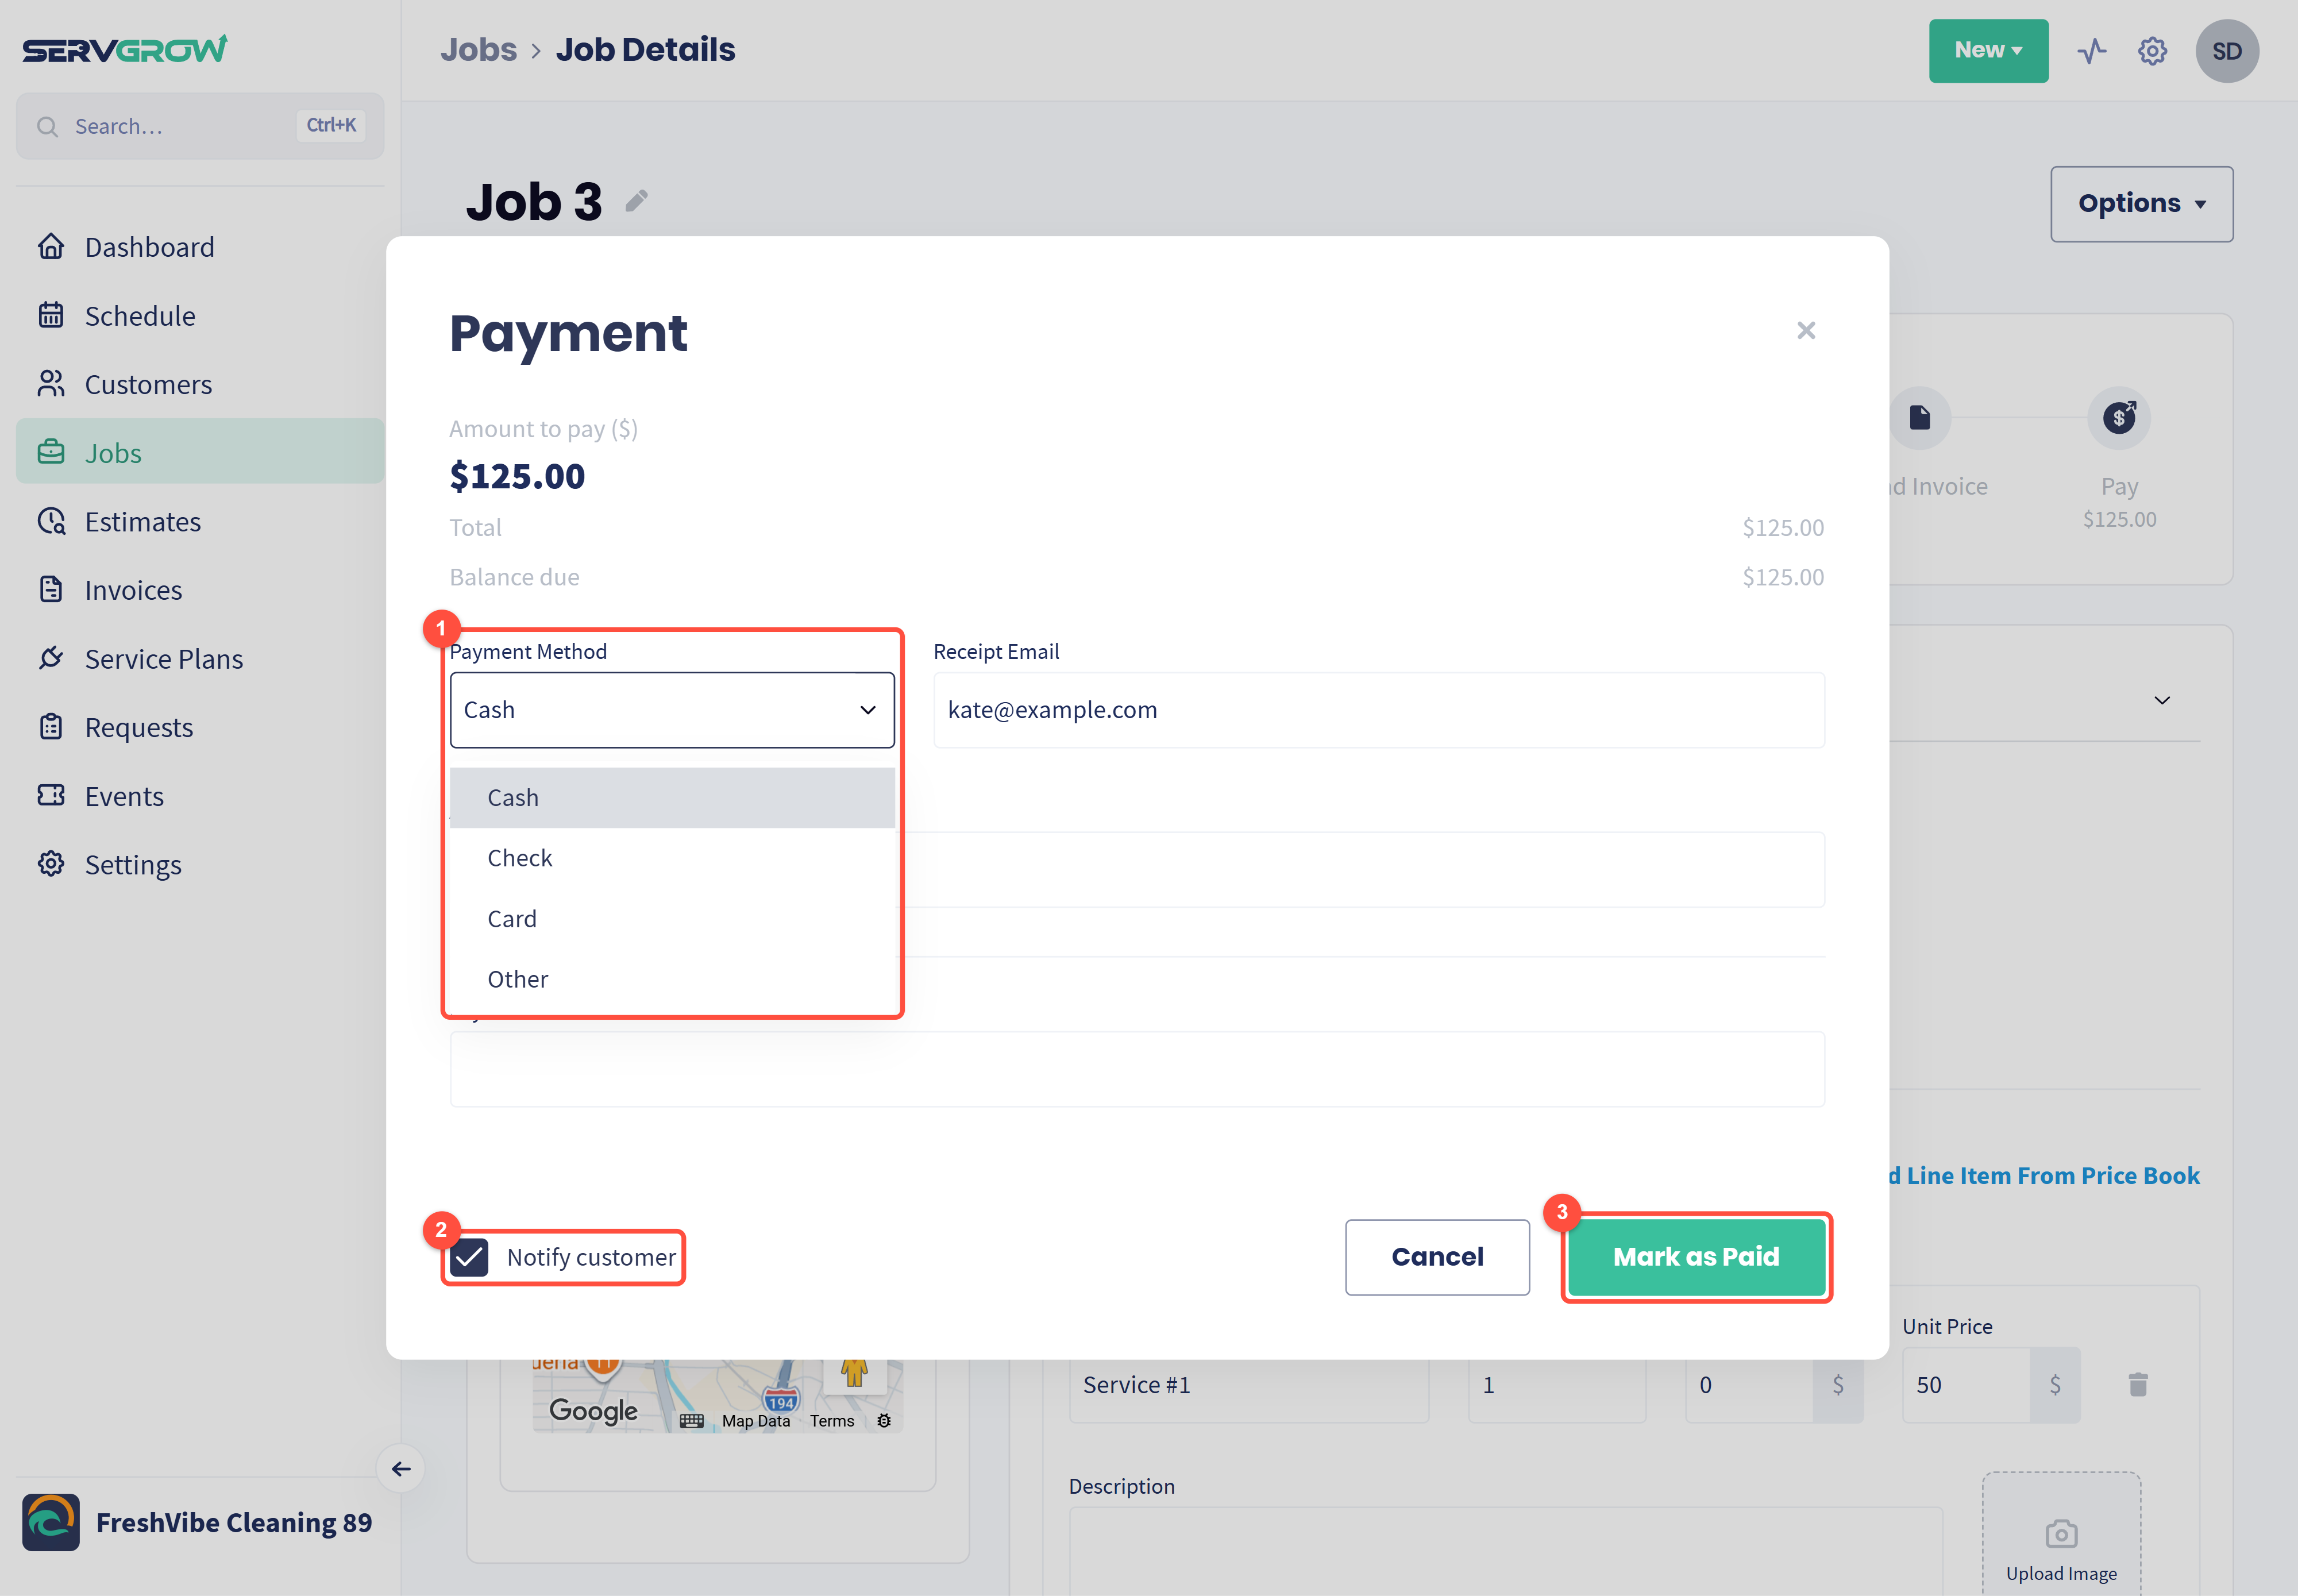
Payment Method: choose Cash, Check, Card or Other. The window also shows the total, the balance due, the Receipt Email and the Amount to pay, which you can lower for a partial payment. Add a Payment Note such as a check number.
Notify customer: leave it ticked to email the customer a receipt.
Click Mark as Paid. If you chose Card, you can charge the customer's saved card instead, and the button changes to Proceed with payment.
If you accept online payments, customers can also pay straight from the invoice you sent them, and the payment is recorded for you.
Keep track of every invoice
Go to Invoices in the left menu to see all of them in one place.
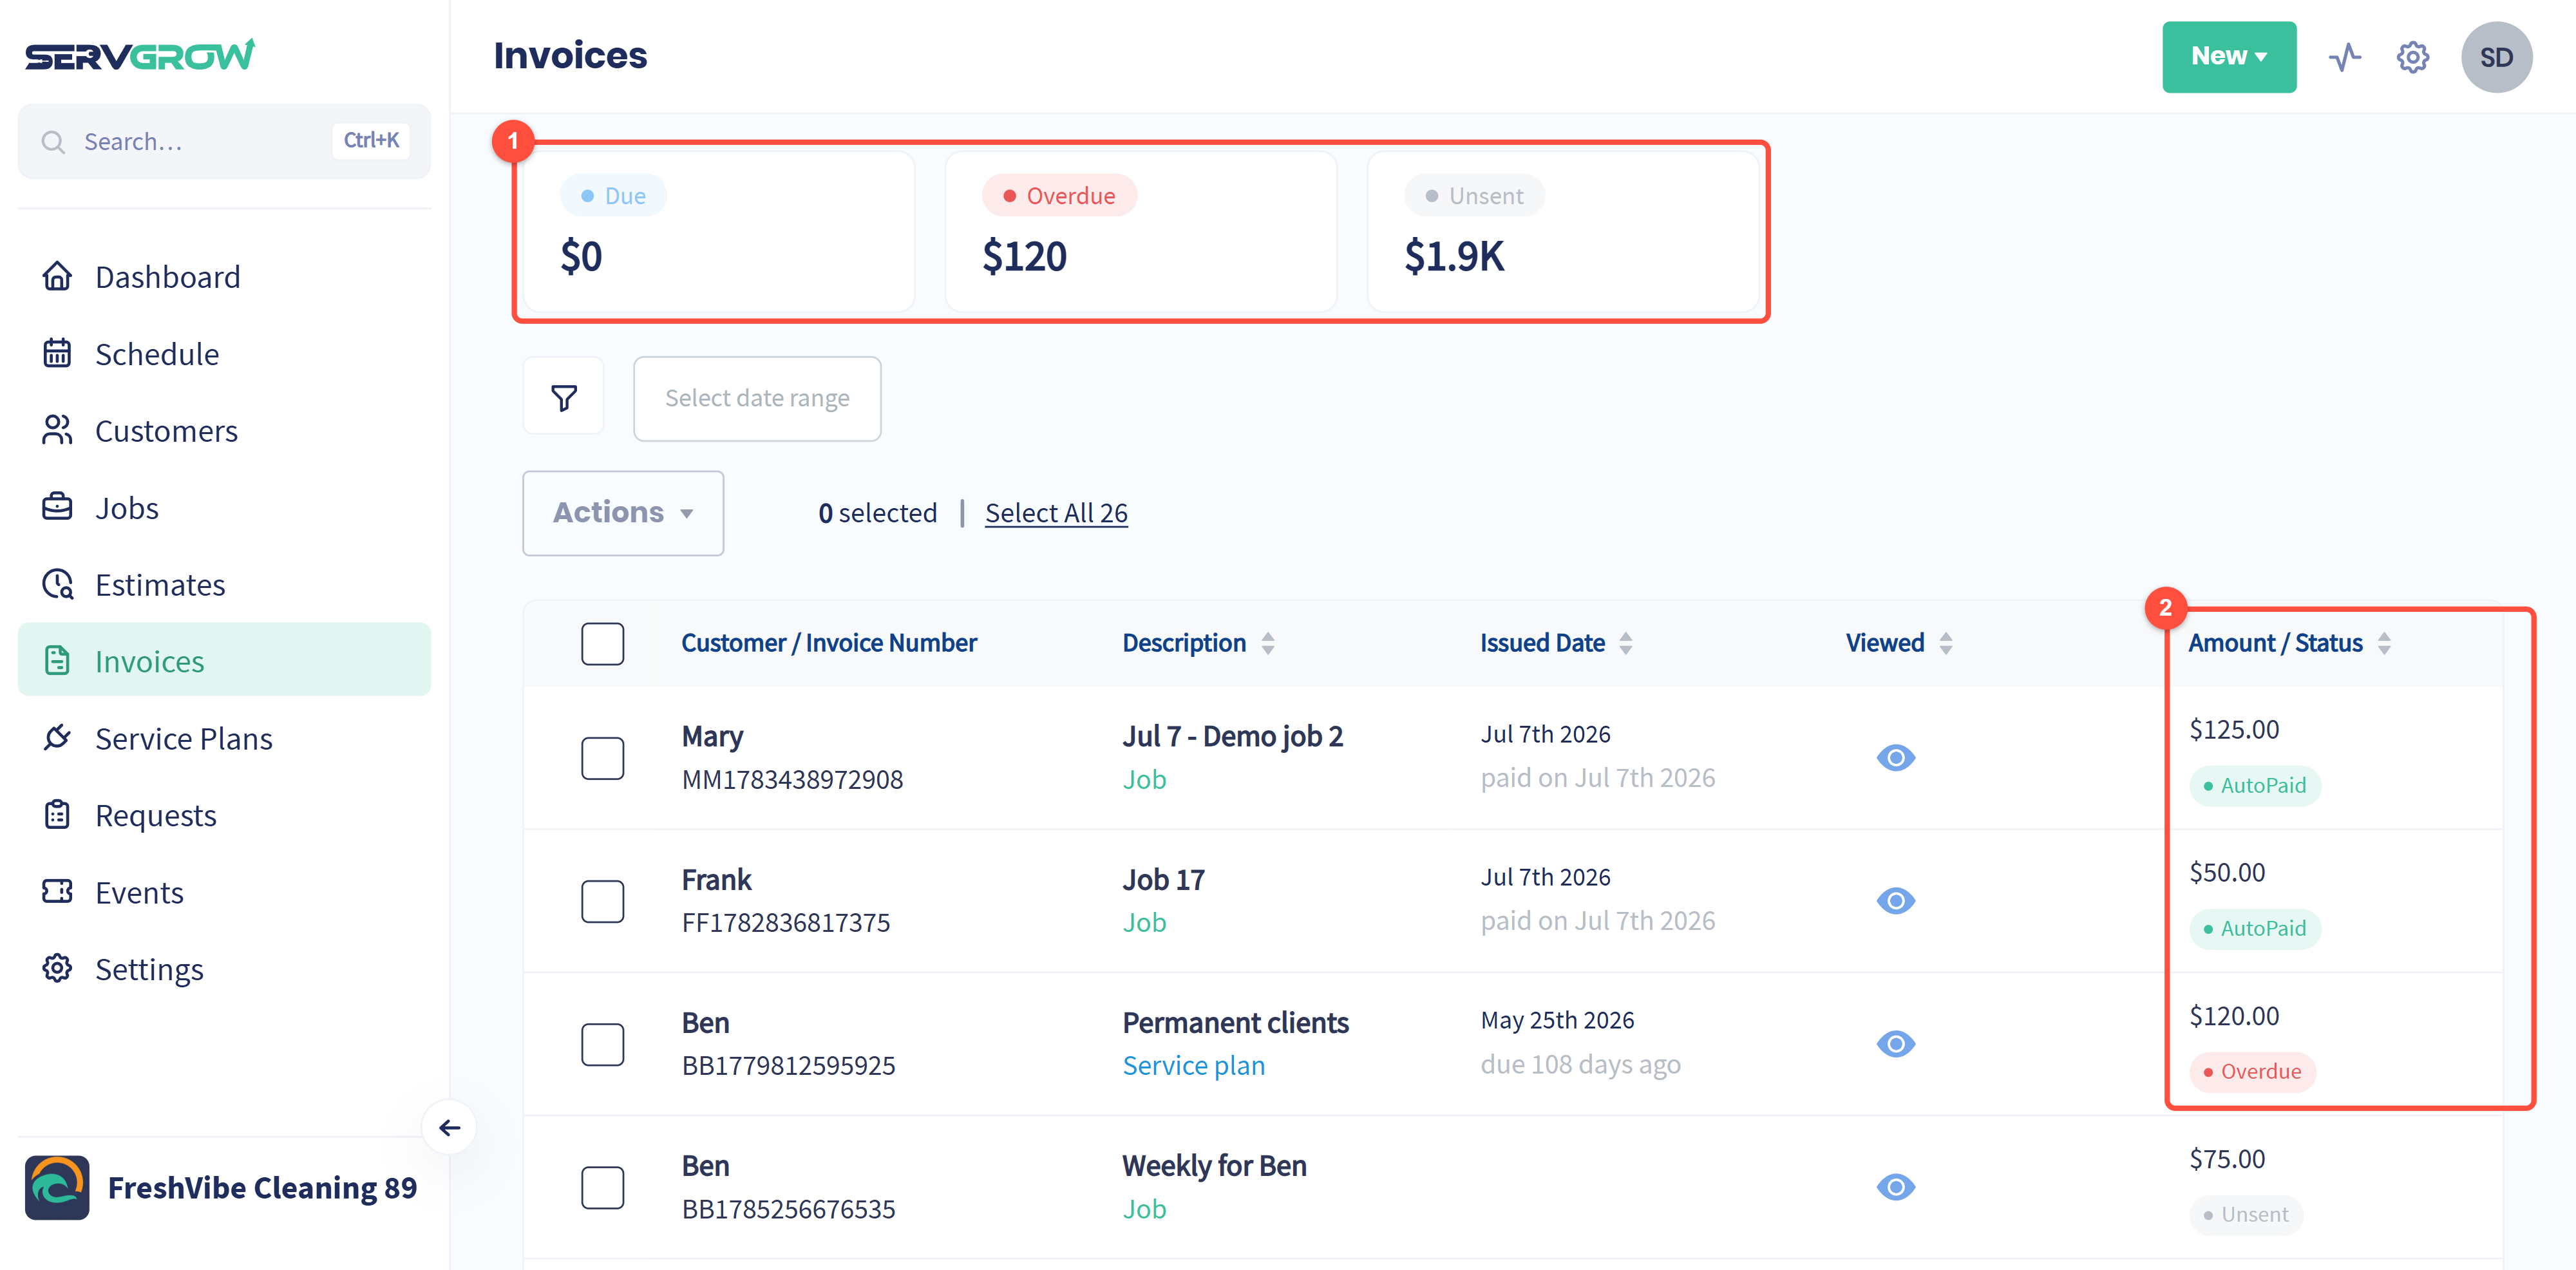
The totals at the top show how much is Due, Overdue and still Unsent.
Each invoice shows its amount and status, such as Unsent, Due, Overdue, Paid or AutoPaid. The eye icon shows whether the customer has viewed it.
Need a copy? Open the job, click Options and choose Download or Print.
Tips to get paid faster
Send the invoice the same day the job is finished. The sooner it arrives, the sooner it gets paid.
Check the Unsent total every week. That number is money you have earned but have not asked for yet.
Follow up on anything Overdue. A friendly text usually does the trick.
Related articles