
Not everything on your team's calendar is a paying job. Staff meetings, training days, vehicle maintenance, trade shows and time off all take people away from customer work. When that time lives on a whiteboard or in someone's head, jobs get booked on top of it and a crew member ends up in two places at once.
Events put that time on the same Schedule as your jobs and estimates. Everyone sees who is busy and why, the office stops double-booking people, and you can plan real work around the time your team is already committed to. Events never create an invoice, so your job and revenue numbers stay clean.
Where to find it
Click Events in the left menu to see all of your events in a list.
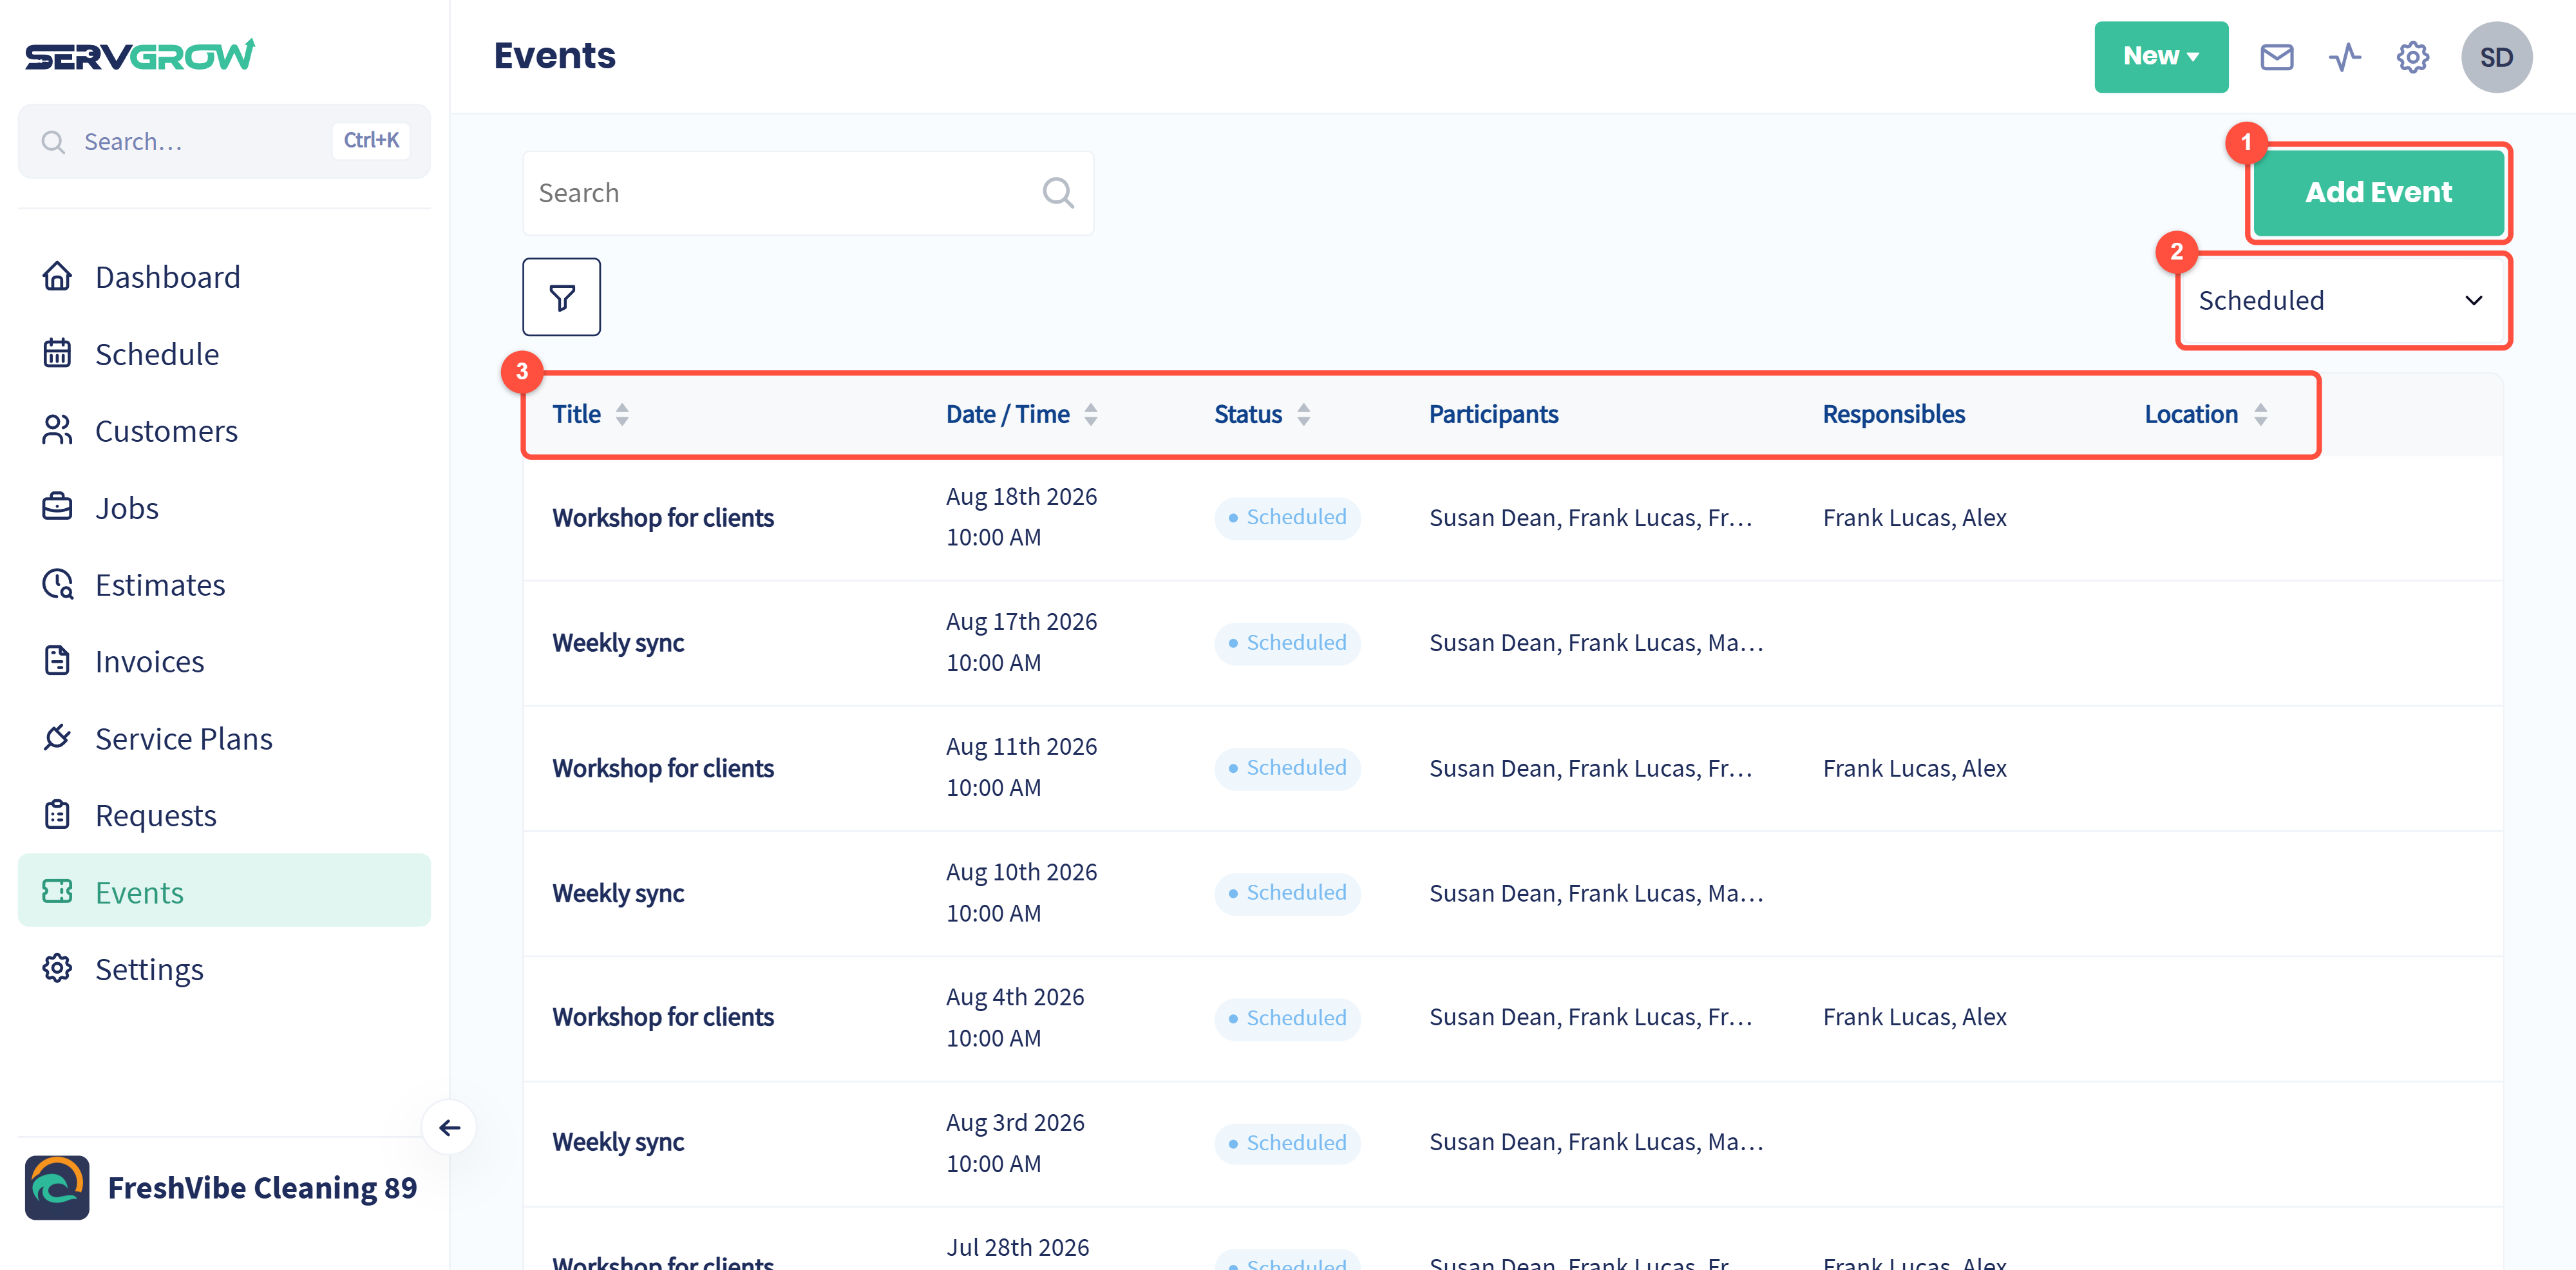
Add Event: create a new event.
Switch the list between Scheduled, Upcoming and Unscheduled events.
Each event shows its Title, Date / Time, Status, Participants, Responsibles and Location. Click an event to open it.
You can also create an event from the New button at the top of any page, or by clicking an open time on the Schedule and choosing Create New Event. Starting from the Schedule fills in the date and time for you.
Create an event
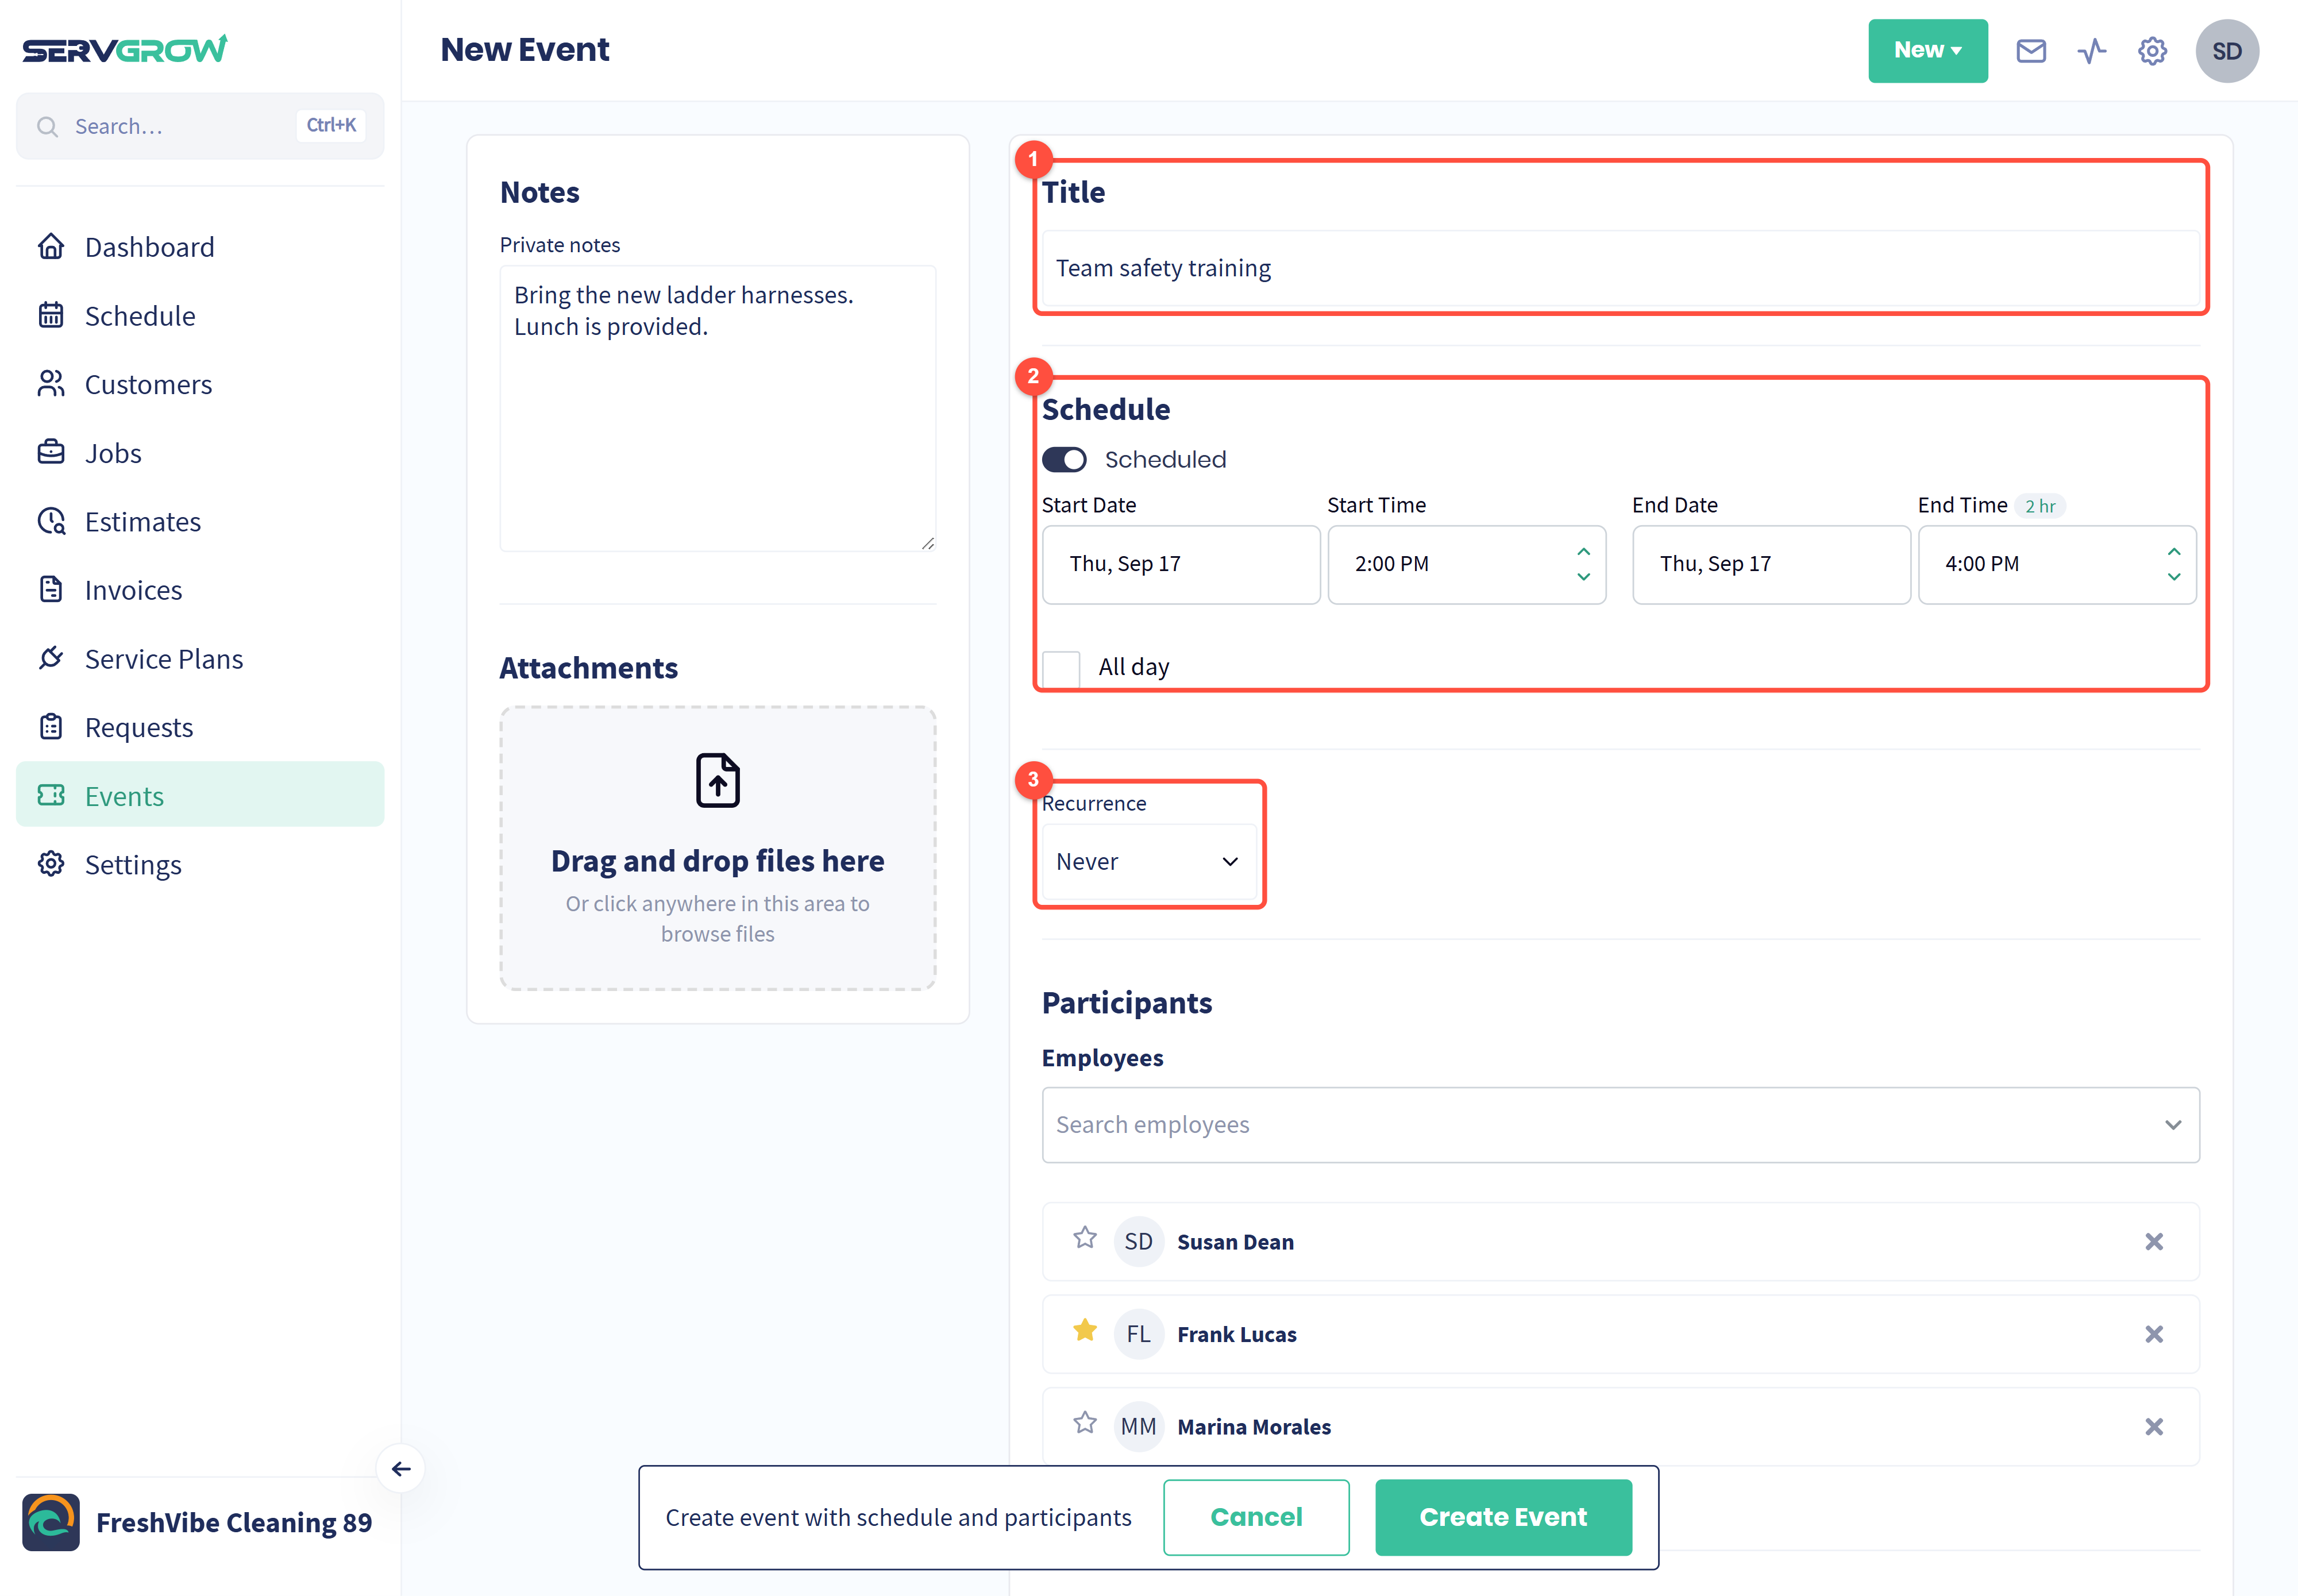
Title: a short name everyone will recognize on the calendar, such as Team safety training.
Schedule: leave the switch on Scheduled and set the Start Date, Start Time, End Date and End Time. Tick All day for things like time off. Not sure of the date yet? Turn the switch off to save it as unscheduled.
Recurrence: repeat the event, for example a weekly team meeting. Pick the date first, then choose how often it repeats.
Add who is involved and where
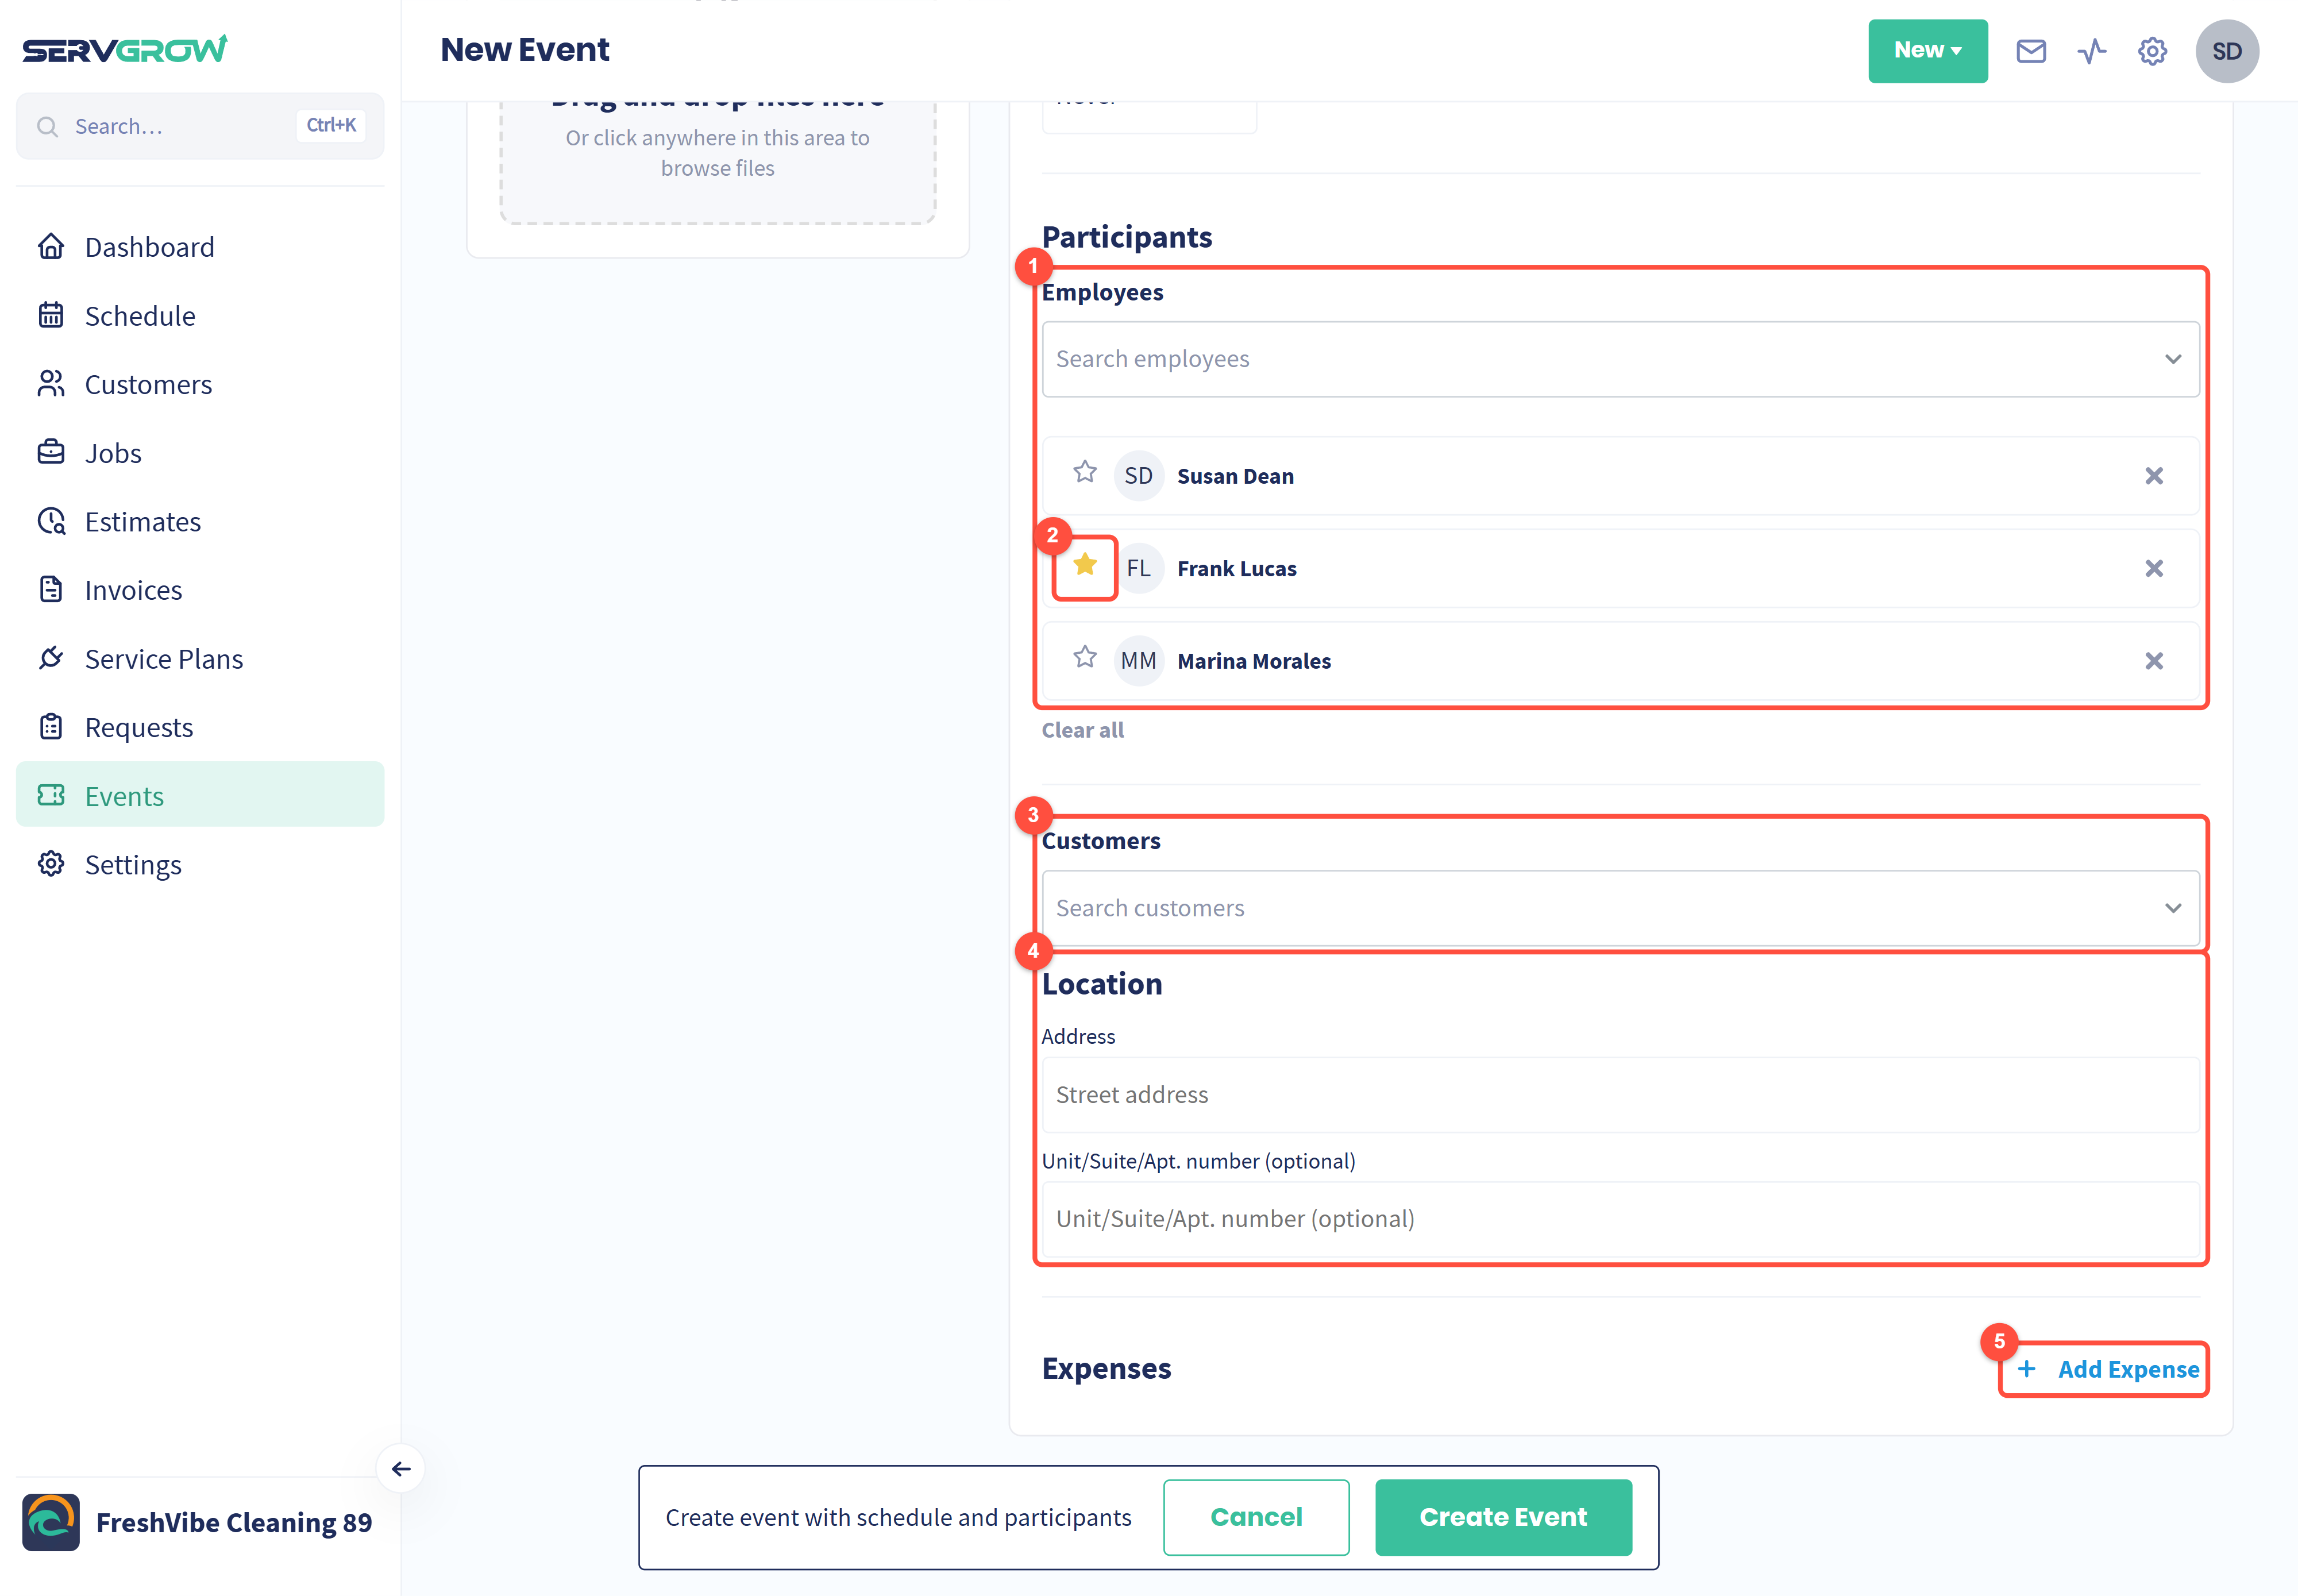
Employees: search for and add everyone taking part. The event shows on each person's schedule.
Click the star next to a name to mark them as responsible for the event. Responsible people appear in the Responsibles column of the Events list.
Customers: add customers if they are involved, for example a workshop or a walkthrough with a client.
Location: add the address, and a unit or suite number if needed.
Add Expense: record costs for the event, such as a venue or training fee. See Expense Tracking.
Add notes and files, then create it
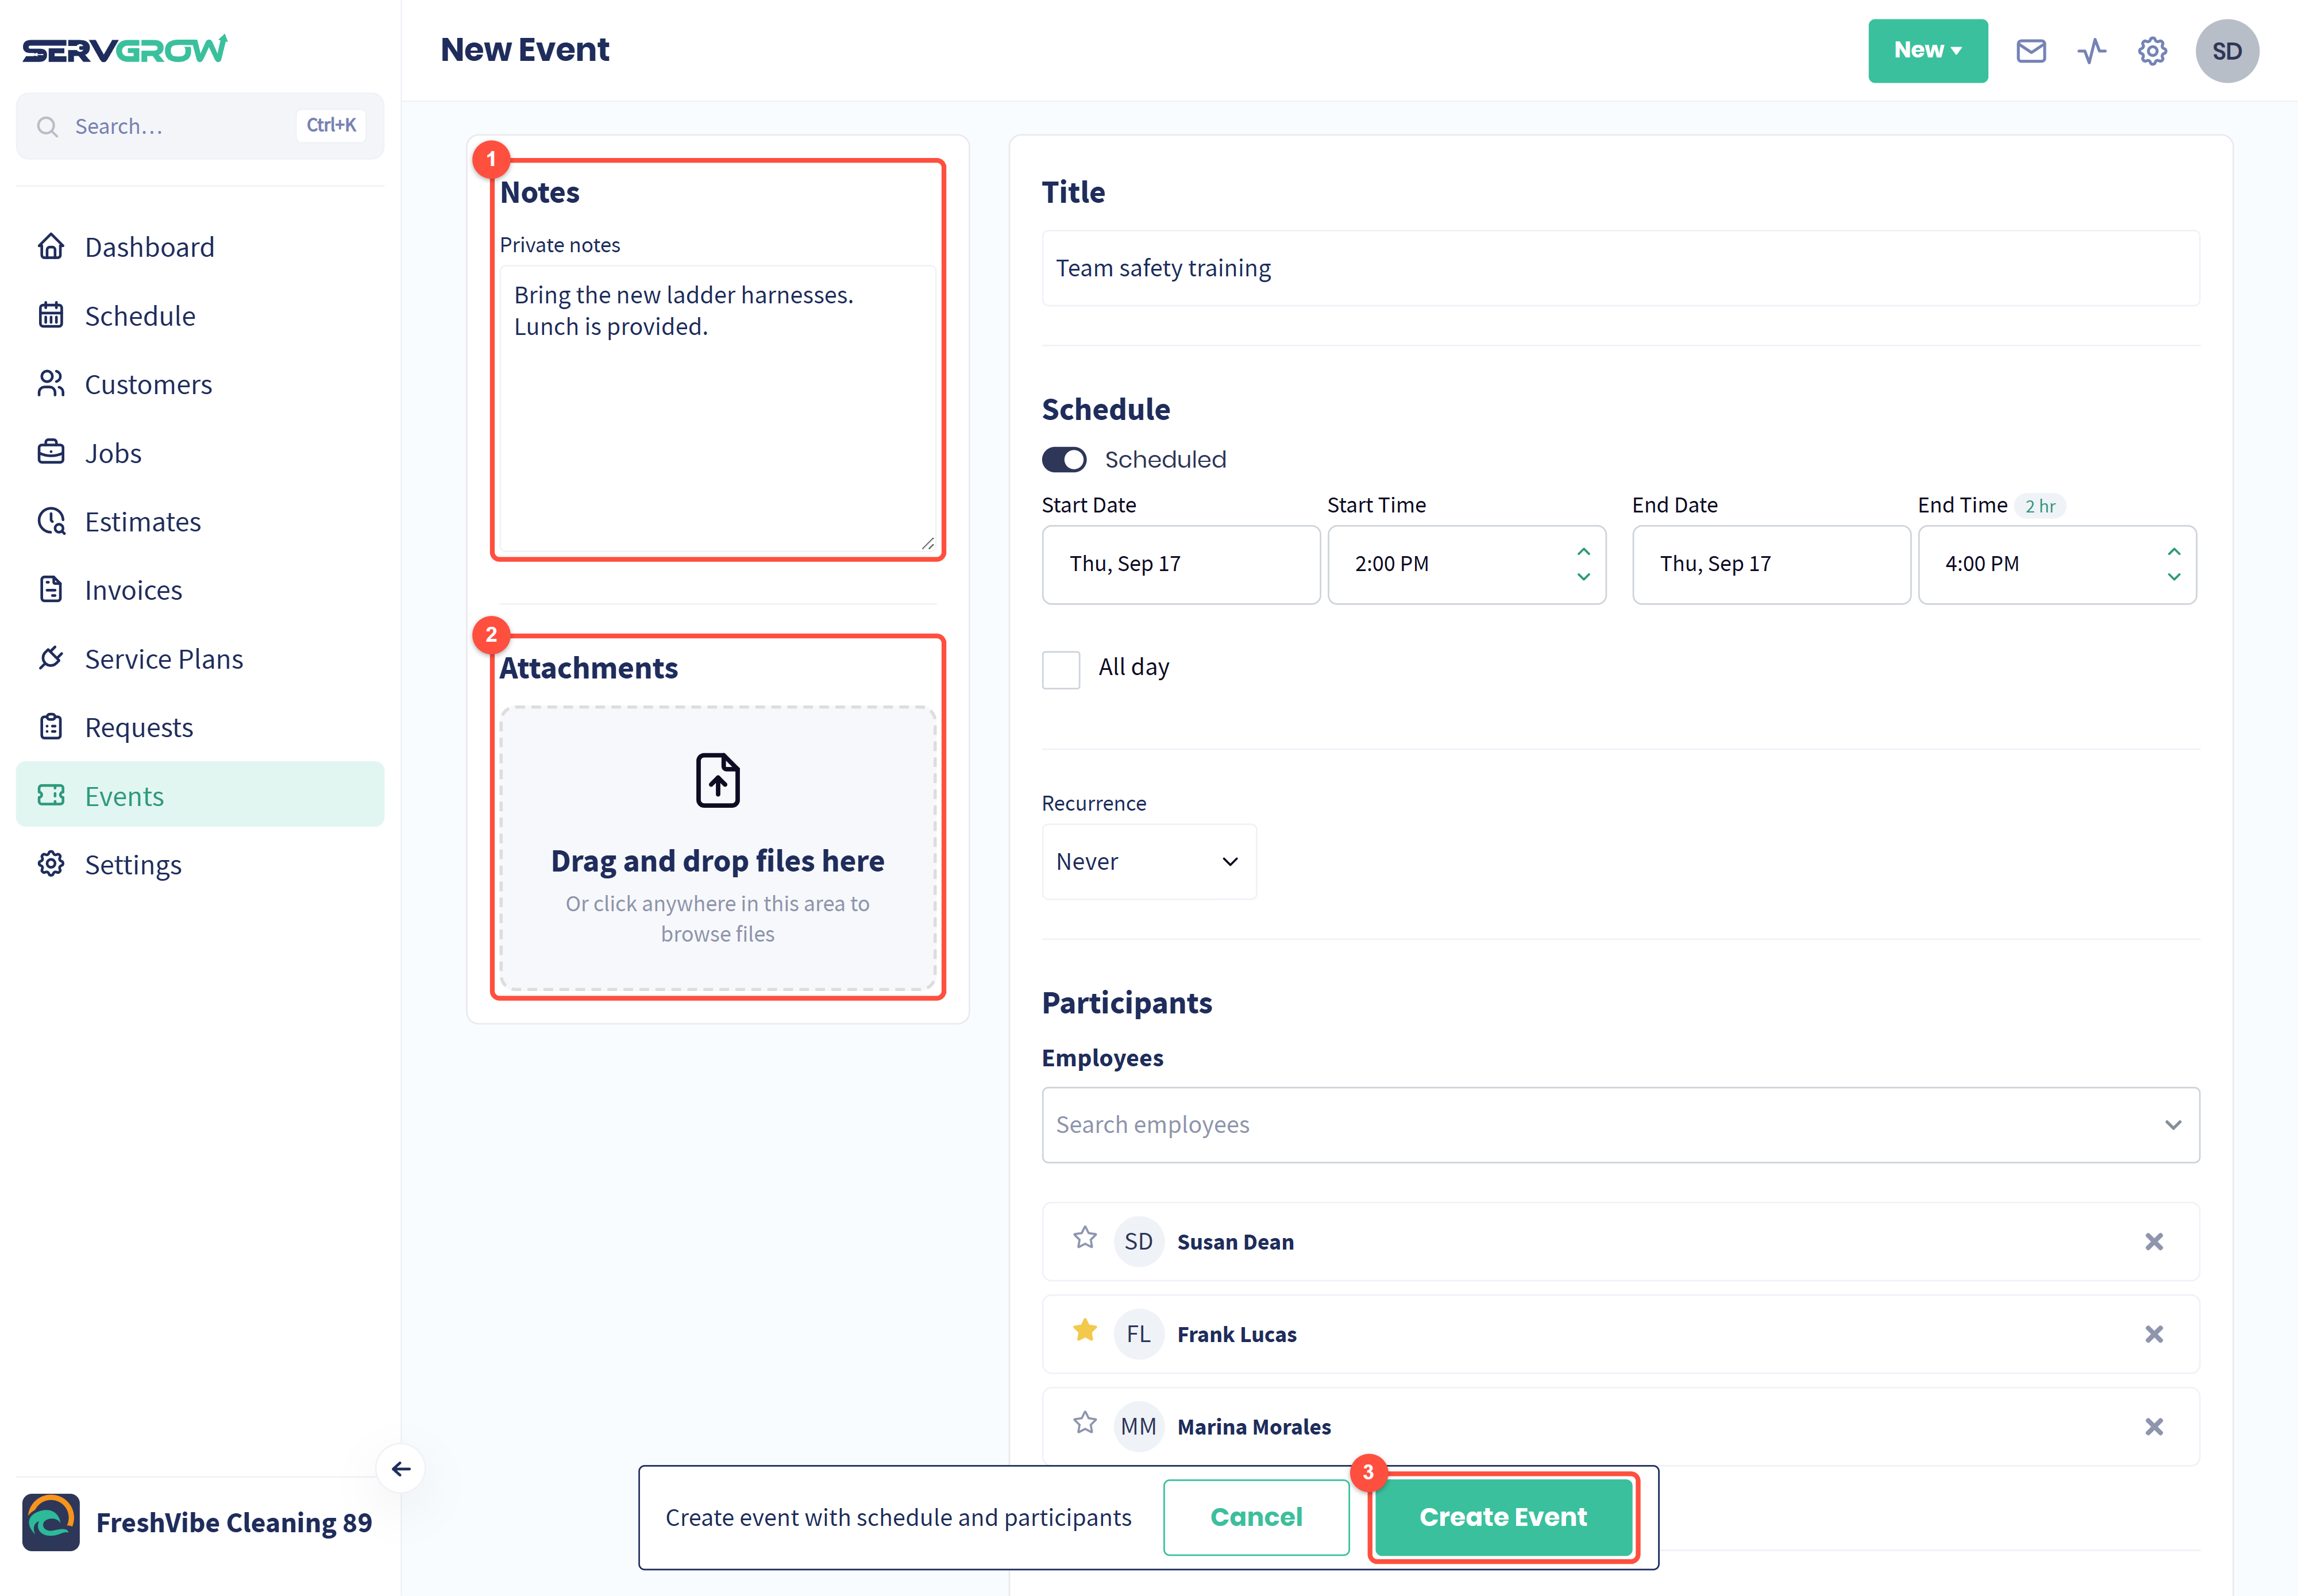
Private notes: details for your team, such as what to bring.
Attachments: drag in or browse for files, such as an agenda or a map. Images and files can be up to 10 MB each, and videos up to 50 MB.
Click Create Event.
Events on your Schedule
Events show on the Schedule in purple, so they are easy to tell apart from jobs and estimates. Click one to see its details.
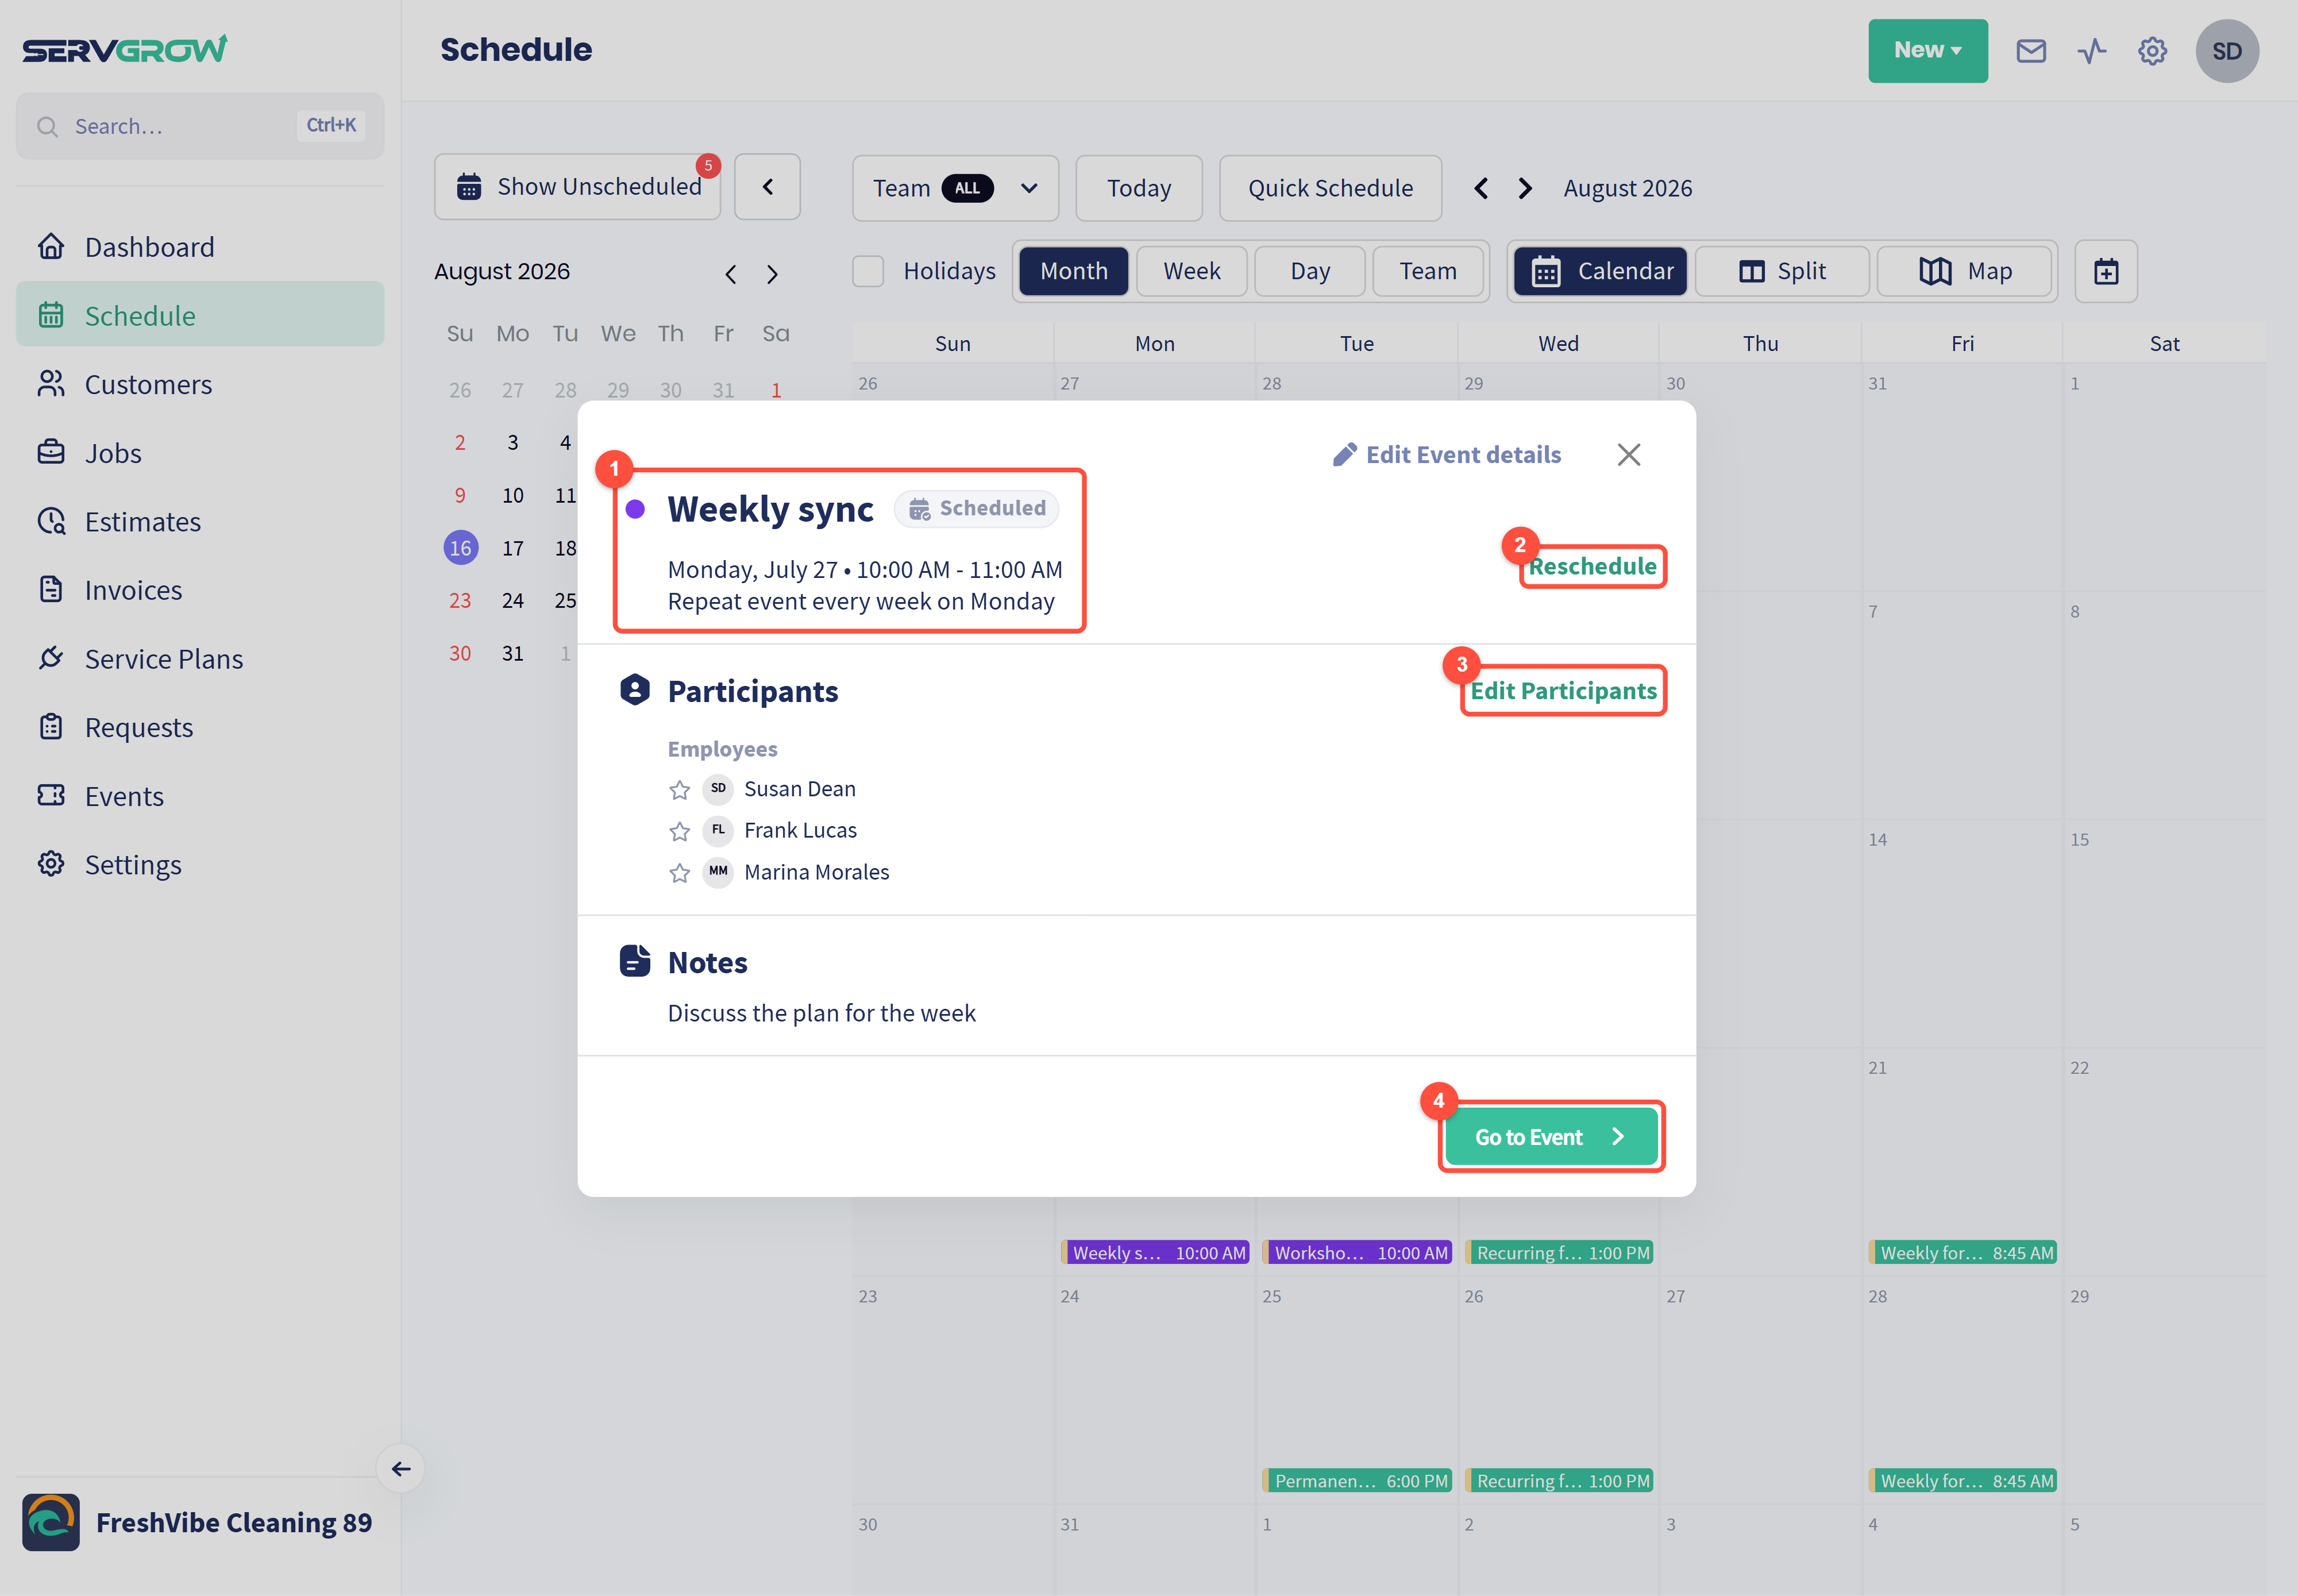
The event's title, status, date and time, and how it repeats.
Reschedule: move it to a new day or time, including quick picks for tomorrow, next week or next month.
Edit Participants: add or remove people without opening the full event.
Go to Event: open the full event to change anything else. To cancel or delete it, open the event and use Options.
Find events quickly
On the Events list, click the filter button to narrow things down.
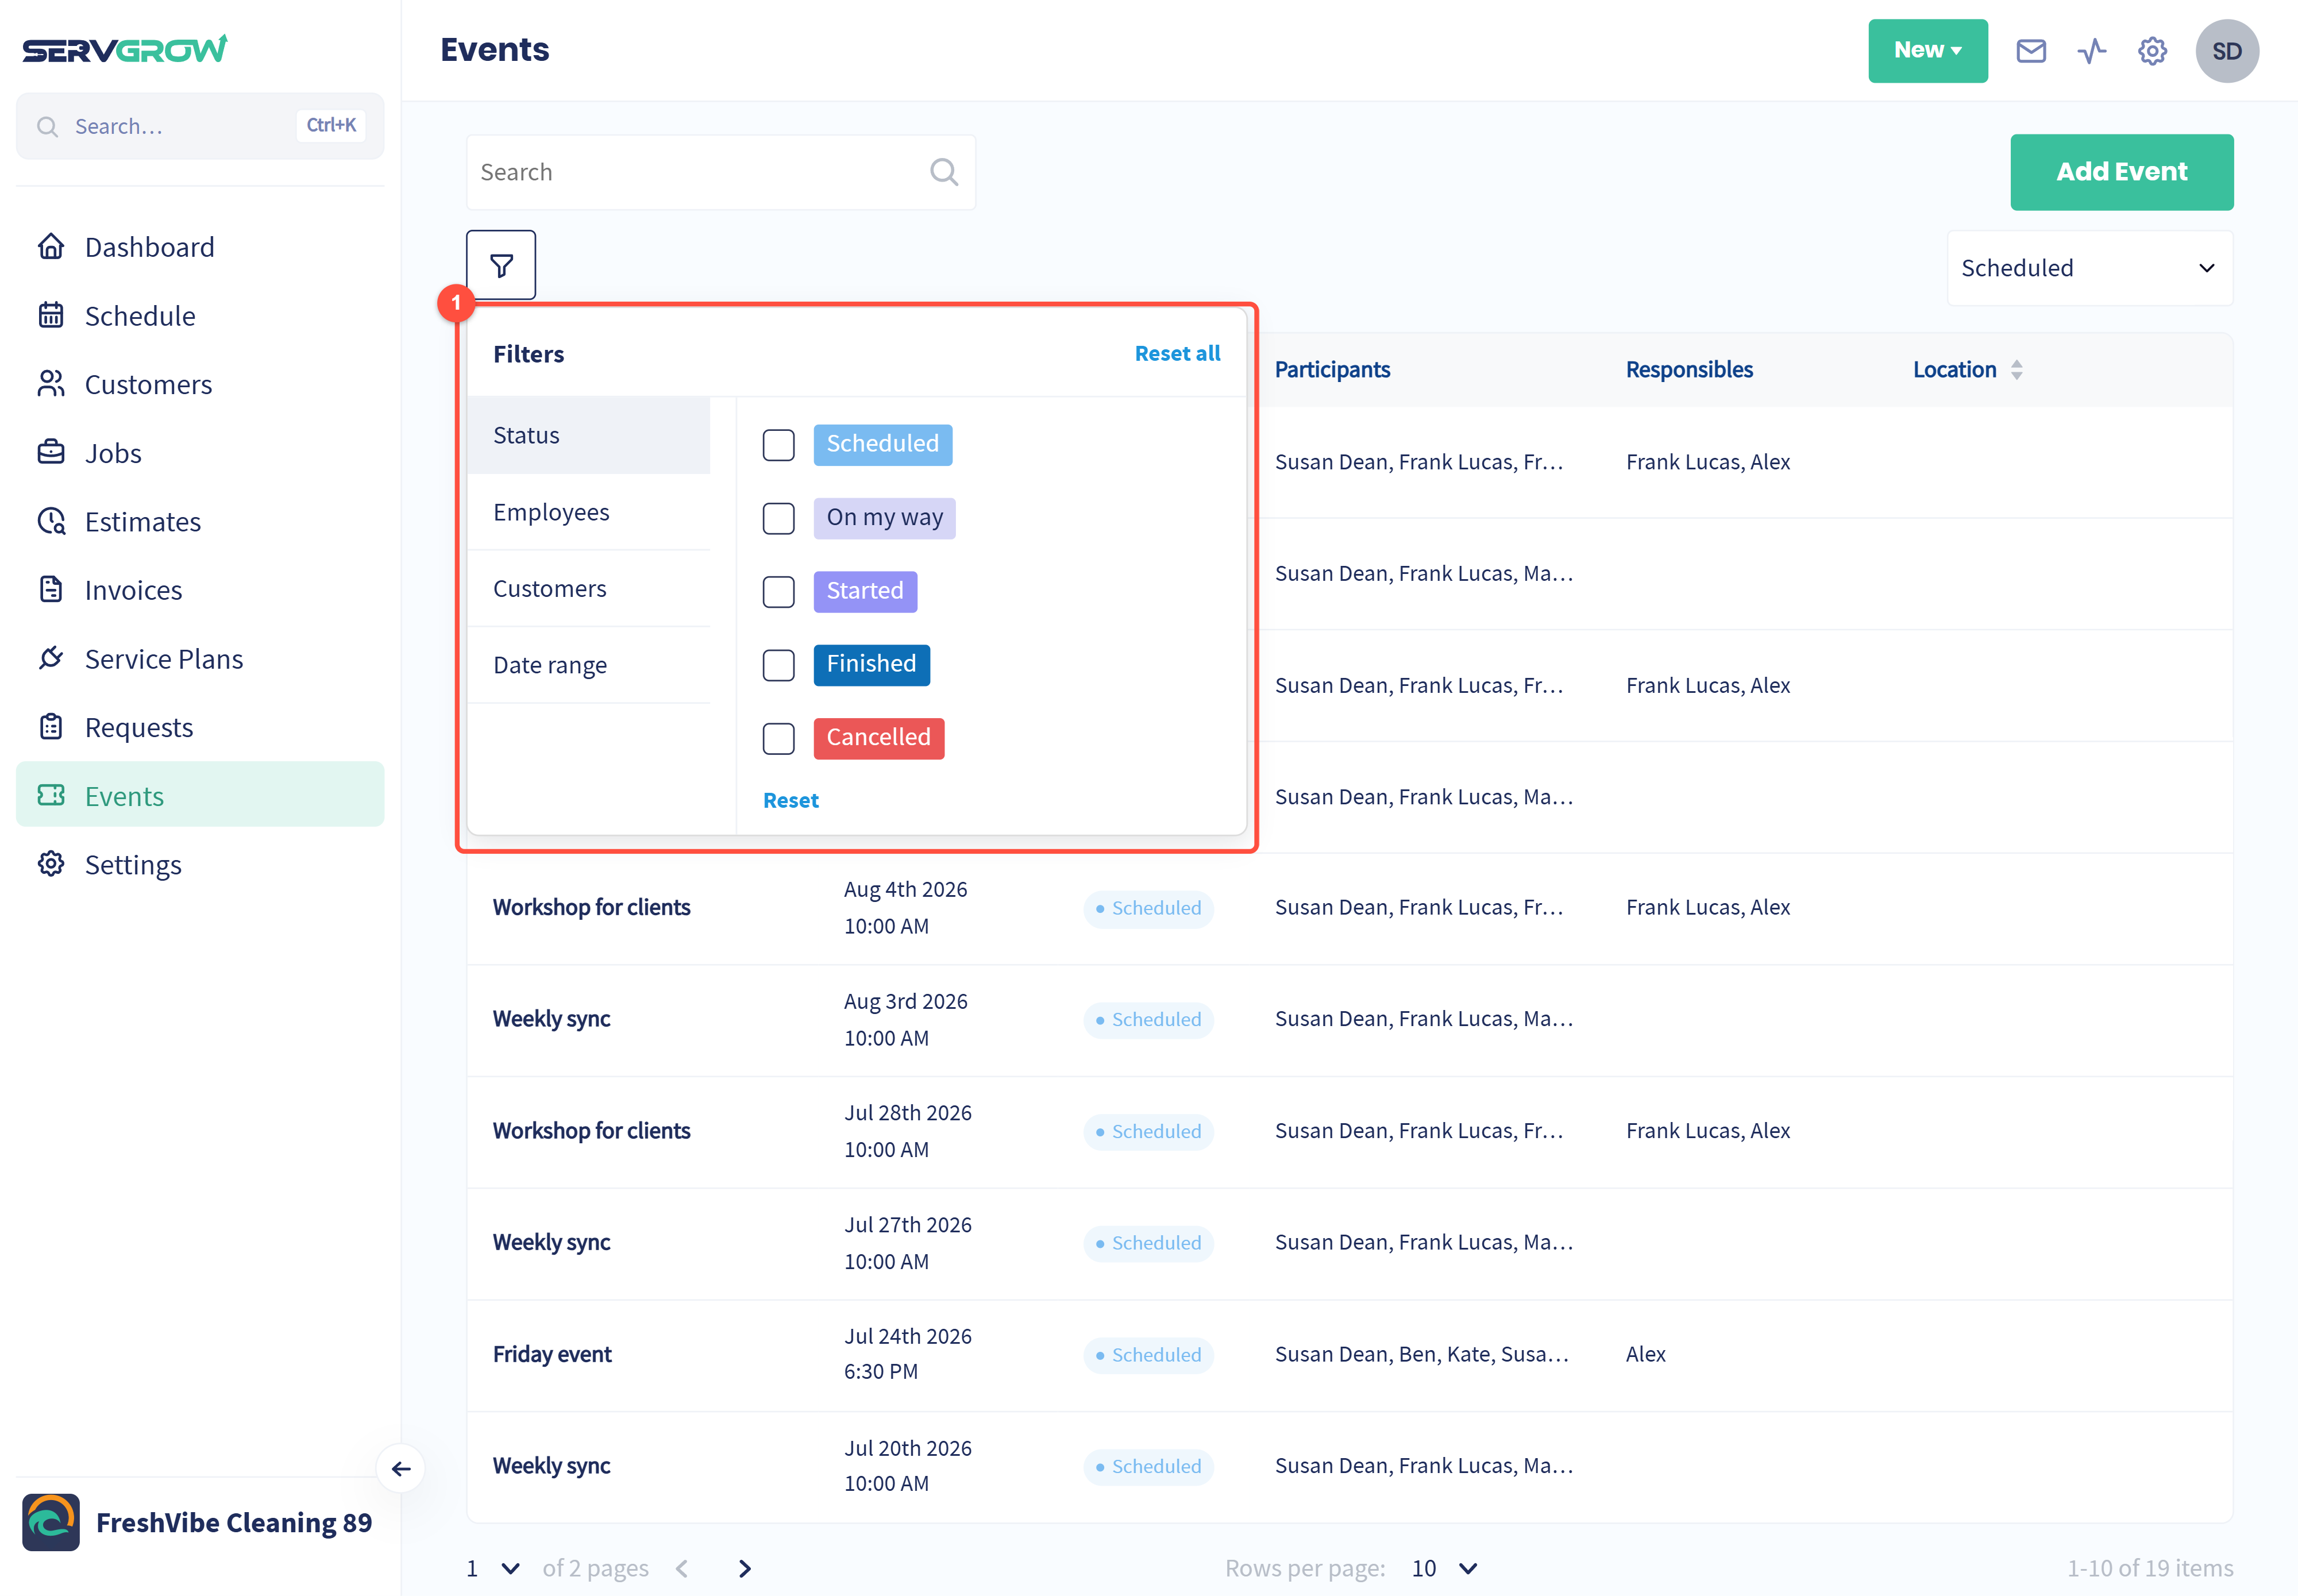
Filter by Status (Scheduled, On my way, Started, Finished or Cancelled), Employees, Customers or Date range. Click Reset all to clear them.
Who can see and change events
By default, Company Admins and Office Staff see every event. Field Techs see the events they are part of. All three roles can create, edit and delete events.
Tips
Put time off on the calendar as soon as it is approved. It stops anyone booking work for that person.
Use a repeating event for regular meetings. Set it up once and it stays on everyone's schedule.
Mark one person responsible. Everyone knows who to ask about the event.
Related articles