
Customers judge you on every message you send, not just the work. A booking confirmation that arrives right away, an invoice that shows up the moment the job is done, and a clear way to pay all tell the customer they picked a professional. Silence, or a generic message that gets their name wrong, tells them the opposite.
Servgrow sends these messages for you, by text and email, at the right moment in every job. You write each template once, in your own voice, and Servgrow fills in the customer's name, the date and time, the address and the right links every time. Your customers stay informed, your office stops typing the same messages over and over, and invoices get paid faster because the payment link is already in the email.
Where to find it
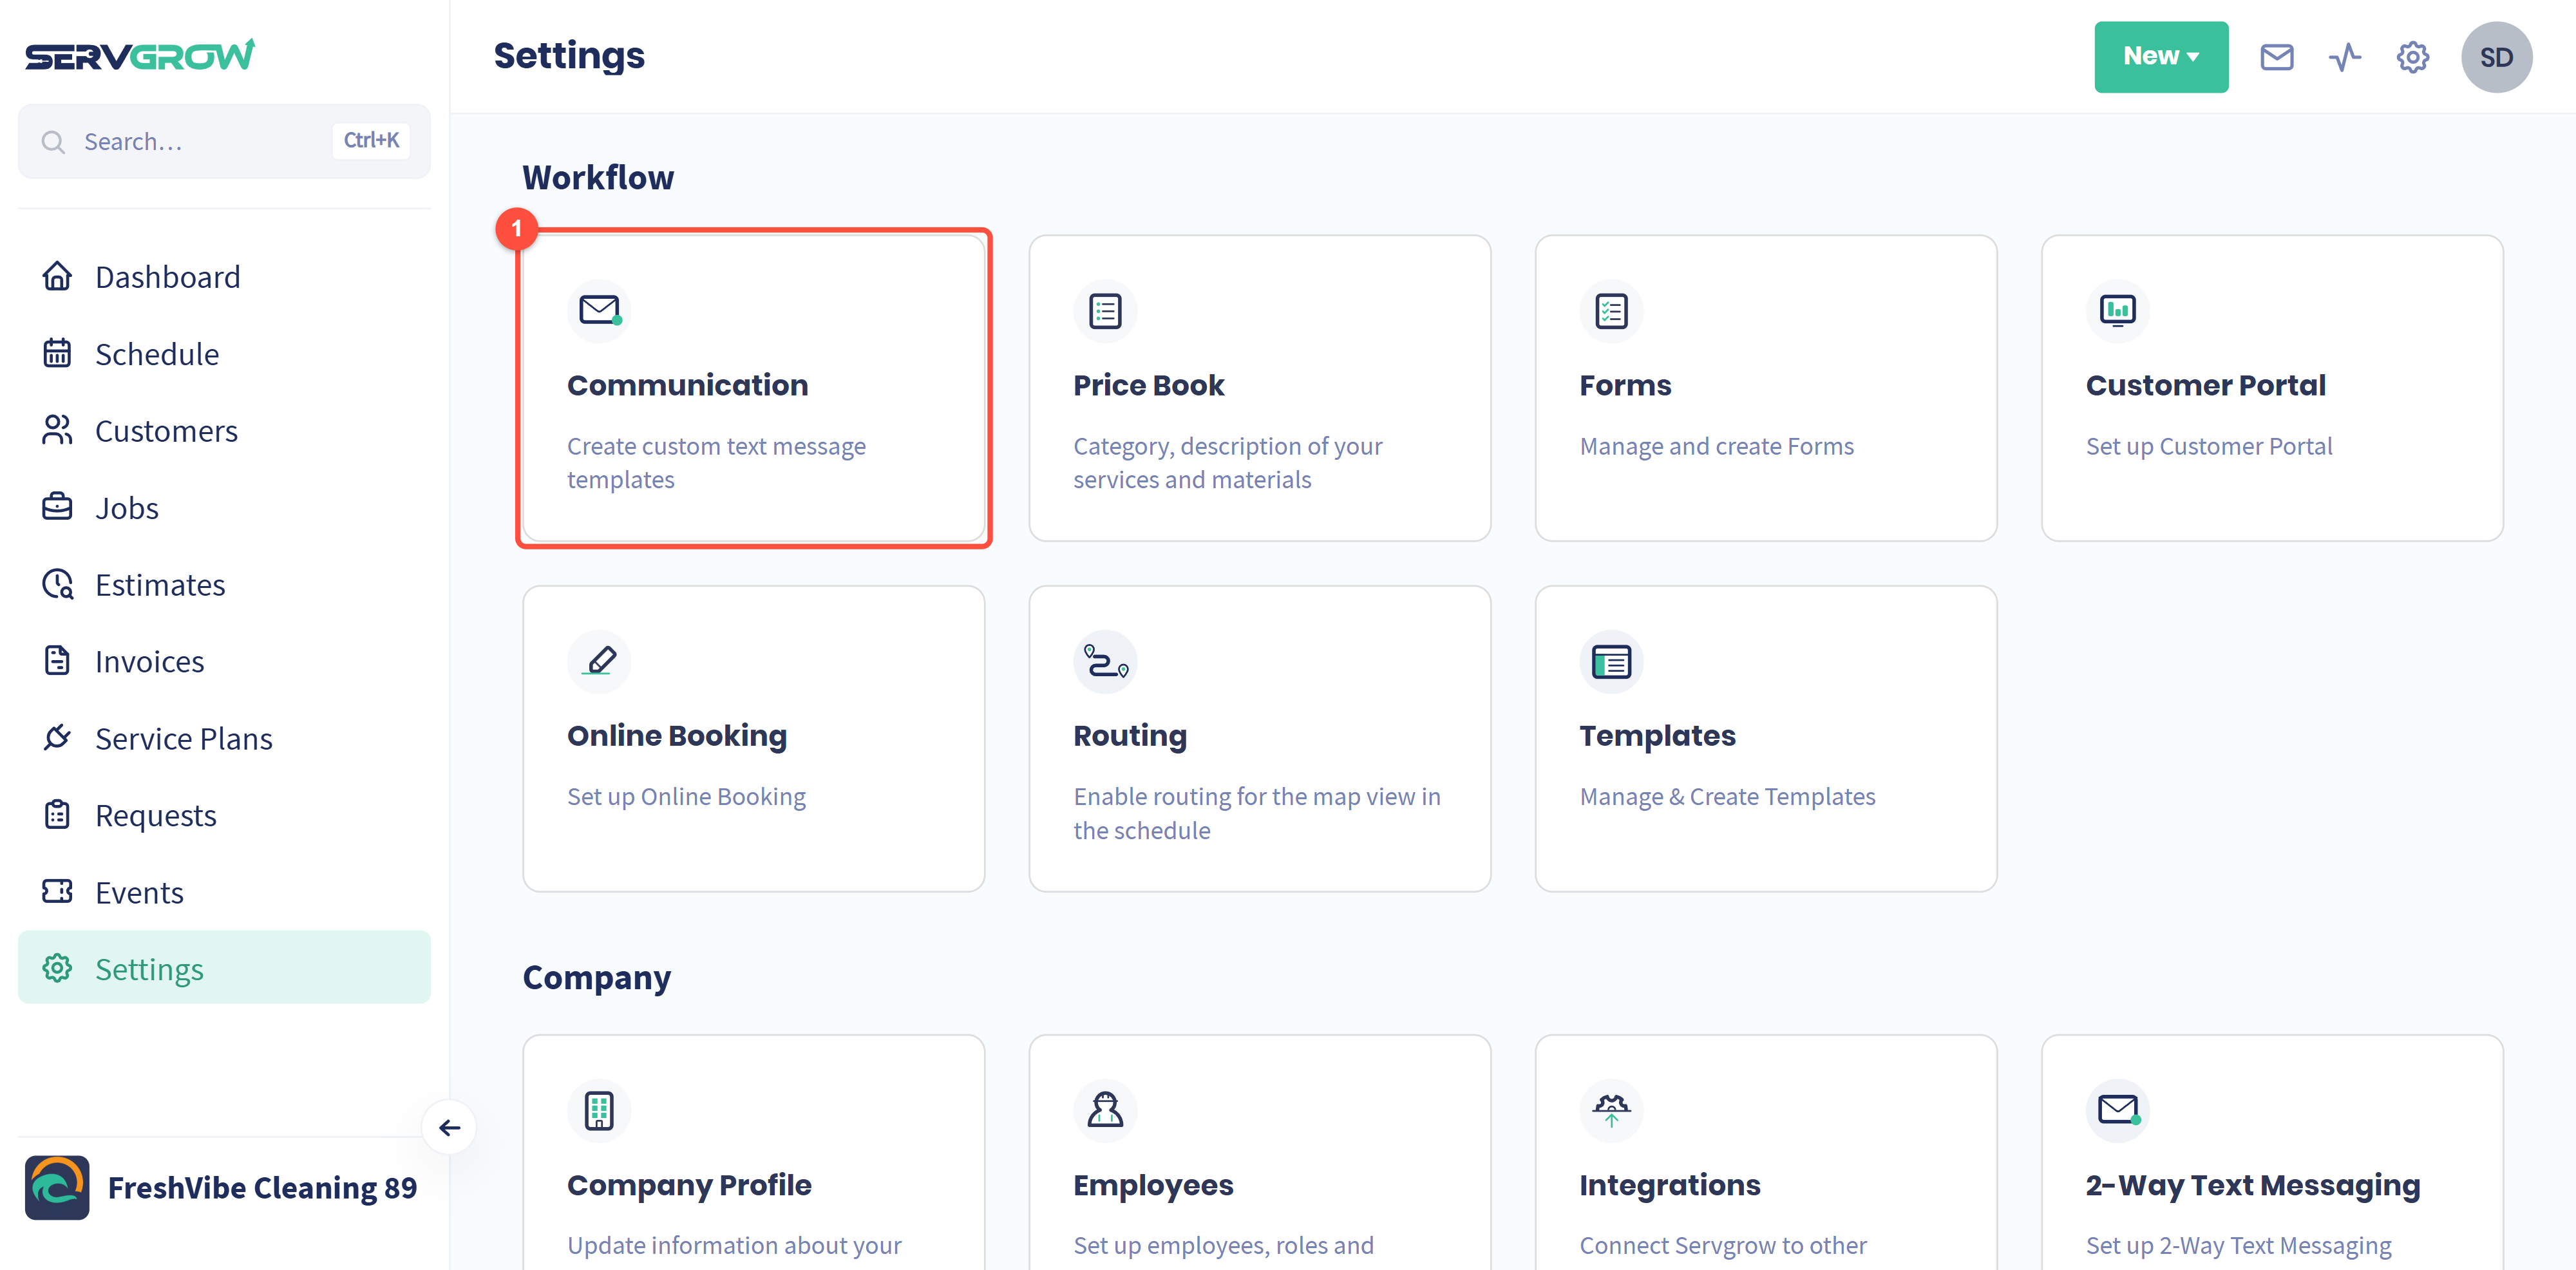
Go to Settings and, under Workflow, click Communication. Only a Company Admin can change these templates.
Your notifications at a glance
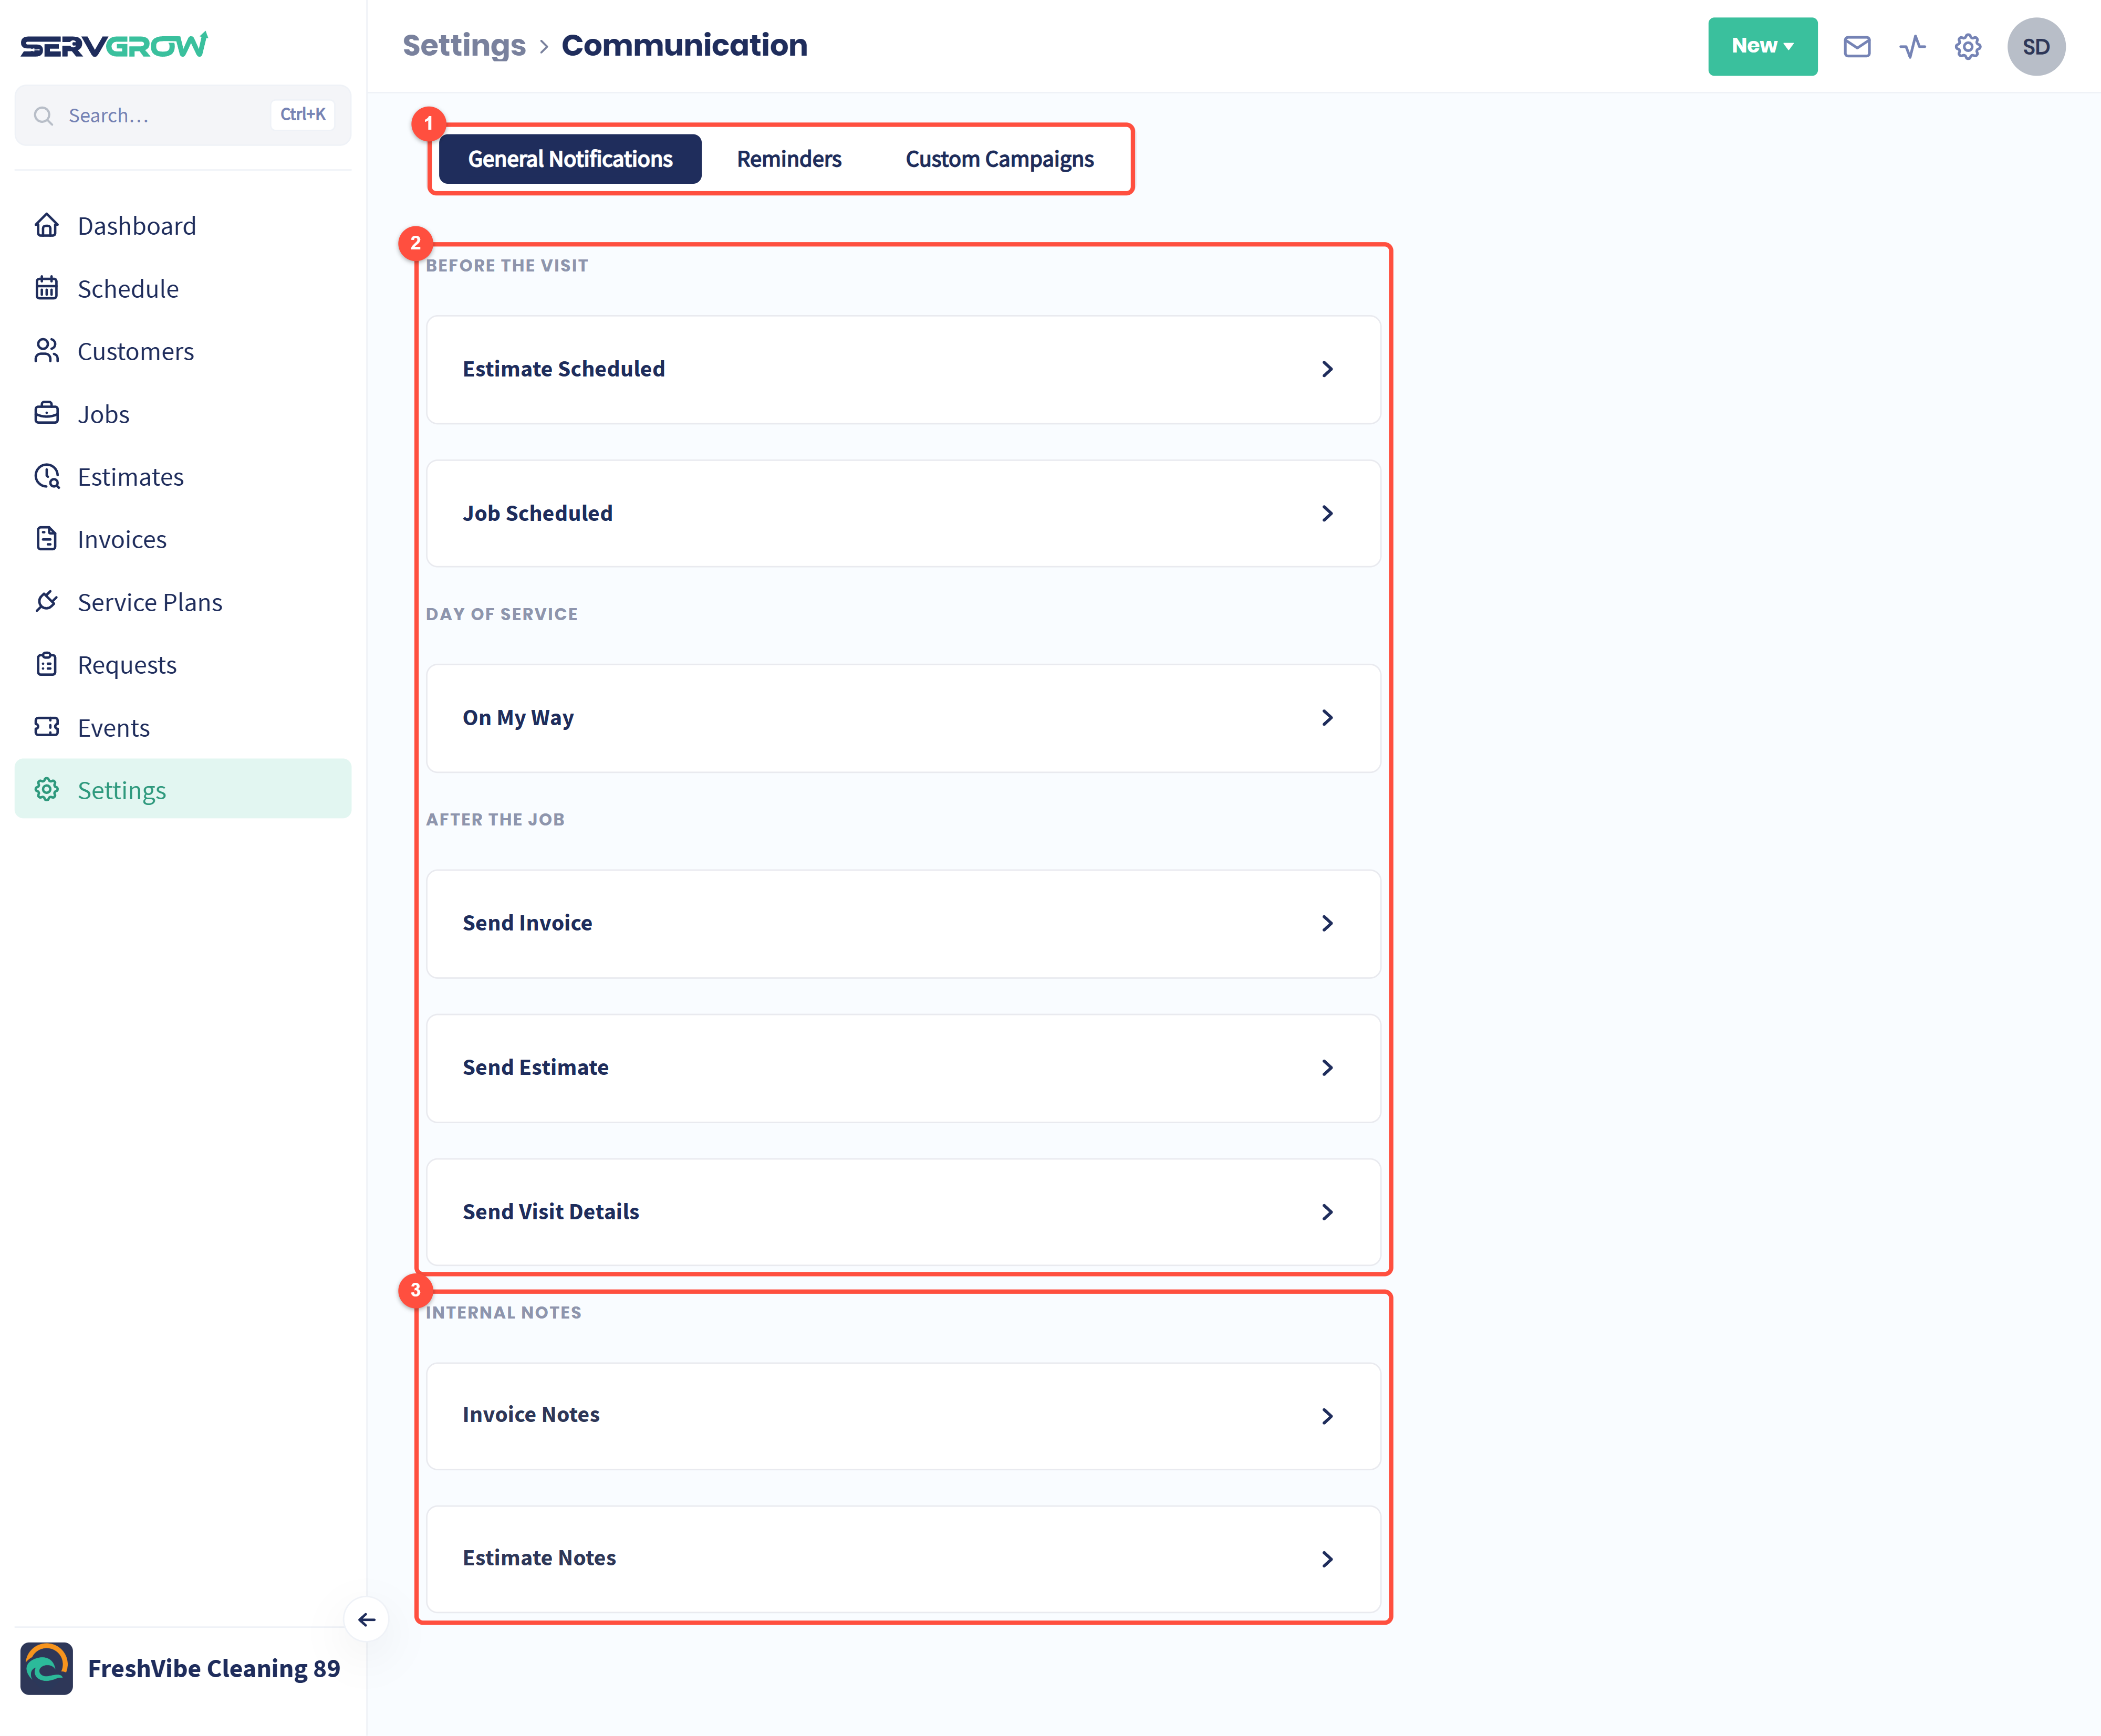
General Notifications holds the messages covered in this article. Reminders holds appointment reminders and invoice and estimate follow-ups, and Custom Campaigns holds your marketing messages. Each has its own article.
Each notification goes out at a set point in the job:
Estimate Scheduled and Job Scheduled: when you or your technician schedule an estimate or a job.
On My Way: when your technician taps On My Way. See On My Way Texts.
Send Invoice, Send Estimate and Send Visit Details: when you or your technician send them to the customer.
Internal Notes: the standard notes that appear on your invoices and estimates.
Click any notification to open it. Every notification has a Text version and an Email version, and you edit and save them separately.
Write the text message
Here we use Job Scheduled as the example. The other notifications work the same way.
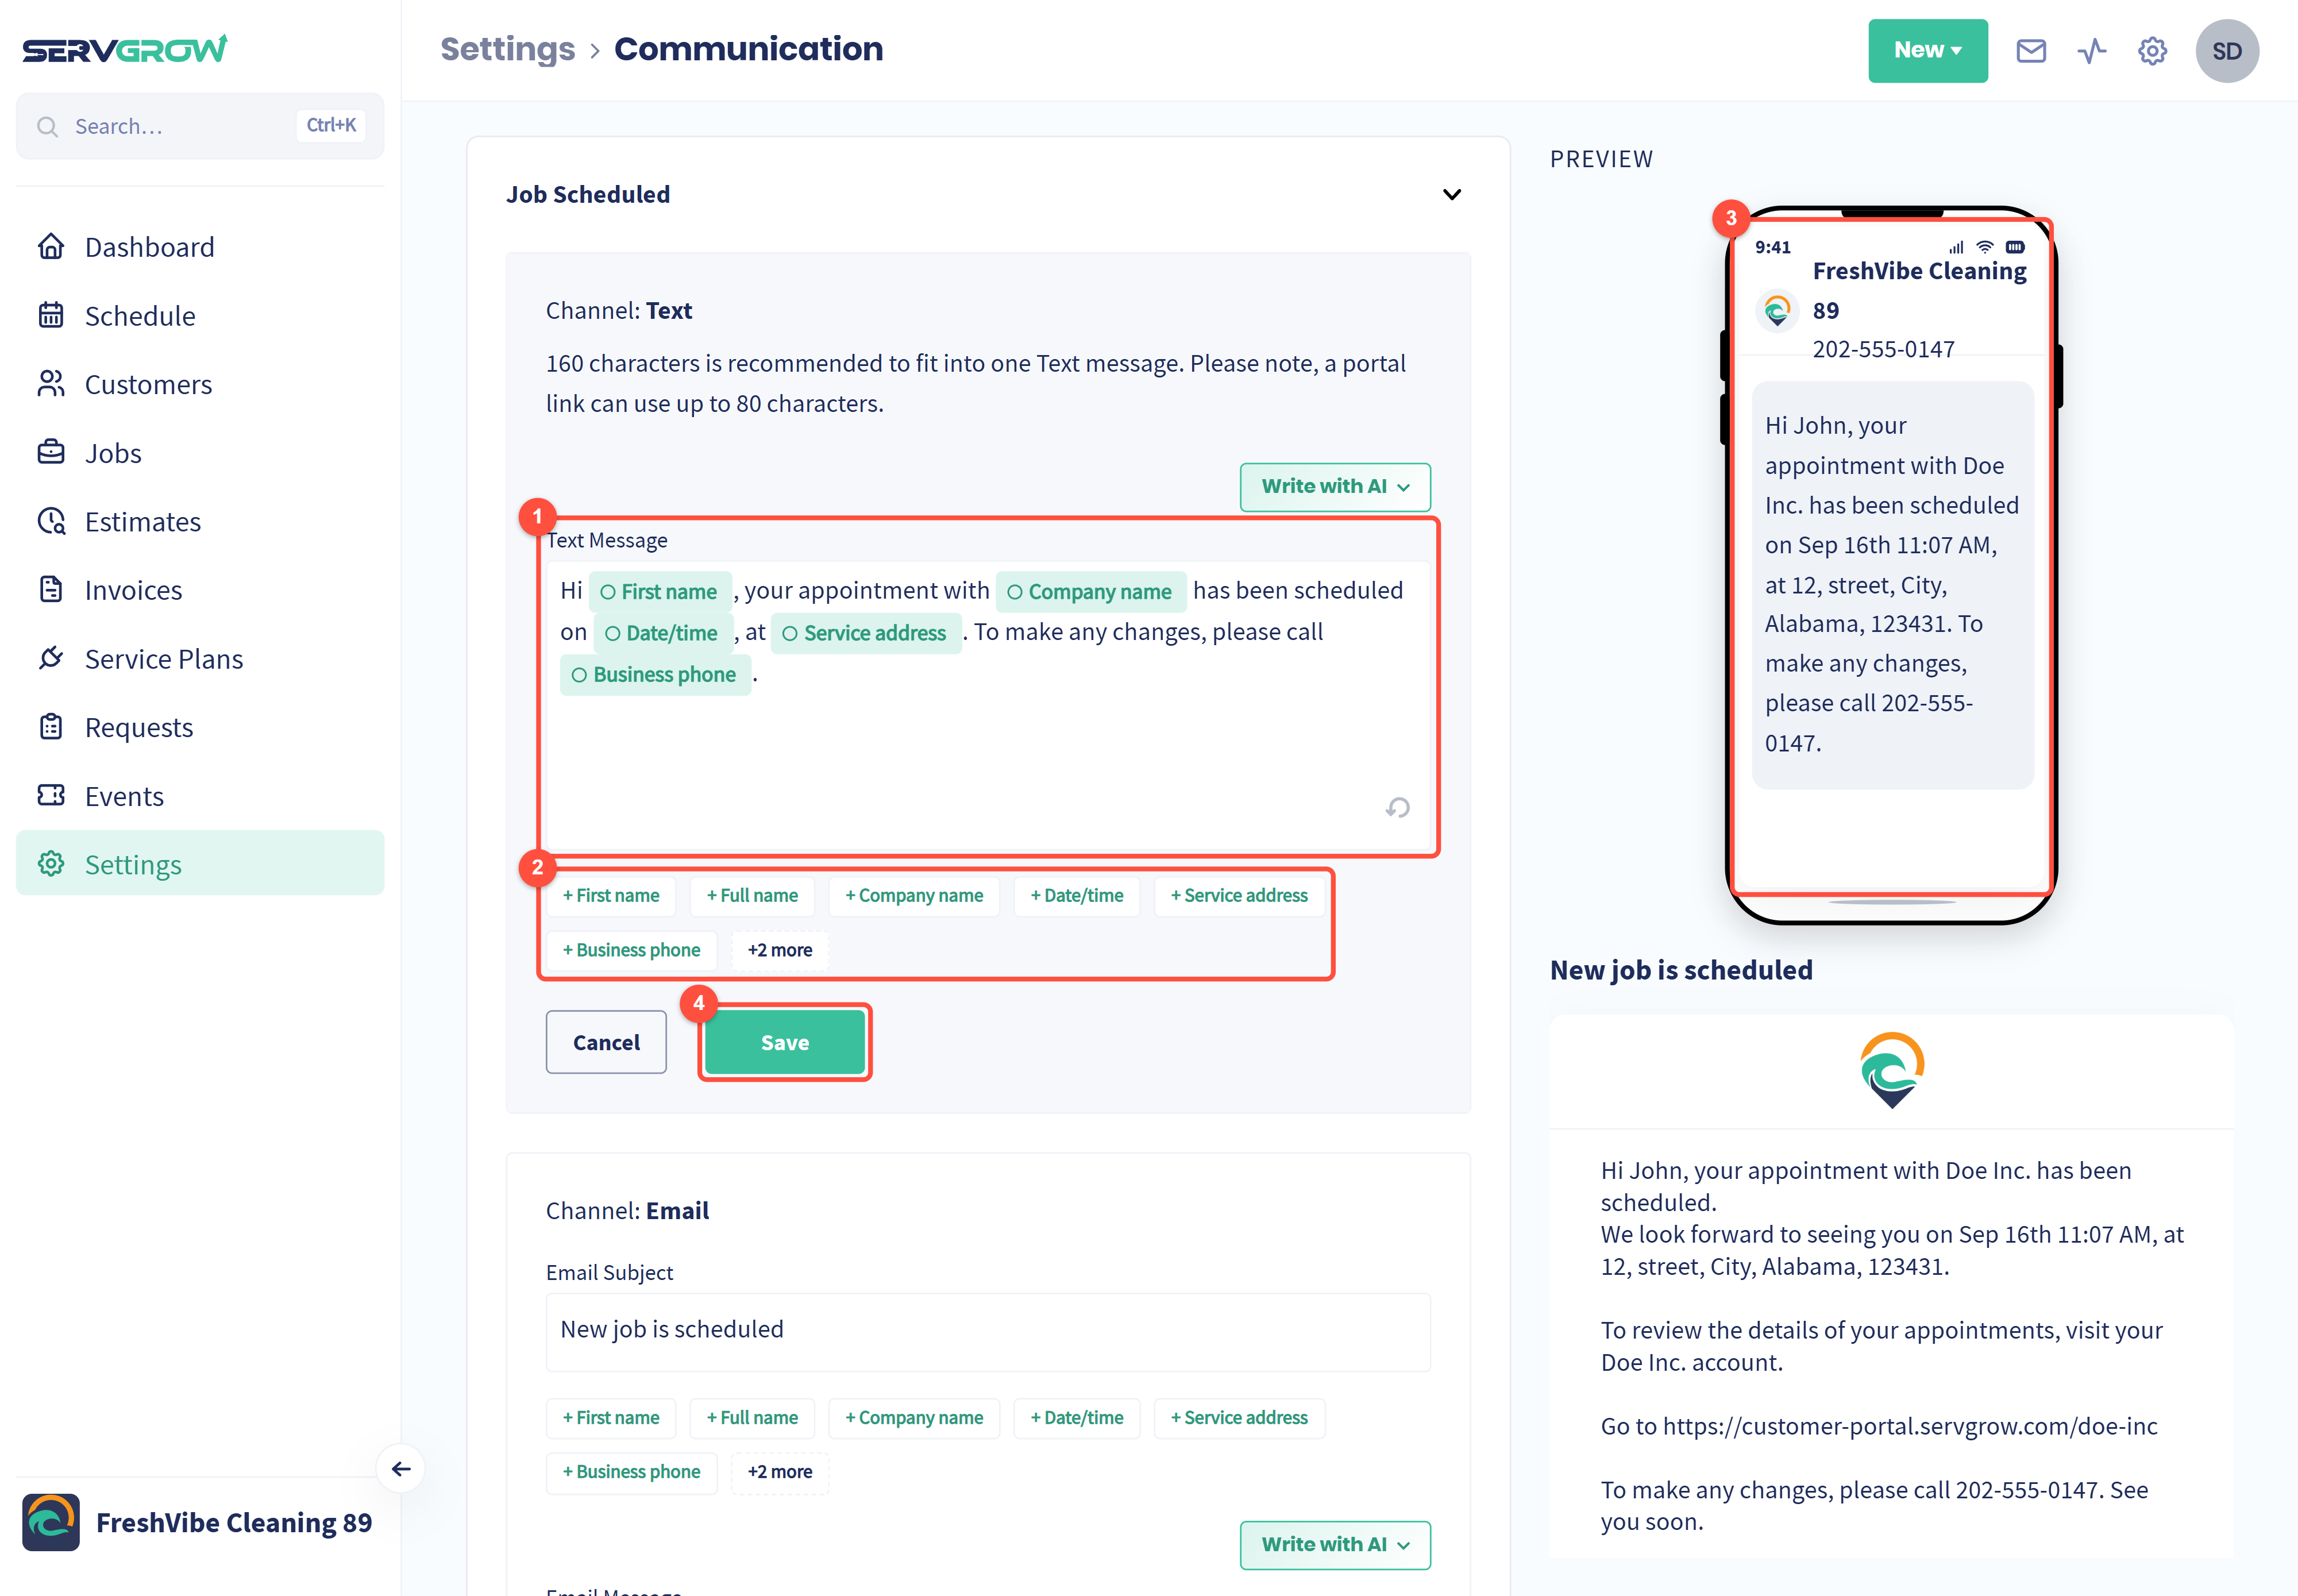
Text Message: write the message the customer receives. Keep it under 160 characters so it arrives as one text. A portal link can use up to 80 of those.
Merge fields: click a button to drop in details that fill themselves in, such as First name, Company name, Date/time, Service address and Business phone. Click +2 more to see the rest, such as Portal link and Technician name.
Preview: see exactly how the text will look on the customer's phone, filled in with sample details.
Click Save.
Always include a way to reach you, such as your Business phone. Customers can only reply to a text if you use 2-Way Text Messaging.
Let AI help with the wording
Not sure how to phrase it? Click Write with AI.
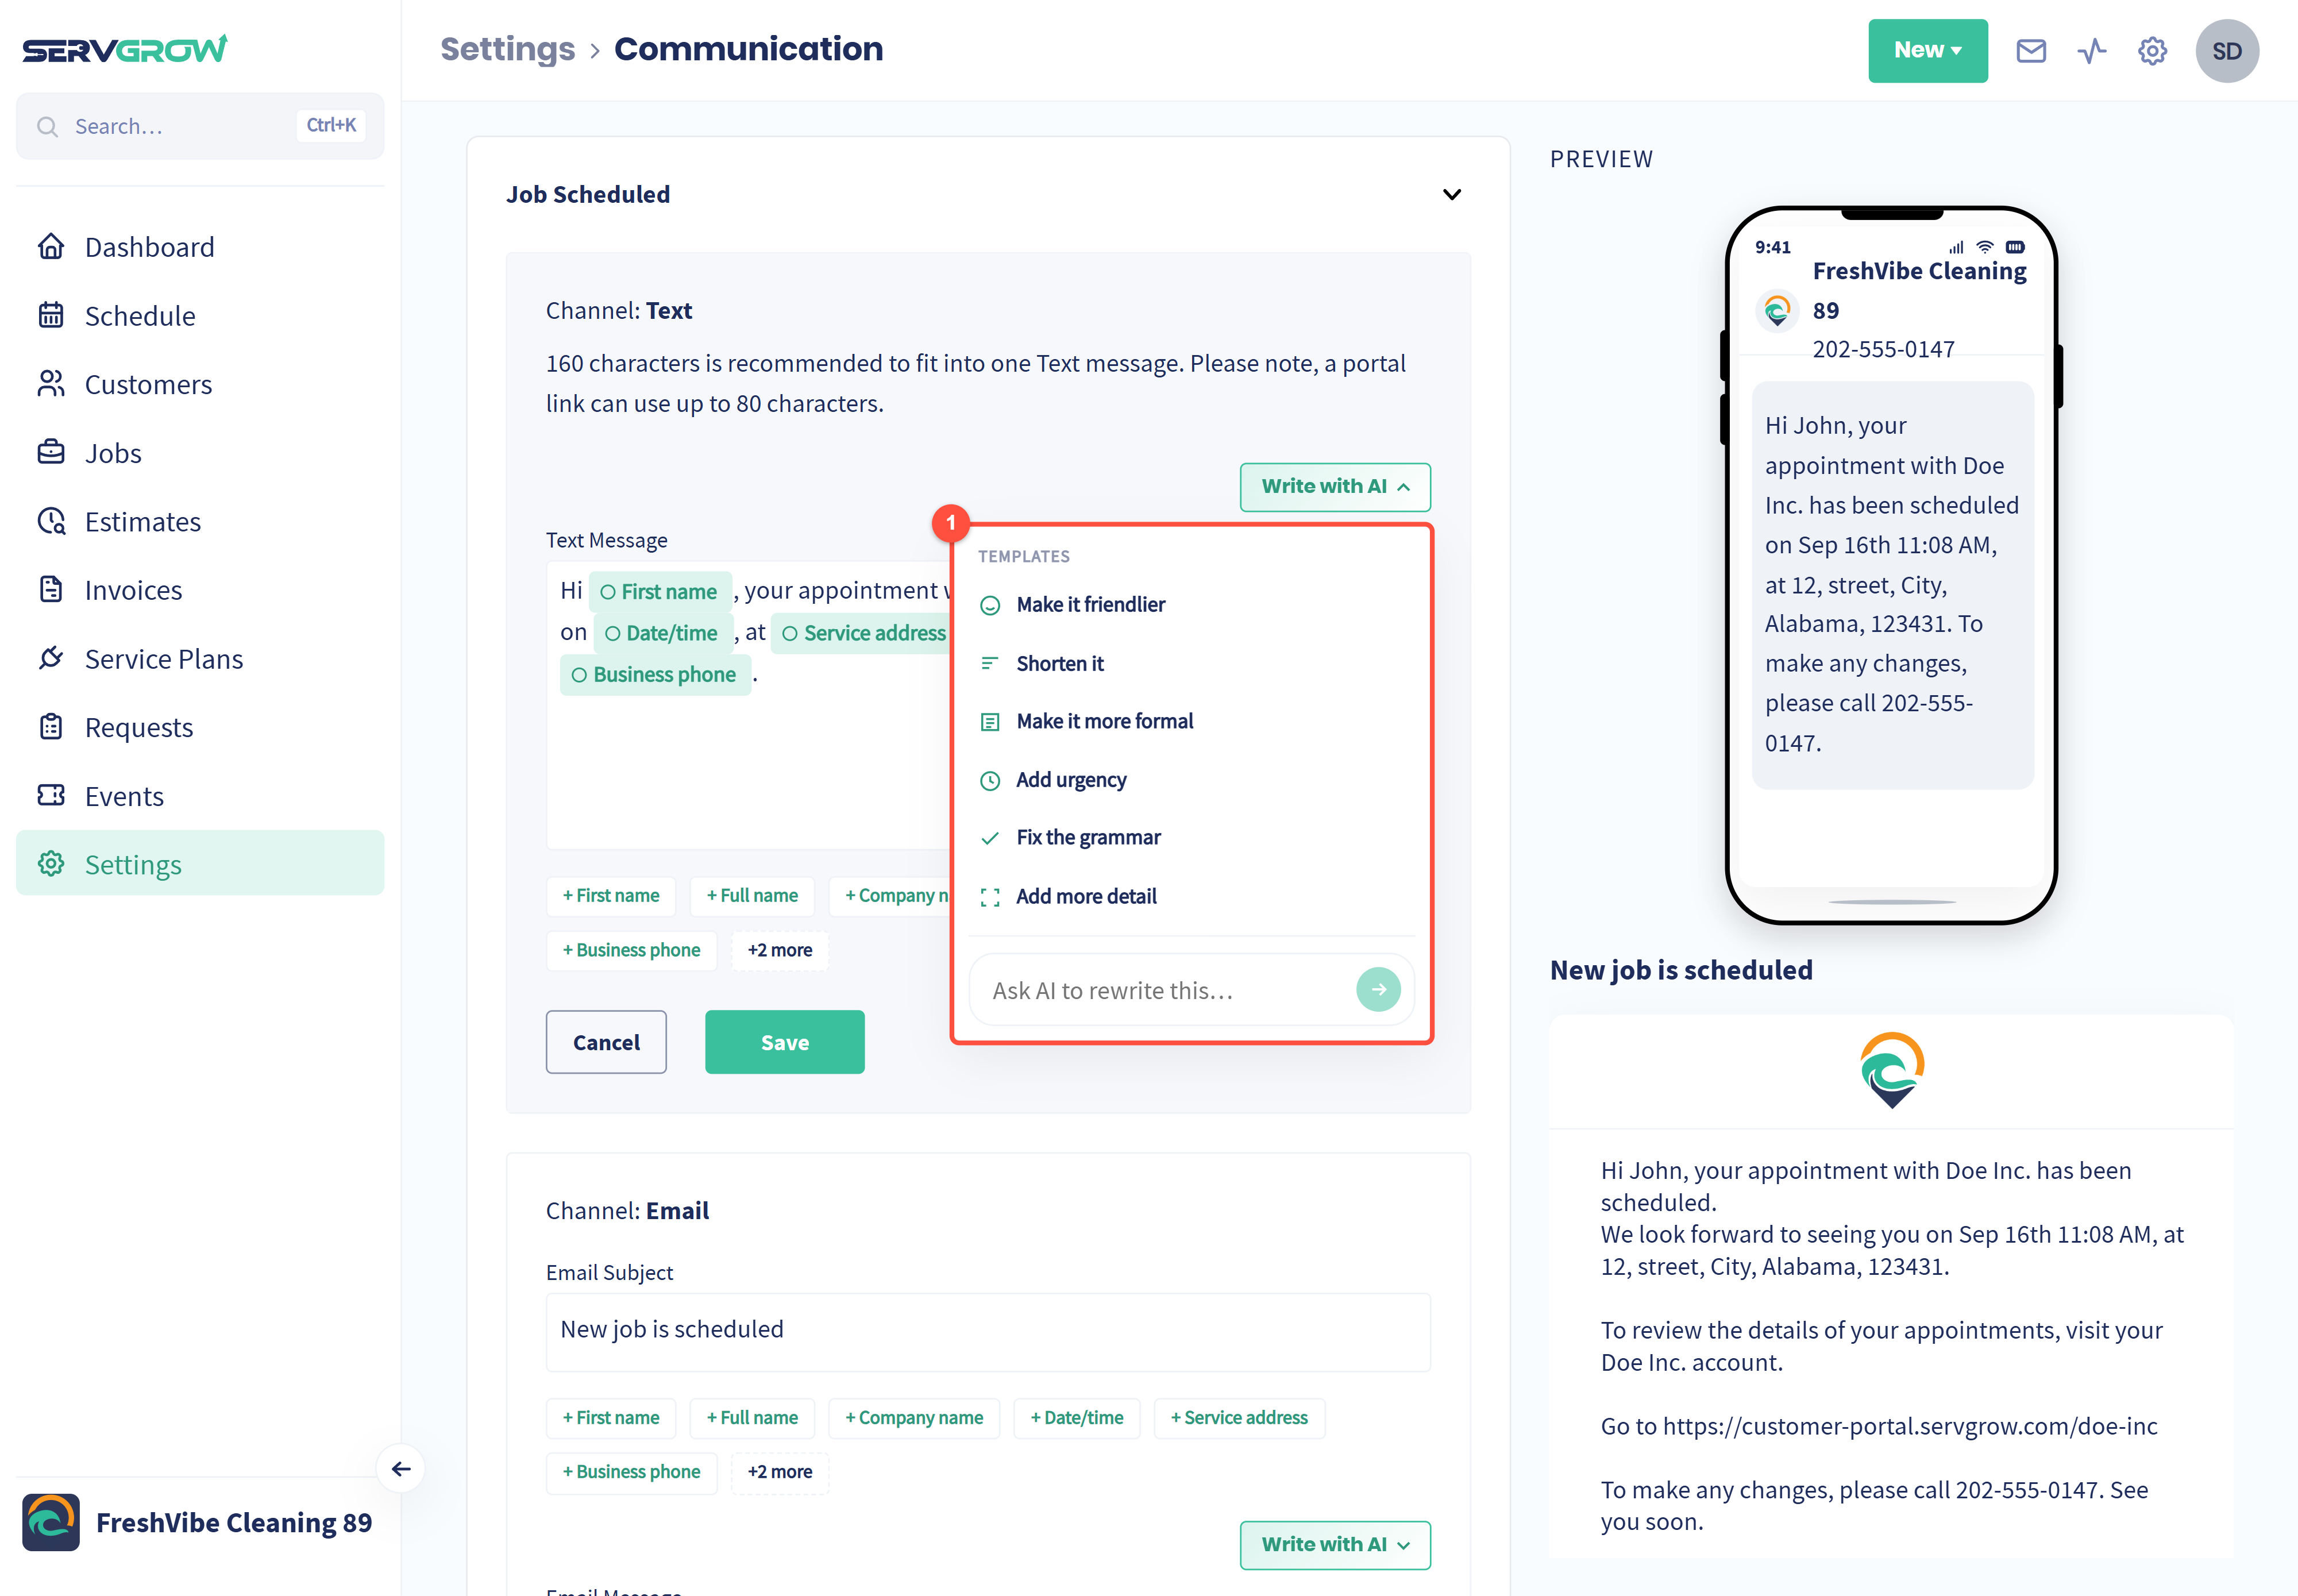
Choose a quick rewrite, such as Make it friendlier, Shorten it, Make it more formal, Add urgency, Fix the grammar or Add more detail. Or type your own instruction in Ask AI to rewrite this. Check the result before you save.
Write the email
Scroll down to Channel: Email. Emails have more room, so use them for the full details.
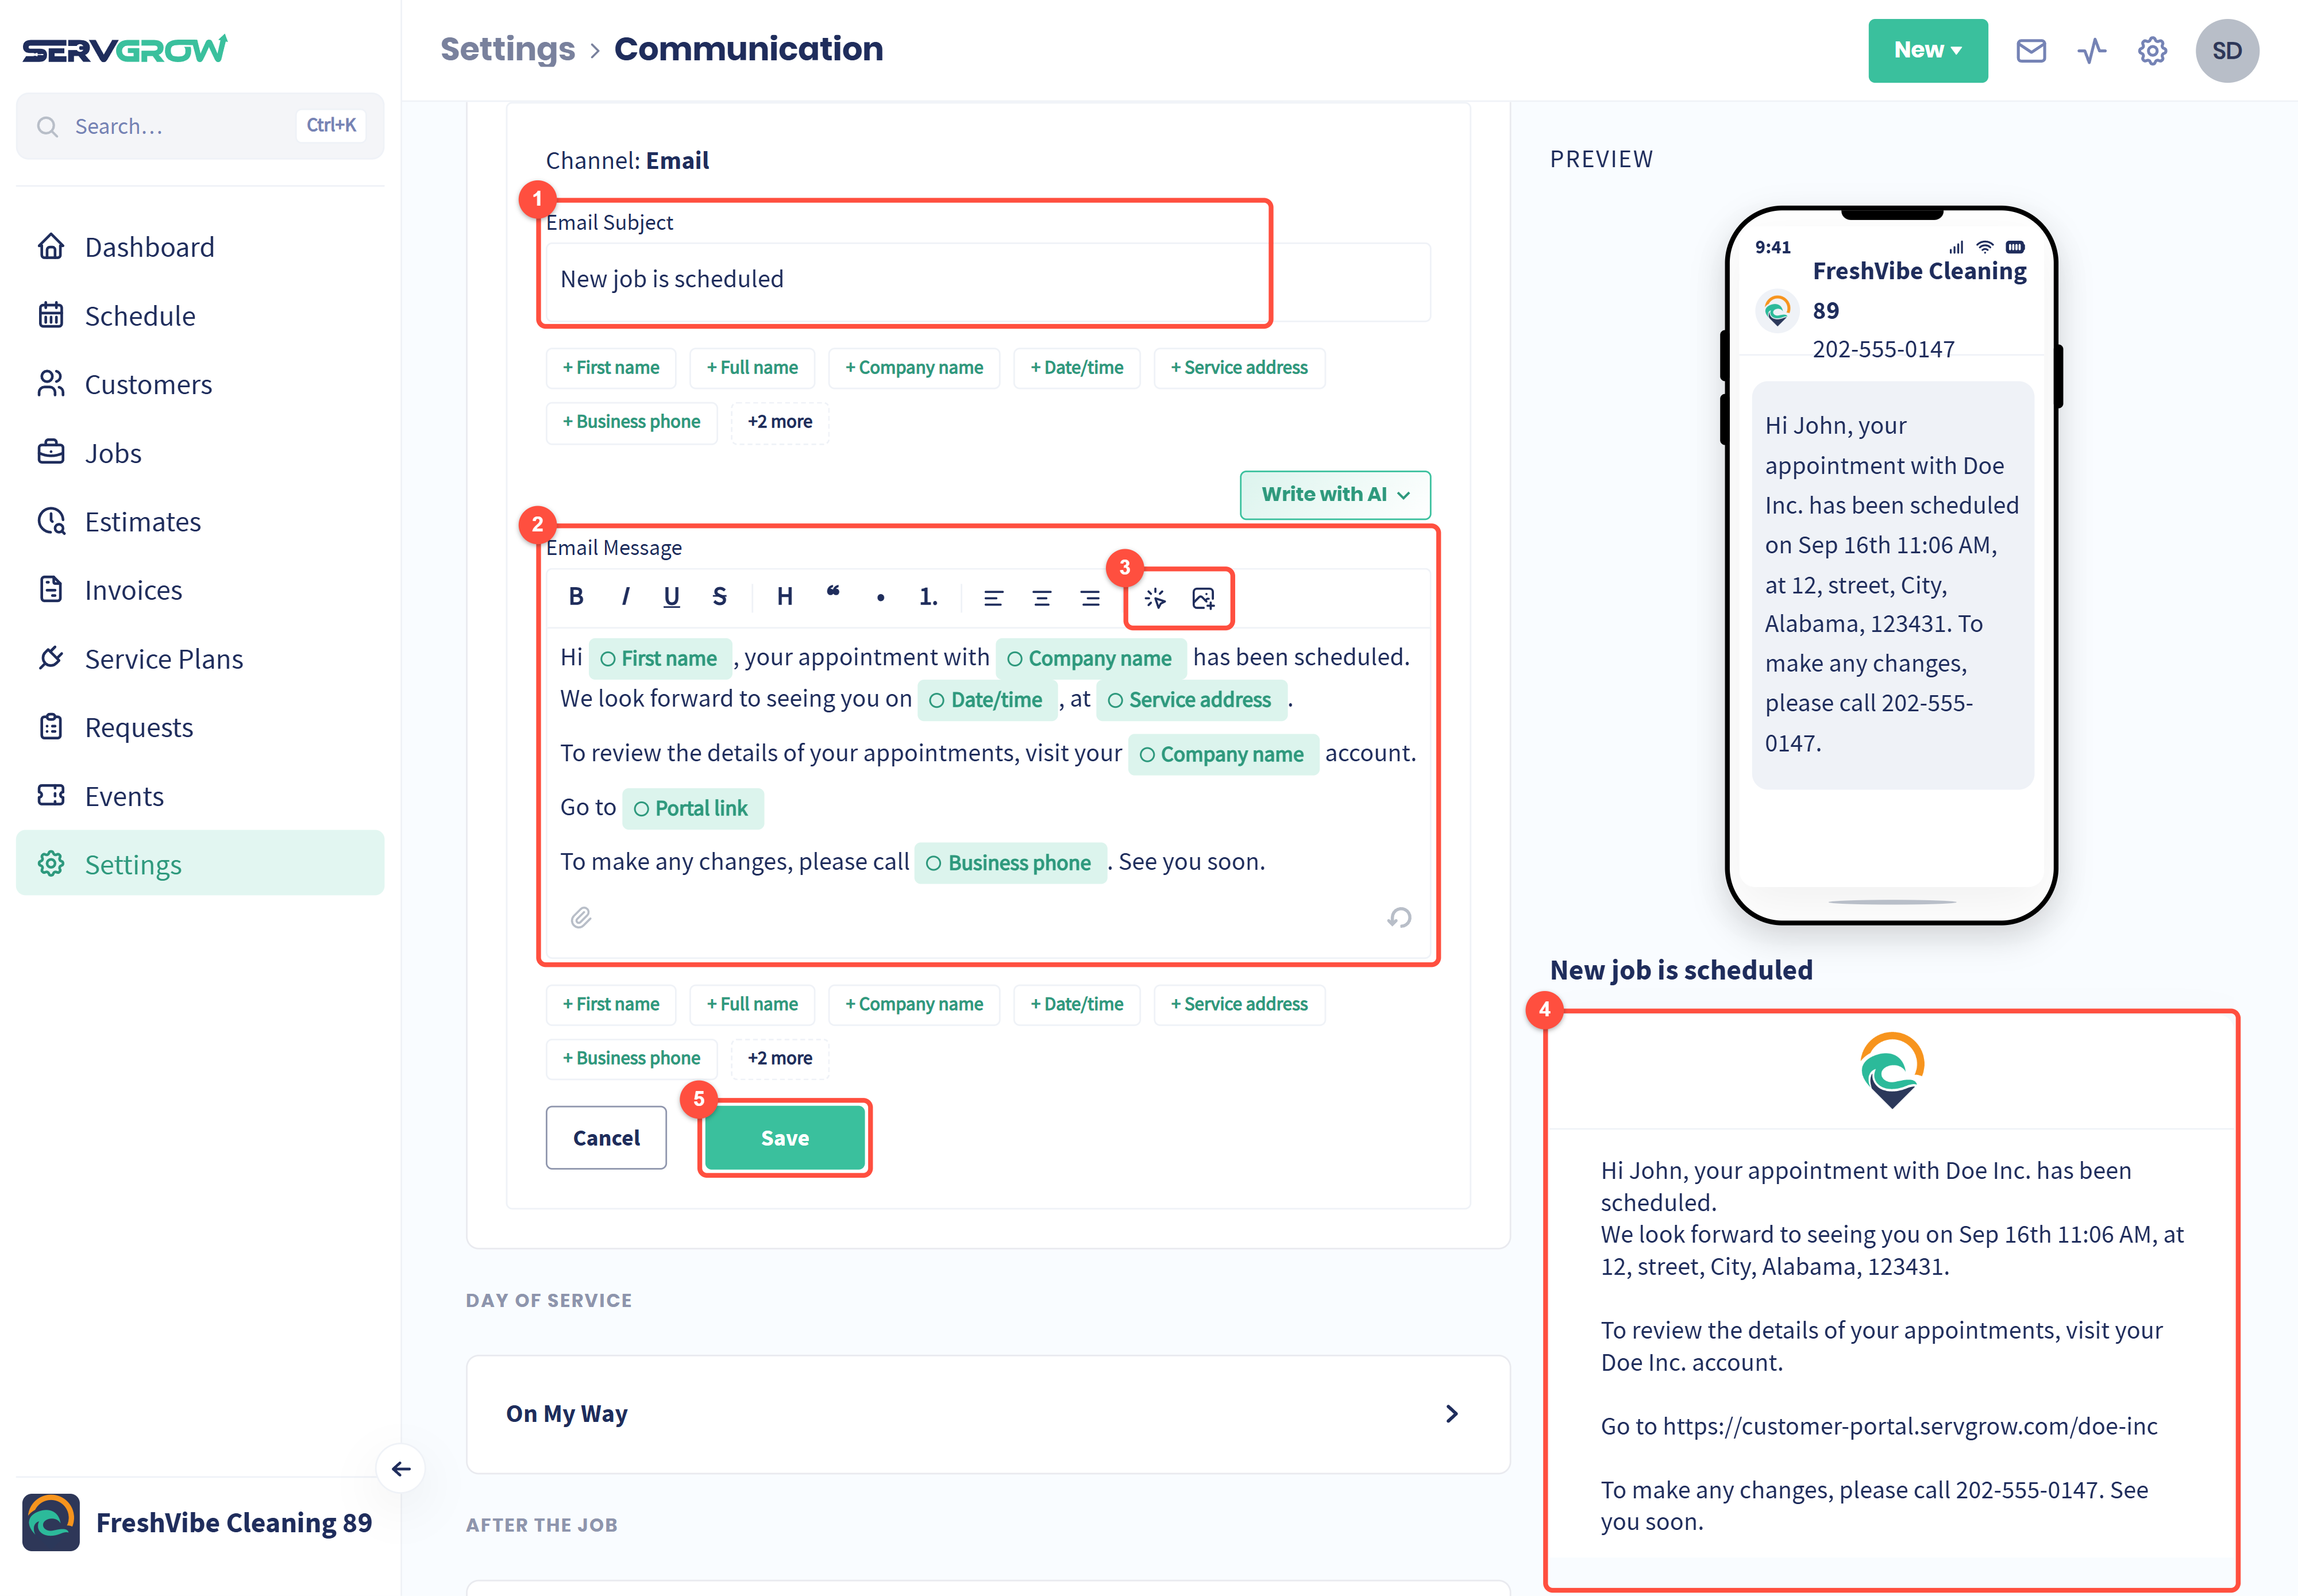
Email Subject: what the customer sees in their inbox. You can use merge fields here too.
Email Message: write and format the email. The paperclip lets you attach a file.
Use the toolbar to add a button that links to your customer portal, or an image such as a photo of your team.
The preview shows the finished email with your logo.
Click Save.
Get paid faster from the invoice email
The Send Invoice email can include a link the customer taps to pay you online.
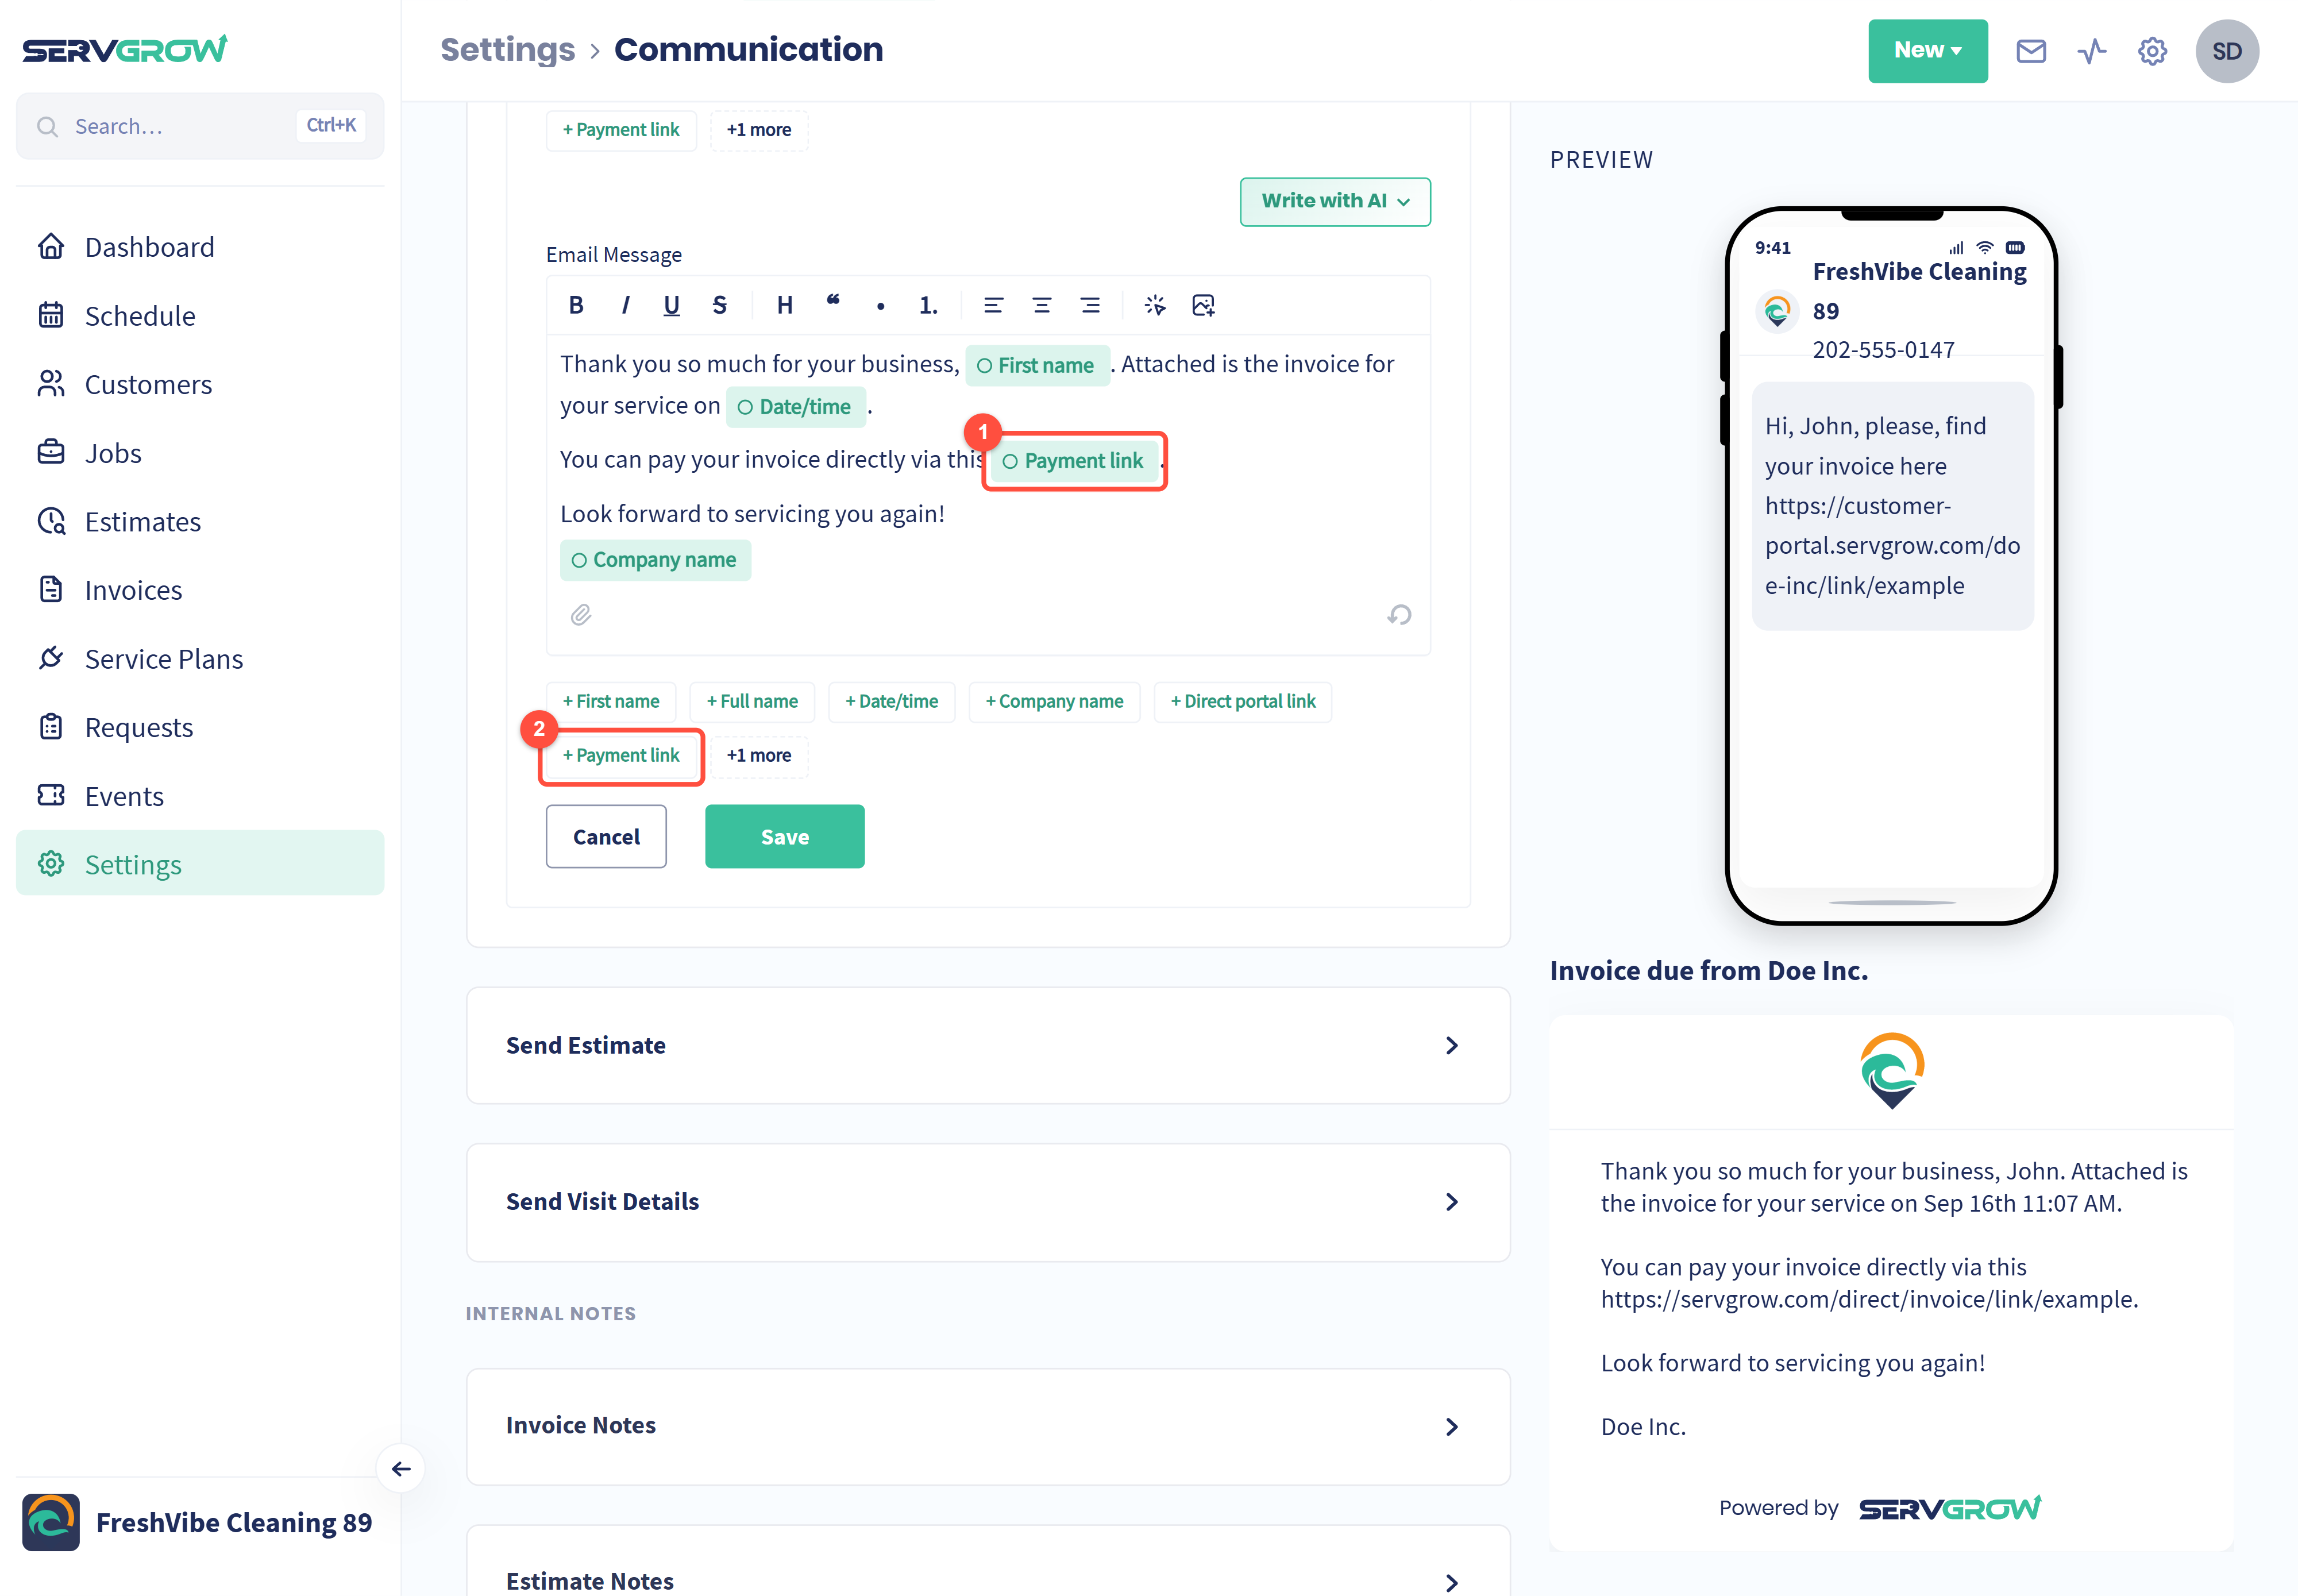
Keep the Payment link field in the message. It turns into a link to that customer's invoice.
If you removed it, click + Payment link to add it back.
The Direct portal link field works the same way, taking the customer straight to the invoice, estimate or visit in your customer portal.
Set the notes on your invoices and estimates
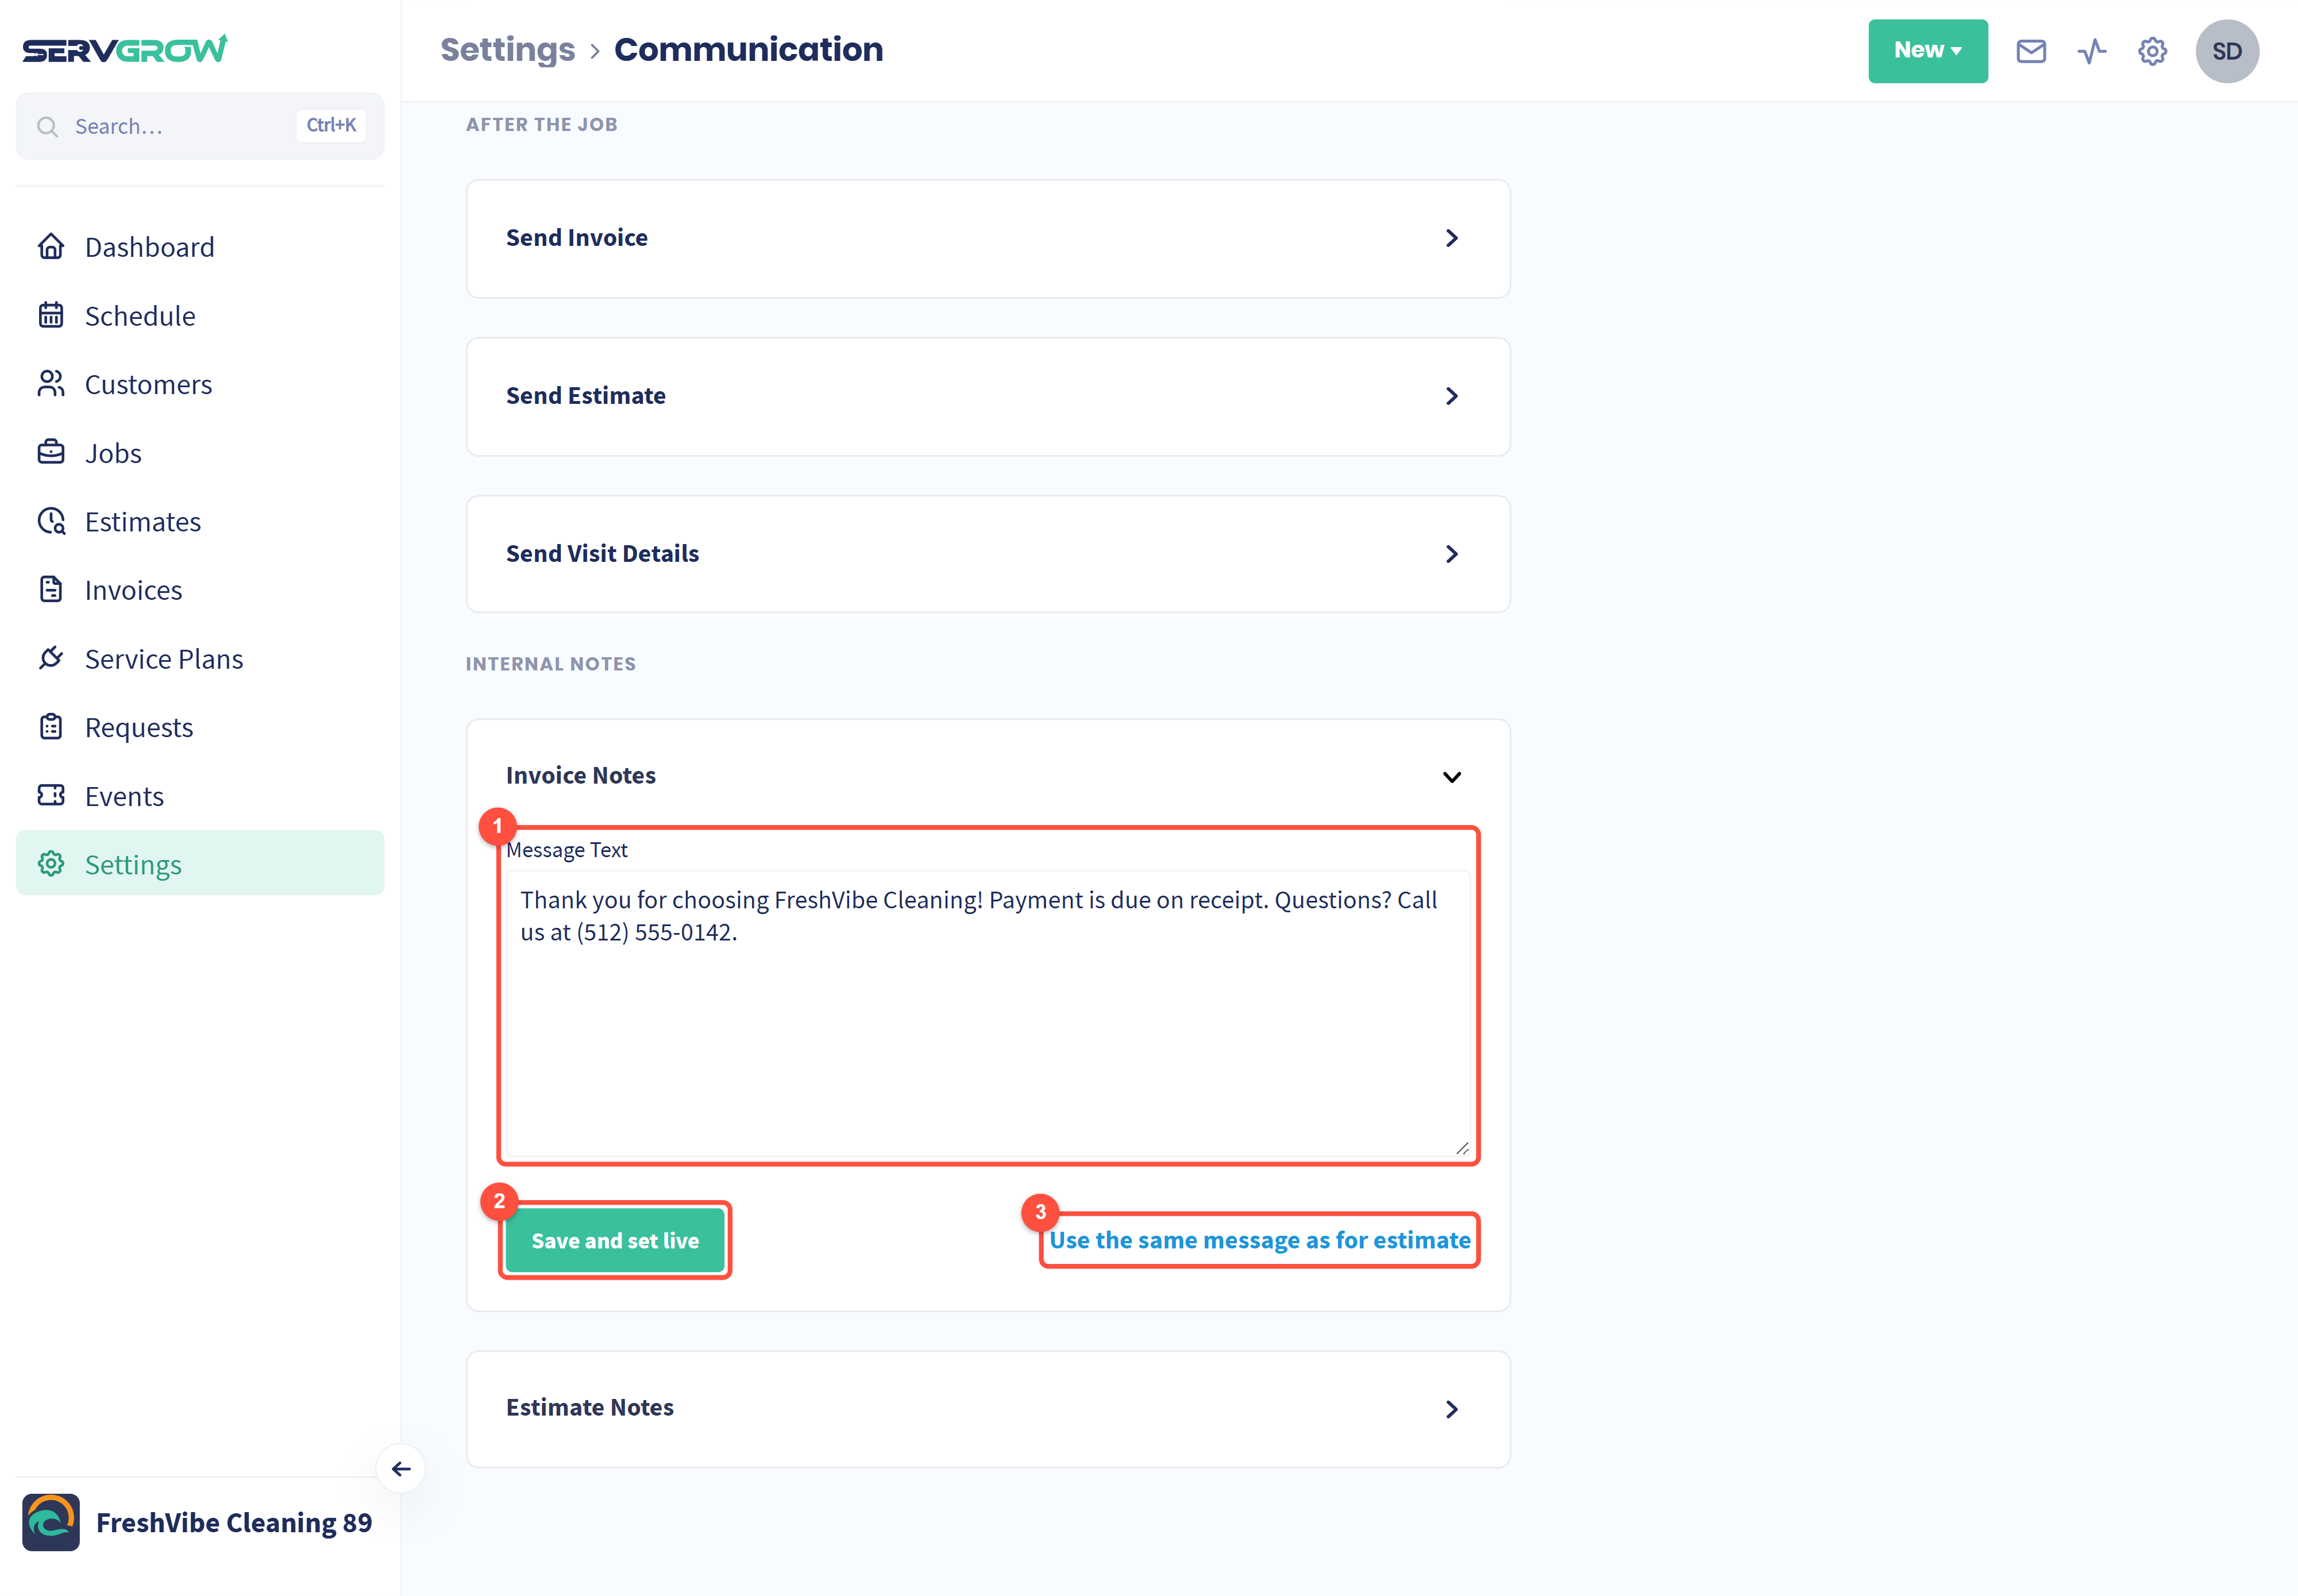
Invoice Notes: type the note you want on your invoices, such as your payment terms, a thank you or your phone number.
Click Save and set live.
Want the same wording on estimates? Click Use the same message as for estimate. Estimate Notes works the same way.
Who gets the messages
You choose each time. When you schedule a job, send an invoice or finish a job, Servgrow asks whether to notify the customer by Email, Text or both. The templates only set what the message says.
Customers can opt out. Each customer's record has Receive Automatic Text Notifications and Receive Automatic Email Notifications. If one is off, that customer does not get those messages. See How to Add a Customer.
Tips for messages customers read
Lead with their name and the date. That is what they are looking for.
Sound like your business. The defaults work, but a message in your own words builds trust.
Test it on yourself. Add yourself as a customer, schedule a test job, and see what arrives.
Related articles