
A new system only pays off once it is set up. The faster your prices, customers, messages and team are in Servgrow, the sooner you can book your first job, send professional estimates and invoices, and get paid online instead of chasing checks.
This guide walks you through setting up your account from scratch, one step at a time, in the order that makes the rest easier. Each step links to a detailed guide if you want to go deeper.
Your setup checklist
Your Dashboard tracks your progress for you.
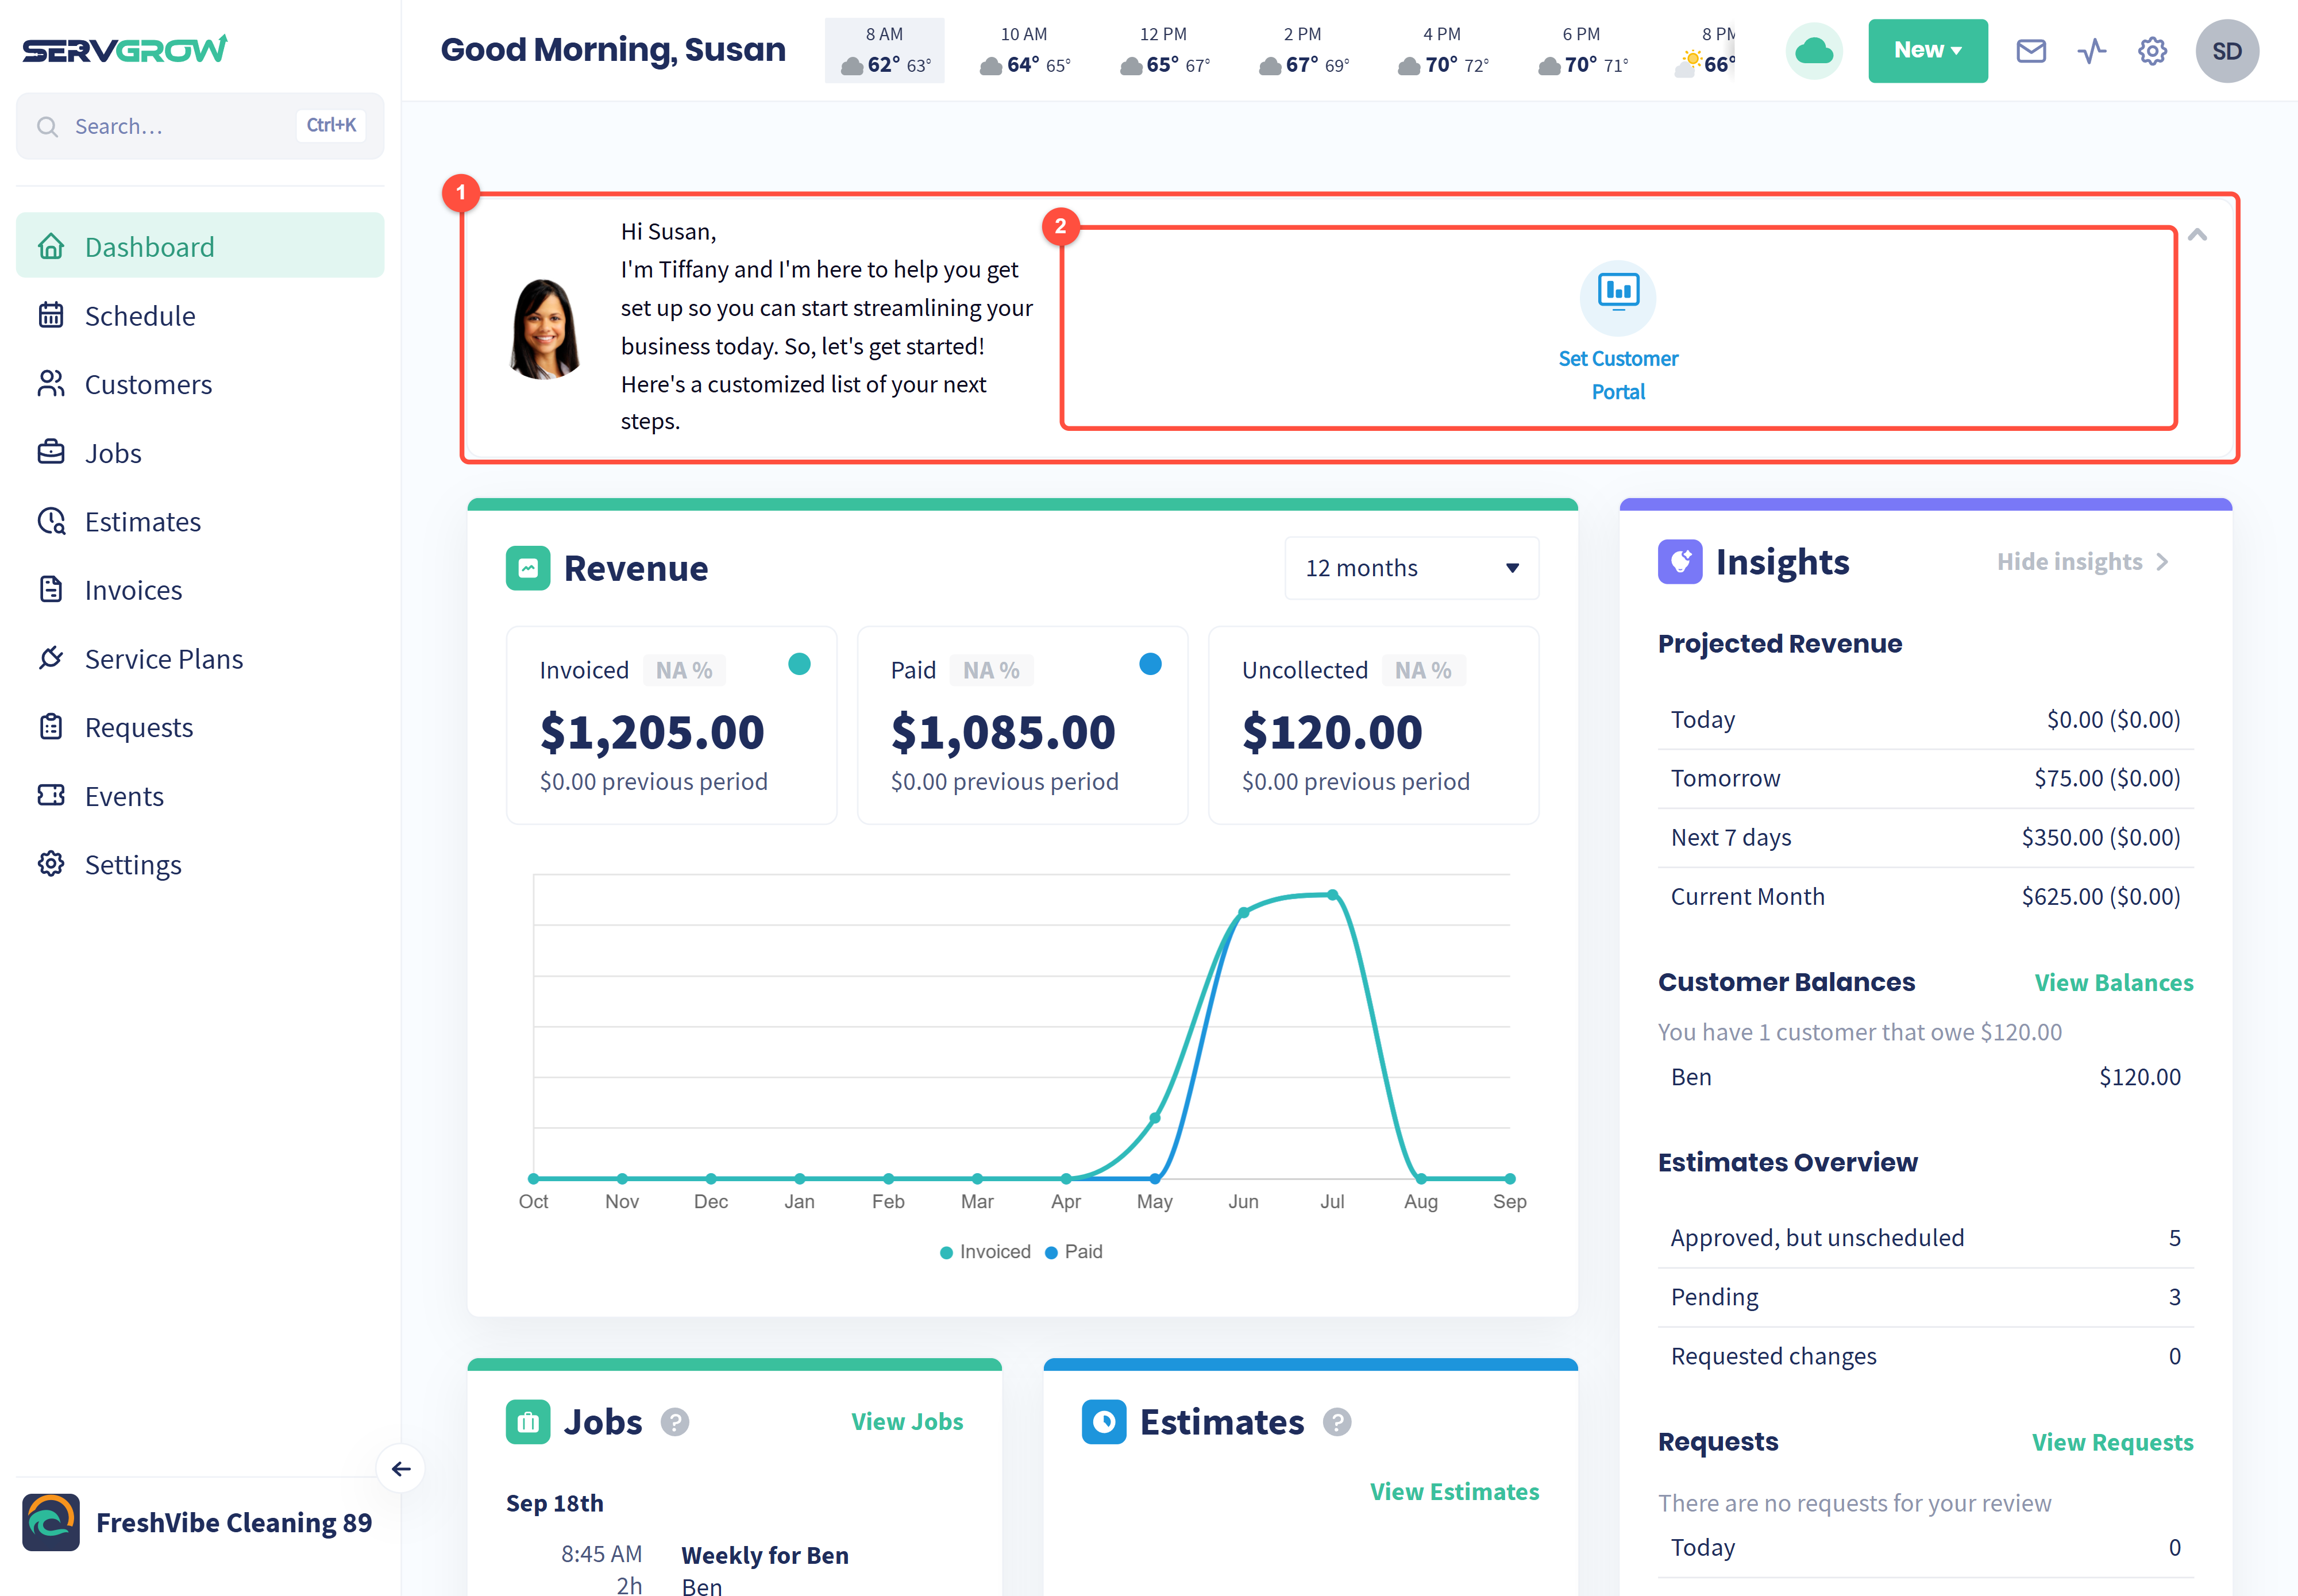
Until your account is fully set up, a card at the top of the Dashboard lists the steps you still have left.
Click a step to go straight to the page where you set it up. Finished steps drop off the list.
The steps below follow the same order, with one extra: adding your team.
Step 1: Set up your Company Profile
Your business details appear on estimates, invoices, texts and emails, so customers see a professional, consistent brand from the first message. Click the gear icon at the top right, then Company Profile.
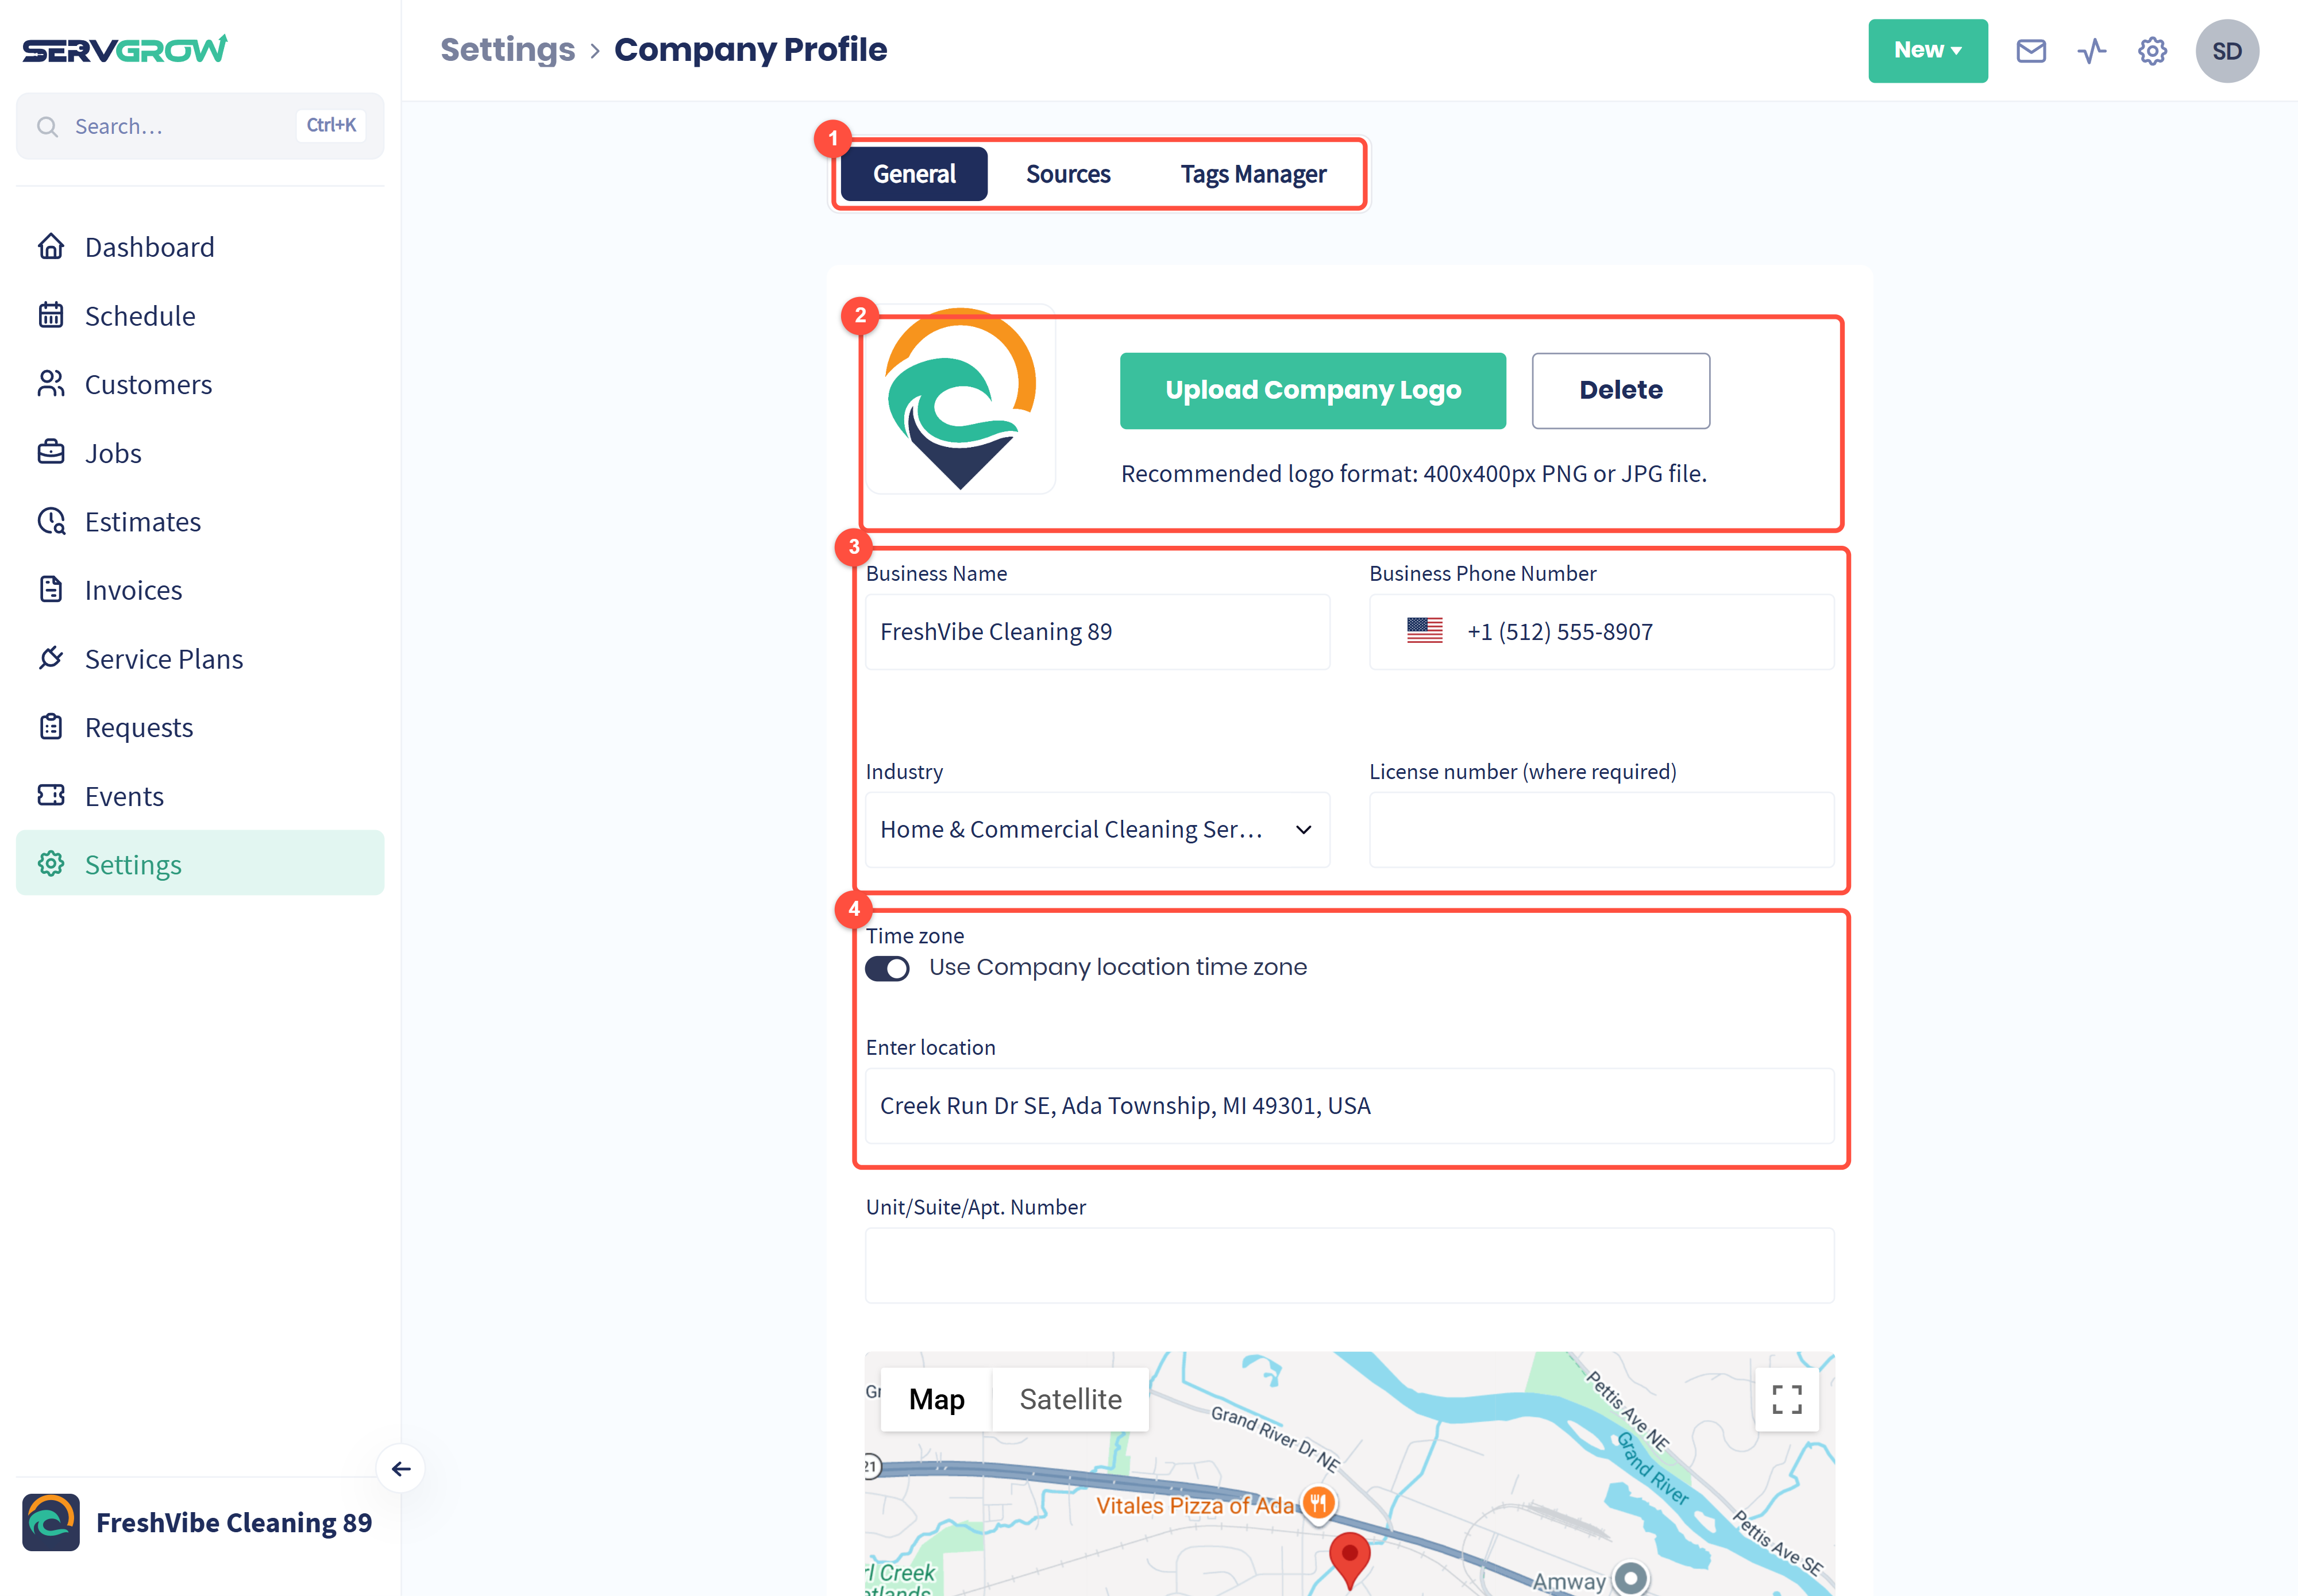
General holds your business details. Sources is your list of lead sources (where customers hear about you), and Tags Manager keeps your tags tidy.
Click Upload Company Logo. A 400x400px PNG or JPG file works best.
Enter your Business Name, Business Phone Number, Industry and, if your trade needs one, your License number.
Enter your business location and keep Use Company location time zone on, so every job is booked in the right time zone.
Scroll down to add your service area radius, support email, website and a short business profile, and set your working days and hours. As soon as you change something, a bar tells you that you have unsaved changes: click Save changes. See How to Set Up Your Company Profile.
Step 2: Accept online payments
Customers who can pay by card pay faster than customers who mail a check, and saved cards make automatic billing possible. Click the gear icon, then My Money, and connect your bank account to Servgrow Payments. Verification and approval can take 3 to 5 business days, so start this early.
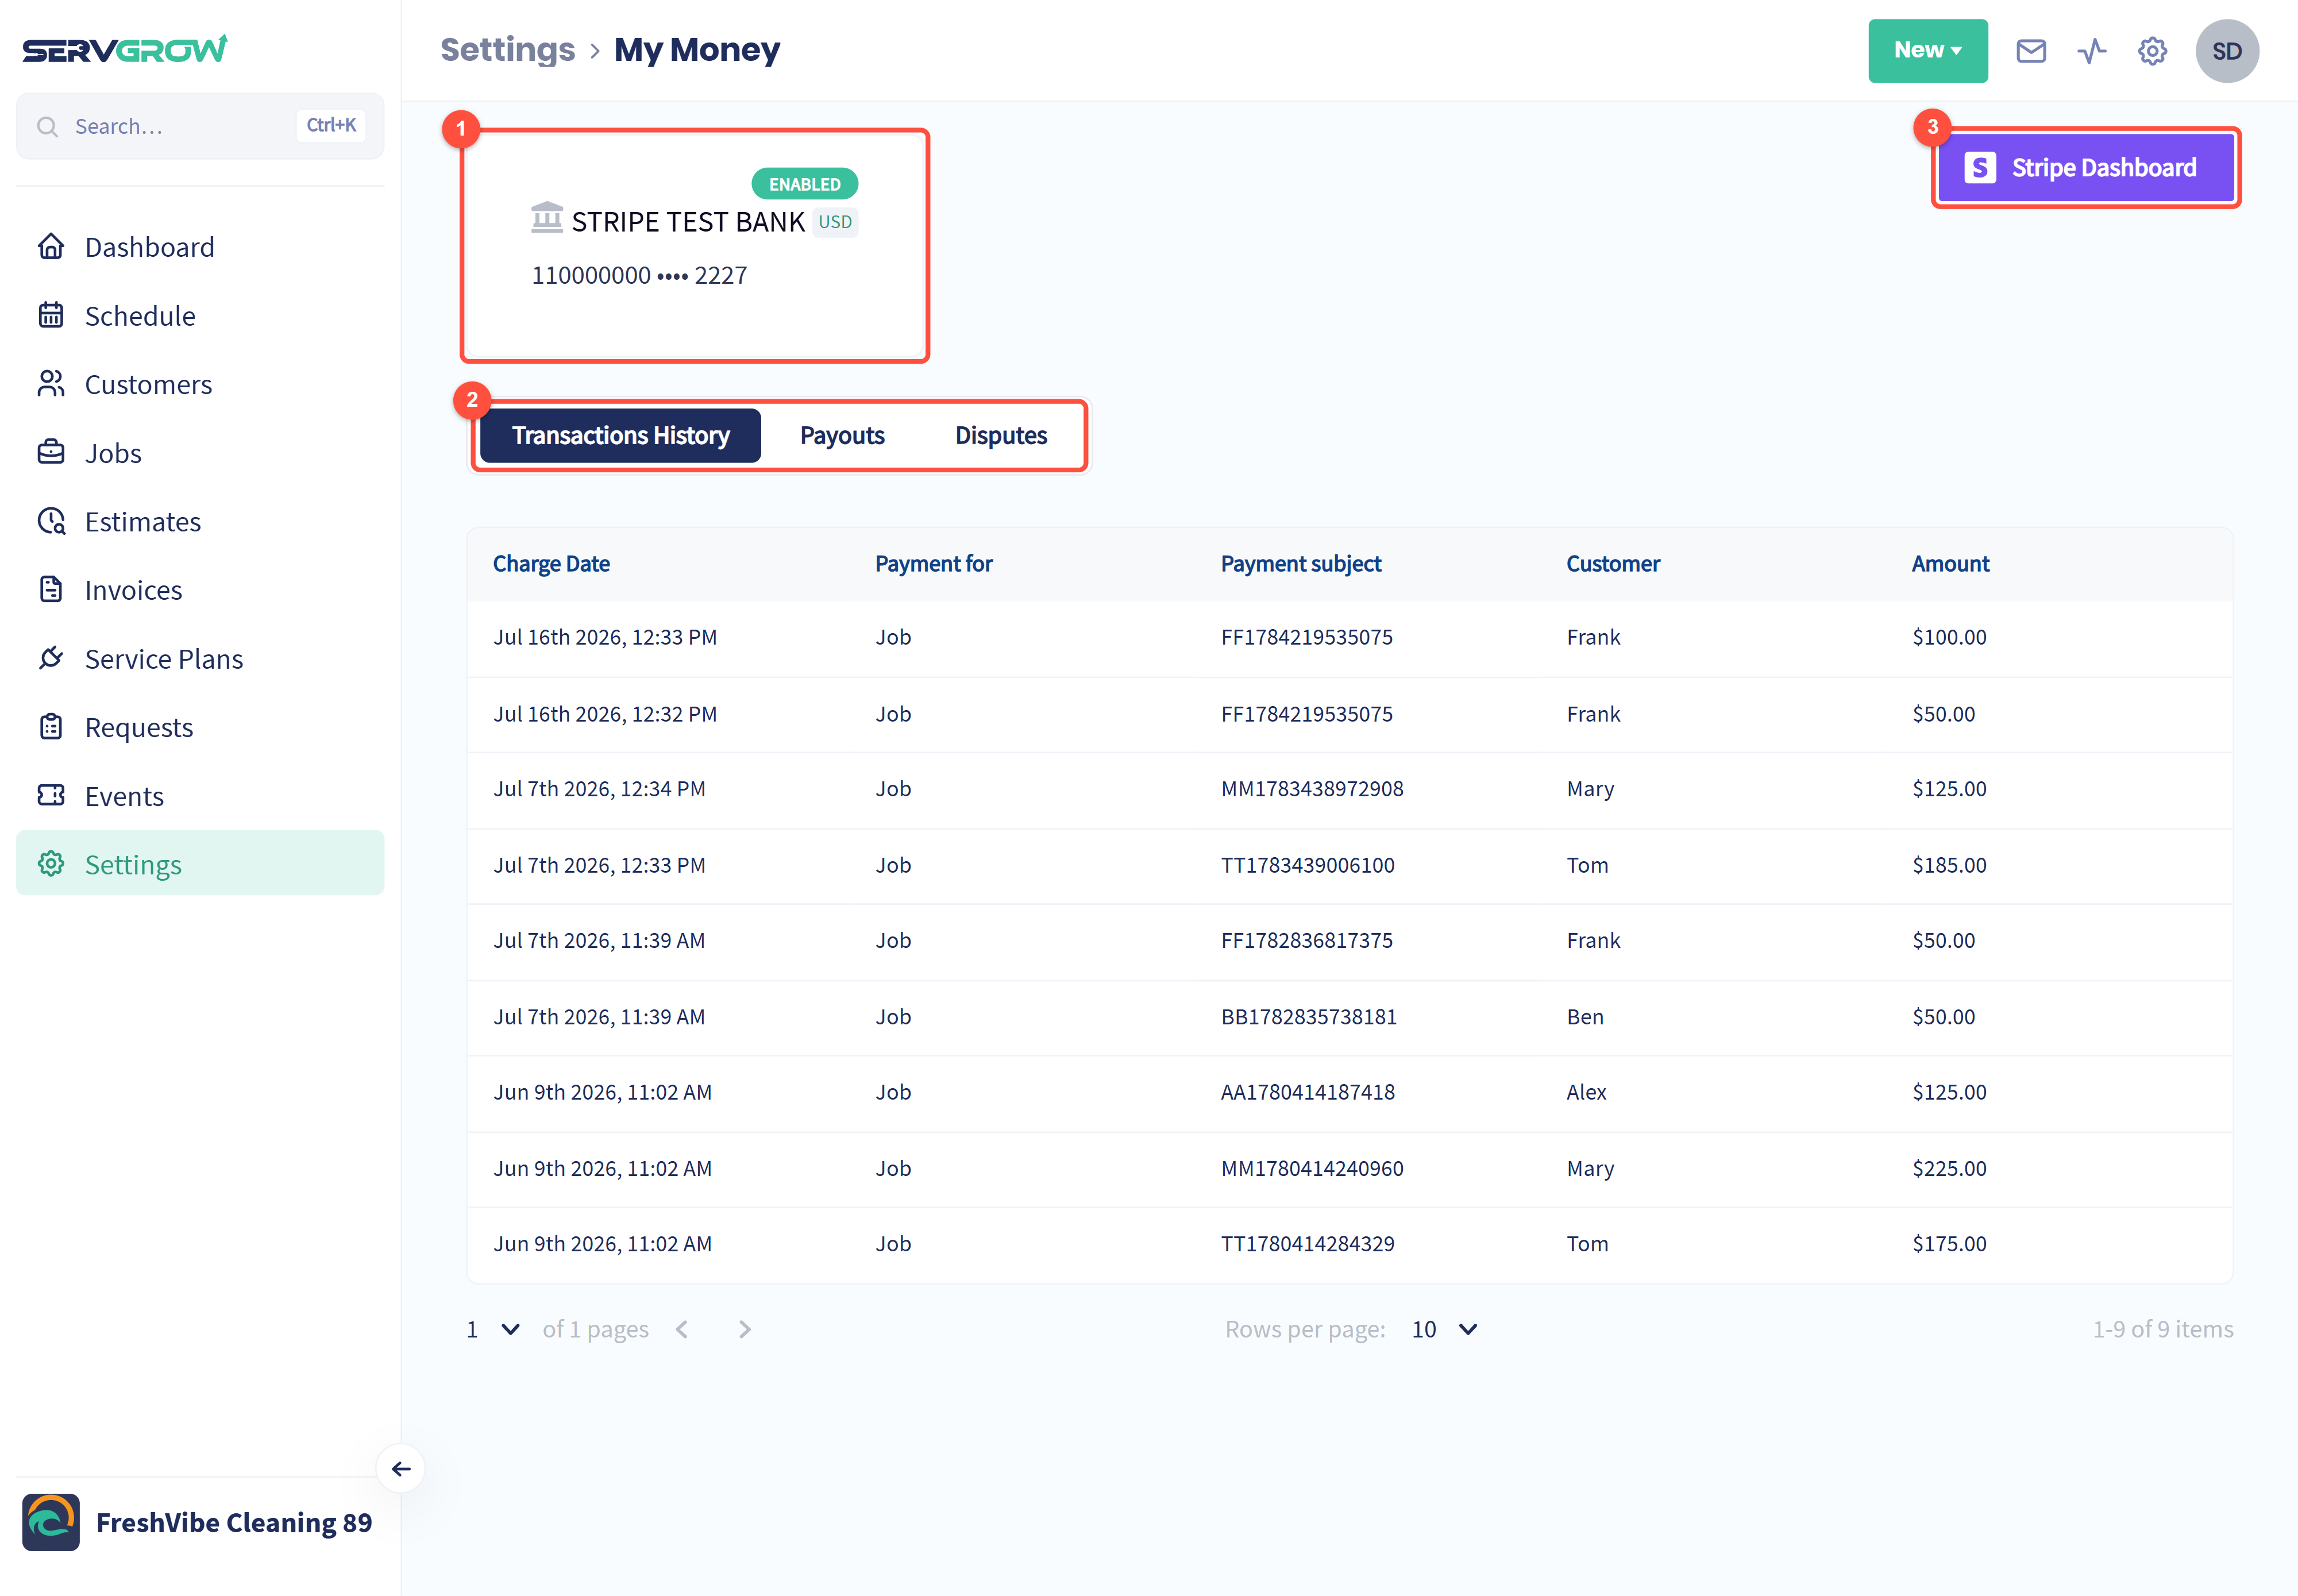
Once connected, your bank account shows here with an Enabled badge.
Transactions History, Payouts and Disputes show every card payment, when money reaches your bank and any payment a customer has disputed.
Stripe Dashboard opens your payment account for more detail.
Step 3: Add your services and prices
With your services and prices saved once, you can build jobs, estimates and invoices in a few clicks instead of typing prices every time, and your whole team charges the same price. Click the gear icon, then Price Book.
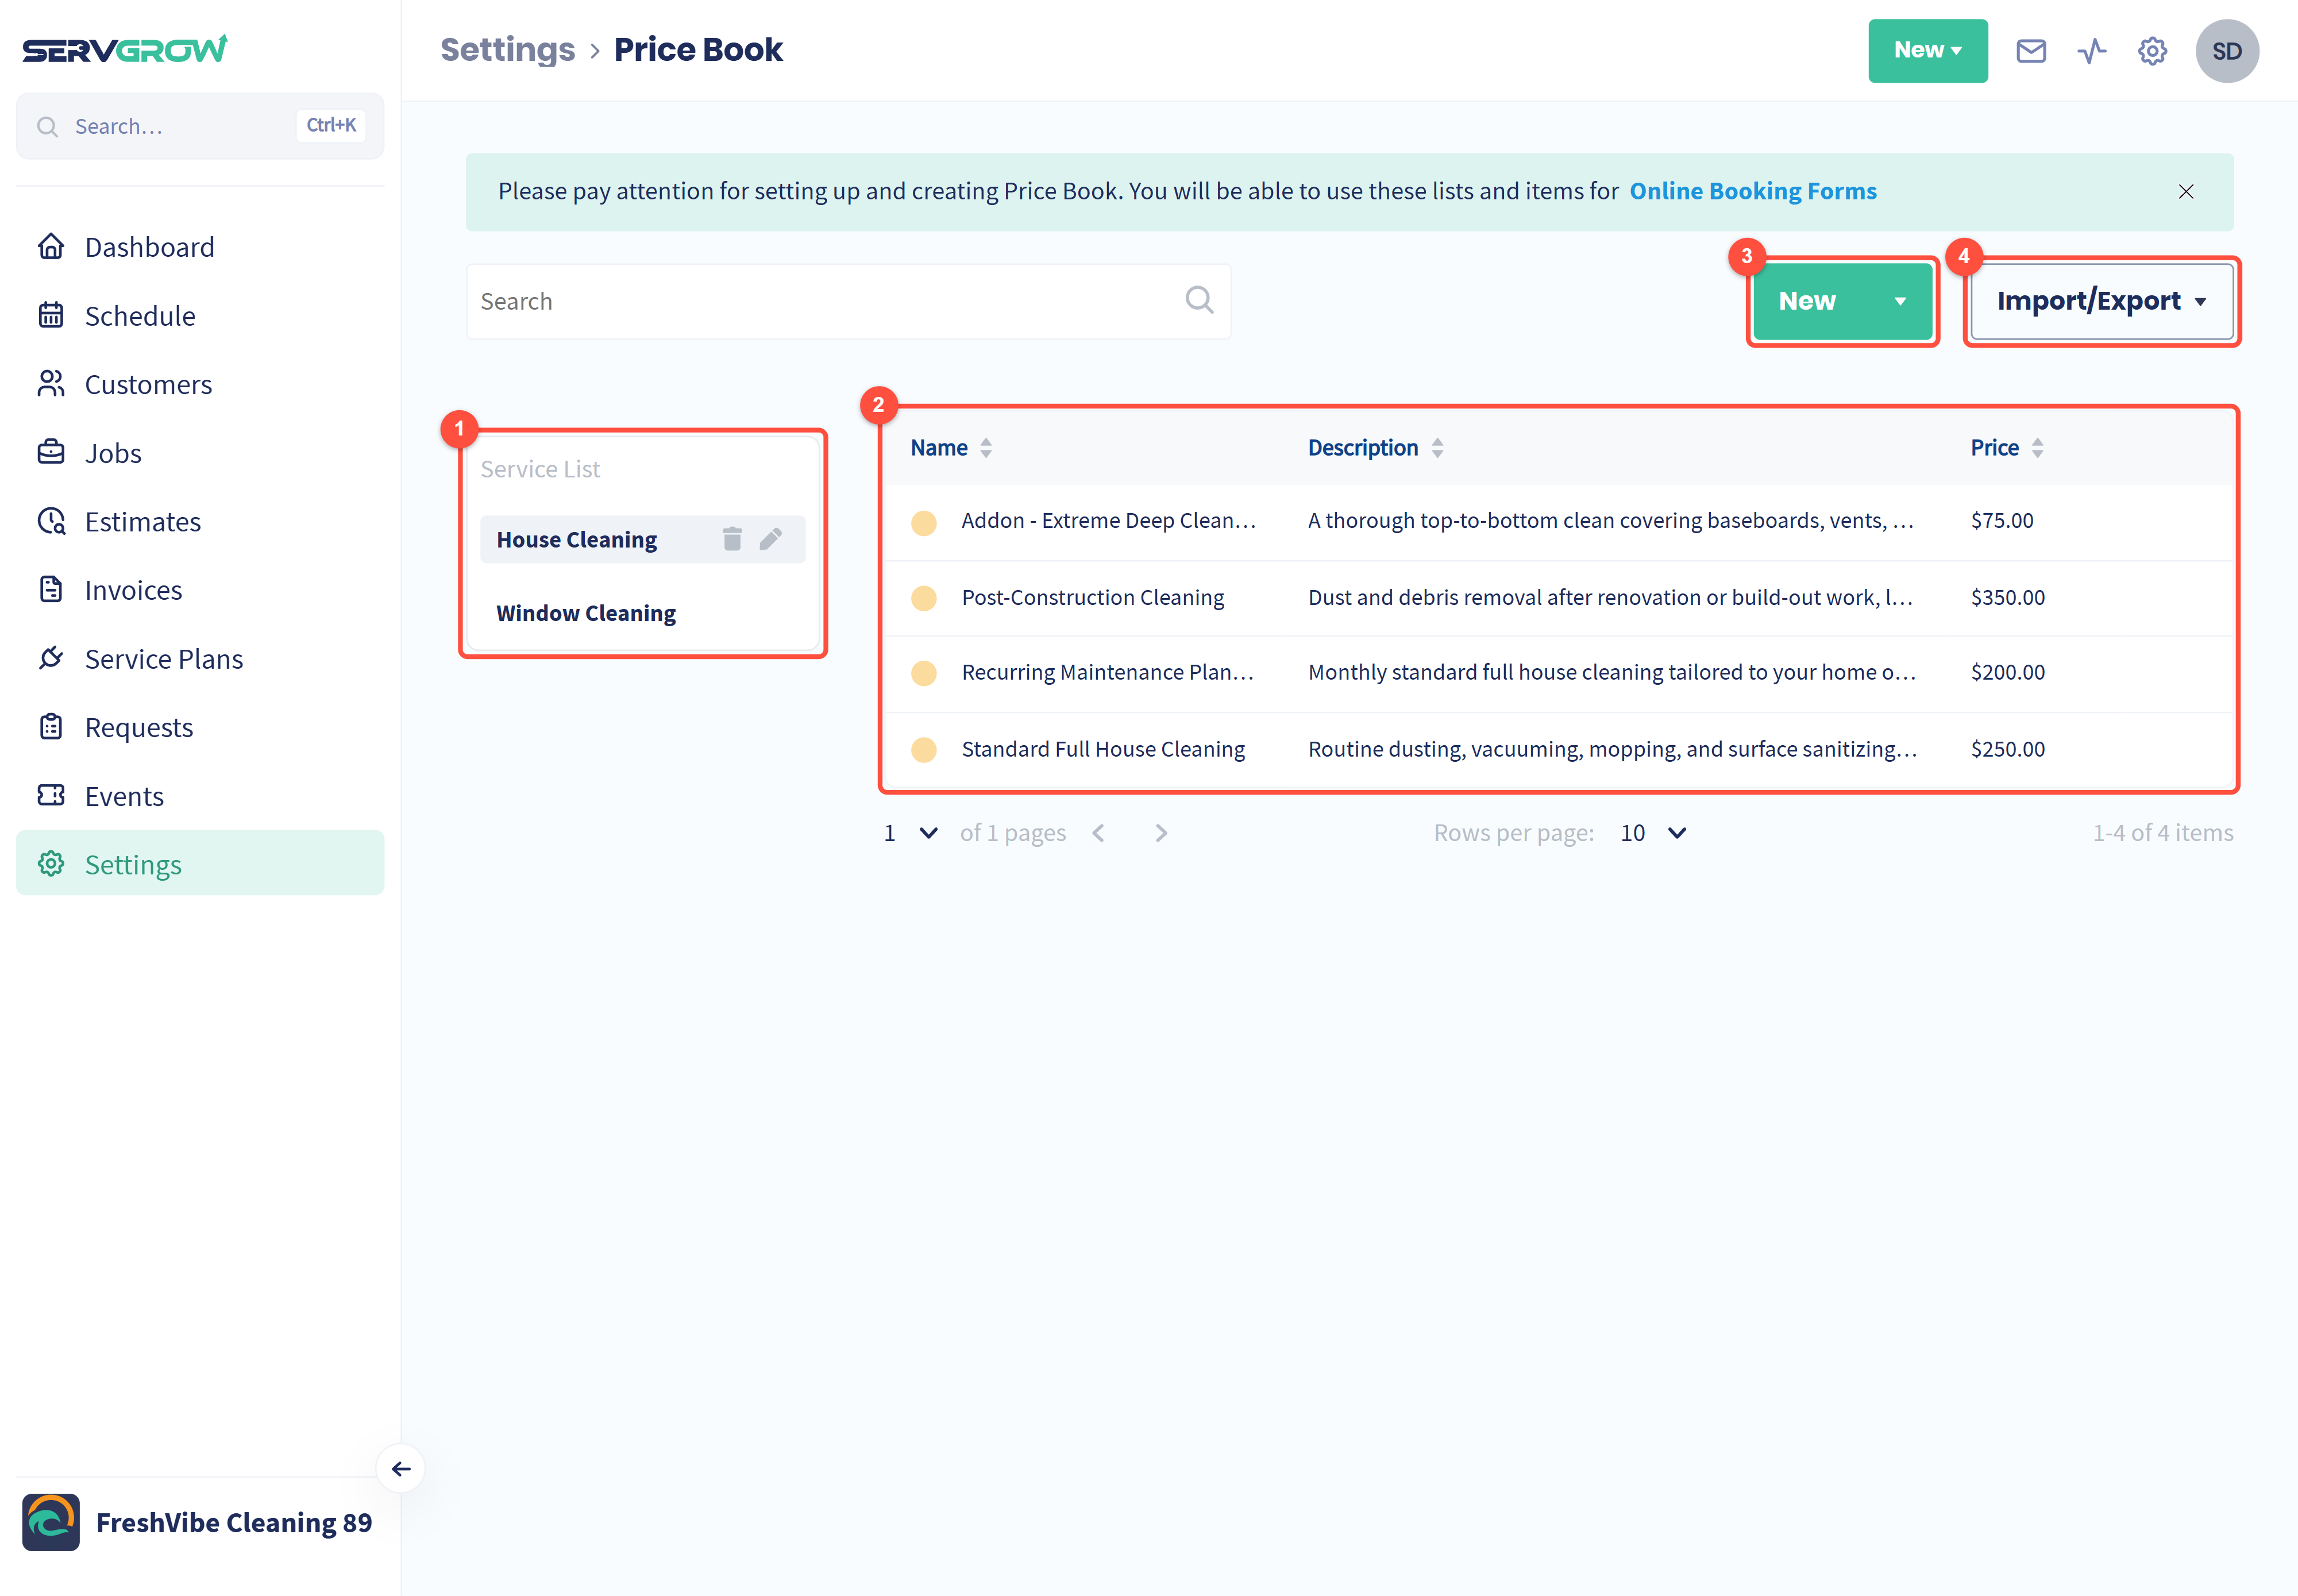
Group your services into lists, such as House Cleaning and Window Cleaning.
Each service has a name, description and price.
Click New to add a list or a service.
Already have a price list in a spreadsheet? Use Import/Export.
Your Price Book also feeds your Online Booking form. See Price Book: Set Your Services and Prices Once, Then Quote and Invoice in Seconds.
Step 4: Add or import your customers
Your existing customers are your easiest repeat business. Having them in Servgrow means every job, estimate, invoice and message is one click away. Click Customers in the left menu.
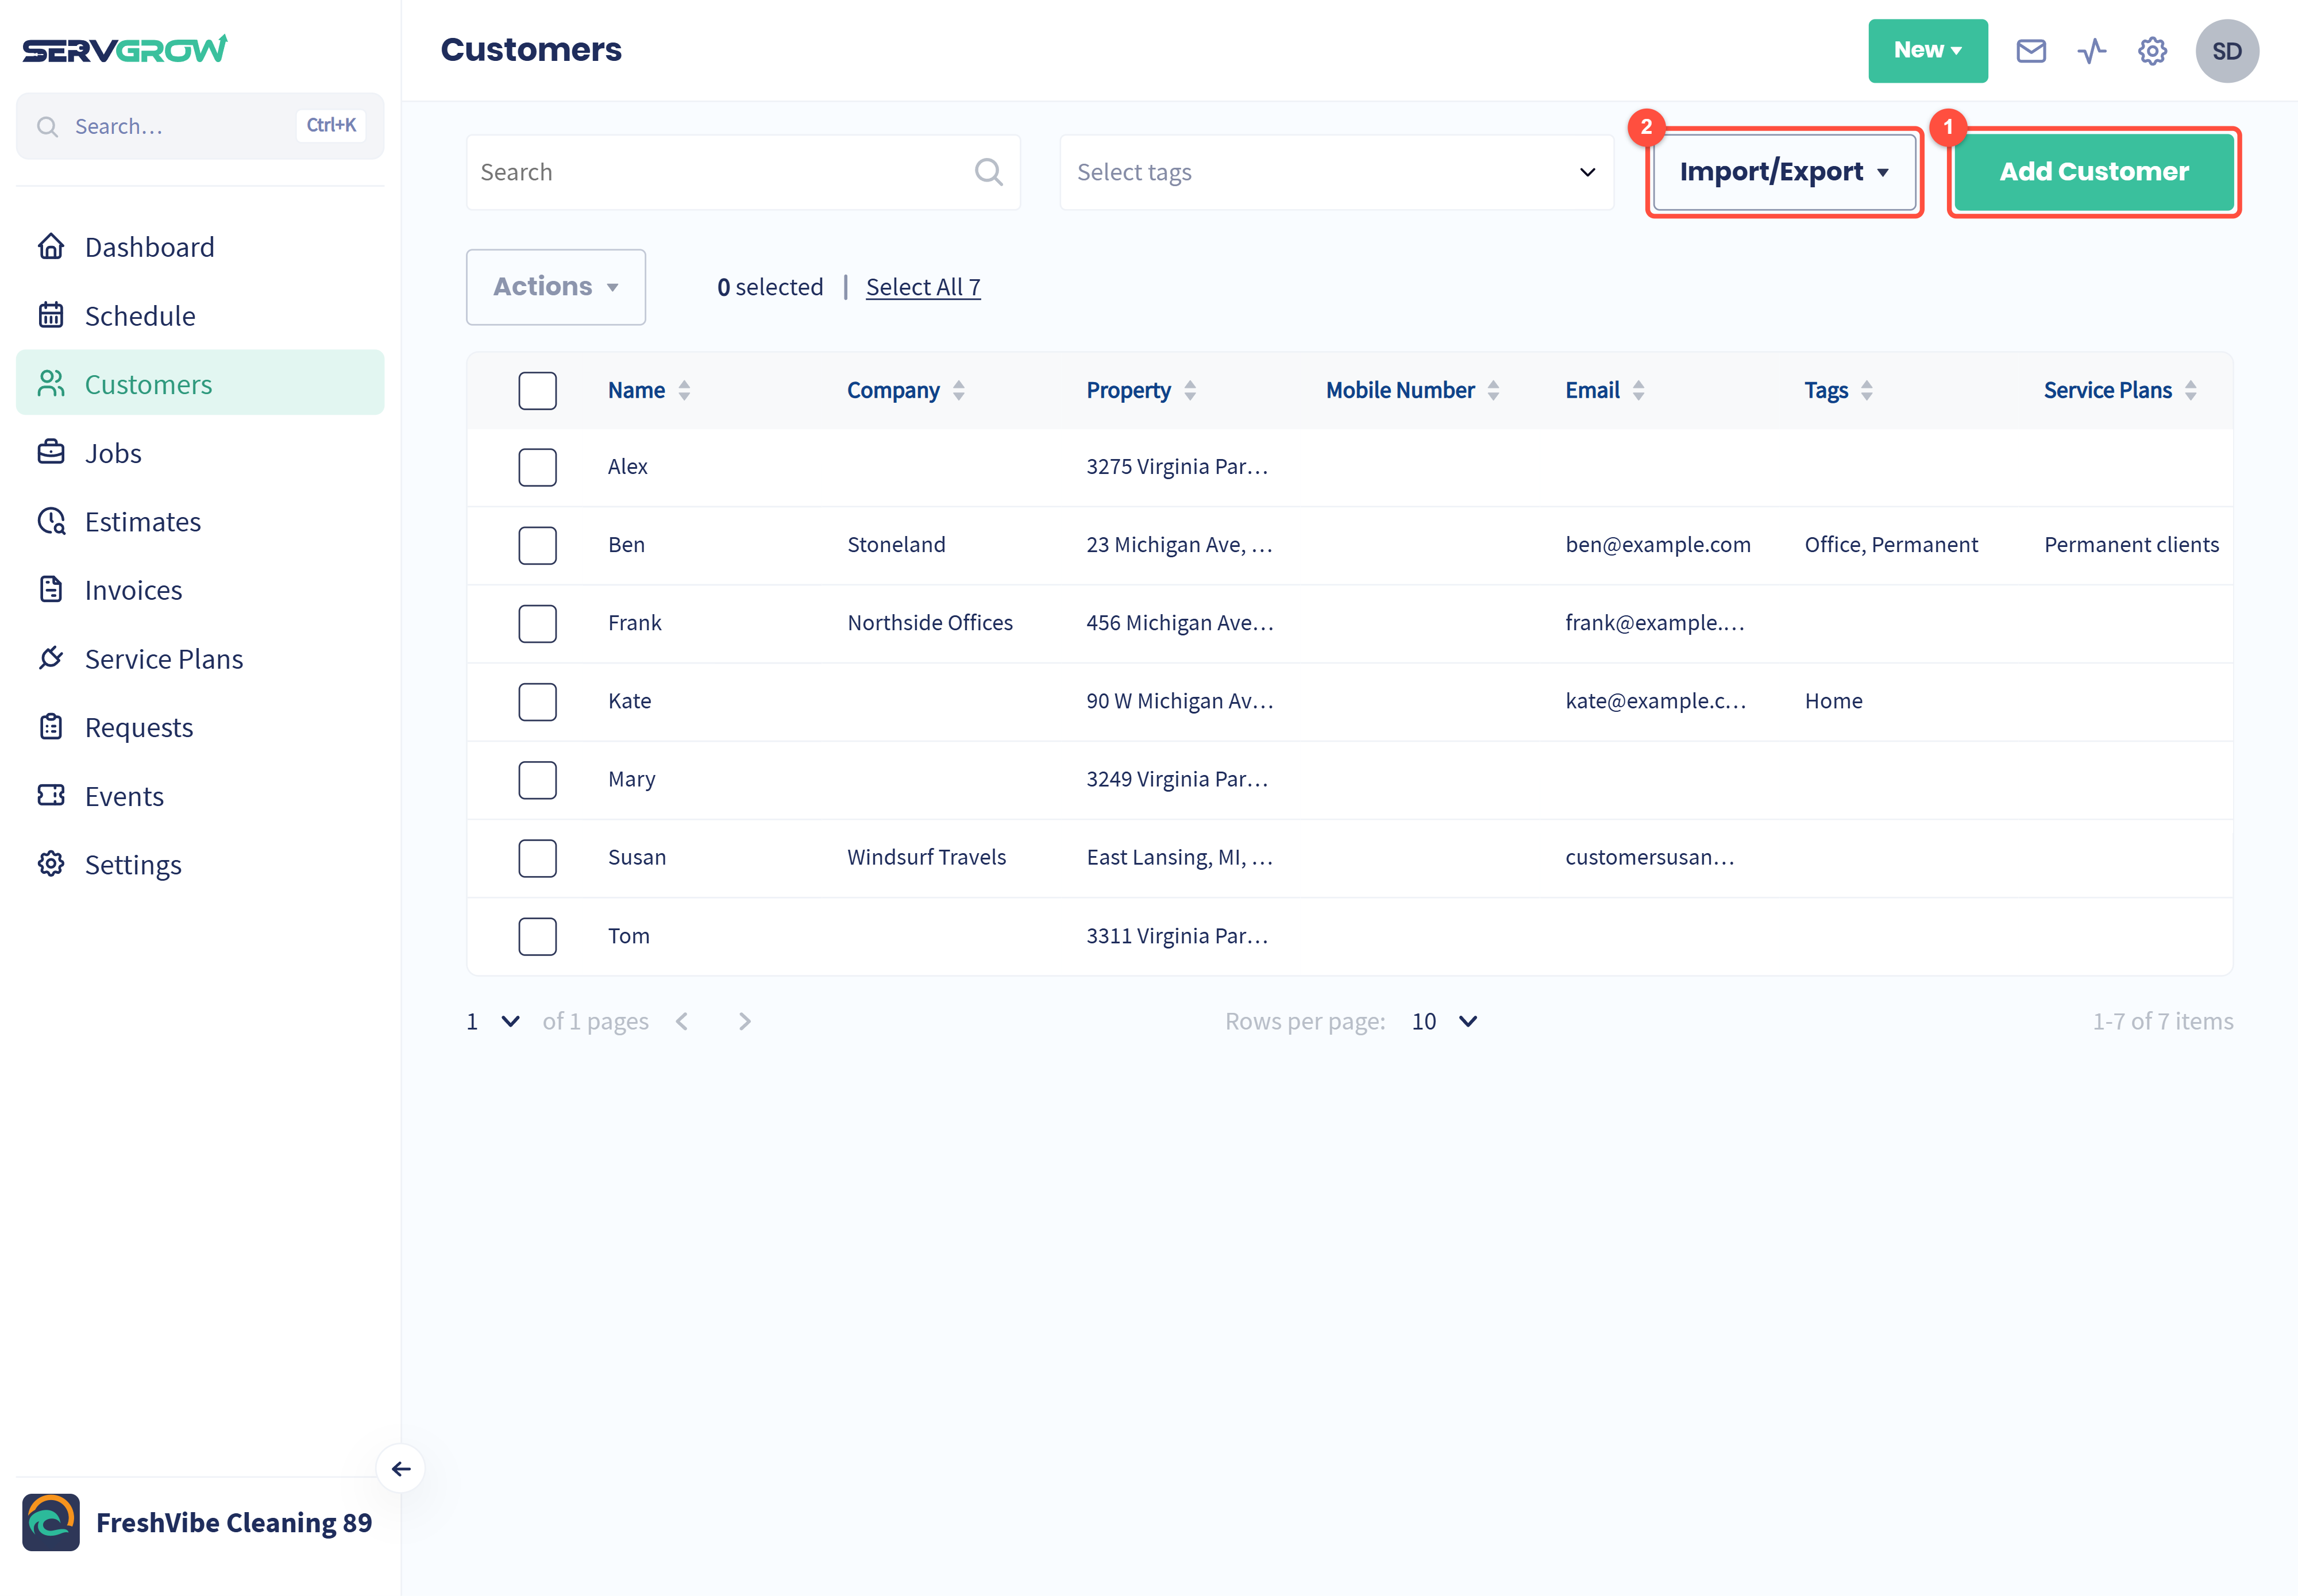
Click Add Customer to add customers one at a time.
Moving from another system or a spreadsheet? Click Import/Export to bring your whole list in at once.
See How to Add a Customer: Keep Every Detail in One Place and How to Import or Export a Customer List.
Step 5: Set up your automatic texts and emails
Automatic messages keep customers informed before, during and after every visit without anyone on your team typing a word. Fewer no-shows, fewer "when are you coming?" calls. Click the gear icon, then Communication.
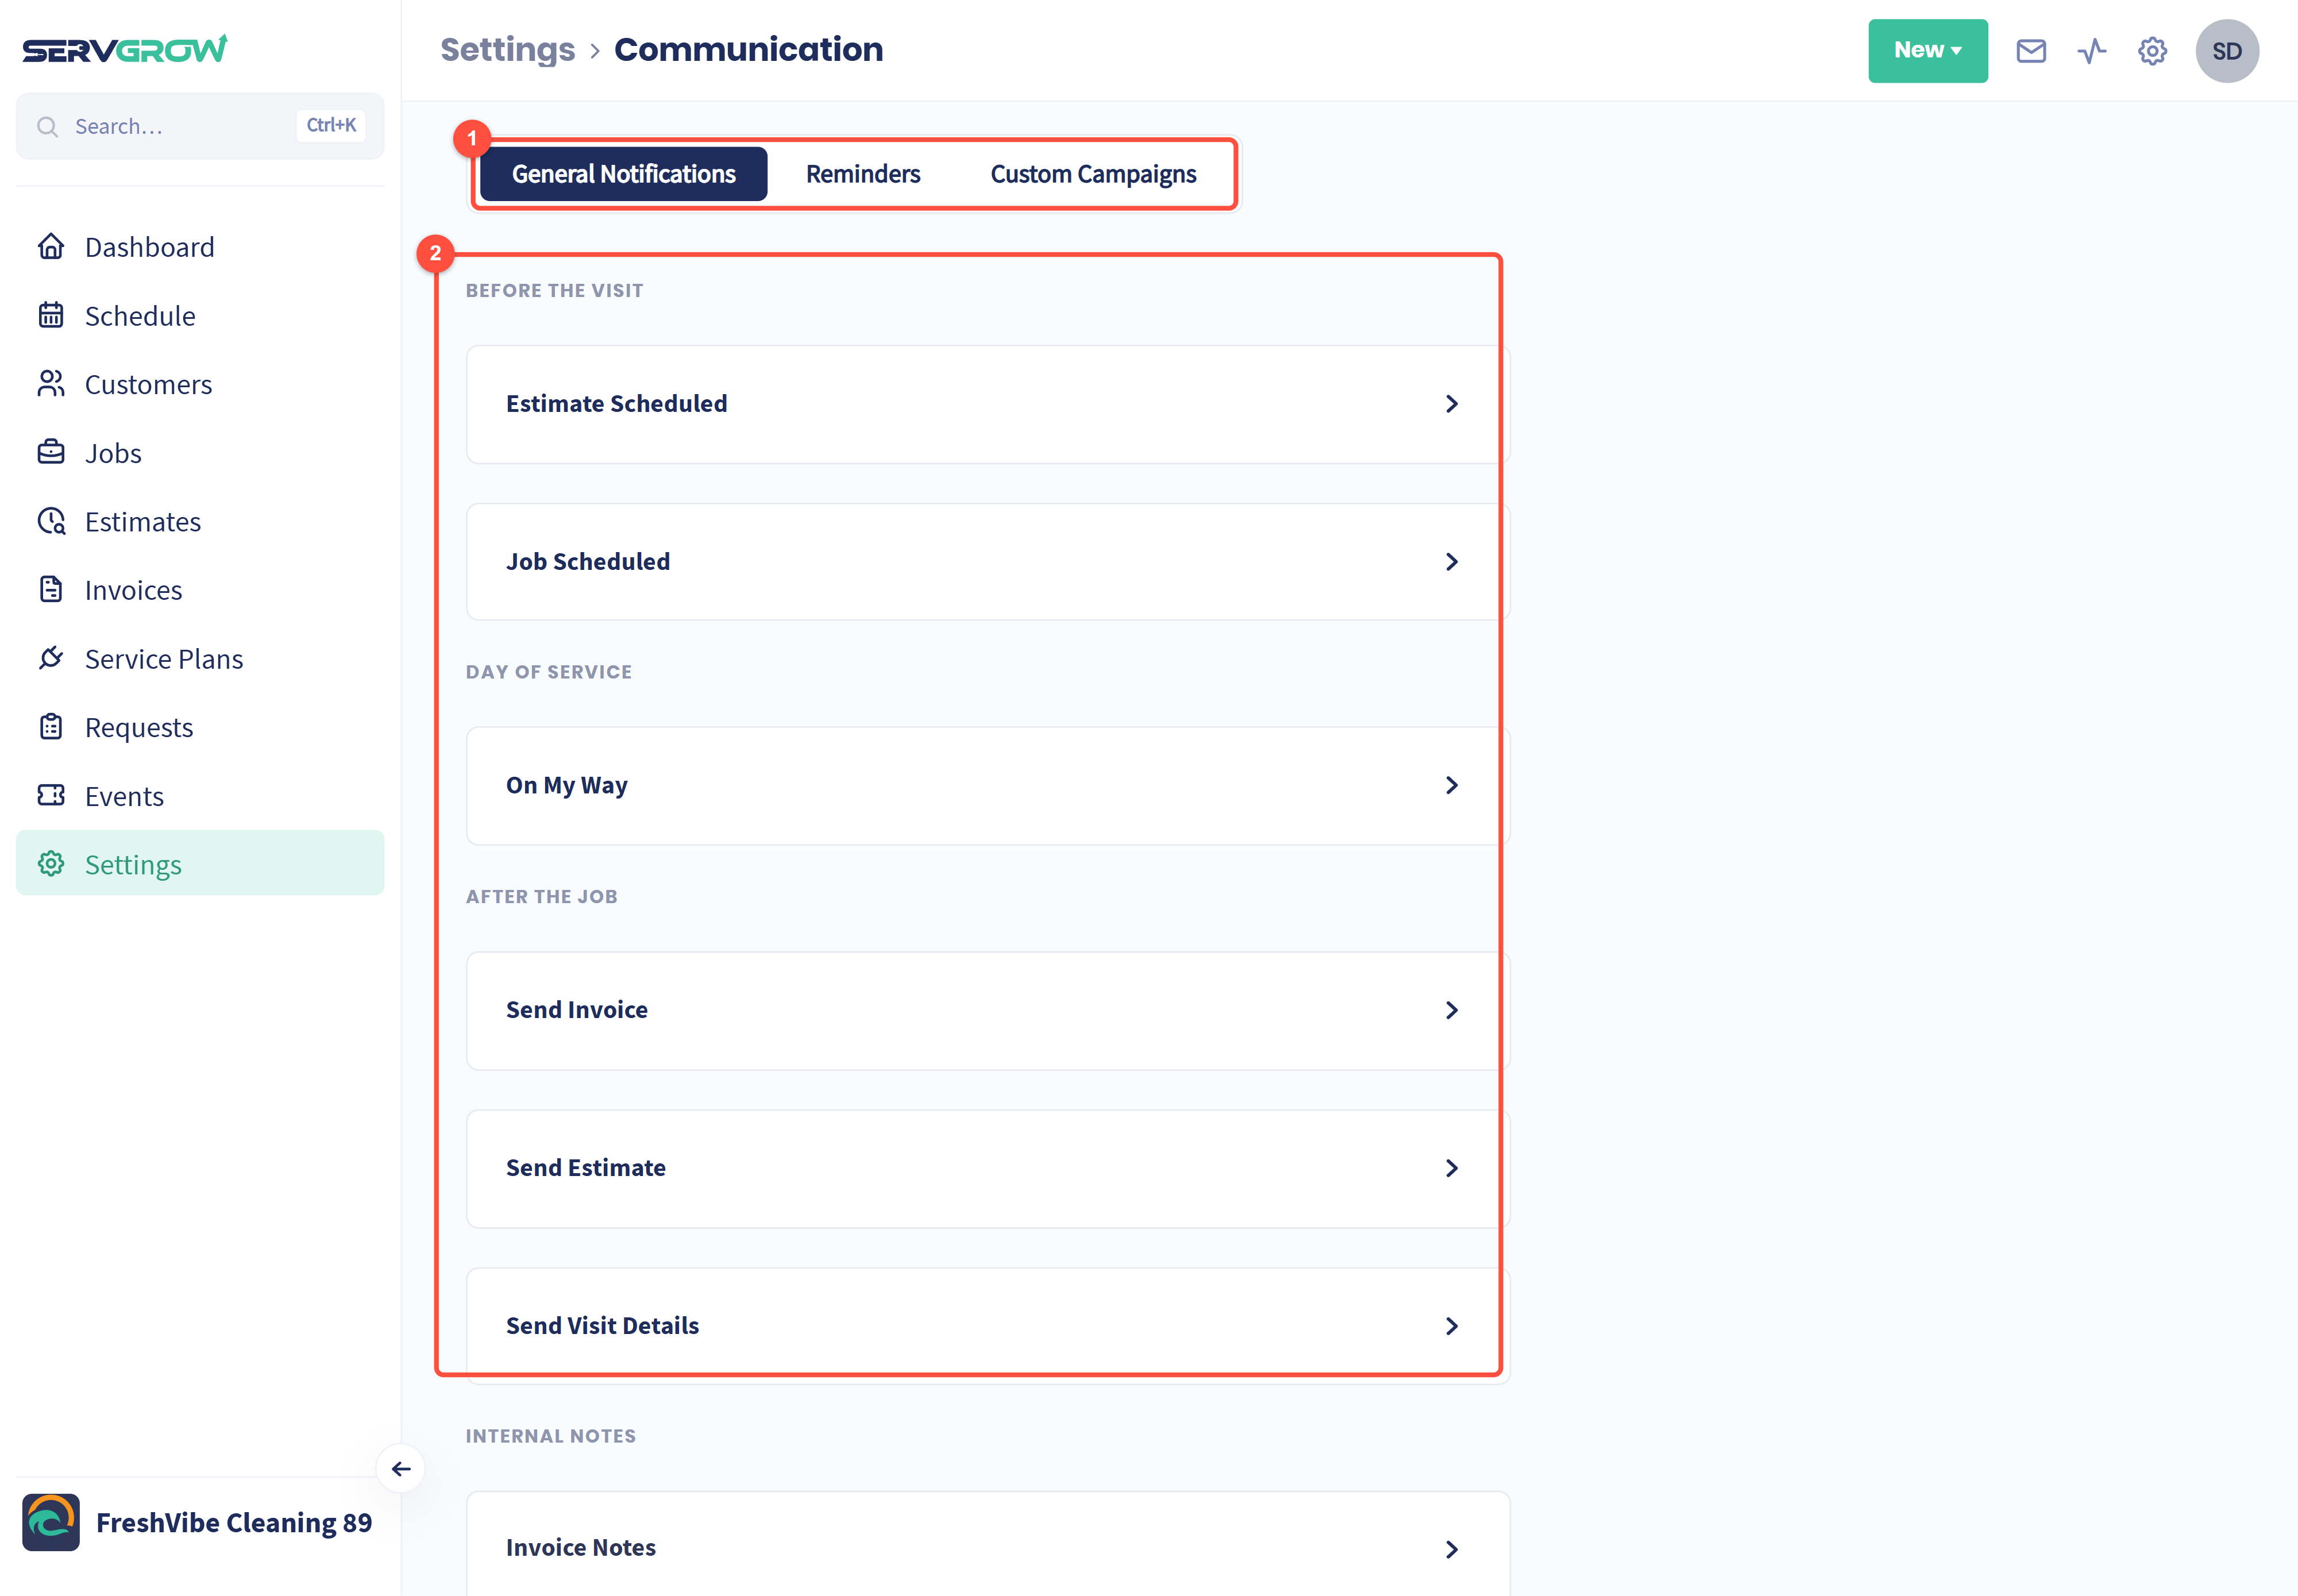
General Notifications are the messages sent as work moves along. Reminders holds appointment reminders and follow-ups on unpaid invoices and open estimates, and Custom Campaigns holds your marketing messages.
Click a message, such as Job Scheduled, On My Way or Send Invoice, to review and personalize it.
See Setting Up Your Email and Text Notifications: Keep Every Customer in the Loop Automatically.
Step 6: Add your team
When your team is in Servgrow, you can assign them to jobs, they get their schedule on their phone, and everyone sees only what they need. Click the gear icon, then Employees.
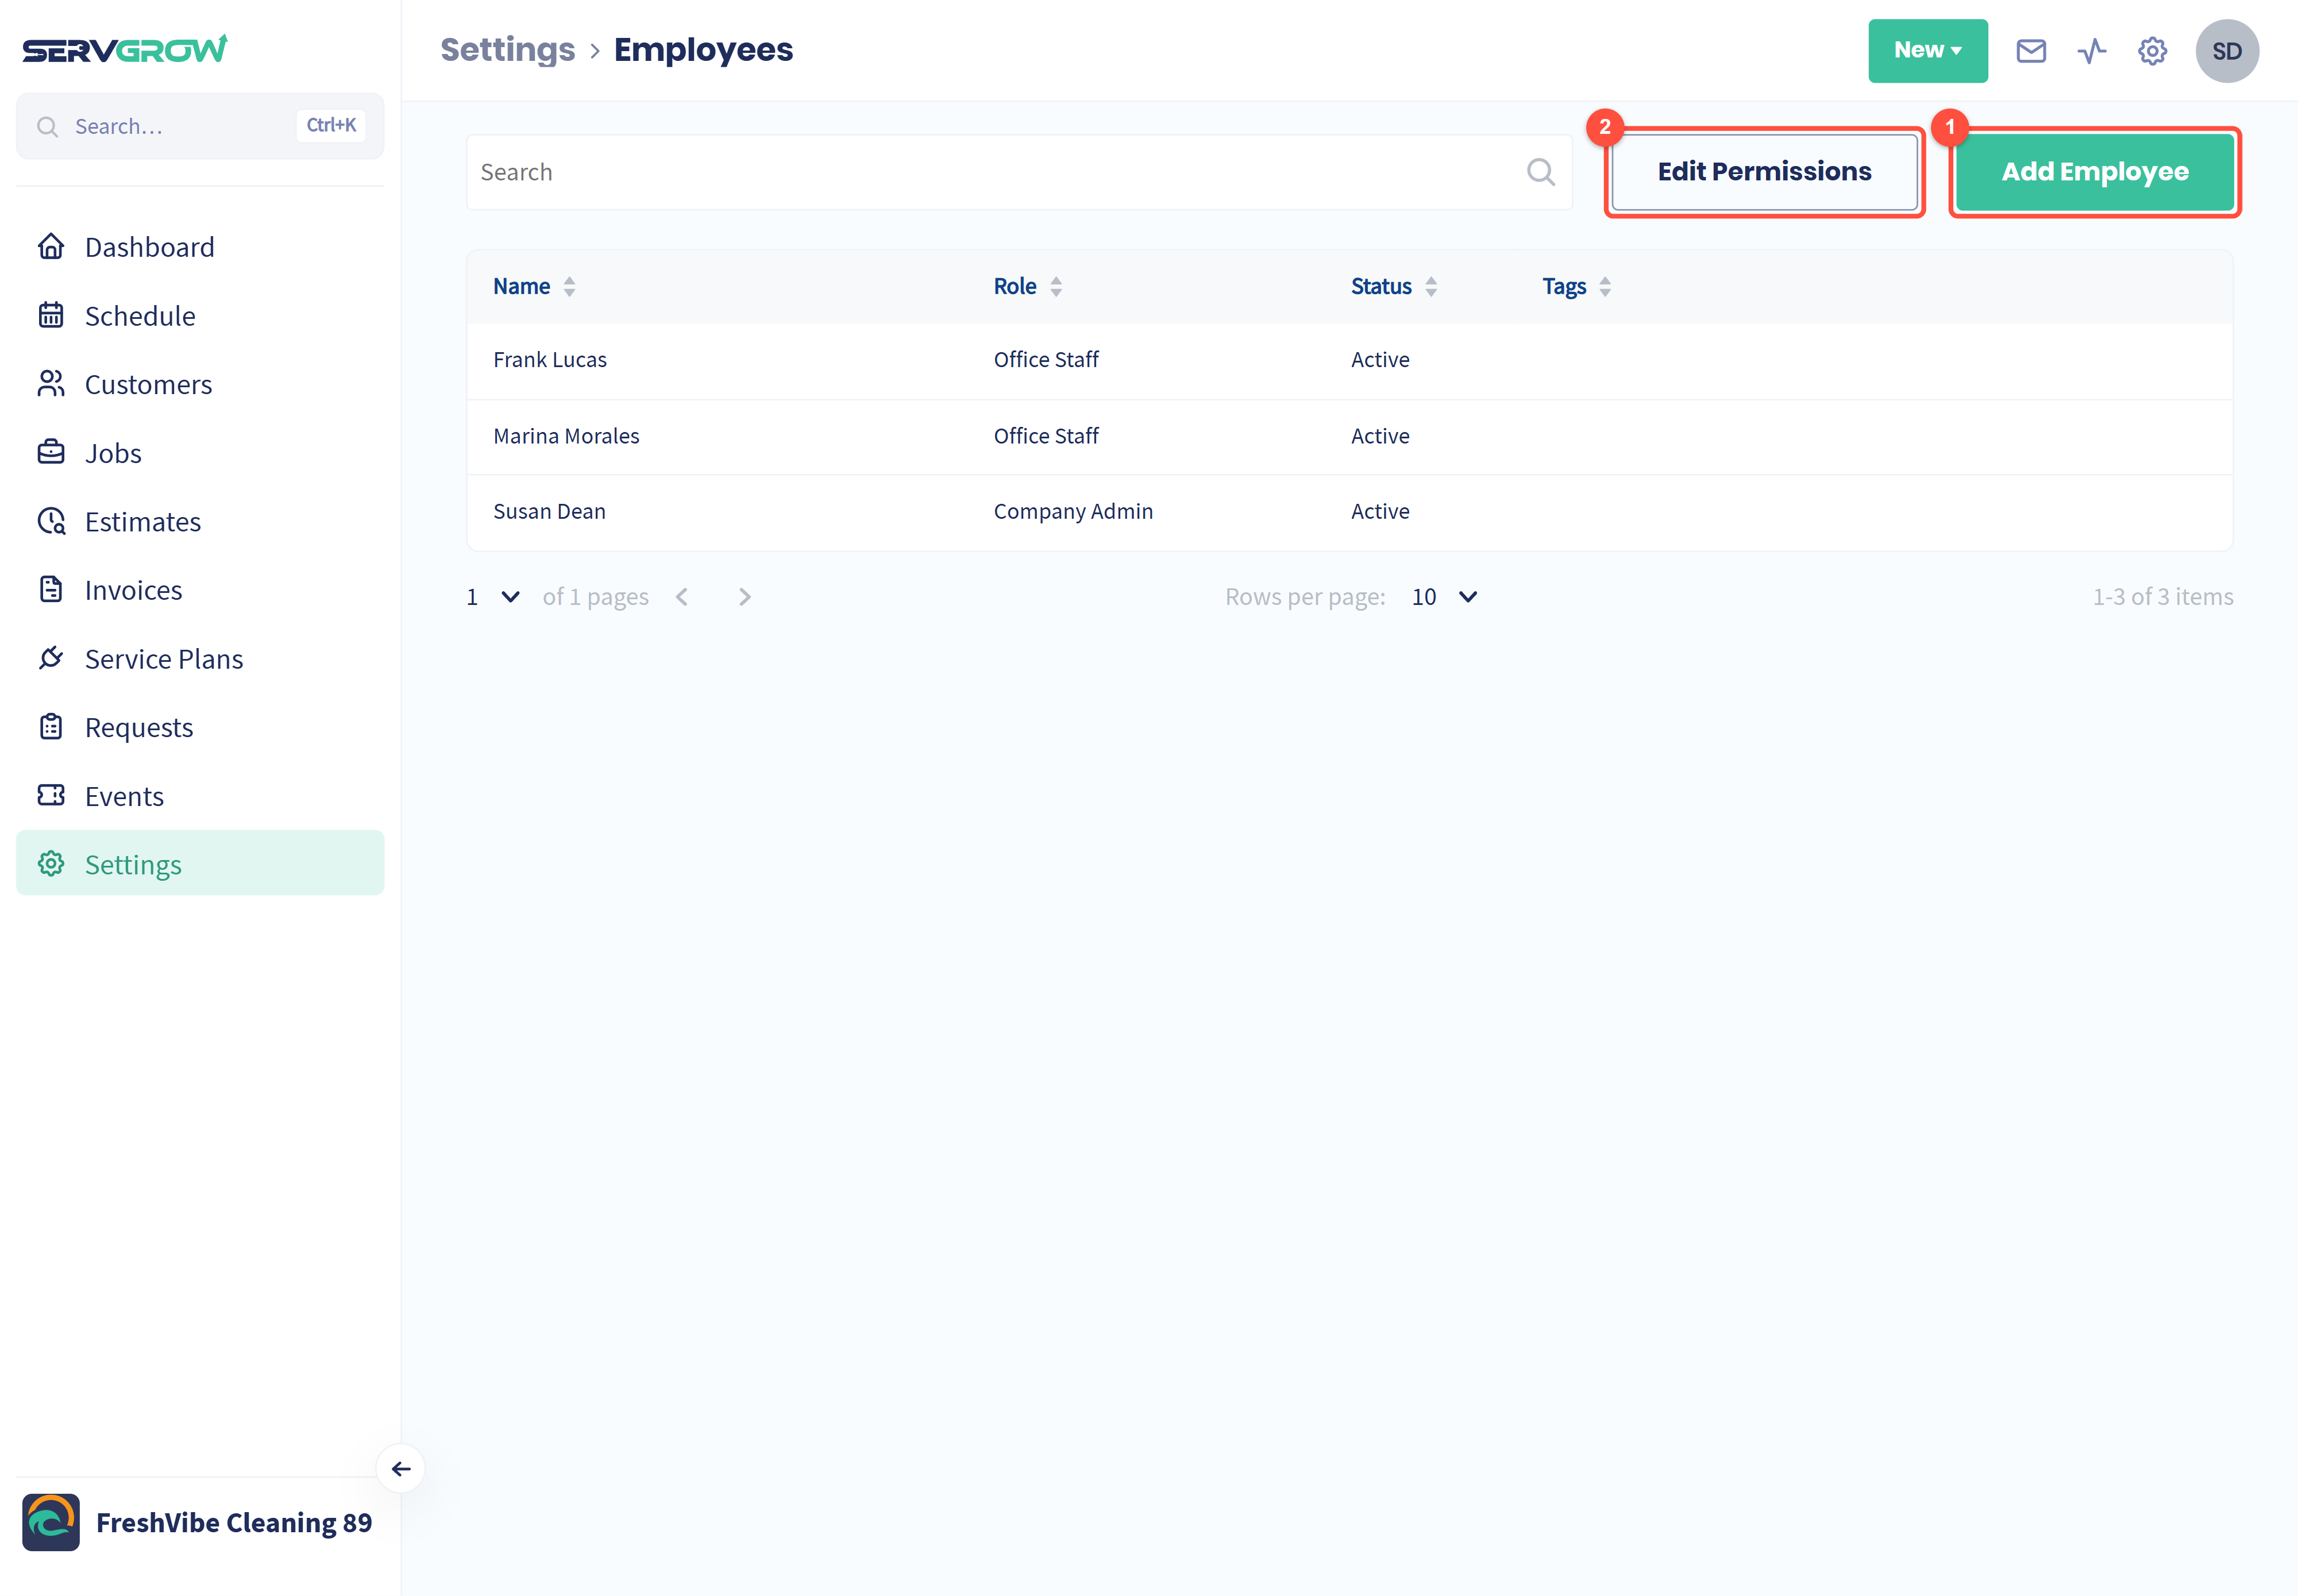
Click Add Employee for each team member and choose their role.
Click Edit Permissions to decide what each role can see and do.
See How to Add an Employee: Give Every Team Member the Right Access and Changing Employee Permissions and Roles: Give Everyone the Right Access.
Step 7: Schedule your first job
This is where it all comes together: your customer, your prices and your team in one job, with the customer notified automatically. Click Jobs in the left menu.
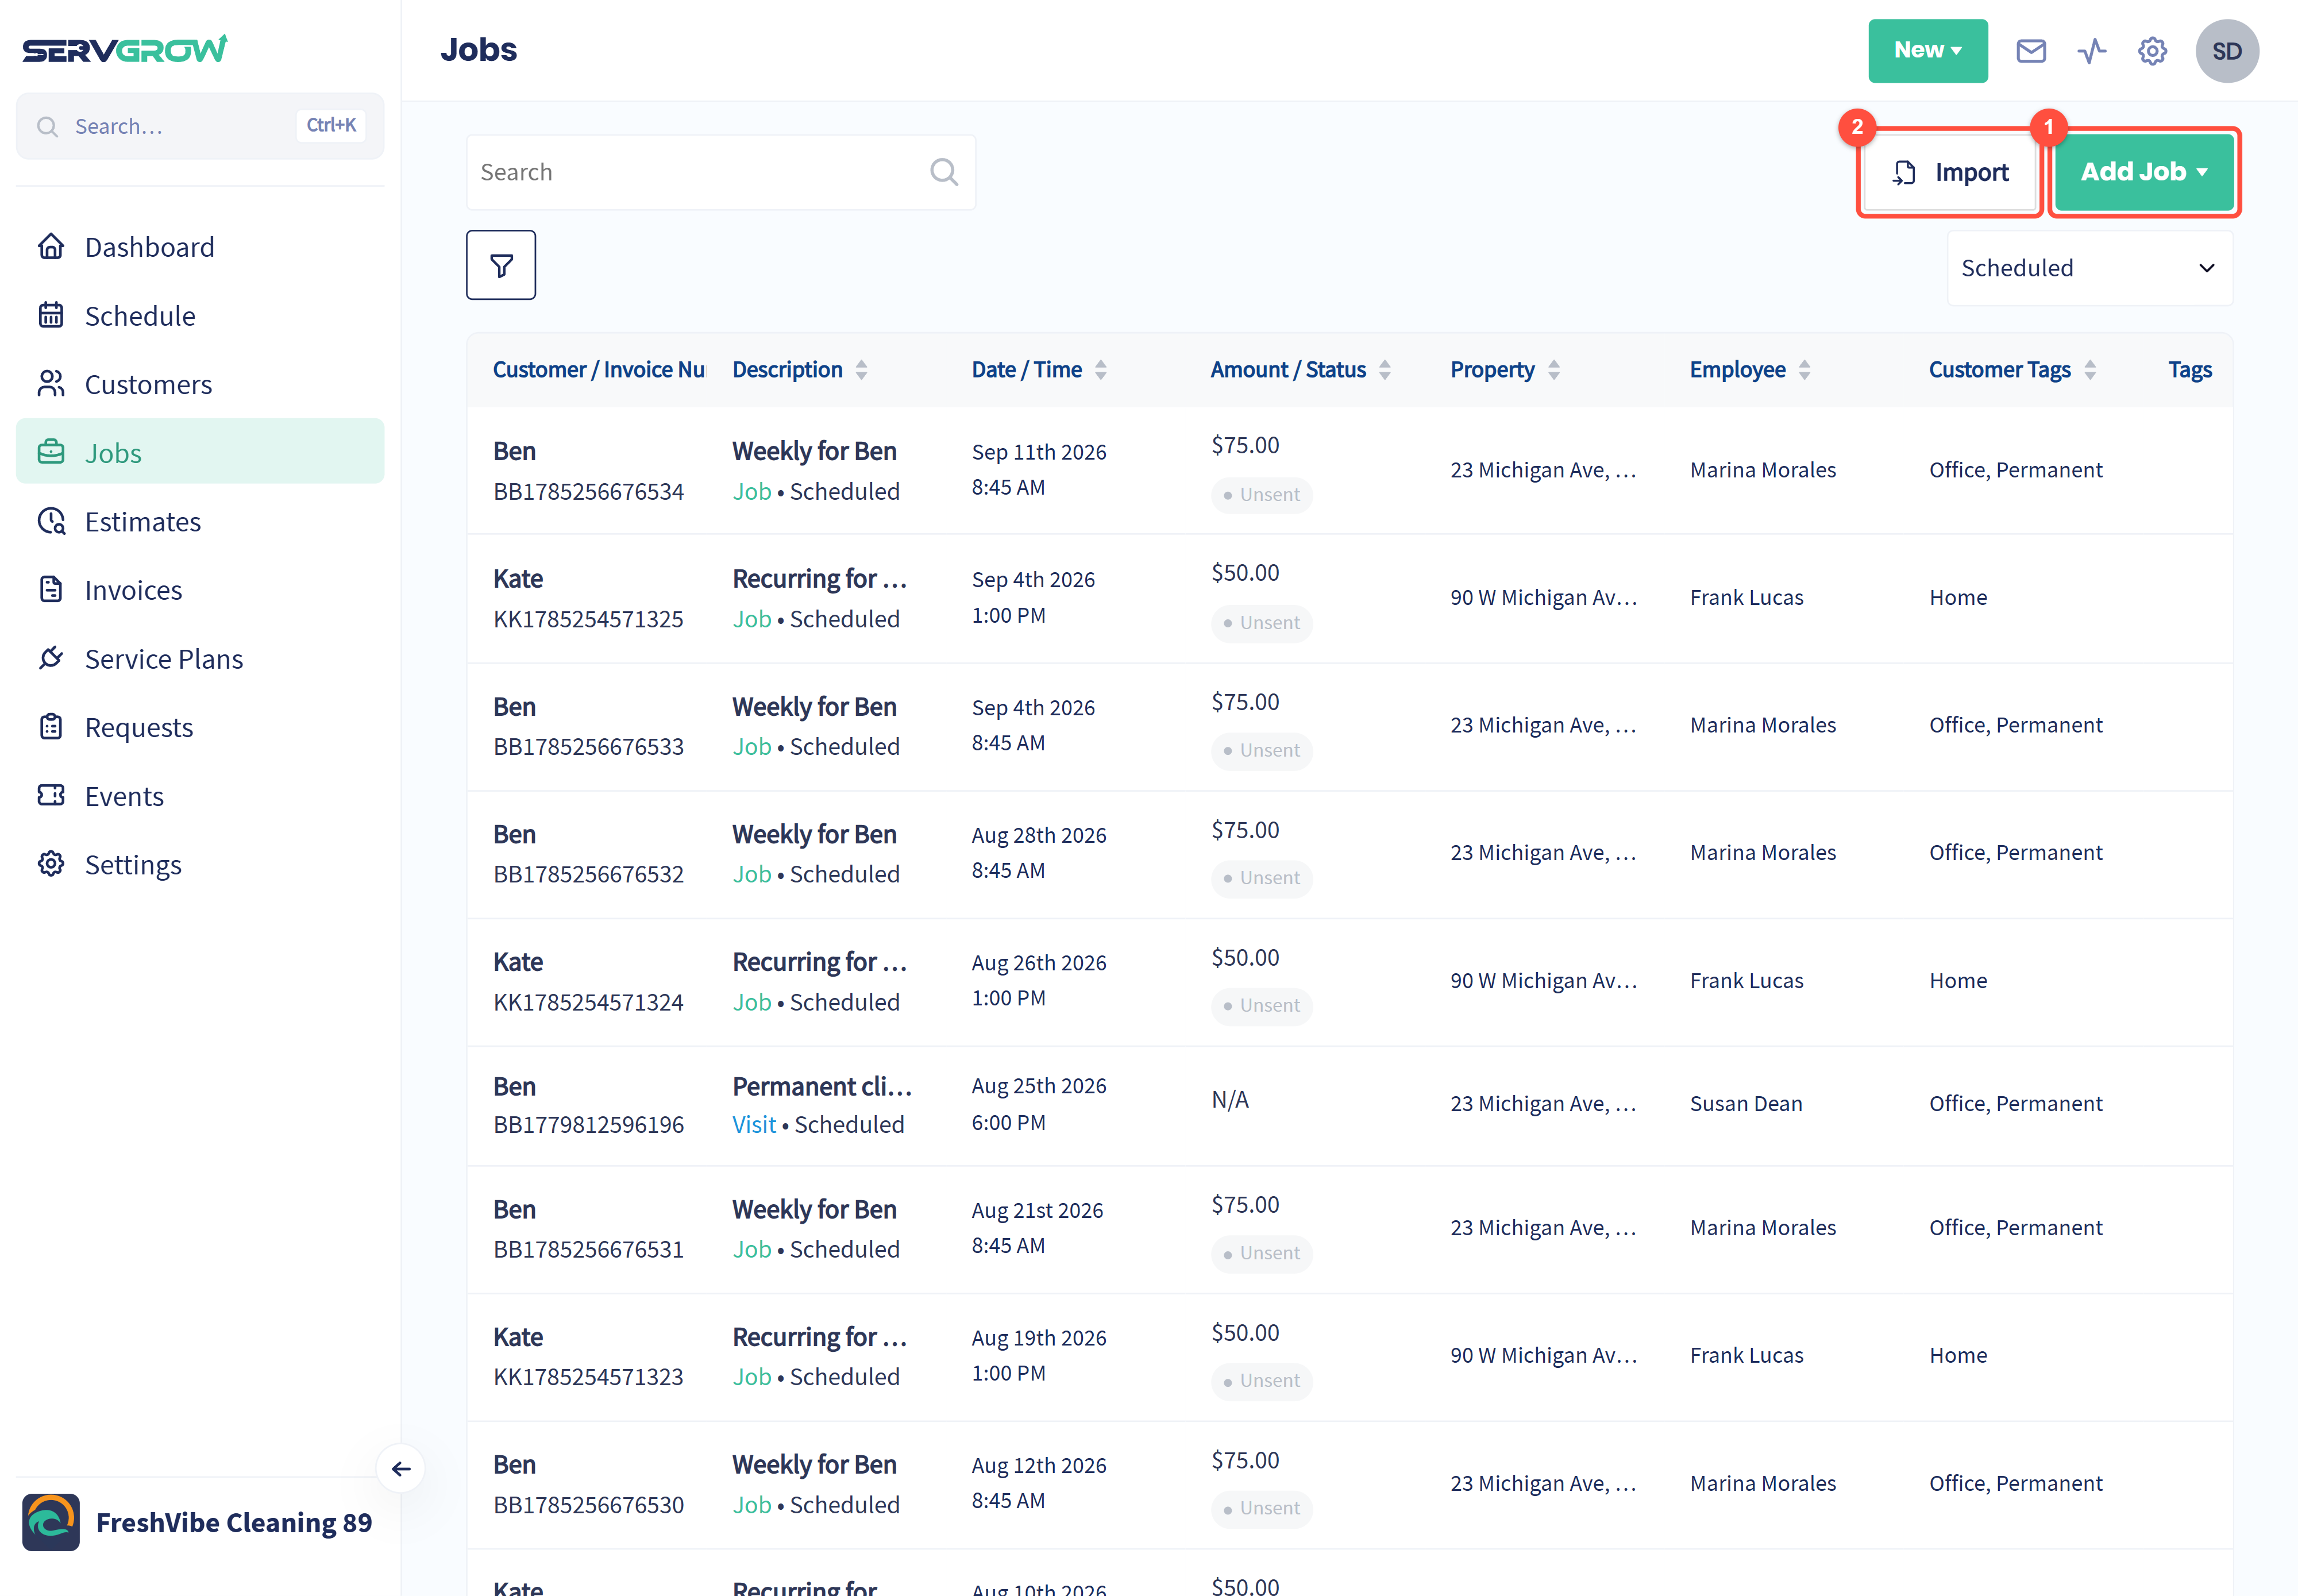
Click Add Job to create and schedule a job.
Have upcoming jobs in another system? Use Import to bring them in from a spreadsheet.
You can also book straight from the calendar with Quick Schedule on the Schedule page. See How to Create a Job: Book, Schedule and Price the Work in One Flow and Quick Schedule: Book a Job or Estimate in Seconds.
Step 8: Set up your Customer Portal
The Customer Portal is your customers' own hub with your business. They sign in with a secure link sent to their email, so there is no password to forget, and they see your branding and contact details. Click the gear icon, then Customer Portal.
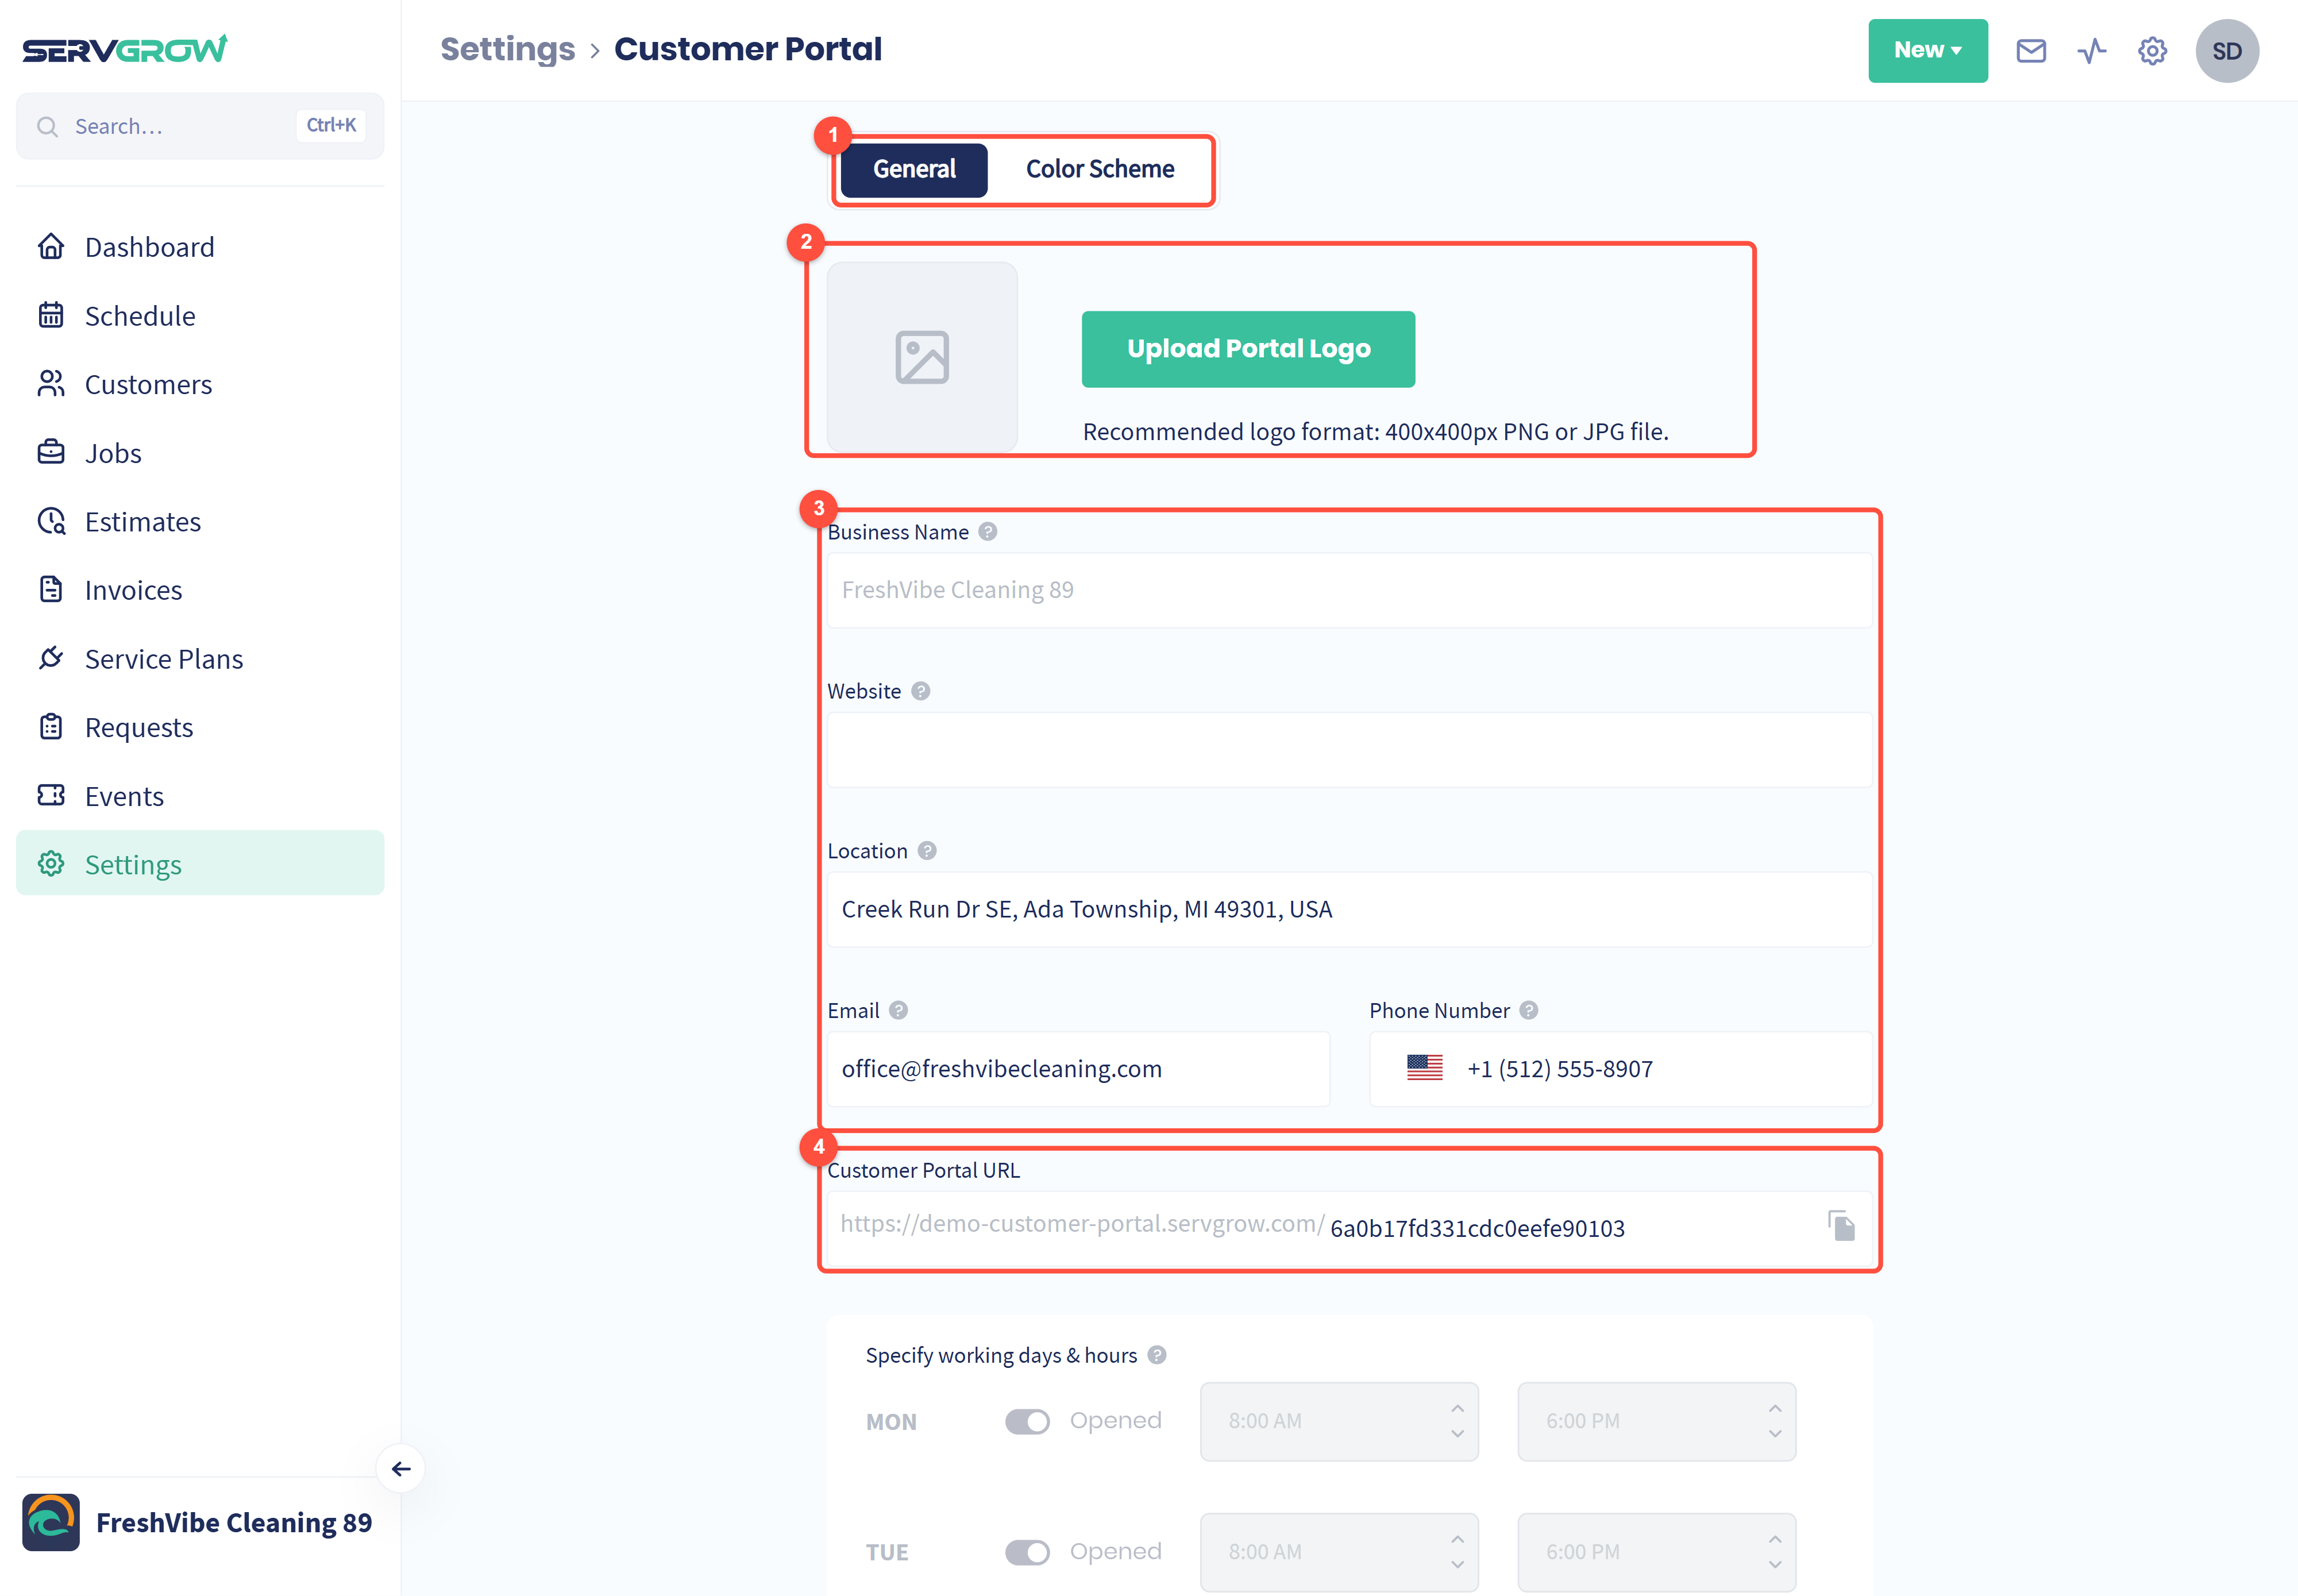
Use Color Scheme to match the portal to your brand colors.
Click Upload Portal Logo.
Check the website, location, email and phone number. Customers see them in the portal as your support contact details.
Customer Portal URL: copy your portal link to share with customers, for example on your website.
Step 9: Set up Online Booking
Online Booking lets customers request work any time, even outside your working hours, so you wake up to new job requests instead of missed calls. Click the gear icon, then Online Booking.
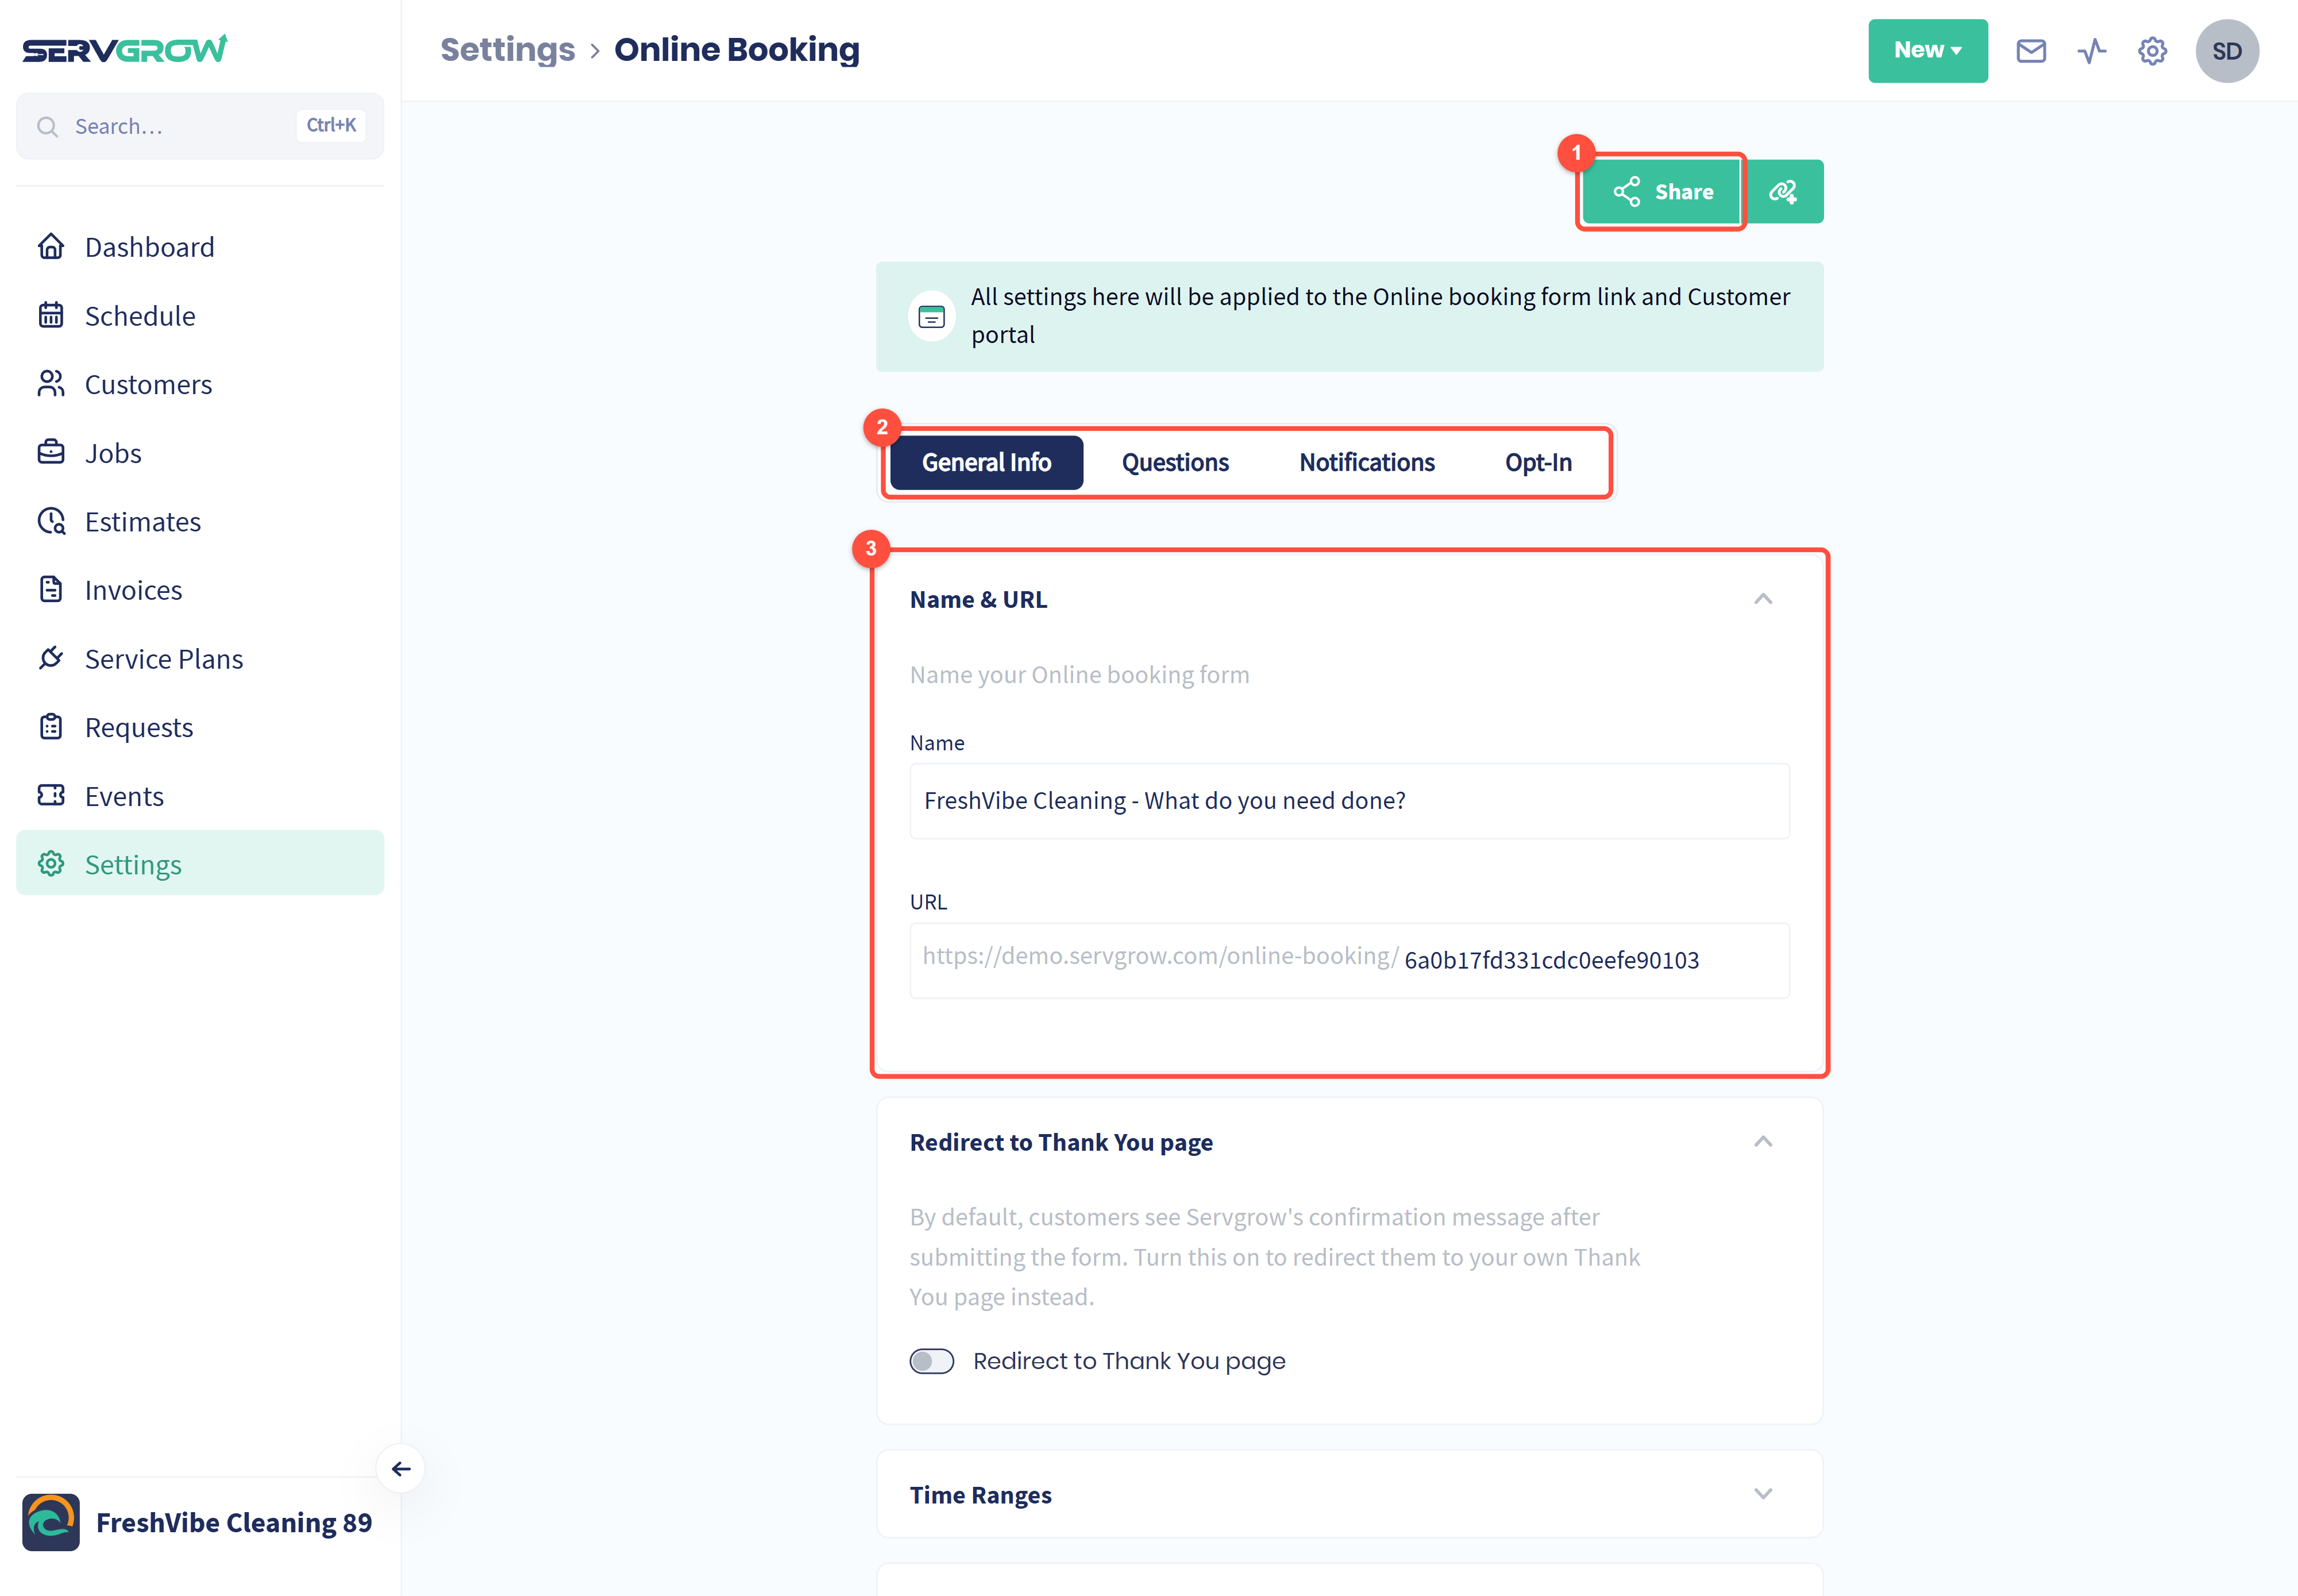
Share: get your booking link to put on your website, social media and email signature.
Use General Info, Questions, Notifications and Opt-In to set up the form.
Give your form a name. The URL is your booking link.
Click Preview to see the form as a customer does, then Submit to save your settings.
See Online Booking: Take Work While You Sleep.
You are set up
Once every step is done, the setup card disappears from your Dashboard. A few more settings are worth a look when you have time, all under the gear icon: Invoice settings for your invoice format and due dates, Discounts & Tax Rates, Forms for job checklists, Templates for jobs you book often and Integrations to connect Servgrow to other apps.
Tips
Start payments first. Approval can take a few business days, so connect your bank on day one and it will be ready when you send your first invoice.
Import instead of typing. Customers, price lists and upcoming jobs can all be brought in from a spreadsheet.
Send yourself a test. Add yourself as a customer and book a job to see exactly what your customers receive.
Related articles